Importante
A tradução é um esforço comunitário você pode contribuir. Esta página está atualmente traduzida em 62.96%.
17.15. Recortar e mesclar camadas raster
Nota
Nesta lição veremos outro exemplo de preparação de dados espaciais, para continuar usando geoalgorítmos em cenários reais.
Para esta lição, vamos calcular uma camada de inclinação para uma área em torno de uma área da cidade, que é dado em uma camada vetorial com um único polígono. O DEM base é dividido em duas camadas raster que, em conjunto, cobrem uma área muito maior do que o entorno da cidade que queremos trabalhar. Se você abrir o projeto correspondente a esta lição, você vai ver algo como isto

Essas camadas têm dois problemas:
Eles cobrem uma área que é muito grande para o que queremos (nós estamos interessados em uma região menor ao redor do centro da cidade)
Eles estão em dois arquivos diferentes (os limites da cidade se enquadram em apenas uma única camada matricial, mas, como foi dito, queremos uma área extra ao redor).
Ambos são facilmente solucionáveis com os geoalgoritmos adequados.
Primeiro. Nós criamos um retângulo definindo a área que nós queremos. Para fazer isto, nós criamos uma camada contendo a caixa delimitadora da camada com os limites da área da cidade, e então lhe aplicamos um buffer, de modo a ter uma camada raster que cobre um pouco mais do que o estritamente necessário.
To calculate the bounding box , we can use the Extract layer extent algorithm
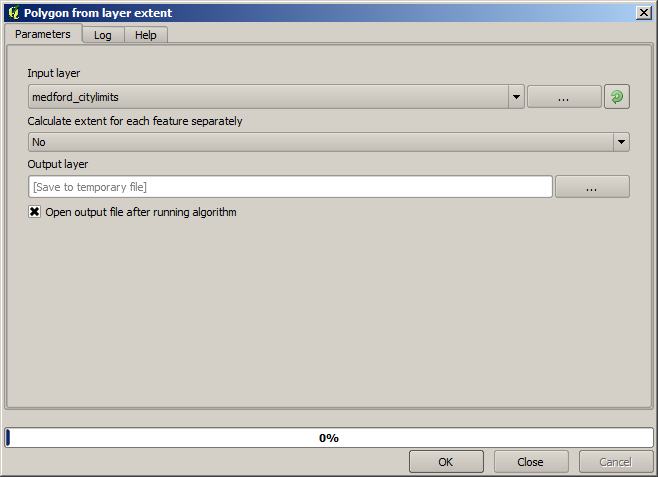
To buffer it, we use the Buffer algorithm, with the following parameter values.

Aviso
A sintaxe mudou nas versões recentes; defina o vértice Distância e Arco para .25
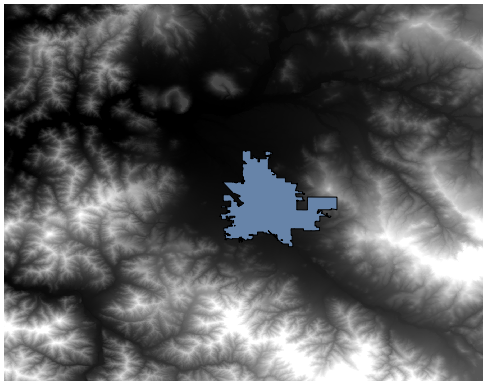
Aqui está a caixa delimitadora obtida usando os parâmetros acima

It is a rounded box, but we can easily get the equivalent box with square angles, by running the Extract layer extent algorithm on it. We could have buffered the city limits first, and then calculate the extent rectangle, saving one step.

You will notice that the rasters has a different projection from the vector. We should therefore reproject them before proceeding further, using the Warp (reproject) tool.

Nota
Versões recentes têm uma interface mais complexa. Verifique se pelo menos um método de compactação está selecionado.
With this layer that contains the bounding box of the raster layer that we want to obtain, we can crop both of the raster layers, using the Clip raster by mask layer algorithm.

Once the layers have been cropped, they can be merged using the SAGA Mosaic raster layers algorithm.

Nota
You can save time merging first and then cropping, and you will avoid calling the clipping algorithm twice. However, if there are several layers to merge and they have a rather big size, you will end up with a large layer than it can later be difficult to process. In that case, you might have to call the clipping algorithm several times, which might be time consuming, but don’t worry, we will soon see that there are some additional tools to automate that operation. In this example, we just have two layers, so you shouldn’t worry about that now.
Com isso, temos o DEM final que queremos.
Agora é hora de calcular a camada de declividade.
A slope layer can be computed with the Slope algorithm, but the DEM obtained in the last step is not suitable as input, since elevation values are in meters but cellsize is not expressed in meters (the layer uses a CRS with geographic coordinates). A reprojection is needed. To reproject a raster layer, the Warp (reproject) algorithm can be used again. We reproject into a CRS with meters as units (e.g. 3857), so we can then correctly calculate the slope, with either SAGA or GDAL.
Com o novo DEM, a declividade pode ser agora calculada.

E aqui está a camada resultante de declividade.

The slope produced by the Slope algorithm can be expressed in degrees or radians; degrees are a more practical and common unit. In case you calculated it in radians, the Metric conversions algorithm will help us to do the conversion (but in case you didn’t know that algorithm existed, you could use the raster calculator that we have already used).

Reprojecting the converted slope layer back with the Reproject raster layer, we get the final layer we wanted.
Os processos de reprojeção podem ter feito com que a camada final contivesse dados fora da caixa delimitadora que calculamos em uma das primeiras etapas. Isto pode ser resolvido recortando-o, como fizemos para obter o MDE básico.