La topología es un aspecto útil de las capas de datos vectoriales, ya que minimiza errores como la superposición o huecos.
Por ejemplo: si dos elementos comparten un borde, y editas el borde utilizando la topología, no necesitarás editar primero un elemento y luego otro cuidadosamente para que luego coincidan. En lugar de eso puedes editar el borde compartido y los dos elementos cambiarán al mismo tiempo.
El objetivo de esta lección: Entender la topología utilizando ejemplos.
Snapping makes topological editing easier.
This will allow your mouse cursor to snap to other objects while you
digitize.
To set snapping options:
Navigate to the menu entry
Project ► Snapping Options….
Set up your Snapping options dialog to activate the
landuse layer with Typevertex and tolerance
12 pixels:
Make sure that the box in the Avoid overlap column is
checked.
Leave the dialog.
Select the landuse layer and enter edit mode
()
Check (under View ► Toolbars) that the
Advanced Digitizing toolbar is enabled.
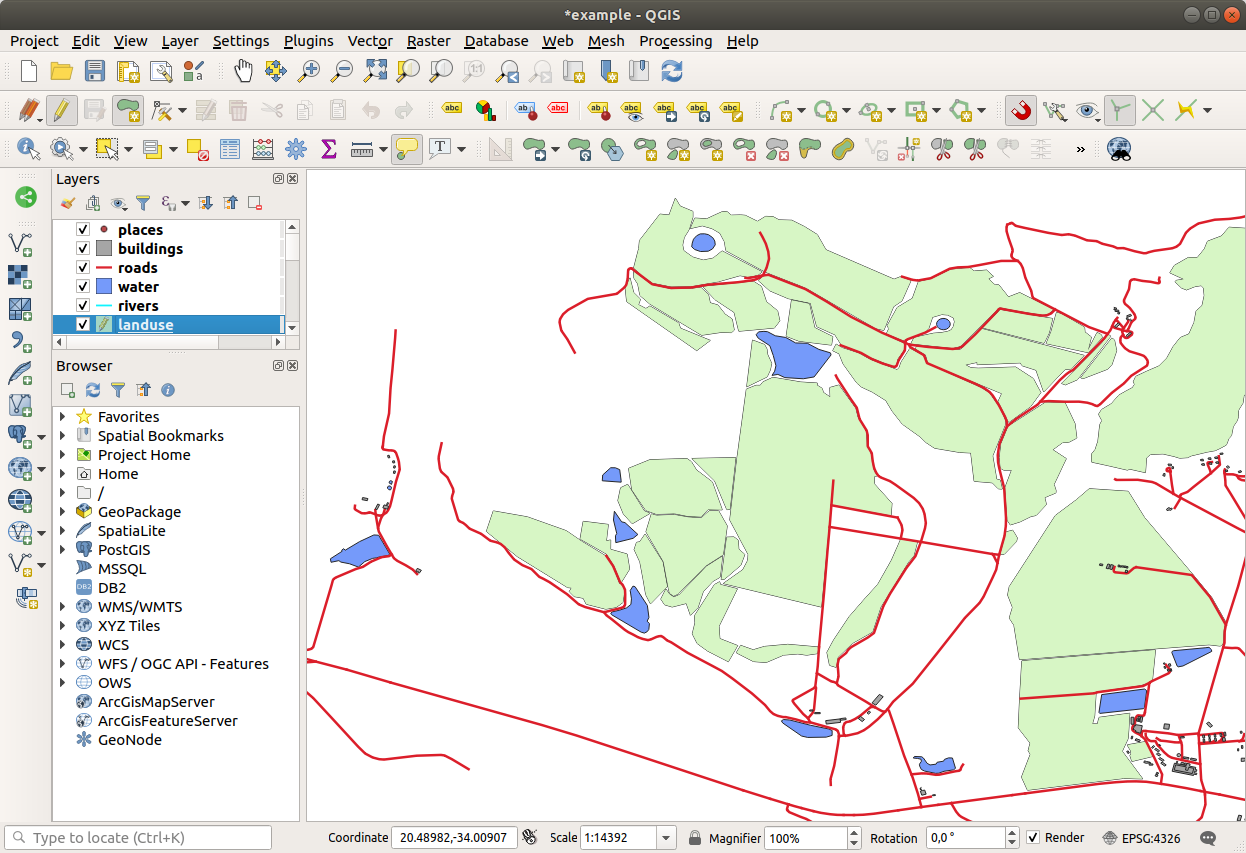
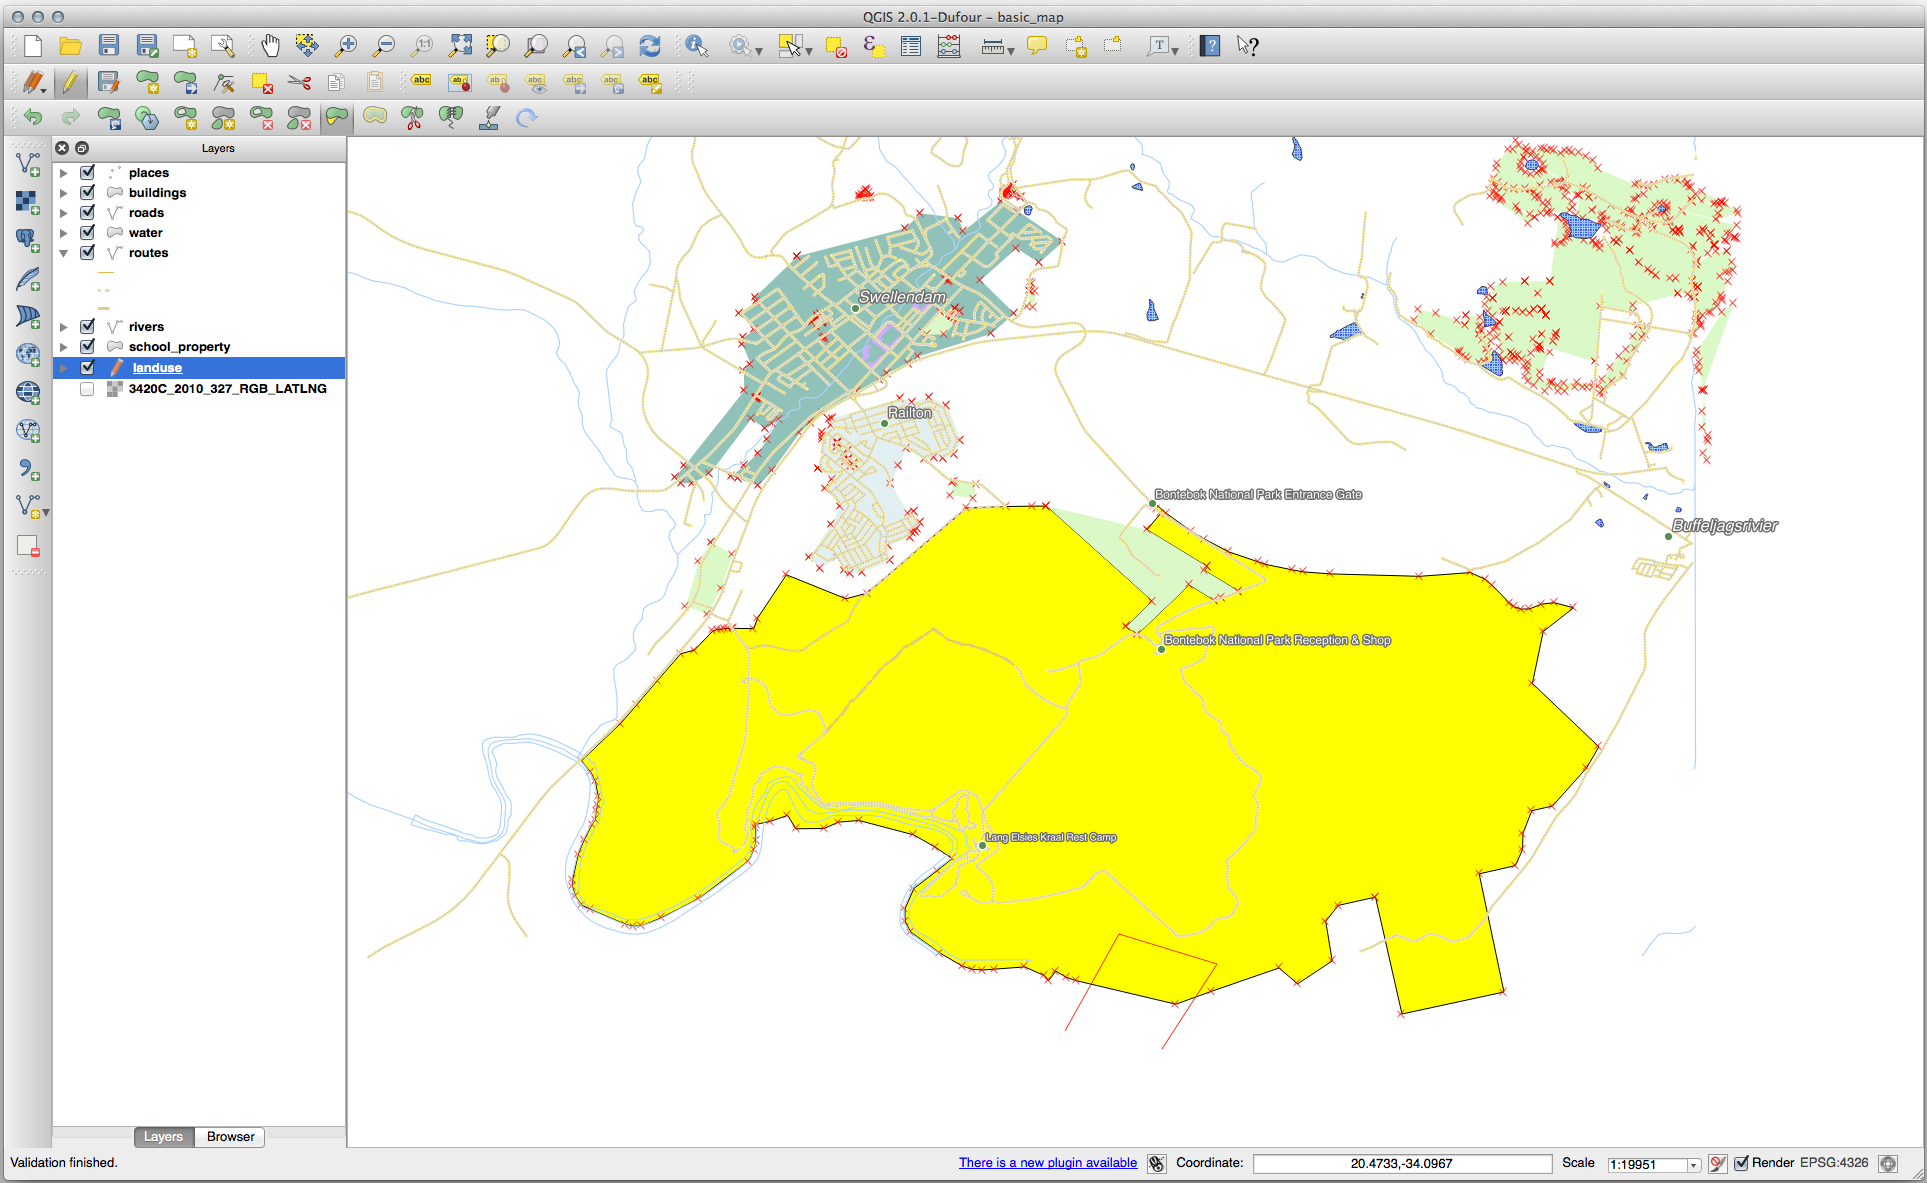
Amplía esa área (habilita capas y etiquetas si es necesario):
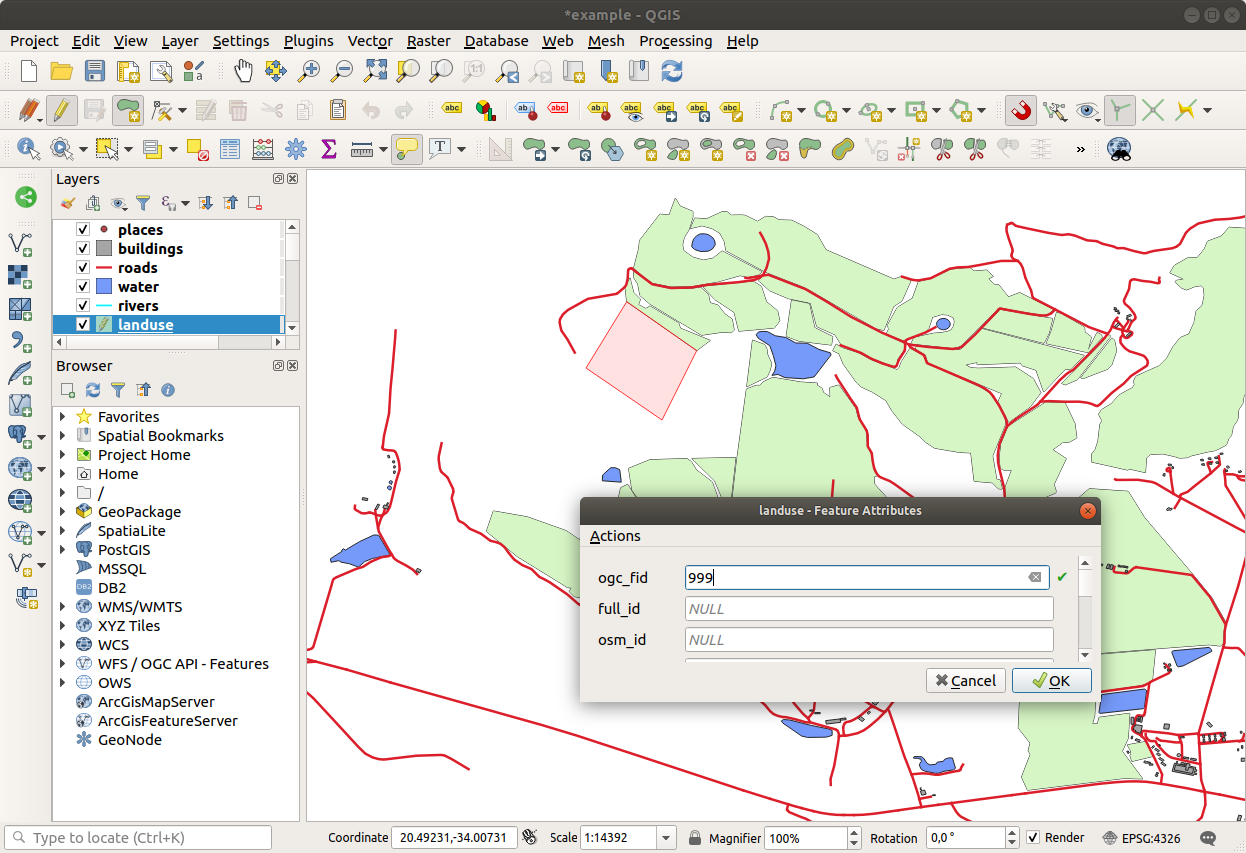
Digitize this new (fictional) area:
When prompted, give it an OGC_FID of 999, but feel free to
leave the other values unchanged.
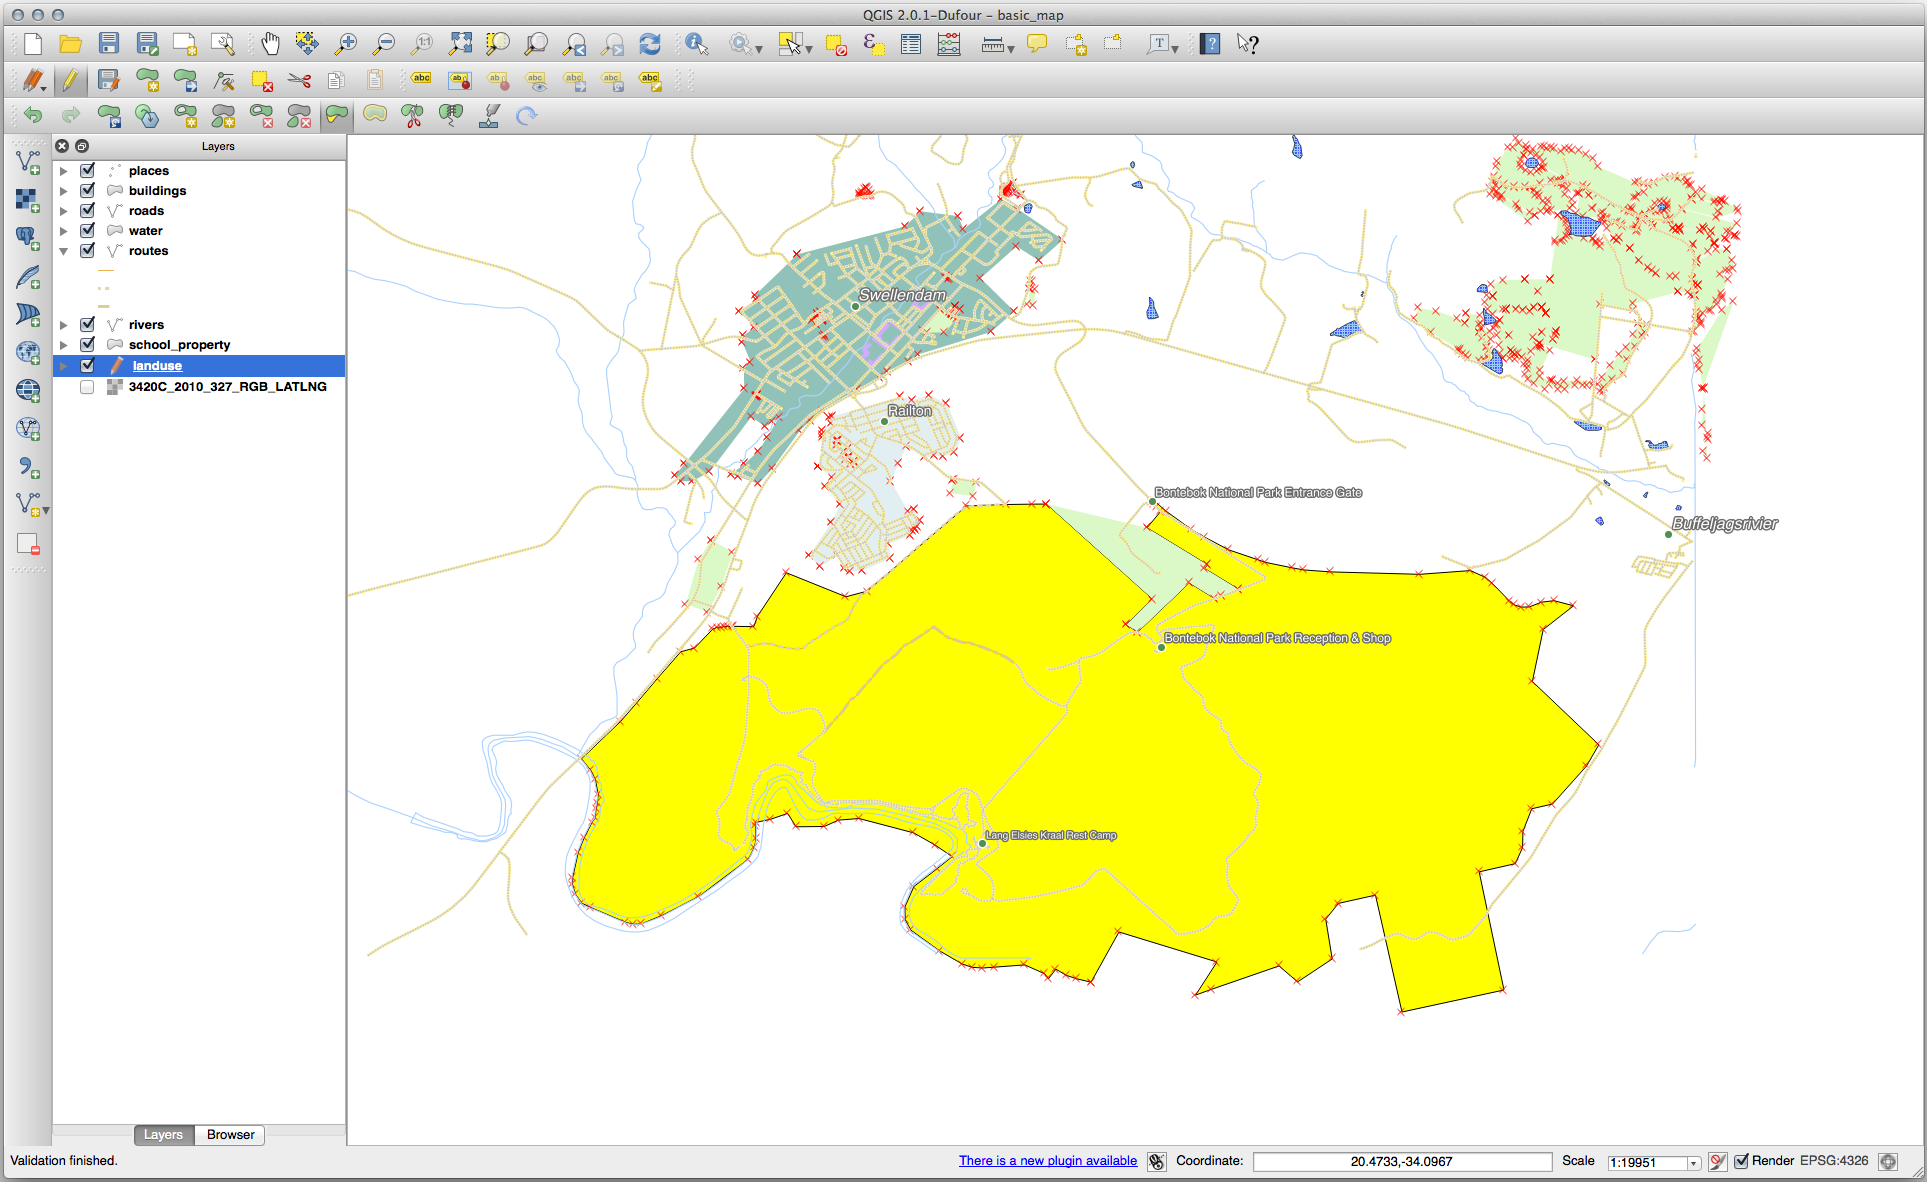
If you are careful while digitizing, and allow the cursor to snap to
the vertices of adjoining areas, you’ll notice that there won’t be
any gaps between your new area and the existing adjacent areas.
Note the undo
and redo tools in the
Advanced Digitizing toolbar.
5.2.2. Follow Along: Corrección de Elementos Topológicos
Topology features can sometimes need to be updated.
In our study area, an area has been turned into forest, so the
landuse layer need an update.
We will therefore expand and join some forest features in this
area:
Instead of creating new polygons to join the forest areas, we are
going to use the Vertex Tool to edit and join existing polygons.
Enter edit mode (if it is not active already)
Select the Vertex Tool tool.
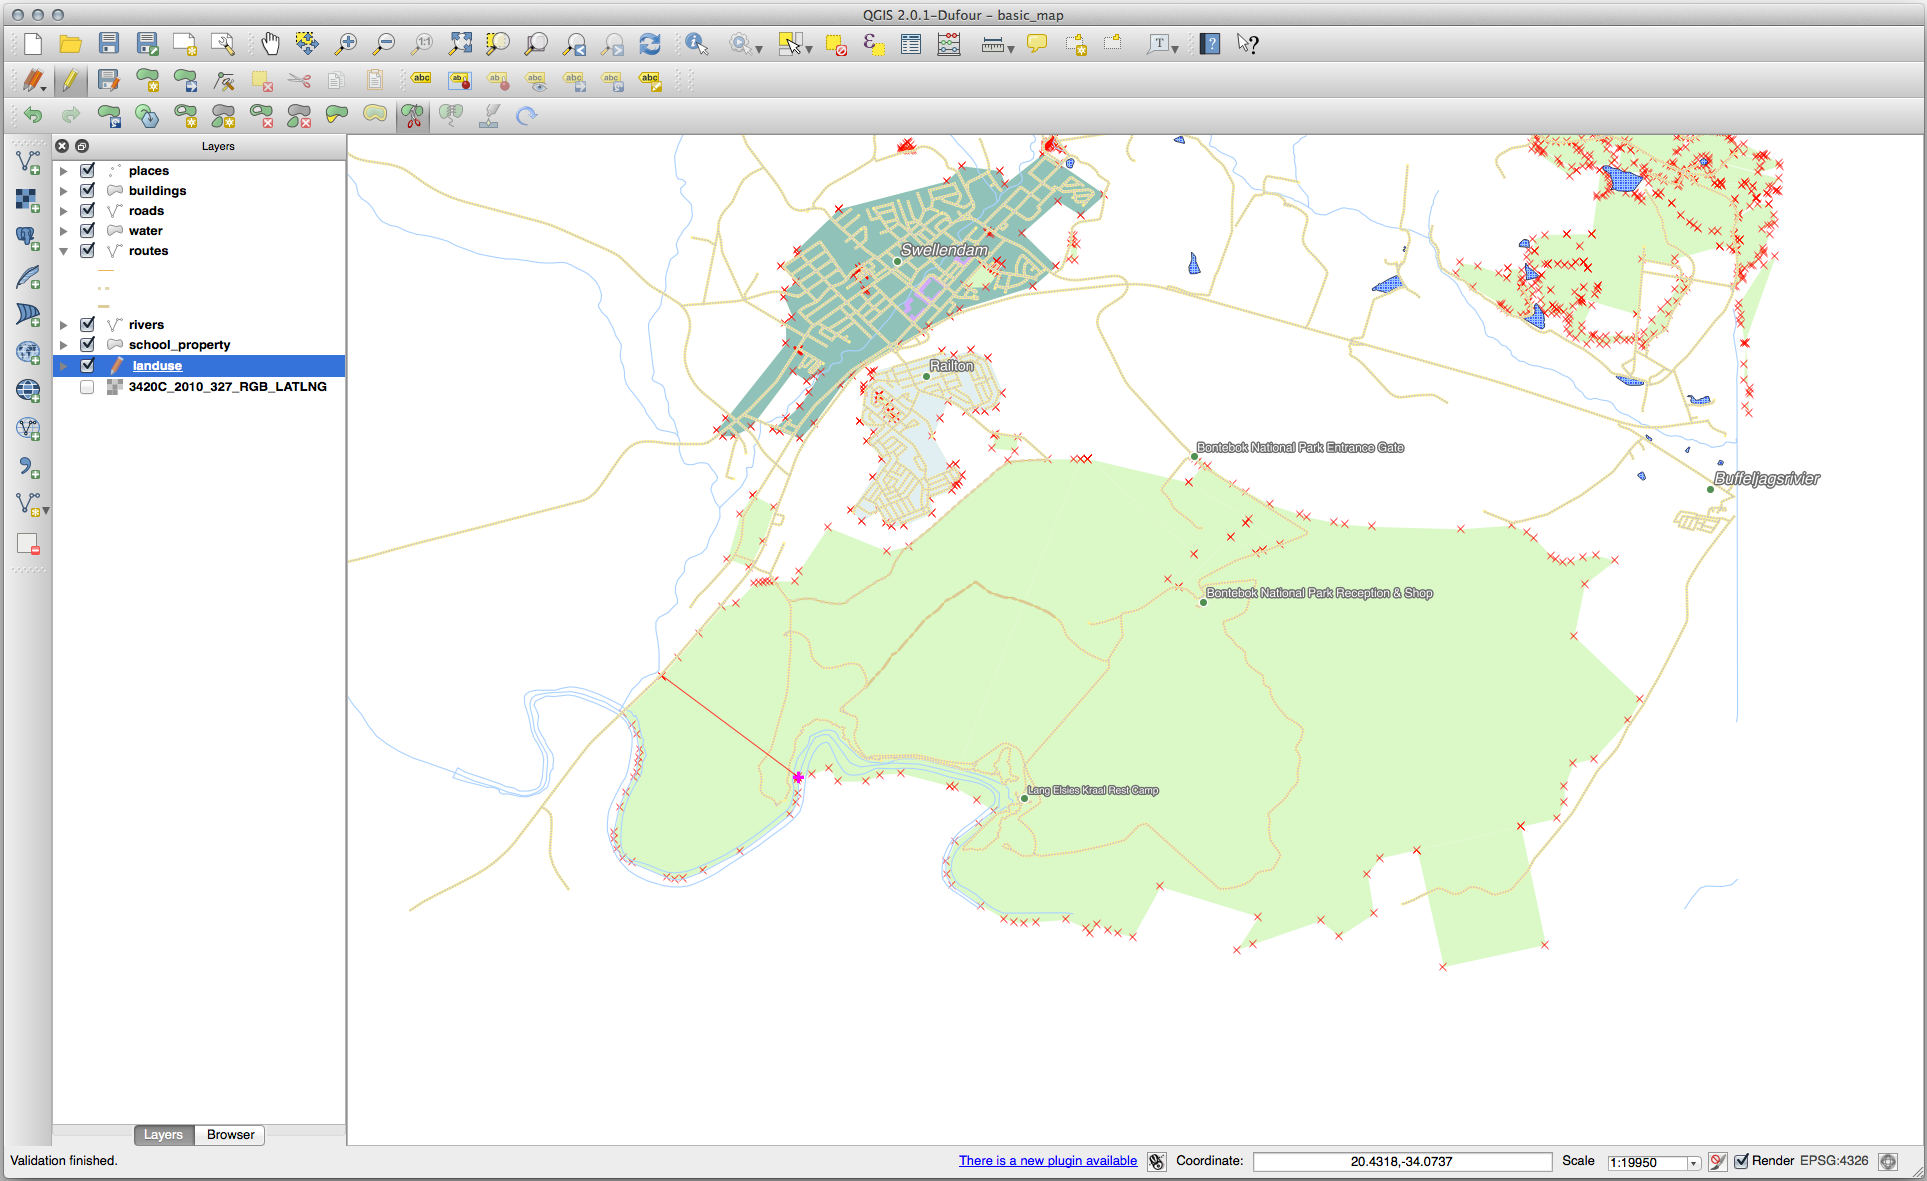
Choose an area of forest, select a vertex, and move it to an
adjoining vertex so that the two forest features meet:
Click on the other vertices and snap them into place.
El borde topológicamente correcto tiene este aspecto:
Go ahead and join a few more areas using the Vertex Tool.
You can also use the Add Polygon Feature
tool to fill the gap between the two forest polygons.
If you have enabled Avoid overlap, you don’t have to add every
single vertex - they will be added automatically if your new
polygon overlaps the existing ones.
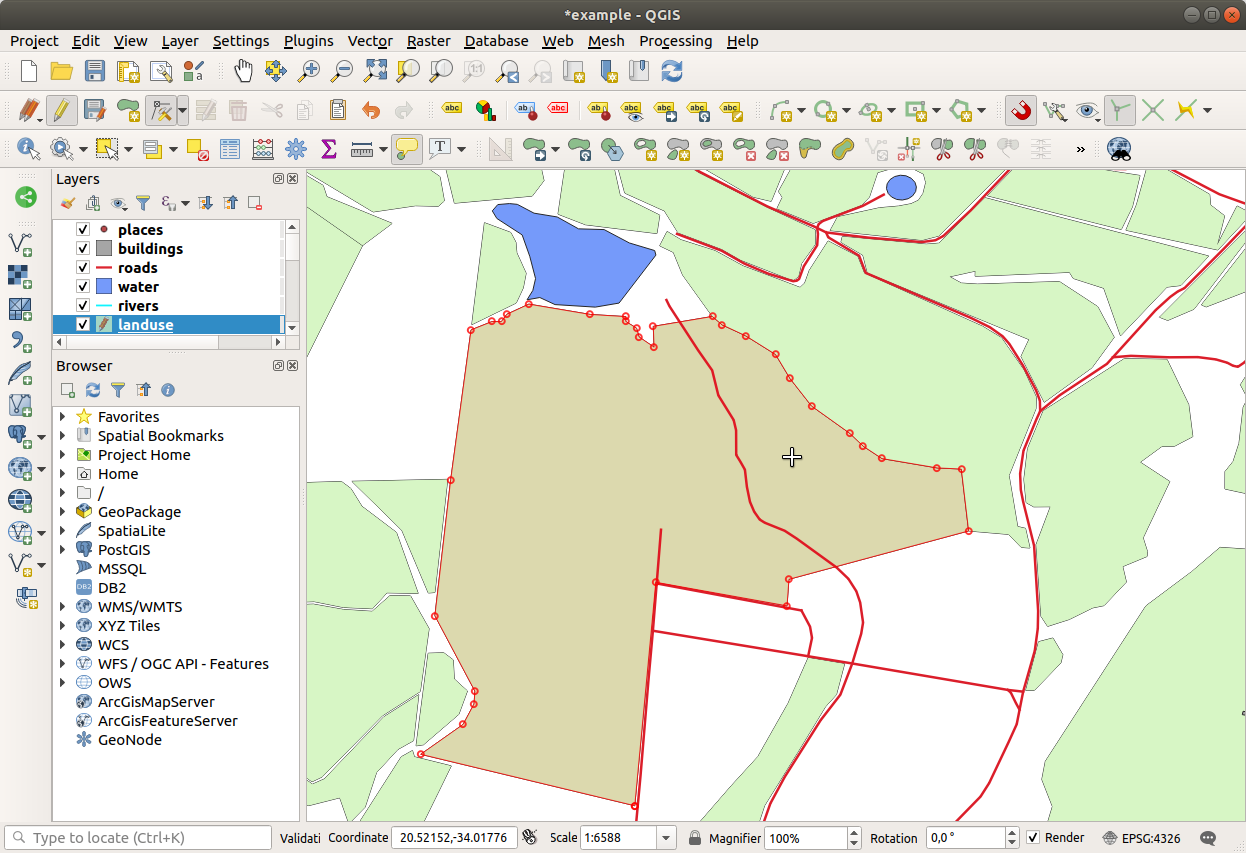
If you are using our example data, you should have a forest area
looking something like this:
No te preocupes si has unido más, menos o diferentes áreas forestales.
Continuing on the same layer, we will test the Simplify Feature tool:
Haz clic en ella para activarla.
Click on one of the areas which you joined using either the
Vertex Tool or Add Feature tool.
You will see this dialog:
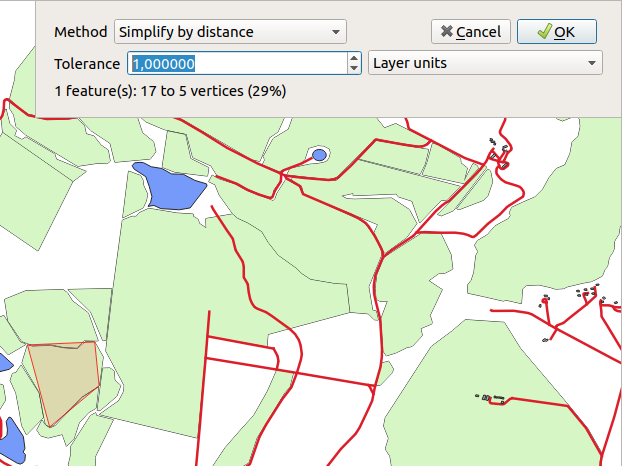
Modify the Tolerance and watch what happens:
This allows you to reduce the number of vertices.
Clique OK.
The advantage of this tool is that it provides you with a simple and
intuitive interface for generalization.
But notice that the tool ruins topology.
The simplified polygon no longer shares boundaries with its adjacent
polygons, as it should.
So this tool is better suited for stand-alone features.
Antes de continuar, ajusta los polígonos a su estado original deshaciendo el último cambio.
The Add Ring tool allows you to add an interior ring
to a polygon feature (cut a hole in the polygon), as long as the hole
is completely contained within the polygon (touching the boundary is
OK).
For example, if you have digitized the outer boundaries of South
Africa and you need to add a hole for Lesotho, you would use this
tool.
If you experiment with the tool, you may notice that the snapping
options can prevent you from creating a ring inside a polygon.
So you are advised to turn off snapping before cutting a hole.
Disable snapping for the landuse layer using the Enable Snapping button (or use the shortcut s).
Use the Add Ring tool to create a hole in the
middle of a polygon geometry.
Draw a polygon over the target feature, as if you were using the
Add polygon tool.
When you right-click, the hole will be visible.
Remove the hole you just created using the Delete Ring tool.
The Add Part tool allows you to add a new part to a
feature, that is not directly connected to the main feature.
For example, if you have digitized the boundaries of mainland South
Africa, but you haven’t yet added the Prince Edward Islands, you
would use this tool to create them.
Select the polygon to which you wish to add the part by using the
Select Features by area or single click
tool.
Use the Add Part tool to add an outlying area.
Delete the part you just created using the Delete Part tool.
The Split Features tool is similar to the
Reshape Features tool, except that it does not delete
either of the two parts.
Instead, it keeps them both.
We will use the tool to split a corner from a polygon.
First, select the landuse layer and re-enable snapping for it.
Select the Split Features tool and click on
a vertex to begin drawing a line.
Draw the bounding line.
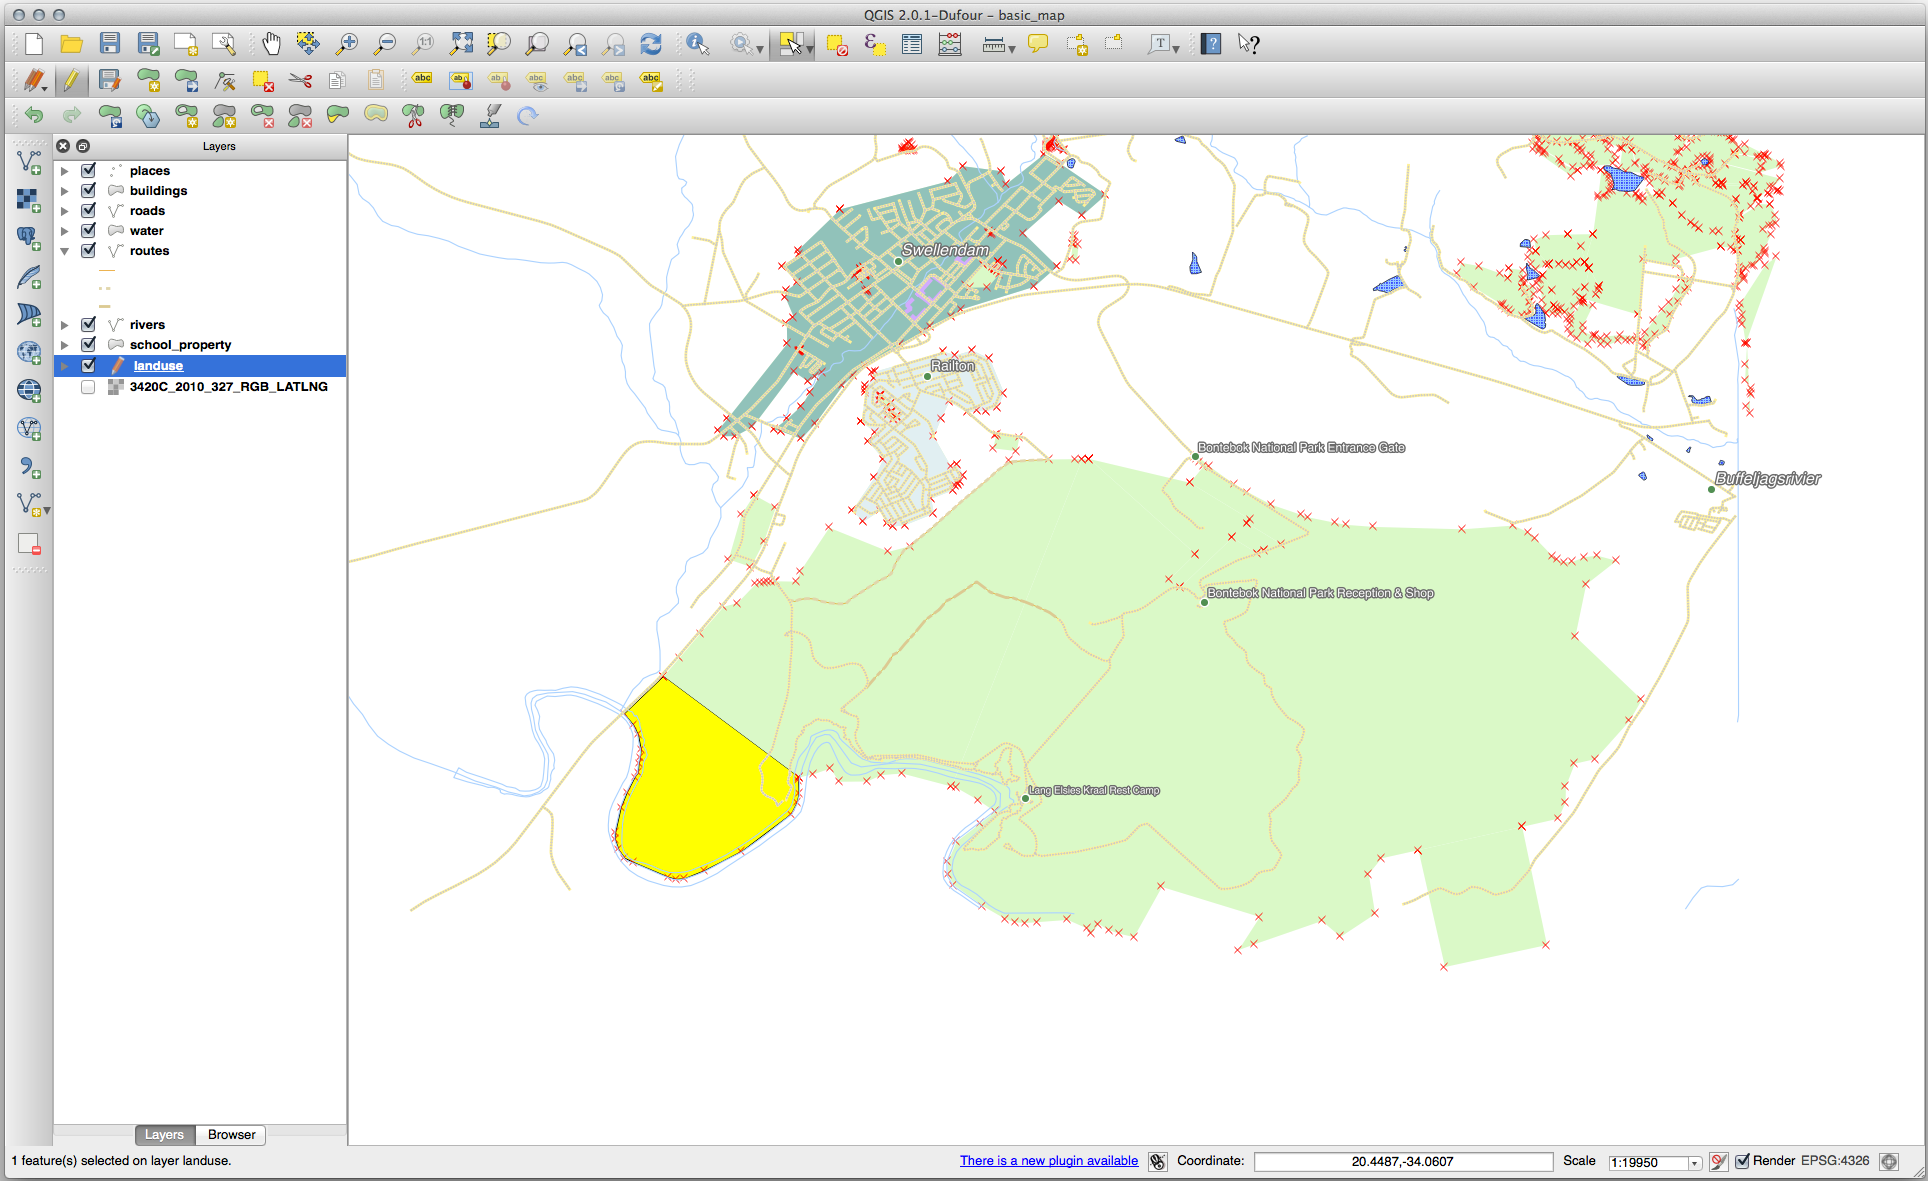
Click a vertex on the “opposite” side of the polygon you wish to
split and right-click to complete the line:
At this point, it may seem as if nothing has happened.
But remember that the landuse layer is rendered without
border lines, so the new division line will not be shown.
Use the Select Features by area or single click tool to select the
part you just split out; the new feature will now be highlighted:
La edición de la topología es una herramienta potente que te permite crear y modificar objetos rápida y fácilmente, a la vez que asegurar que permanecen topológicamente correctos.
Now you know how to digitize the shape of the objects easily, but
adding attributes is still a bit of a headache!
Next we will show you how to use forms, making attribute editing
simpler and more effective.
 Follow Along: Autoensamblado
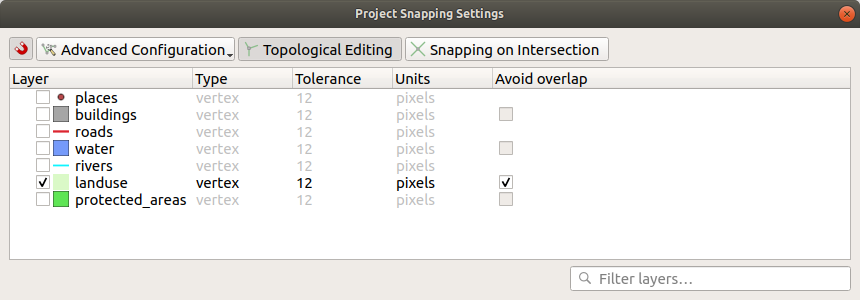
 )
)
 undo
and
undo
and  redo tools in the
Advanced Digitizing toolbar.
redo tools in the
Advanced Digitizing toolbar. Vertex Tool tool.
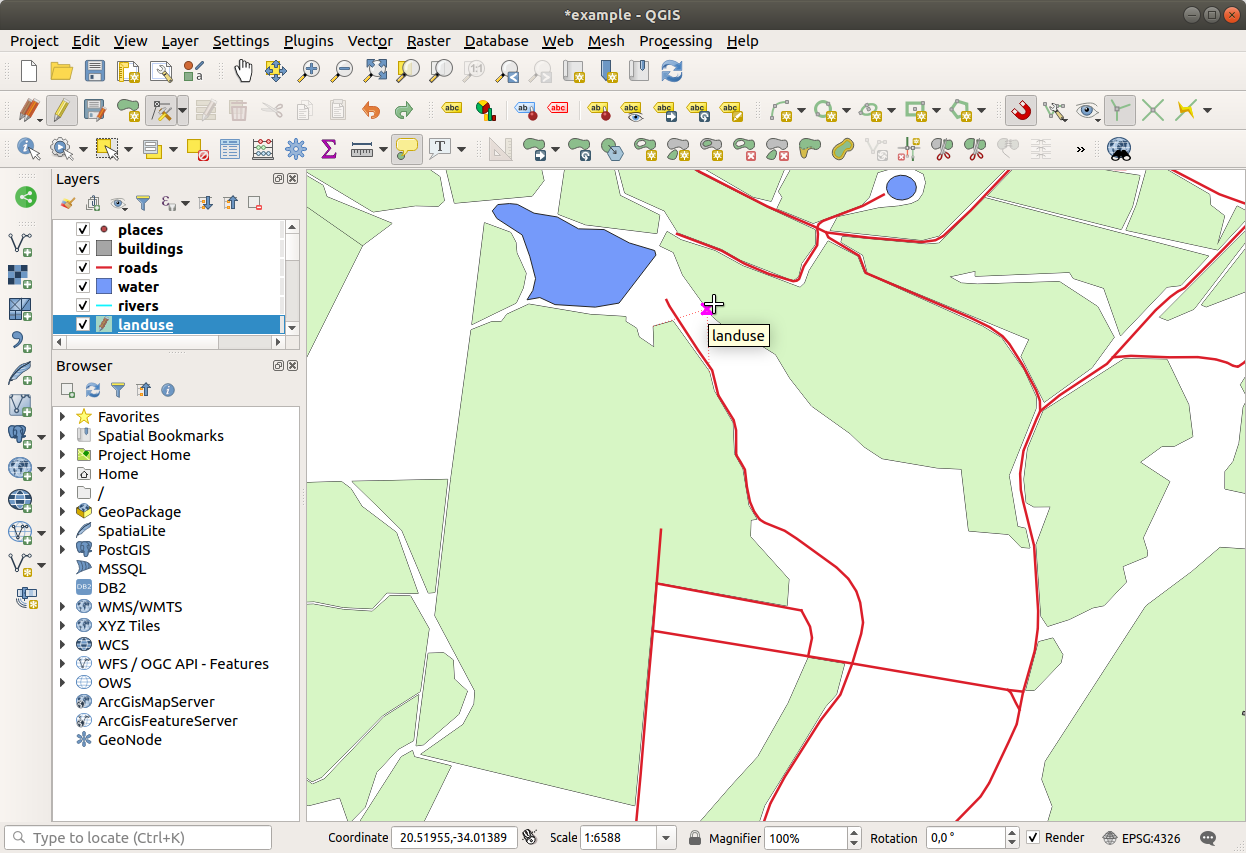
 Add Polygon Feature
tool to fill the gap between the two forest polygons.
If you have enabled Avoid overlap, you don’t have to add every
single vertex - they will be added automatically if your new
polygon overlaps the existing ones.
Add Polygon Feature
tool to fill the gap between the two forest polygons.
If you have enabled Avoid overlap, you don’t have to add every
single vertex - they will be added automatically if your new
polygon overlaps the existing ones.
 Simplify Feature tool:
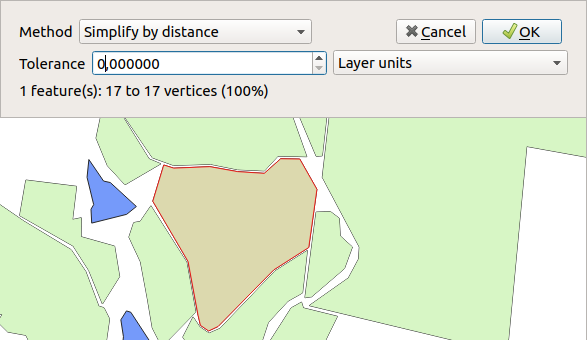
 Add Ring tool allows you to add an interior ring
to a polygon feature (cut a hole in the polygon), as long as the hole
is completely contained within the polygon (touching the boundary is
OK).
For example, if you have digitized the outer boundaries of South
Africa and you need to add a hole for Lesotho, you would use this
tool.
Add Ring tool allows you to add an interior ring
to a polygon feature (cut a hole in the polygon), as long as the hole
is completely contained within the polygon (touching the boundary is
OK).
For example, if you have digitized the outer boundaries of South
Africa and you need to add a hole for Lesotho, you would use this
tool. Enable Snapping button (or use the shortcut s).
 Delete Ring tool.
 Add Part tool allows you to add a new part to a
feature, that is not directly connected to the main feature.
For example, if you have digitized the boundaries of mainland South
Africa, but you haven’t yet added the Prince Edward Islands, you
would use this tool to create them.
Add Part tool allows you to add a new part to a
feature, that is not directly connected to the main feature.
For example, if you have digitized the boundaries of mainland South
Africa, but you haven’t yet added the Prince Edward Islands, you
would use this tool to create them. Select Features by area or single click
tool.
Select Features by area or single click
tool. Delete Part tool.
 Reshape Features tool is used to extend a polygon
feature or cut away a part of it (along the boundary).
Reshape Features tool is used to extend a polygon
feature or cut away a part of it (along the boundary).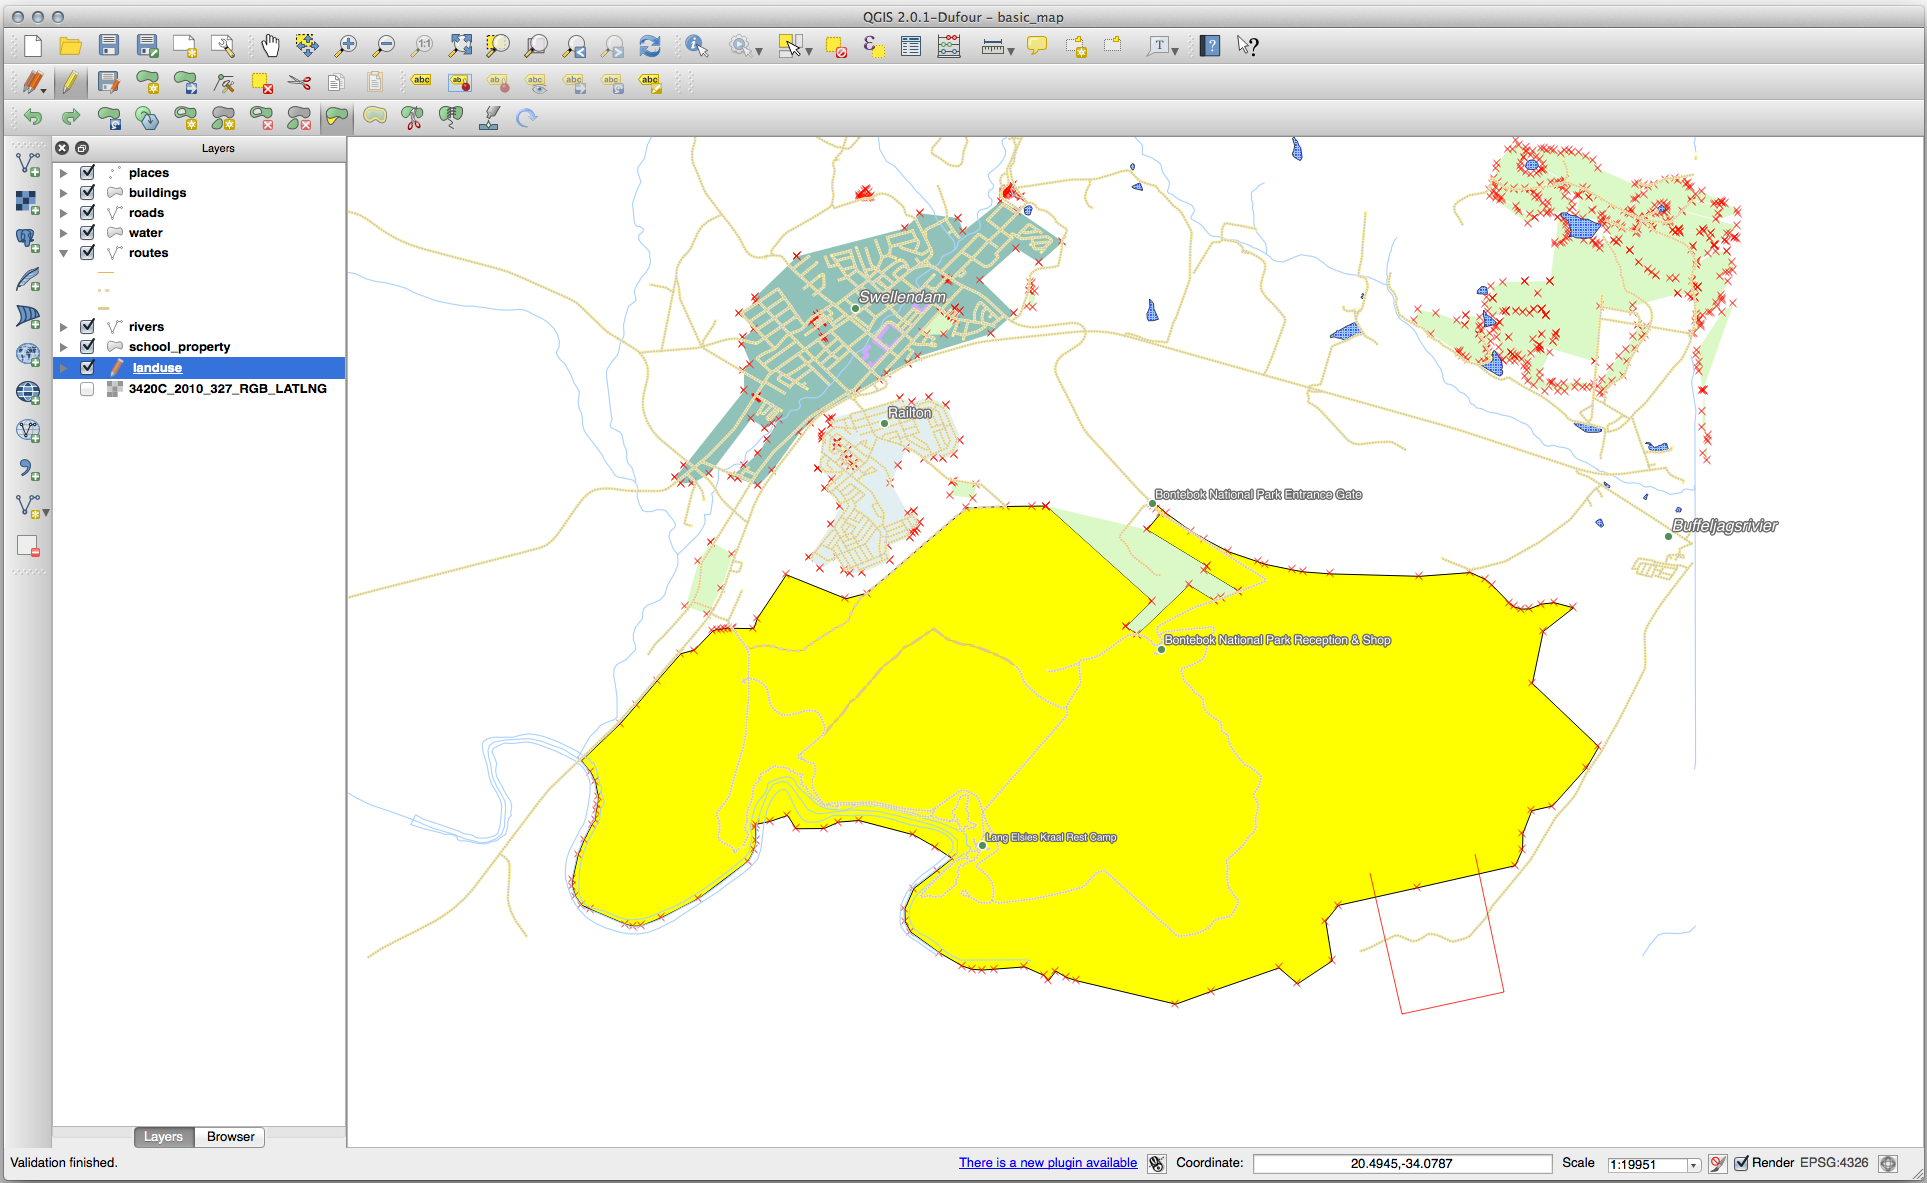

 Split Features tool is similar to the
 Try Yourself Herramienta: Combinar Objetos Espaciales
 Merge Selected Features
and
Merge Selected Features
and  Merge Attributes of Selected Features tools.