5.3. Lesson: Formulários
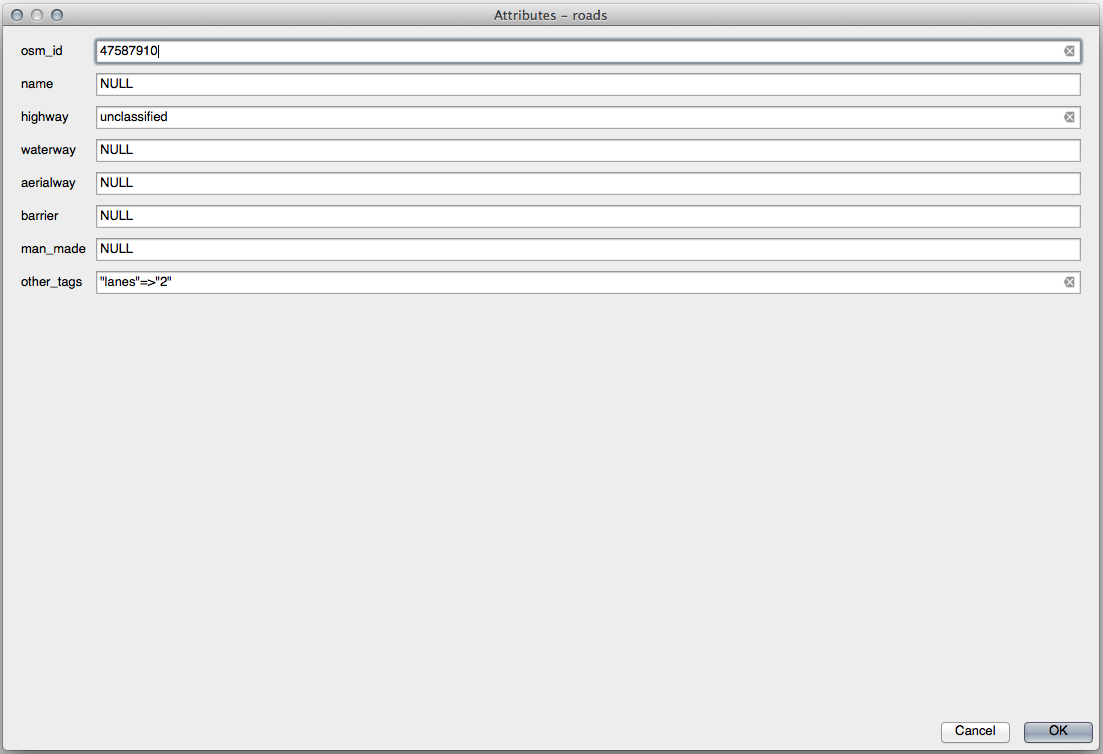
Cuando añades nuevos datos digitalizando, se te presenta un cuadro de diálogo que te permite rellenar los atributos del elemento. Sin embargo, el cuadro de diálogo no es muy bonito a la vista. Esto puede causar algún problema, especialmente si tienes que crear conjuntos de datos extensos, o si quieres que otra gente te ayude a digitalizar y encuentran los formularios por defecto confusas.
Afortunadámente, QGIS te permite crear tus propios cuadros de diálogo para una capa. Esta lección te enseñará cómo.
El objetivo de esta lección: Crear un formulario para una capa.
5.3.1.  Follow Along: Using QGIS’ Funcionalidad del Diseño de un Formulario
Select the
roadslayer in the Layers panelEnter Edit Mode as before
Open the
roadslayer’s attribute tableRight-click on any cell in the table. A short menu will appear, that includes the Open form entry.
Click on it to see the form that QGIS generates for this layer
Obviamente sería bonito poder hacerlo mientras miras el mapa, en lugar de buscar una calle específica en la Tabla de Atributos cada vez.
Select the roads layer in the Layers panel
Using the
 Identify Features tool, click on any
street in the map.
Identify Features tool, click on any
street in the map.The Identify Results panel opens and shows a tree view of the fields values and other general information about the clicked feature.
At the top of the panel, check the Auto open form for single feature results checkbox in the
 sup:Identify Settings menu.
Now, click again on any street in the map. Along the previous Identify Results dialog, you’ll see the now-familiar form:
Each time you click on a single feature with the Identify tool, its form pops up as long as the Auto open form is checked.
5.3.2. Try Yourself Utilizando el Formulario para Editar Valores
Si estás en modo edición, puedes utilizar el formulario para editar los atributos de los elementos.
Activa el modo edición (si no está ya activado).
Using the
Identify Features tool, click on the
main street running through Swellendam:
Edit its highway value to be
secondaryExit edit mode and save your edits
Open the Attribute Table and note that the value has been updated in the attributes table and therefore in the source data
5.3.3.  Follow Along: Ajustando los Tipos de Campos del Formulario
Es bonito editar cosas utilizando un formulario, pero todavía tienes que introducirlo todo a mano. Afortunadamente, los formularios tienen diferentes tipos de los llamados widgets que te permiten editar datos de varias formas diferentes.
Open the roads layer’s Properties…
Cambia a la pestaña Campos. Verás esto:
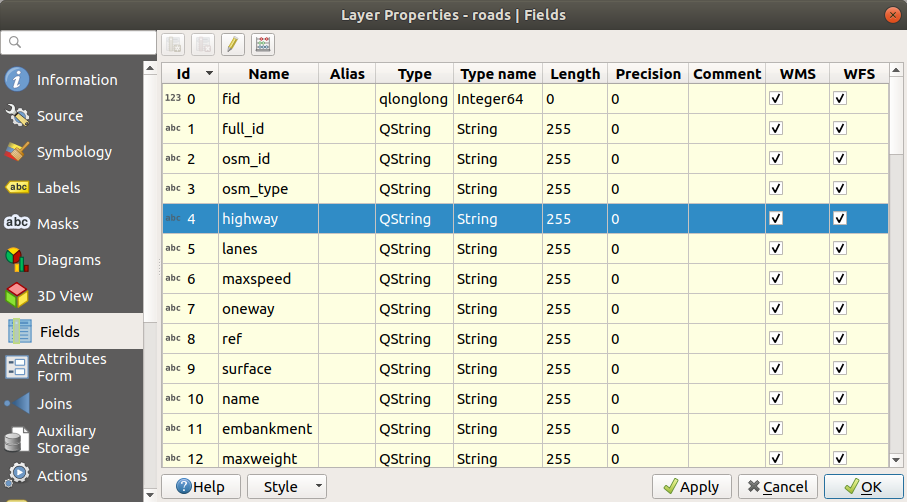
Switch to the Attributes Form tab. You’ll see this:

Click on the
onewayrow and choose Checkbox as Widget Type in the list of options: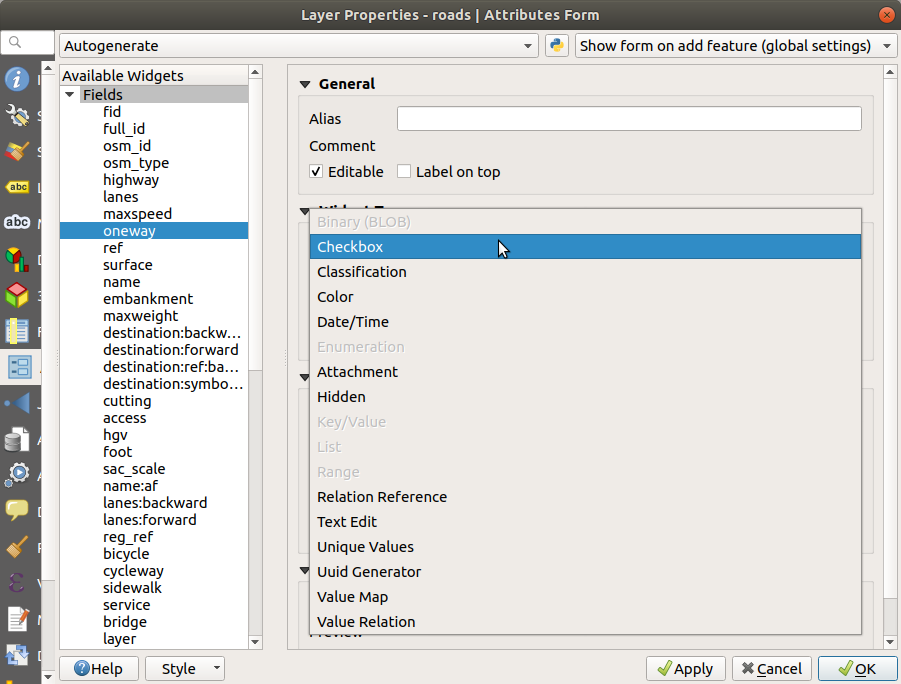
Clique OK.
Enter edit mode (if the
roadslayer is not already in edit mode)Click on the
Identify Features toolClick on the same main road you chose earlier
You will now see that the oneway attribute has a
checkbox next to it denoting True (checked) or False
(unchecked).
5.3.4.  Try Yourself
Ajusta un formulario más apropiado para el campo highway.
5.3.5. Try Yourself Creacion de Datos para Test
También puedes diseñar tu formulario personalizado desde cero
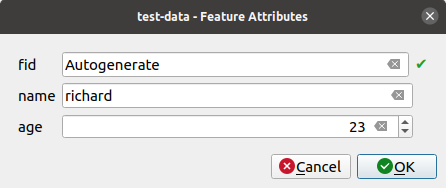
Create a simple point layer named
test-datawith two attributes:name (text)
age (integer)

Captura unos pocos puntos en tu nueva capa utilizando las herramientas de digitalización para tener pocos datos con los que jugar. Debería presentarse un formulario QGIS de atributos capturados por defecto cada vez que capturas un punto nuevo.
Nota
Puede que necesites desactivar Autoensamblado si todavía está acitvada de pasos anteriores.
5.3.6. Follow Along: Creando un Nuevo Formulario
Now we want to create our own custom form for the attribute data capture phase. To do this, you need to have QT Designer installed (only needed for the person who creates the forms).
Start QT Designer.
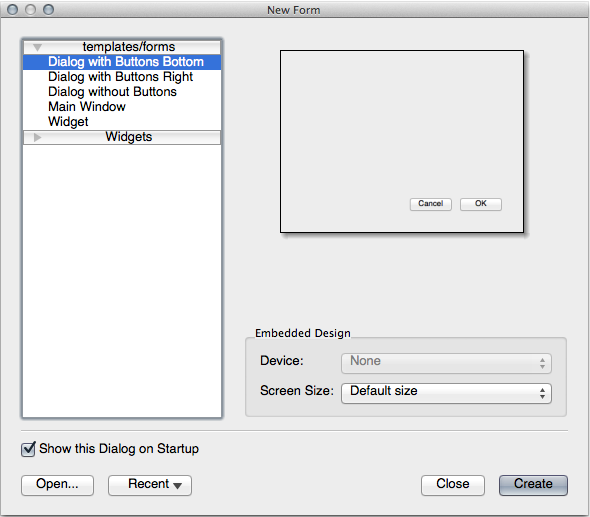
En el cuadro de diálogo que aparece, crea un nuevo cuadro de diálogo:
Busca Widget Box a la izquierda de tu pantalla (por defecto). Contiene un elemento llamado Line Edit.
Haz clic y arrastra el elemento hasta tu formulario. Esto creará un nuevo Line Edit en el formulario.
Con el nuevo elemento de edición de línea seleccionado, verás sus propiedades en un lado de tu pantalla (en el lado derecho por defecto):
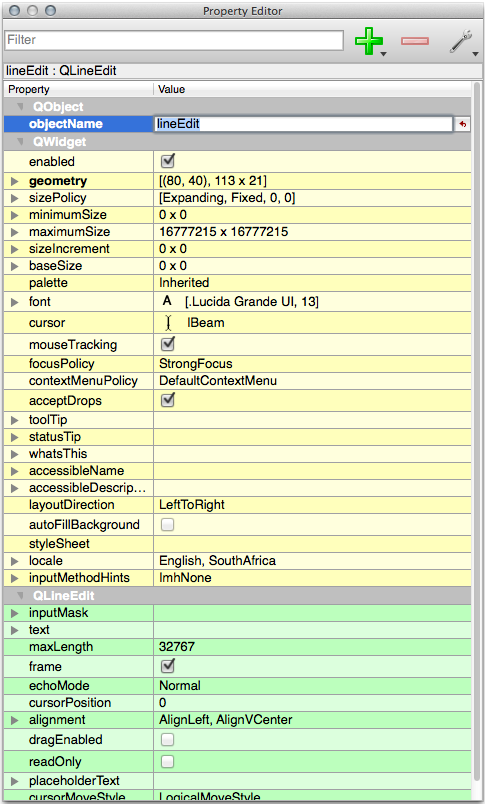
Set its name to
name.Using the same approach, create a new Spin Box and set its name to
age.Add a Label with the text
Add a New Personin a bold font (look in the object properties to find out how to set this). Alternatively, you may want to set the title of the dialog itself (rather than adding a label).Add a Label for your Line Edit and your Spin Box.
Arrange the elements to your own desire.
Haz clic en cualquier parte de tu cuadro de diálogo.
Find the Lay Out in a Form Layout button (in a toolbar along the top edge of the screen, by default). This lays out your dialog automatically.
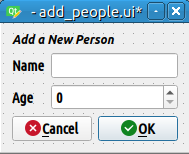
Set the dialog’s maximum size (in its properties) to
200(width) by150(height).Your form should now look similar to this:
Save your new form as
exercise_data/forms/add_people.uiWhen it’s done saving, you can close Qt Designer
5.3.7. Follow Along: Asociando el Formulario con Tu Capa
Go back to QGIS
Haz doble clic en la leyenda de la capa datos-test para acceder a sus propiedades.
Click on the Attributes Form tab in the Layer Properties dialog
En el menú desplegable Disposición del editor de atributos, selecciona Proporcionar archivo UI.
Click the ellipsis button and choose the
add_people.uifile you just created: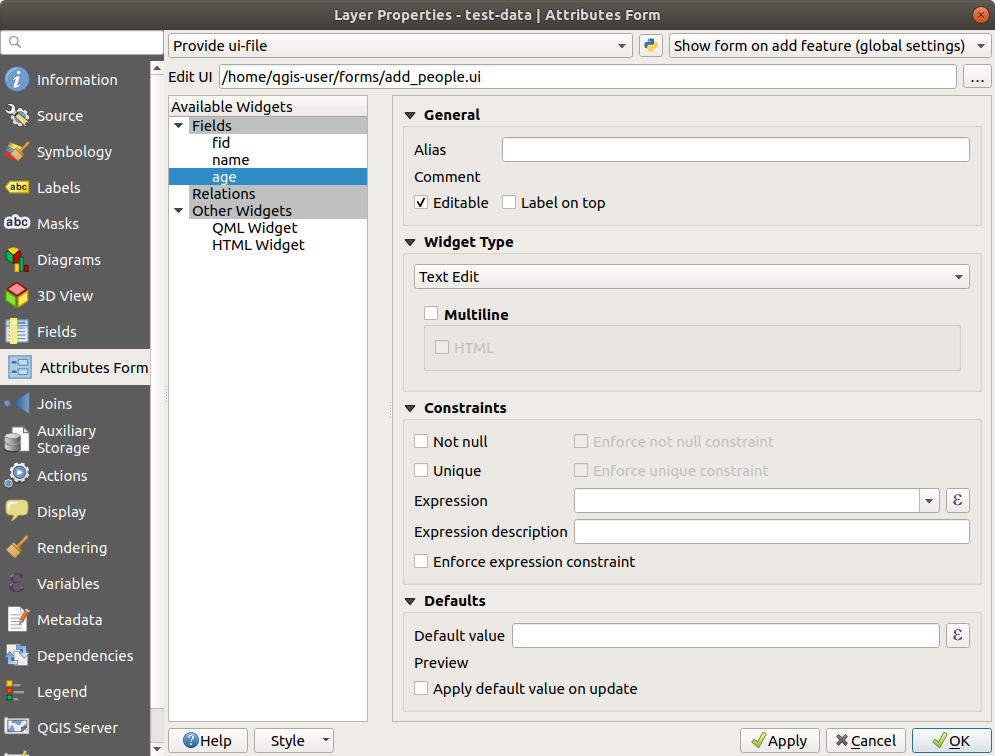
Click OK on the Layer Properties dialog
Enter edit mode and capture a new point
Cuando lo hagas, se presentará un cuadro de diálogo personalizado (en lugar del genérico que el QGIS crea normalmente).
If you click on one of your points using the
Identify Features tool, you can now bring up the
form by right clicking in the identify results window and choosing
from the context menu.If you are in edit mode for this layer, that context menu will show instead, and you can then adjust the attributes in the new form even after initial capture.
5.3.8. In Conclusion
Utilizando formularios, puedes facilitarte la vida cuando creas o editas datos. Editando tipos de widgets o creando nuevos desde cero, puedes controlar la experiencia de alguien que digitalice nuevos datos para esa capa, además minimizas malentendidos y errores innecesarios.
5.3.9. Further Reading
If you completed the advanced section above and have knowledge of Python, you may want to check out this blog entry about creating custom feature forms with Python logic, which allows advanced functions including data validation, autocompletion, etc.
5.3.10. What’s Next?
Abrir un formulario de identificación de un elemento es una de las acciones estándar que QGIS puede realizar. Sin embargo, puedes dirigirlo a realizar acciones de personalización que tú definas. Este es el tema de la siguiente lección.