5.3. Lesson: フォーム
デジタイズで新しいデータを追加する場合、その地物の属性を入力するダイアログが表示されます。ただし、このダイアログボックスは既定ではあまり見た目がよくありません。これは特に大規模なデータセットを作成する場合や他の人にデジタイズを手伝って貰うときに既定のフォームではわかりにくい場合に、ユーザビリティ上の問題を引き起こす可能性があります。
幸いにも、QGISではレイヤーに独自のカスタムダイアログを作成できます。このレッスンではその方法について説明します。
このレッスンの目標: レイヤーのフォームを作成します。
5.3.1.  Follow Along: QGISのフォームデザイン機能の使用
Select the
roadslayer in the Layers panelEnter Edit Mode as before
Open the
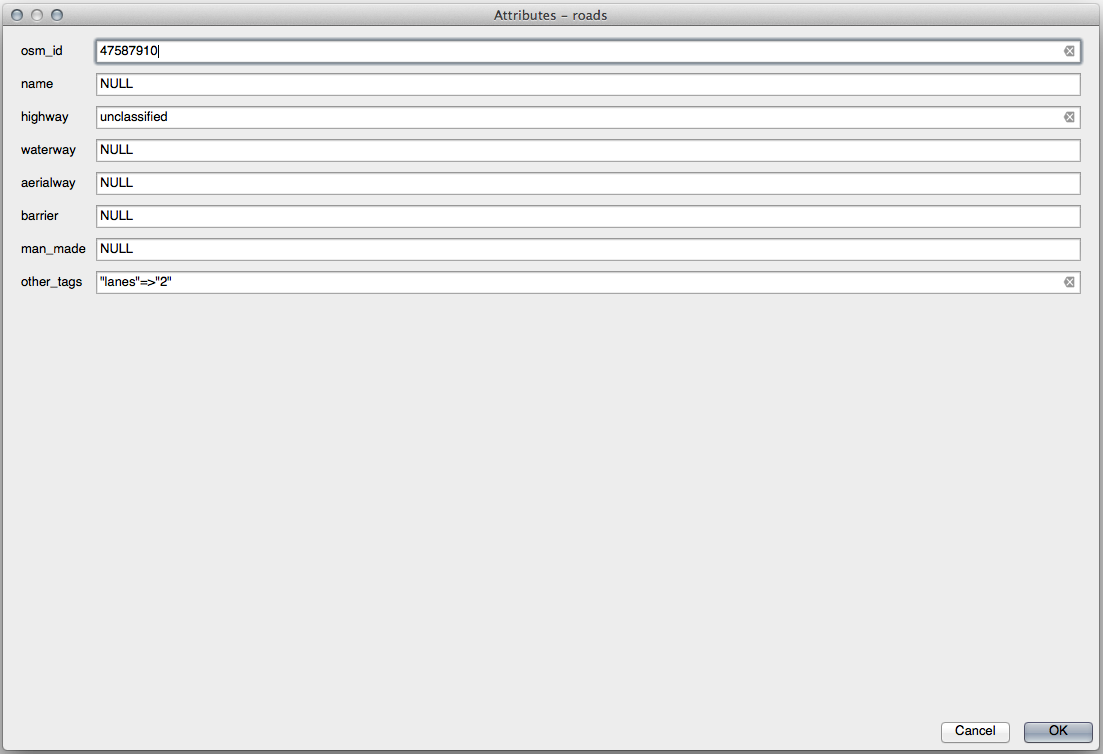
roadslayer's attribute tableRight-click on any cell in the table. A short menu will appear, that includes the Open form entry.
Click on it to see the form that QGIS generates for this layer
明らかに、毎回 属性テーブル で特定の街路を検索するのではなく、地図を見ながらこれを行うことができるといいですね。
Select the roads layer in the Layers panel
Using the
 Identify Features tool, click on any
street in the map.
Identify Features tool, click on any
street in the map.The Identify Results panel opens and shows a tree view of the fields values and other general information about the clicked feature.
At the top of the panel, check the Auto open form for single feature results checkbox in the
 sup:Identify Settings menu.
さて、地図内のどれかの街路をもう一度クリックします。前の 結果を識別 ダイアログに沿って今やおなじみのフォームが表示されます。
Each time you click on a single feature with the Identify tool, its form pops up as long as the Auto open form is checked.
5.3.2. Try Yourself フォームを使用して値を編集する
編集モードの場合は、このフォームを使用して地物の属性を編集できます。
編集モードをアクティブにします (まだアクティブになっていない場合)。
Using the
Identify Features tool, click on the
main street running through Swellendam: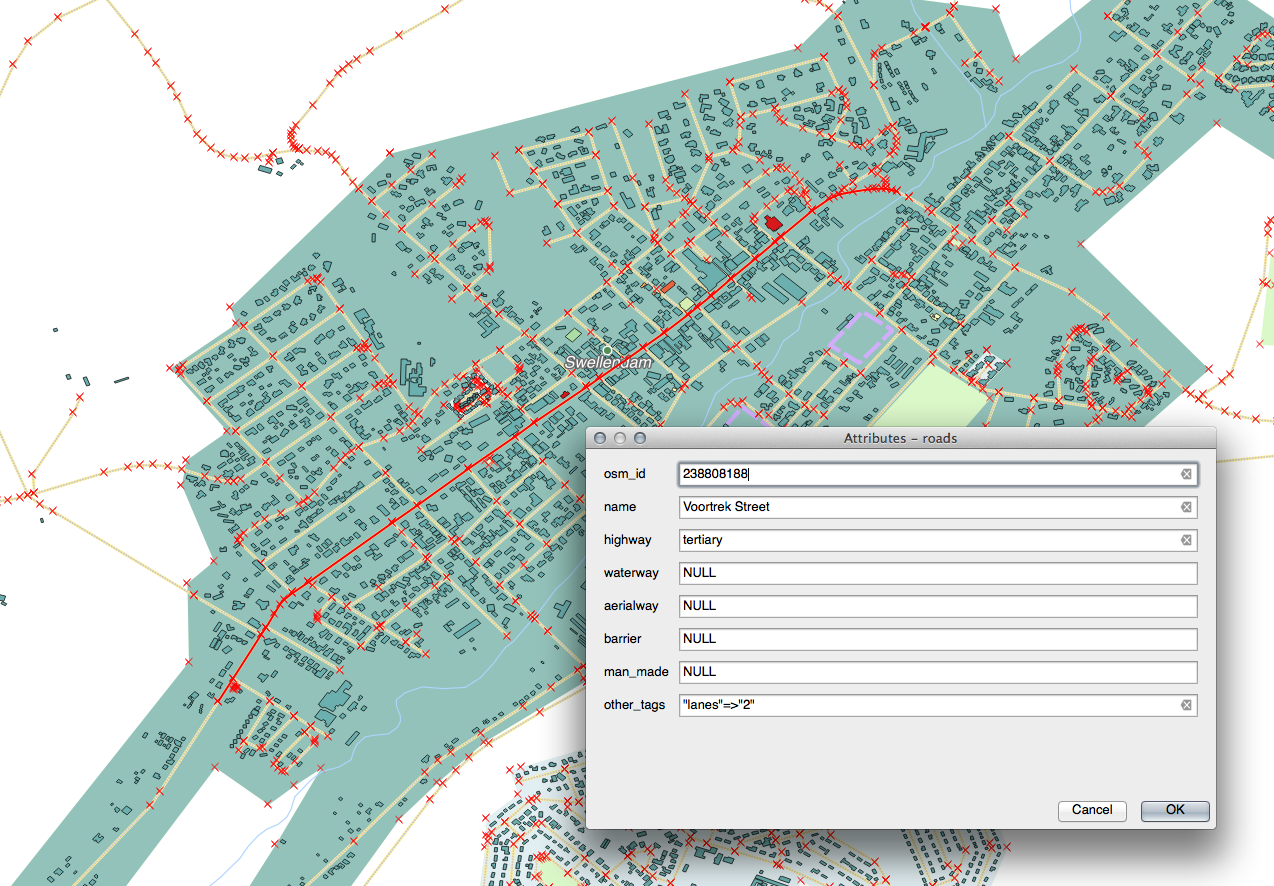
Edit its highway value to be
secondaryExit edit mode and save your edits
Open the Attribute Table and note that the value has been updated in the attributes table and therefore in the source data
5.3.3.  Follow Along: フォームのフィールドタイプを設定する
フォームを使用して編集するのはよいのですが、まだ何もかも手で入力しなければいけません。幸いにも、フォームには様々な方法でデータの編集ができる様々な種類の、いわゆる ウィジェット を持ちます。
Open the roads layer's Properties...
フィールド タブに切り替えます。次が表示されます:
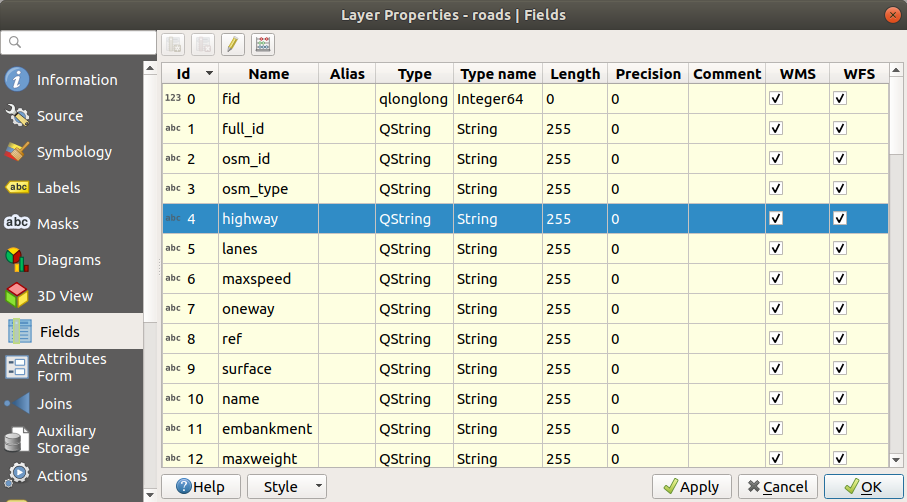
Switch to the Attributes Form tab. You'll see this:
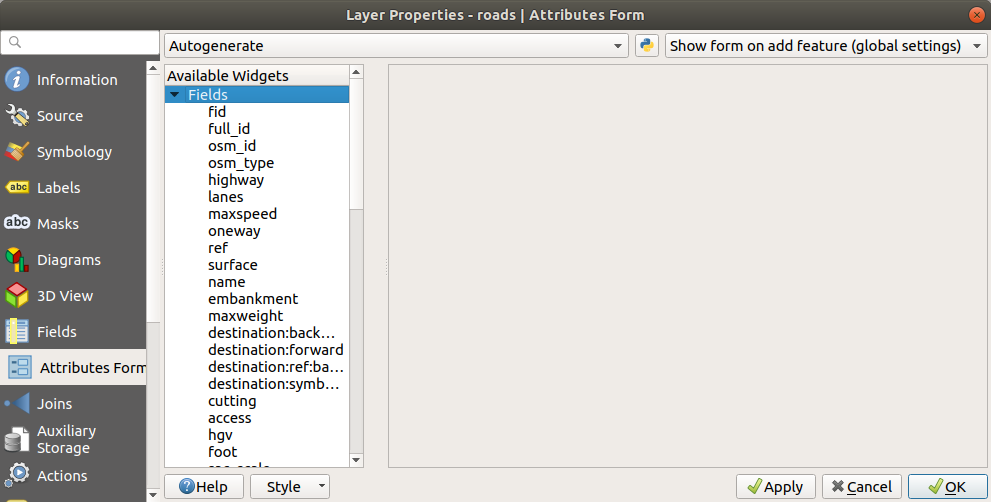
Click on the
onewayrow and choose Checkbox as Widget Type in the list of options: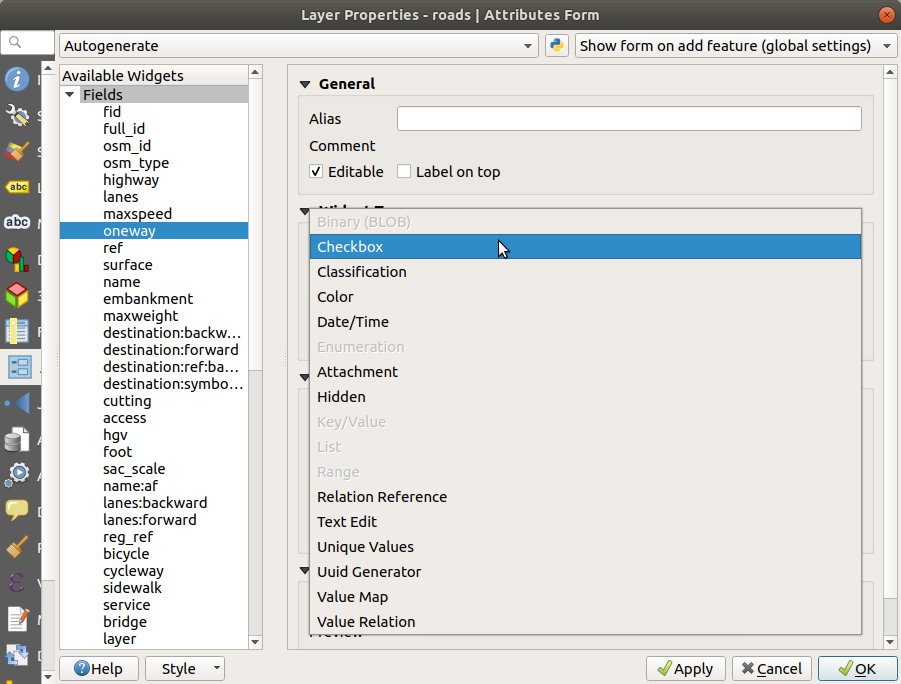
OK をクリックします
Enter edit mode (if the
roadslayer is not already in edit mode)Click on the
Identify Features toolClick on the same main road you chose earlier
You will now see that the oneway attribute has a
checkbox next to it denoting True (checked) or False
(unchecked).
5.3.4.  Try Yourself
highway フィールドに、より適切なフォームウィジェットを設定します。
5.3.5. Try Yourself テストデータの作成
まったくのゼロから独自のカスタム フォームを設計することもできます。
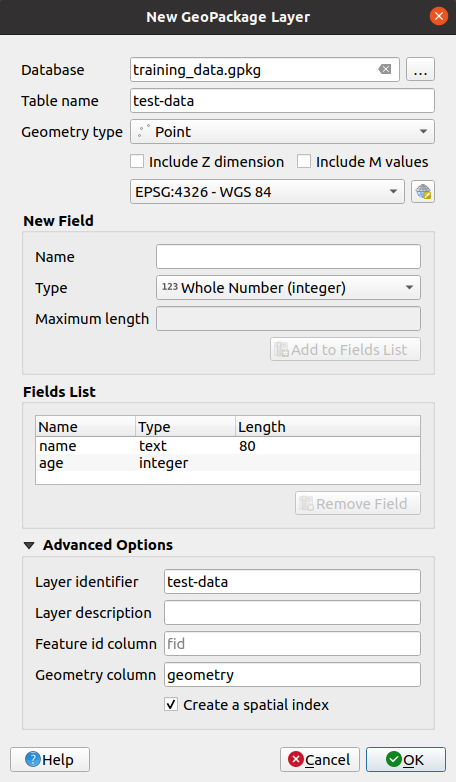
Create a simple point layer named
test-datawith two attributes:name (text)
age (integer)
デジタイズツールを使用して新しいレイヤー上にいくつかのポイントを追加してテスト用データを作成します。新しいポイントをキャプチャするたびにQGISの既定の属性フォームが表示されます。
注釈
以前の作業の時からスナップを有効にしたままの場合、スナップを無効にする必要があります。

5.3.6. Follow Along: 新しいフォームの作成
Now we want to create our own custom form for the attribute data capture phase. To do this, you need to have QT Designer installed (only needed for the person who creates the forms).
Start QT Designer.
表示されるダイアログで新しいダイアログボックスを作成します:

画面の左側(デフォルト)にある ウィジェットボックス で Line Edit アイテムを探します。
このアイテムをクリックしてフォームにドラッグします。フォーム上に新しい Line Edit が作成されます。
Line Edit要素を選択すると、その プロパティ が画面の片側に沿って表示されます(デフォルトで右側):
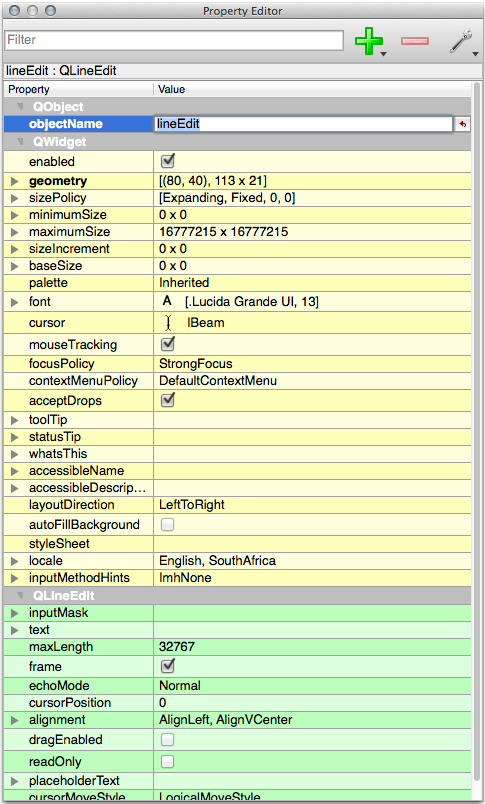
Set its name to
name.Using the same approach, create a new Spin Box and set its name to
age.Add a Label with the text
Add a New Personin a bold font (look in the object properties to find out how to set this). Alternatively, you may want to set the title of the dialog itself (rather than adding a label).Add a Label for your Line Edit and your Spin Box.
Arrange the elements to your own desire.
ダイアログの任意の場所をクリックします。
Find the Lay Out in a Form Layout button (in a toolbar along the top edge of the screen, by default). This lays out your dialog automatically.
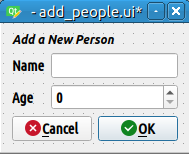
Set the dialog's maximum size (in its properties) to
200(width) by150(height).Your form should now look similar to this:
Save your new form as
exercise_data/forms/add_people.uiWhen it's done saving, you can close Qt Designer
5.3.7. Follow Along: レイヤーをフォームに関連付ける
Go back to QGIS
凡例で test-data レイヤーをダブルクリックしてプロパティにアクセスします。
Click on the Attributes Form tab in the Layer Properties dialog
属性エディタレイアウト ドロップダウンボックスで ui-ファイルを提供する を選択します。
Click the ellipsis button and choose the
add_people.uifile you just created: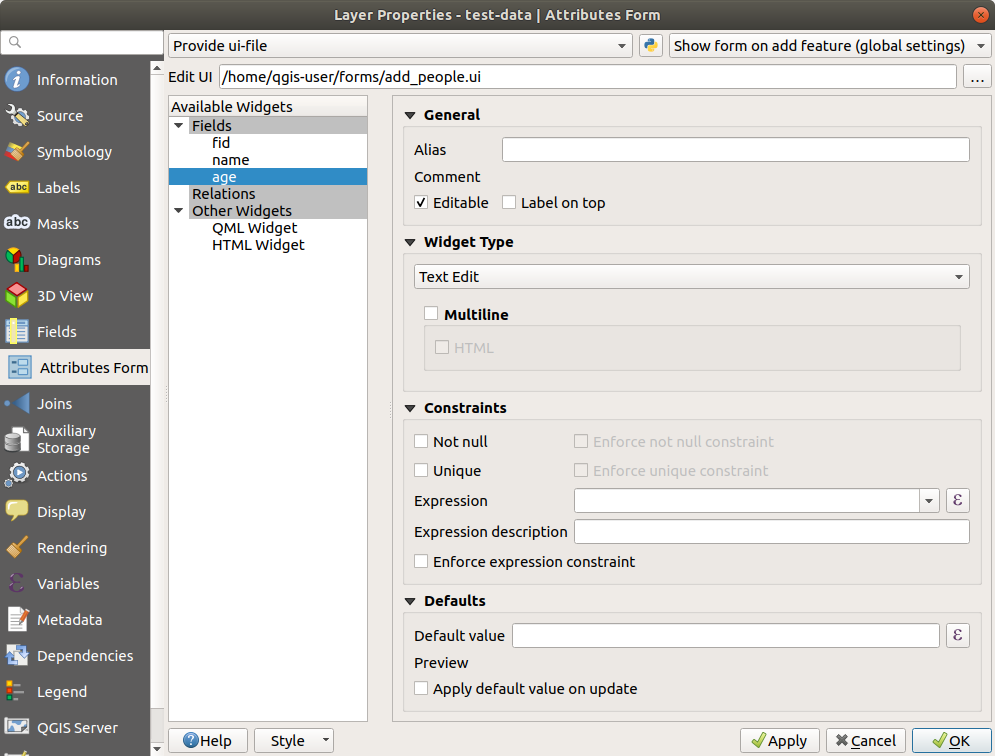
Click OK on the Layer Properties dialog
Enter edit mode and capture a new point
そうするとカスタムダイアログが表示されます(QGISが通常作成するものの代わりに)。
If you click on one of your points using the
Identify Features tool, you can now bring up the
form by right clicking in the identify results window and choosing
from the context menu.If you are in edit mode for this layer, that context menu will show instead, and you can then adjust the attributes in the new form even after initial capture.
5.3.8. In Conclusion
フォームを使用すればデータの編集や作成がもっと楽になります。ウィジェットの種類を編集するか全くのゼロから新しいフォームを作成することで、新しいデータをデジタイズをする人のエクスペリエンスをコントロールできます。それによって誤解や不必要なエラーを最小限に押さえることができます。
5.3.9. Further Reading
If you completed the advanced section above and have knowledge of Python, you may want to check out this blog entry about creating custom feature forms with Python logic, which allows advanced functions including data validation, autocompletion, etc.
5.3.10. What's Next?
地物フォームを開くことはQGISができる標準的な操作の1つです。一方で、自ら定義したカスタムアクションを実行させることもできます。これは次のレッスンのテーマです。