5.4. Lesson: アクション
Now that you have seen a default action in the previous lesson, it is time to define your own actions.
An action is something that happens when you click on a feature. It can add a lot of extra functionality to your map, allowing you to retrieve additional information about an object, for example. Assigning actions can add a whole new dimension to your map!
このレッスンの目標: カスタムアクションを追加する方法を学びます。
In this lesson you will use the school_property layer you created previously. The sample data include photos of each of the three properties you digitized. What we are going to do is to associate each property with its image. Then we will create an action that will open the image for a property when clicking on the property.
5.4.1.  Follow Along: 画像のためのフィールドの追加
The school_property layer has no way to associate an image with a
property yet. First we will create a field for this purpose.
レイヤーのプロパティ ダイアログを開きます。
フィールド タブをクリックします。
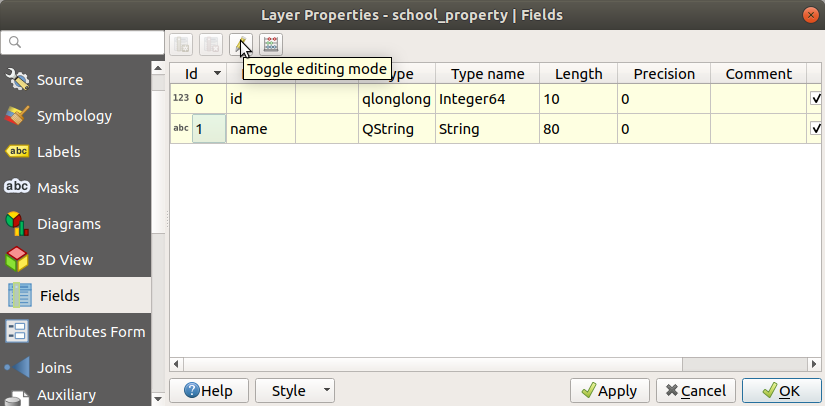
編集モードに切り替えます:
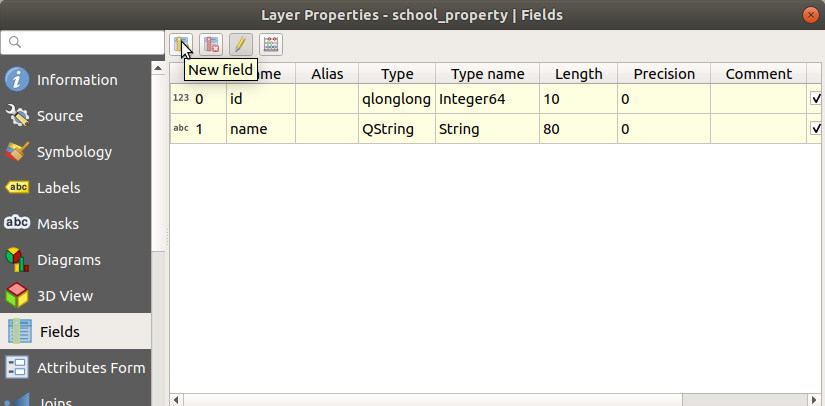
新しい列を追加します:
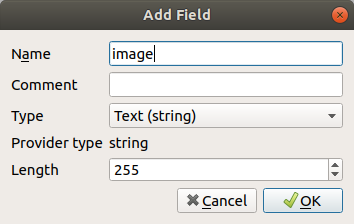
下記の値を入力します:
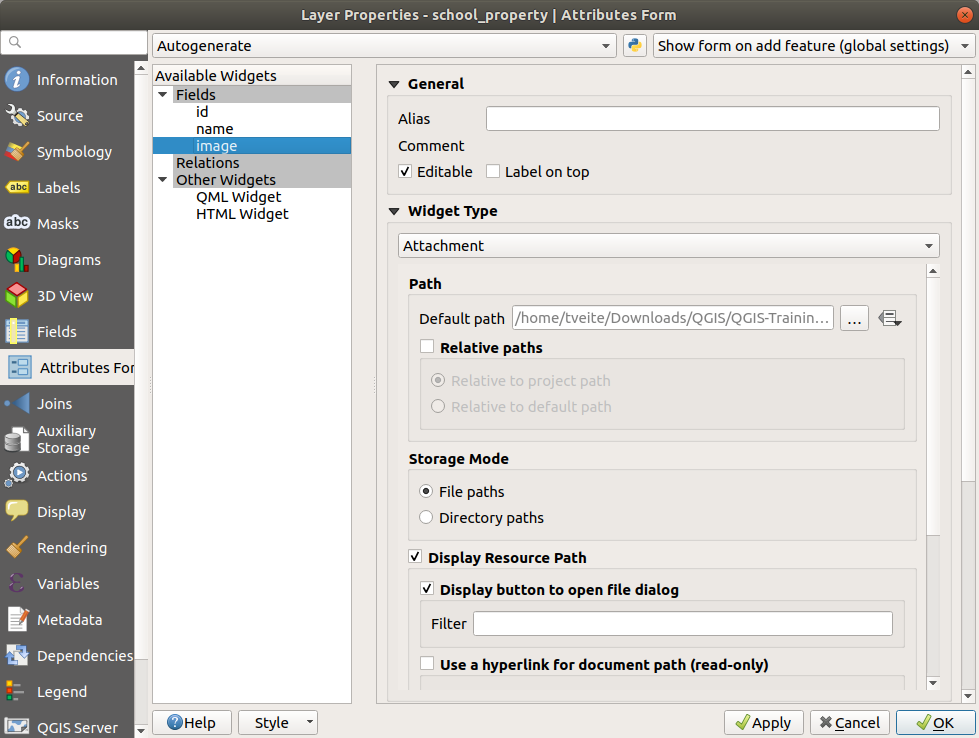
After the field has been created, move to the Attributes Form tab and select the
imagefield.Set Widget Type to Attachment:
Click OK in the Layer Properties dialog.
地物情報表示 ツールを使用して school_property レイヤーの3つの地物のいずれかをクリックします。
Since you are still in edit mode, the dialog should be active and look like this:
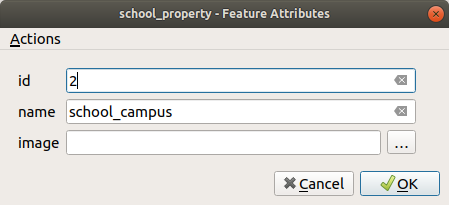
参照ボタンをクリックします (image フィールドの横の ...)。
Select the path for your image. The images are in
exercise_data/school_property_photos/and are named the same as the features they should be associated with.OK をクリックします。
この方法ですべての画像と地物を正しく関連付けます。
編集内容を保存し、編集モードを終了します。
5.4.2.  Follow Along: アクションの作成
Open the Actions tab for the school_property layer, and click on the
 Add a new action button.
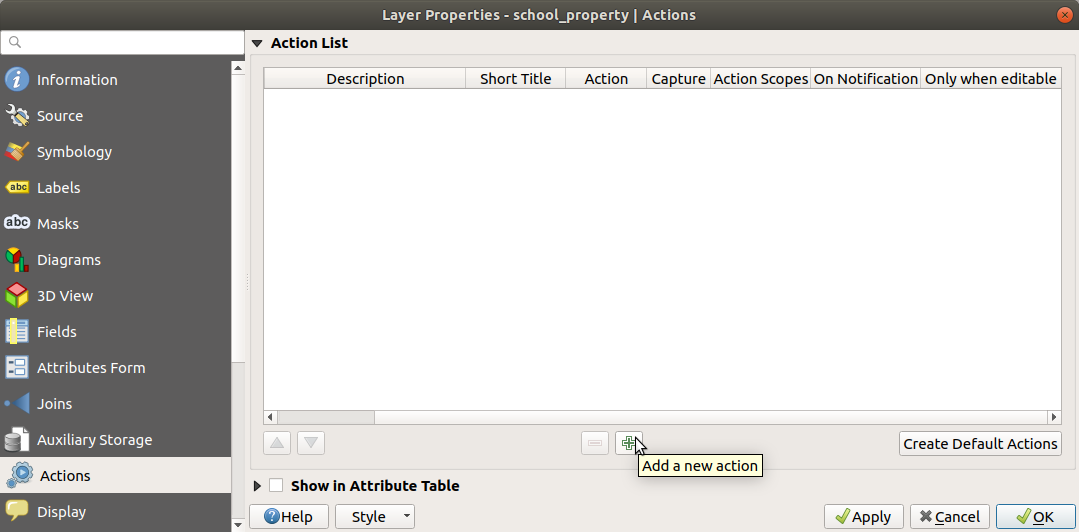
In the Add New Action dialog, enter the words
Show Imageinto the Description field: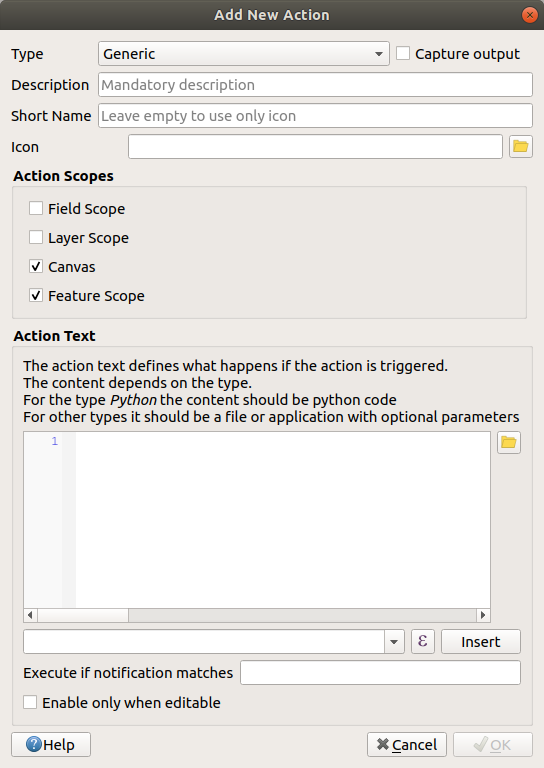
次に何をすべきかはオペレーティングシステムによって異なりますので、次で適切なコースを選択して下さい:
Windows
タイプ ドロップダウンリストをクリックし、 開く を選択します。
Ubuntu Linux
Under Action, write
eogfor the Gnome Image Viewer, or writedisplayto use ImageMagick. Remember to put a space after the command!MacOS
タイプ ドロップダウンリストをクリックし、 Mac を選択します。
Under Action, write
open. Remember to put a space after the command!
Now you can continue writing the command.
あなたは画像を開きたい。そしてQGISは画像の場所を知っている。あとは アクション に画像がどこにあるかを知らせるだけです。
リストから image を選択します:
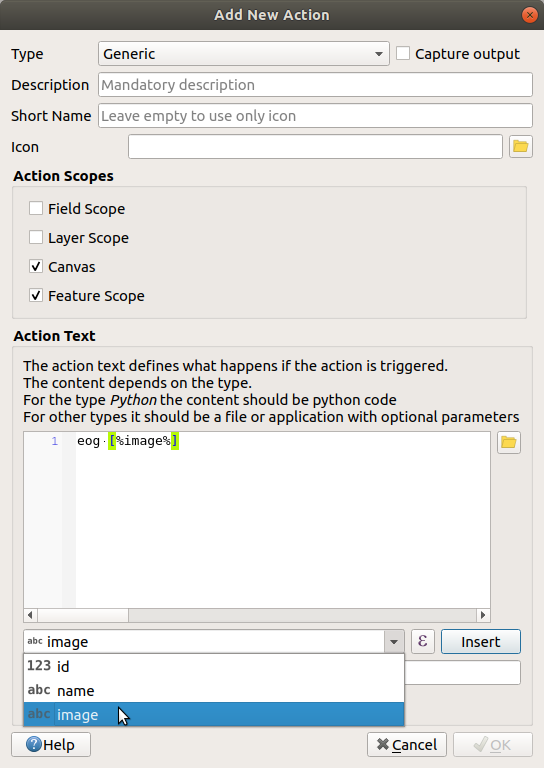
Click the Insert field button. QGIS will add the phrase
[% "image" %]in the Action Text field.Click the OK button to close the Add New Action dialog
Click OK to close the Layer Properties dialog
Now it is time to test the new action:
Click on the school_property layer in the Layers panel so that it is highlighted.
Find the
 Run feature action button (in the
Attributes Toolbar).
Run feature action button (in the
Attributes Toolbar).Click on the down arrow to the right of this button. There is only one action defined for this layer so far, which is the one you just created.

ボタン自体をクリックしてツールをアクティブにします。
このツールを使用して、3つの地所のいずれかをクリックします。
The image for that property should open.
5.4.3.  Follow Along: インターネットを検索する
Let's say we are looking at the map and want to know more about the area that a farm is in. Suppose you know nothing of the area in question and want to find general information about it. Your first impulse, considering that you're using a computer right now, would probably be to Google the name of the area. So let's tell QGIS to do that automatically for us!
landuse レイヤーの属性テーブルを開きます。
We will be using the
namefield for each of our landuse areas to search Google.属性テーブルを閉じます。
レイヤープロパティ の アクション に戻ります。
Click on the Create Default Actions button to add a number of pre-defined actions.
Remove all the actions but the Open URL action with the short name Search Web using the
 Remove the selected action button below.
Double-click on the remaining action to edit it
Change the Description to
Google Search, and remove the content of the Short Name field.Make sure that Canvas is among the checked Action scopes.
次に何をすべきかはオペレーティングシステムによって異なりますので、次で適切なコースを選択して下さい:
Windows
タイプ で 開く を選択します。これはWindowsにInternet Explorer等の既定のブラウザでインターネットアドレスを開かせます。
Ubuntu Linux
Under Action, write
xdg-open. This will tell Ubuntu to open an Internet address in your default browser, such as Chrome or Firefox.MacOS
Under Action, write
open. This will tell MacOS to open an Internet address in your default browser, such as Safari.
Now you can continue writing the command
上でどのコマンドを使った場合でも次に、開くべきインターネットアドレスを知らせなければいけません。Googleを訪問させて語句を自動的に検索させます。
Usually when you use Google, you enter your search phrase into the Google Search bar. But in this case, you want your computer to do this for you. The way you tell Google to search for something (if you don't want to use its search bar directly) is by giving your Internet browser the address
https://www.google.com/search?q=SEARCH_PHRASE, whereSEARCH_PHRASE`is what you want to search for. Since we don't know what phrase to search for yet, we will just enter the first part (without the search phrase).In the Action field, write
https://www.google.com/search?q=. Remember to add a space after your initial command before writing this in!Now you want QGIS to tell the browser to tell Google to search for the value of
namefor any feature that you could click on.名称 フィールドを選択します。
Click Insert button:
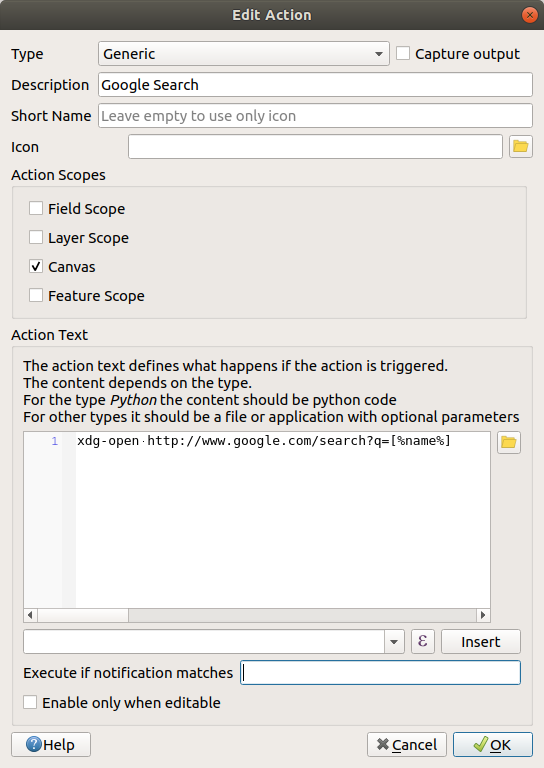
What this means is that QGIS is going to open the browser and send it to the address
https://www.google.com/search?q=[% "name" %].[% "name" %]tells QGIS to use the contents of thenamefield as the phrase to search for.So if, for example, the landuse area you click on is named
Marloth Nature Reserve, QGIS is going to send the browser tohttps://www.google.com/search?q=Marloth%20Nature%20Reserve, which will cause your browser to visit Google, which will in turn search for "Marloth Nature Reserve".If you have not done so already, set everything up as explained above.
Click the OK button to close the Add New Action dialog
Click OK to close the Layer Properties dialog
では新しいアクションをためします。
With the landuse layer active in the Layers panel, click on the down arrow to the right of the
 Run feature action button, and select the
only action (
Run feature action button, and select the
only action (Google Search) defined for this layer.Click on any landuse area you can see on the map. Your browser will now open, and will start a Google search for the place that is recorded as that area's
namevalue.
注釈
アクションがうまく動作しない場合は、すべてが正しく入力されたことをチェックしてください。タイプミスはこの種の作業でよくあることです!
5.4.4.  Follow Along: QGISで直接Webページを開く
Above, you've seen how to open a webpage in an external browser. There are some shortcomings with this approach in that it adds an unknowable dependency – will the end-user have the software required to execute the action on their system? As you've seen, they don't necessarily even have the same kind of base command for the same kind of action, if you don't know which OS they will be using. With some OS versions, the above commands to open the browser might not work at all. This could be an insurmountable problem.
However, QGIS sits on top of the incredibly powerful and versatile Qt library. Also, QGIS actions can be arbitrary, tokenized (i.e. using variable information based on the contents of a field attribute) Python commands!
Now you will see how to use a python action to show a web page. It is the same general idea as opening a site in an external browser, but it requires no browser on the user’s system since it uses the Qt QWebView class (which is a webkit based html widget) to display the content in a pop-up window.
Let us use Wikipedia this time. So the URL you request will look like this:
https://wikipedia.org/wiki/SEARCH_PHRASE
レイヤーアクションを作成するには:
レイヤープロパティ ダイアログを開いて アクション タブへ向かいます。
次のアクションのプロパティを使って新しいアクションを設定します。
Type:
PythonDescription:
WikipediaAction Text (all on one line):
from qgis.PyQt.QtCore import QUrl; from qgis.PyQt.QtWebKitWidgets import QWebView; myWV = QWebView(None); myWV.load(QUrl('https://wikipedia.org/wiki/[%name%]')); myWV.show()
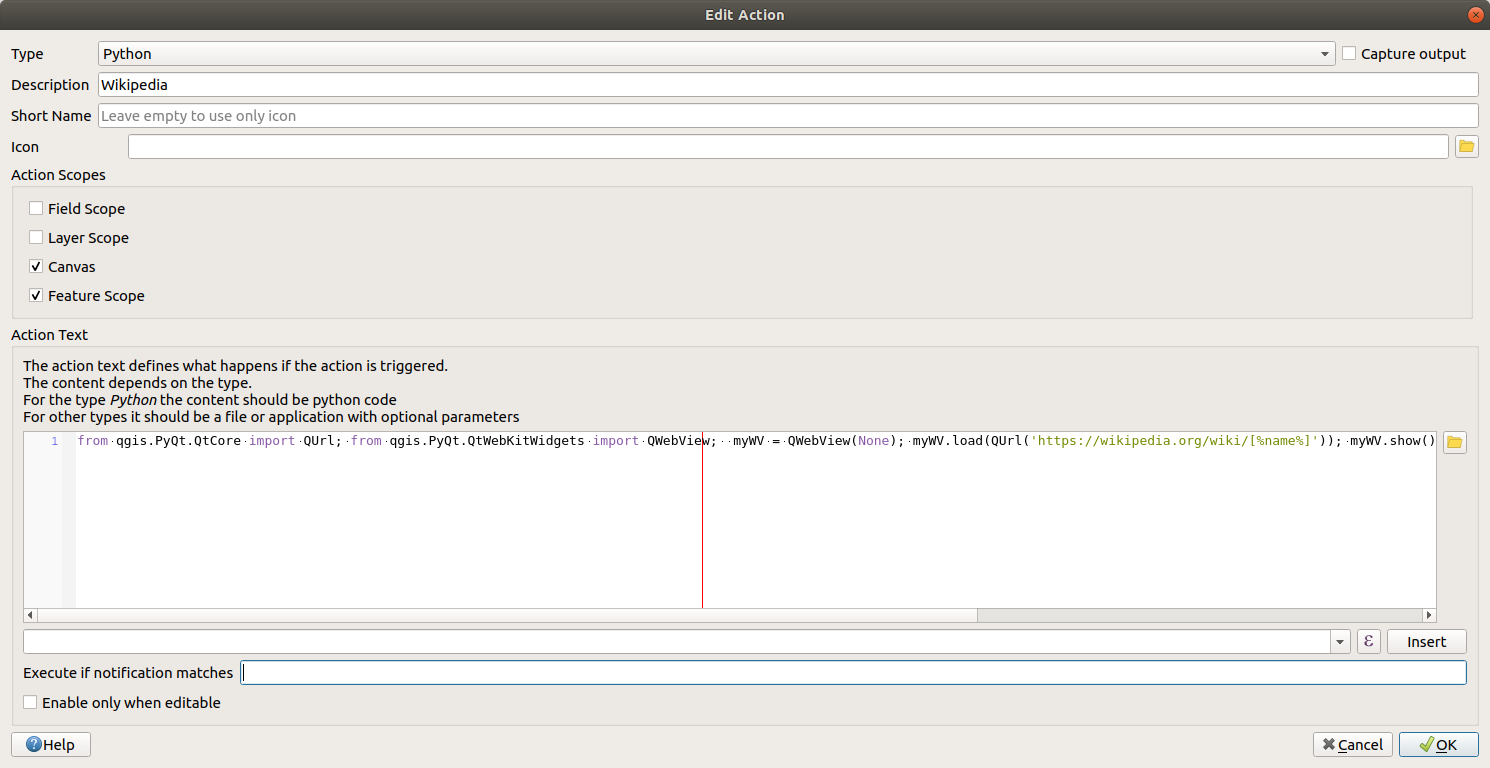
ここでは:
すべてのPythonのコードはコマンドがセミコロンで区切られて1行になっています(通常Pythonのコマンドは改行で区切ります)。
[%name%]will be replaced by the actual attribute value when the action is invoked (as before).The code simply creates a new
QWebViewinstance, sets its URL, and then callsshow()on it to make it visible as a window on the user’s desktop.
これはいくぶん不自然な例であることに注意してください。Pythonでは意味的に重要なインデントが使われますので、セミコロンで区切ることは記述の最良の方法ではありません。ですから現実の世界では、Pythonモジュールからロジックをインポートして、引数にフィールド属性をとる関数を呼び出す可能性が高いと思います。
You could also use this approach to display an image without requiring that the users have a particular image viewer on their system.
Try to use the methods described above to load a Wikipedia page using the Wikipedia action you just created.
5.4.5. In Conclusion
Actions allow you to give your map extra functionality, useful to the end-user who views the same map in QGIS. Due to the fact that you can use shell commands for any operating system, as well as Python, the sky is the limit in terms of the functions you could incorporate!
5.4.6. What's Next?
Now that you've done all kinds of vector data creation, you will learn how to analyze the data to solve problems. That is the topic of the next module.