6.2. Lesson: Feature Topology
Topology is a useful aspect of vector data layers, because it minimizes errors such as overlap or gaps.
For example: if two features share a border, and you edit the border using topology, then you won’t need to edit first one feature, then another, and carefully line up the borders so that they match. Instead, you can edit their shared border and both features will change at the same time.
The goal for this lesson: To understand topology using examples.
6.2.1.  Follow Along: Snapping
To make topological editing easier, it’s best if you enable snapping. This will allow your mouse cursor to snap to other objects while you digitize. To set snapping options:
Navigate to the menu entry .
Set up your Snapping options dialog as shown:

Ensure that the box in the Avoid Int. column is checked (set to true).
Click OK to save your changes and leave the dialog.
Enter edit mode with the landuse layer selected.
Check under to make sure that your Advanced Digitizing toolbar is enabled.
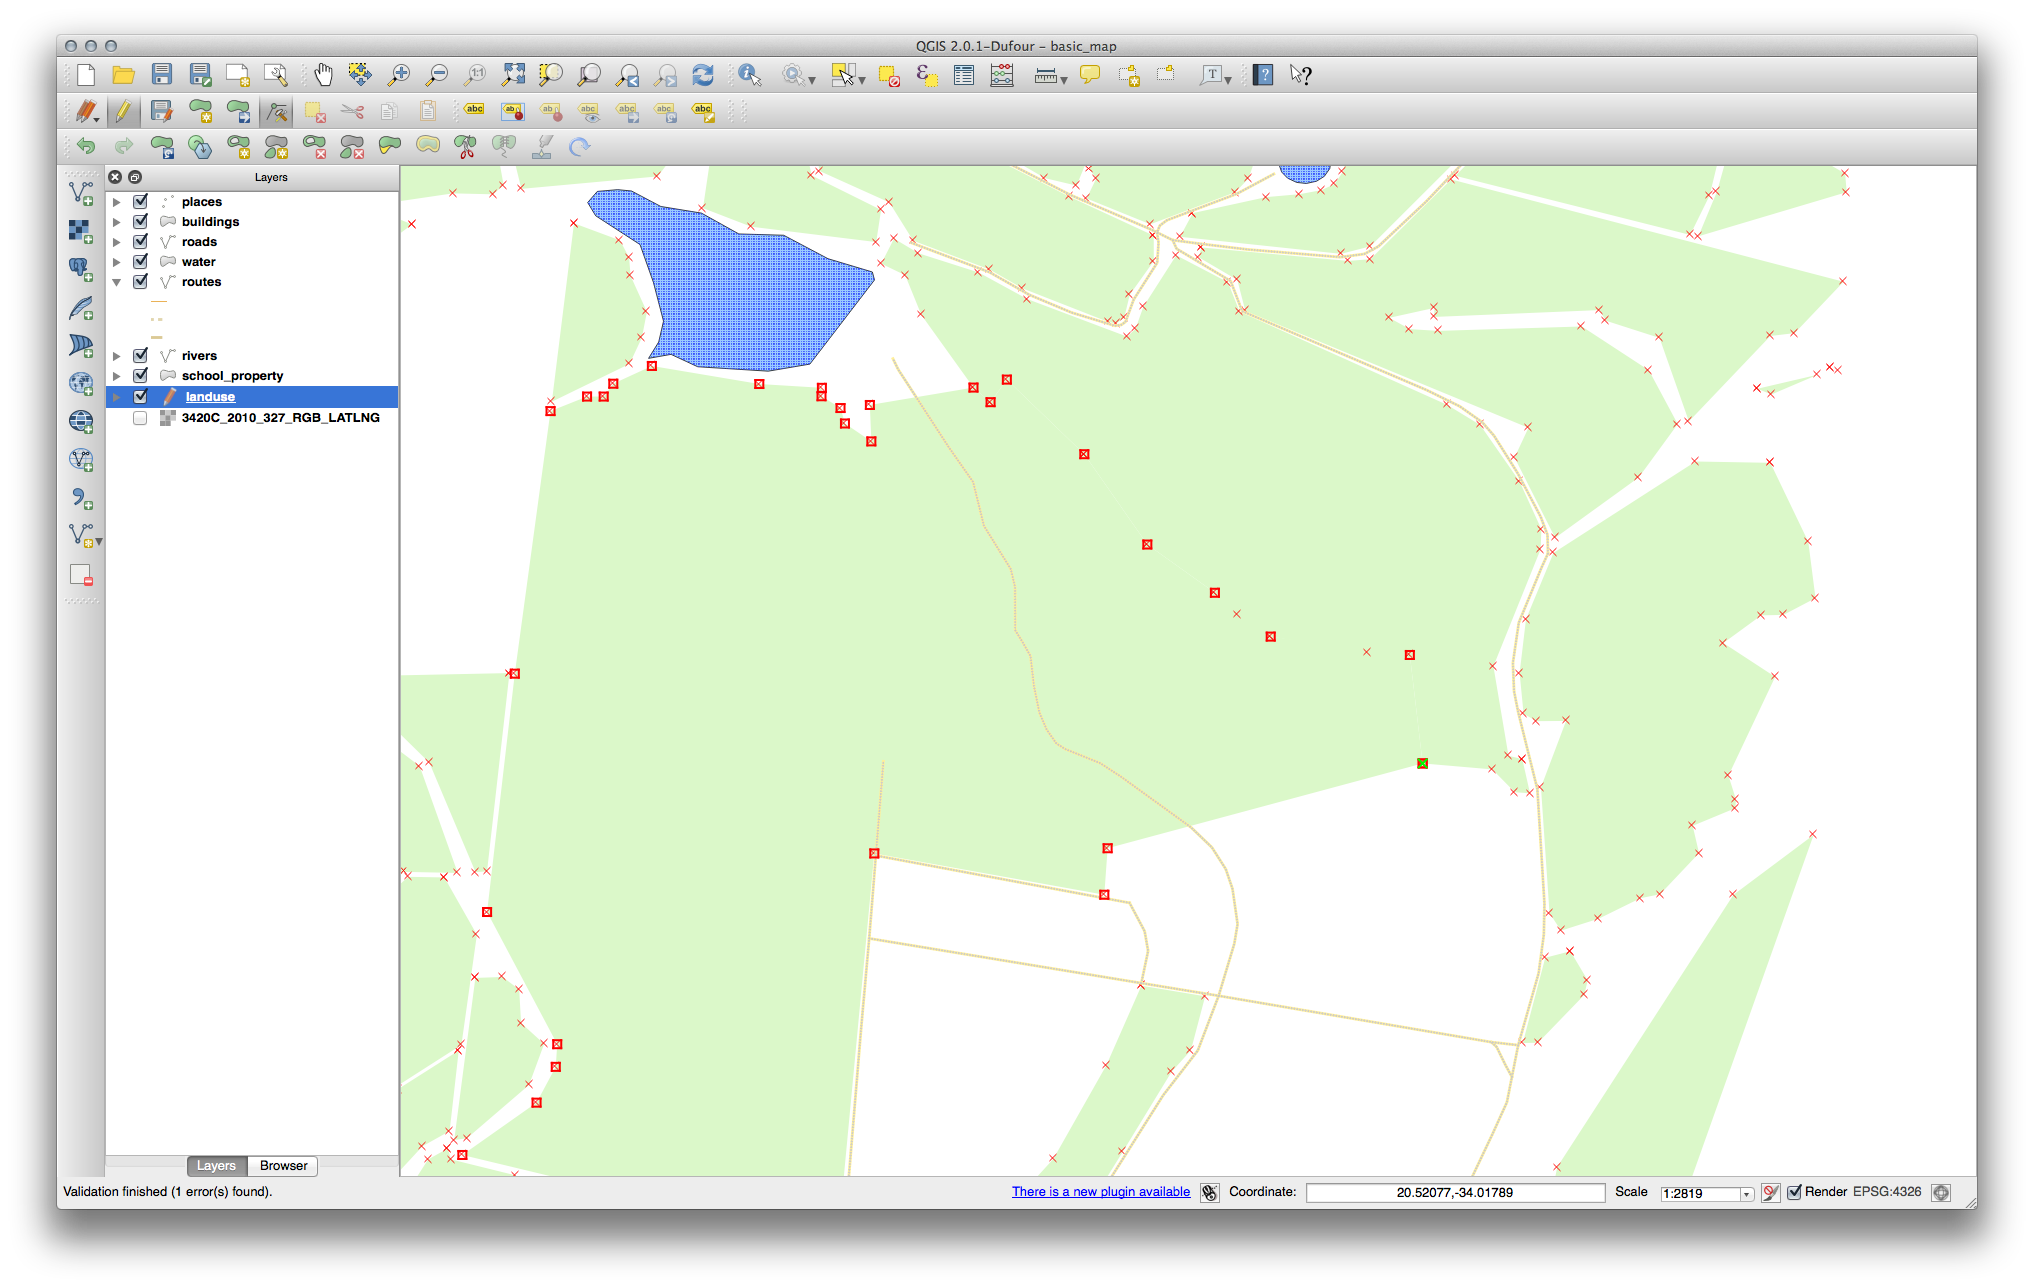
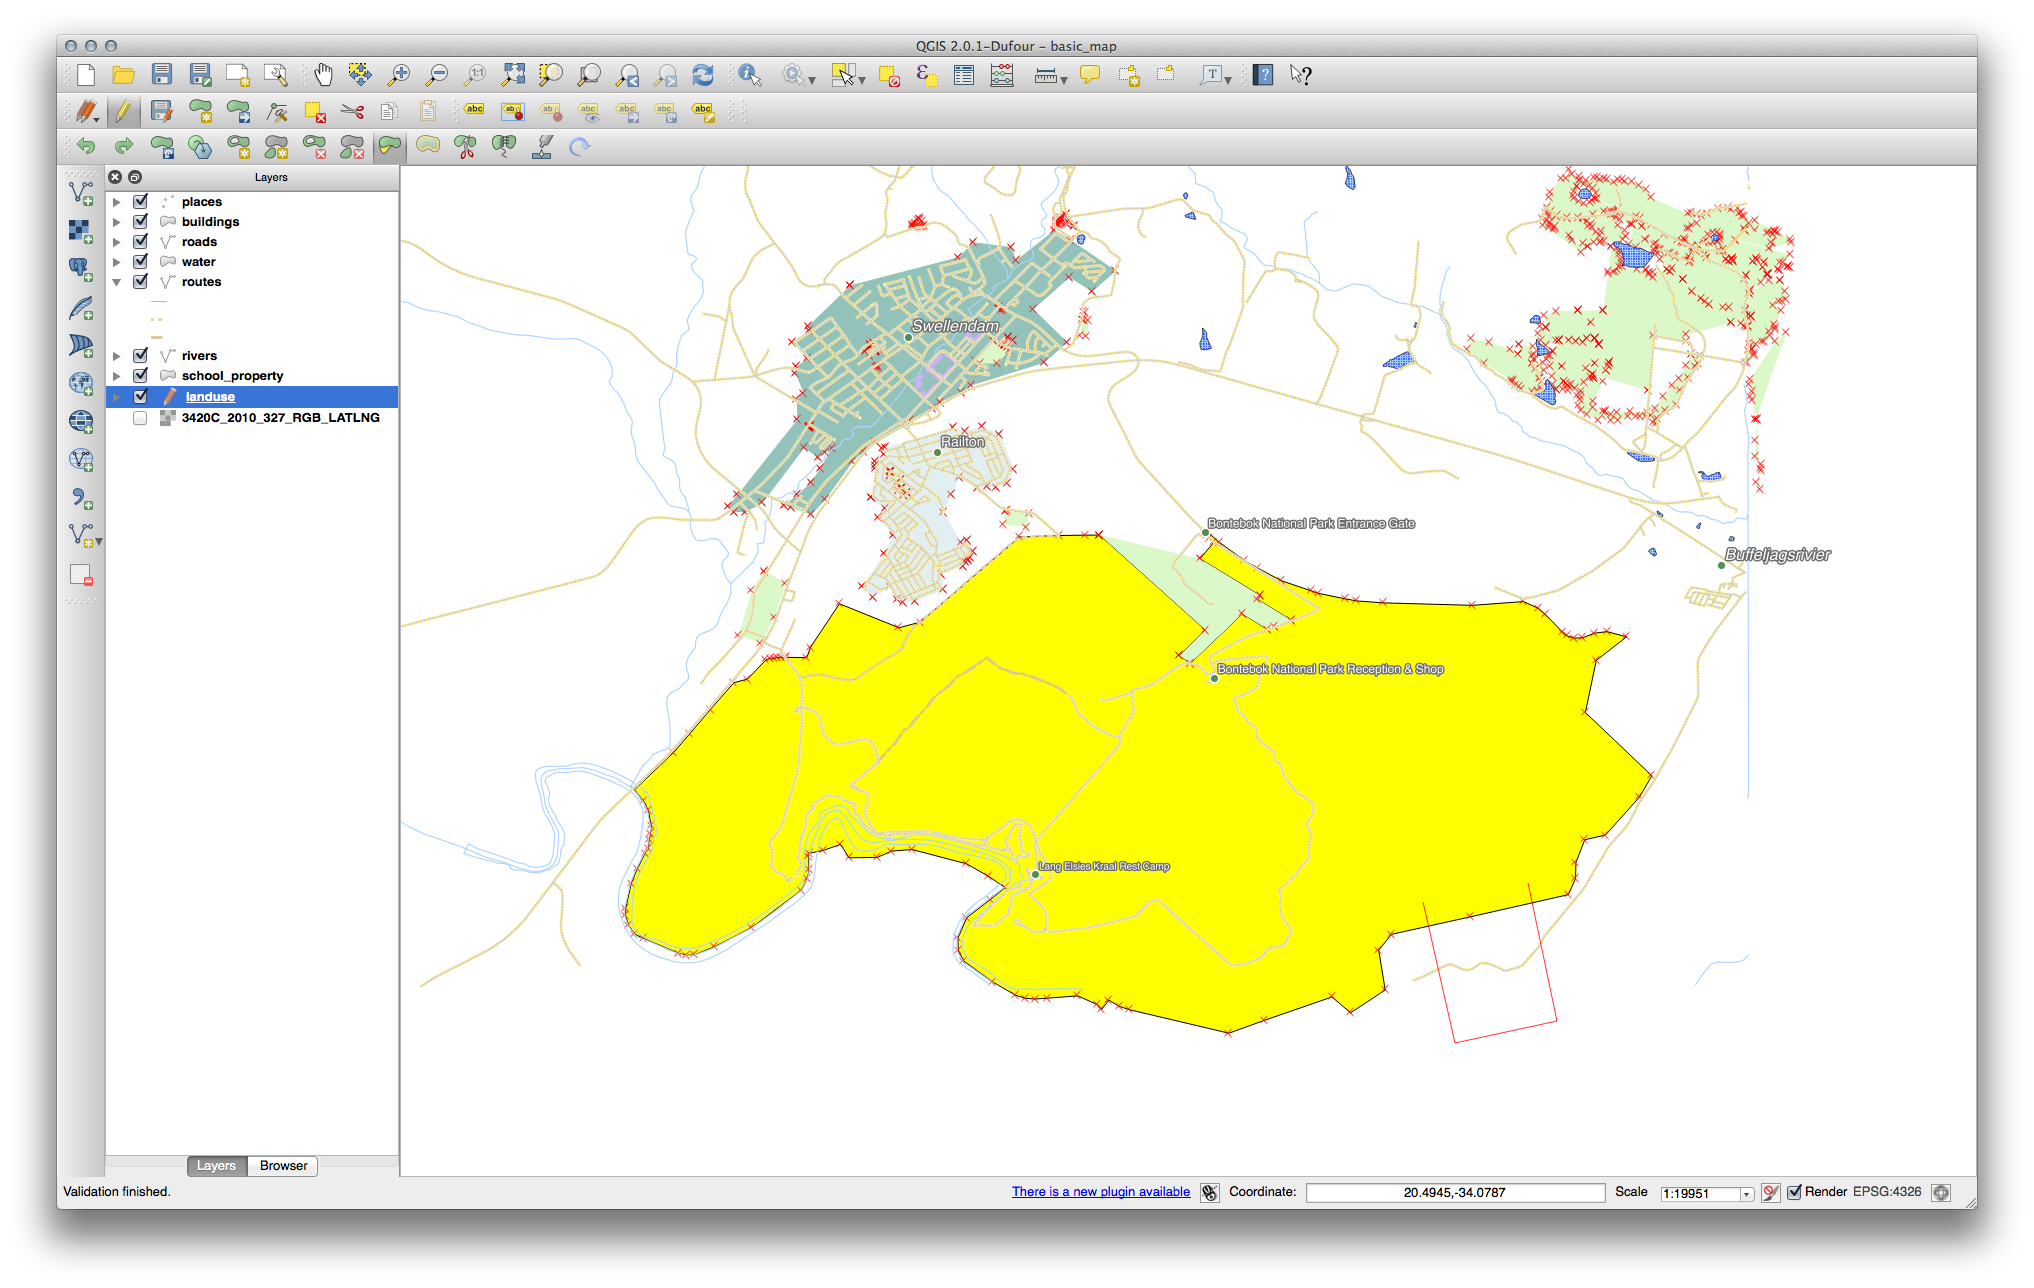
Zoom to this area (enable layers and labels if necessary):
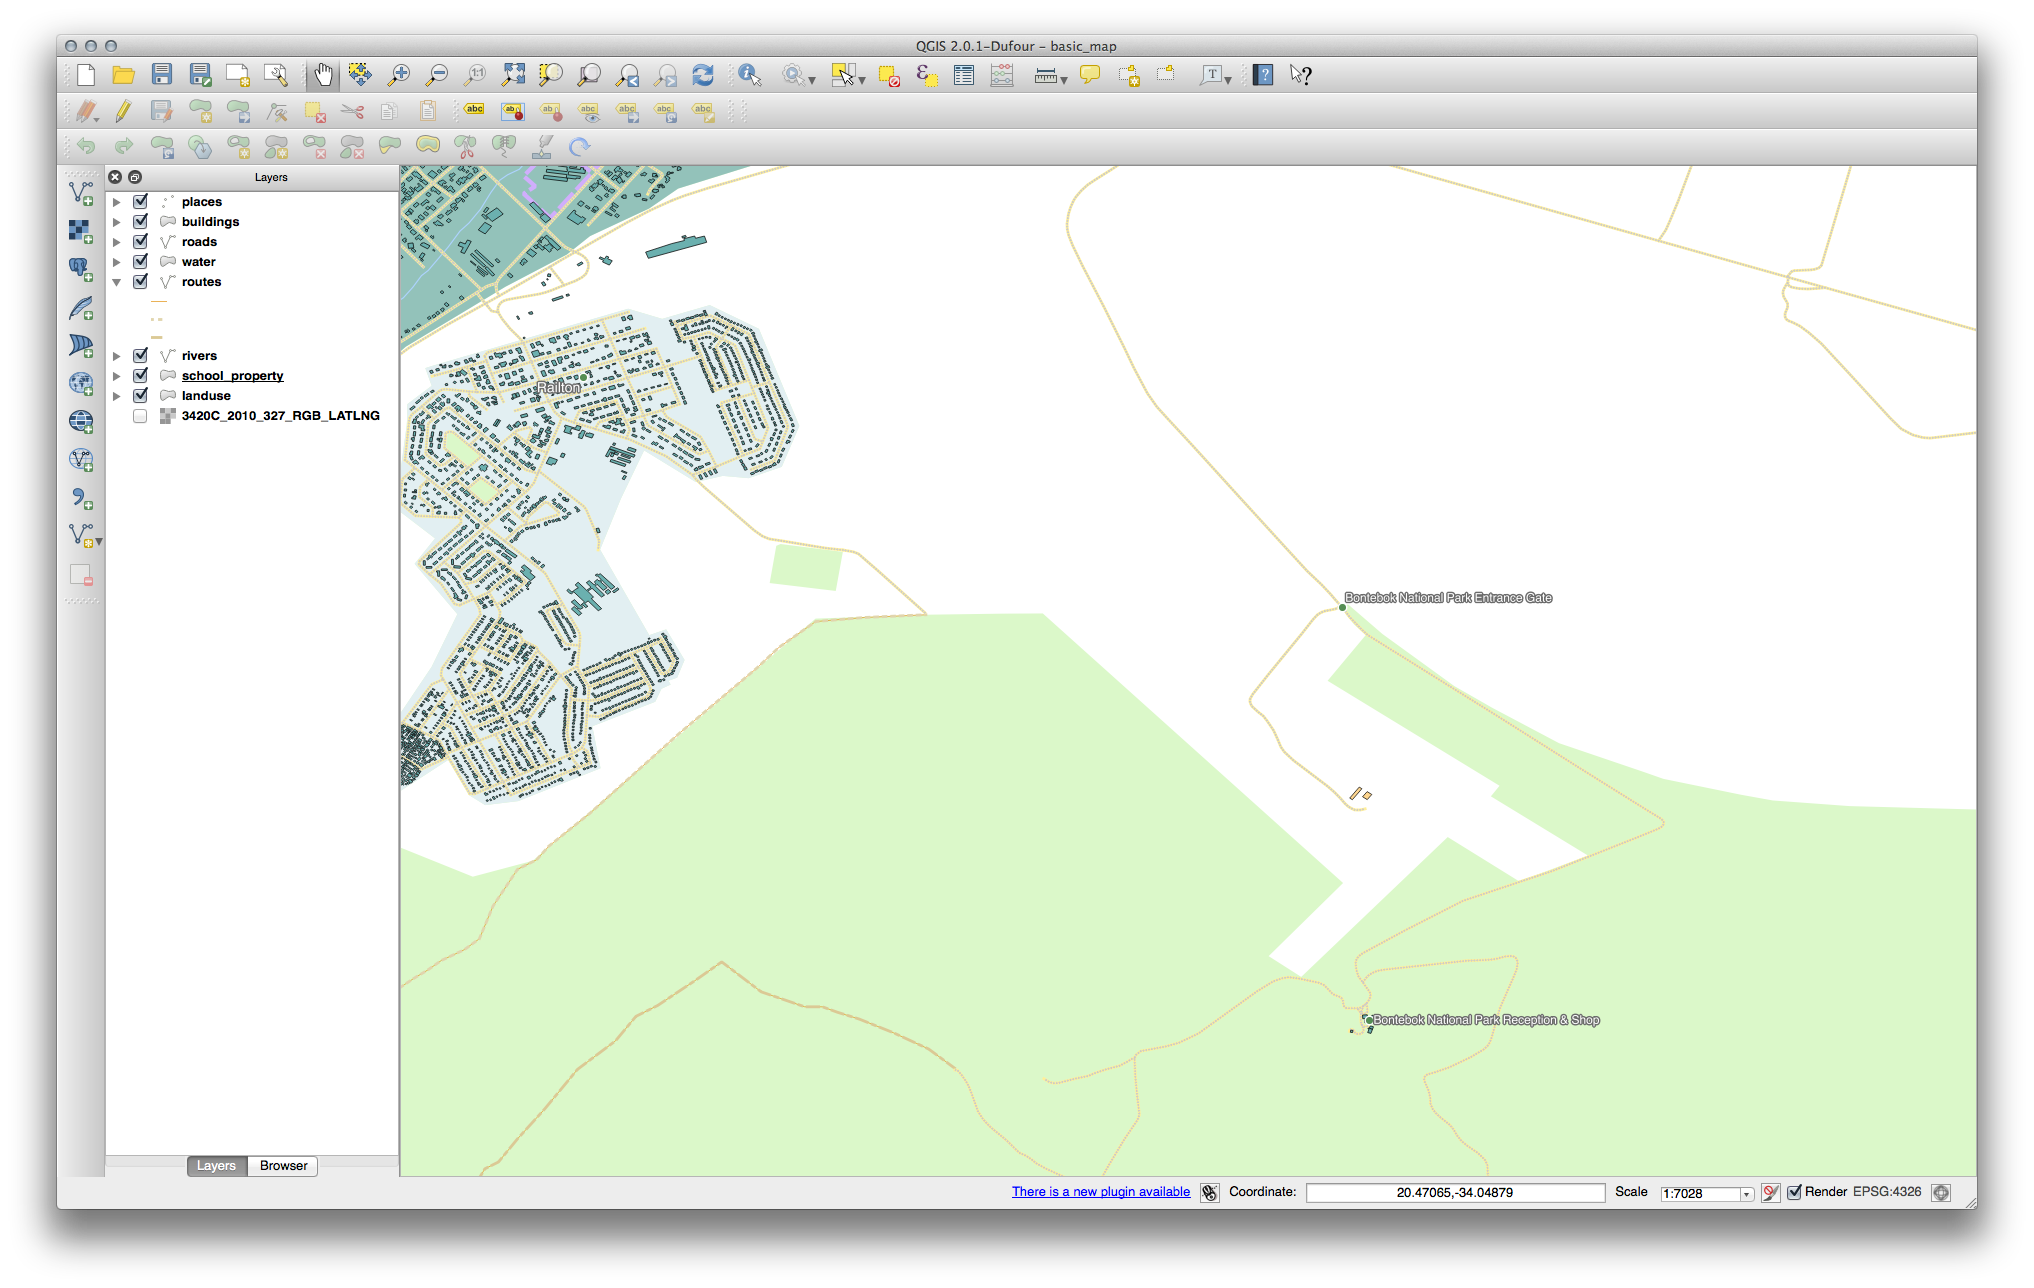
Digitize this new (fictional) area of the Bontebok National Park:
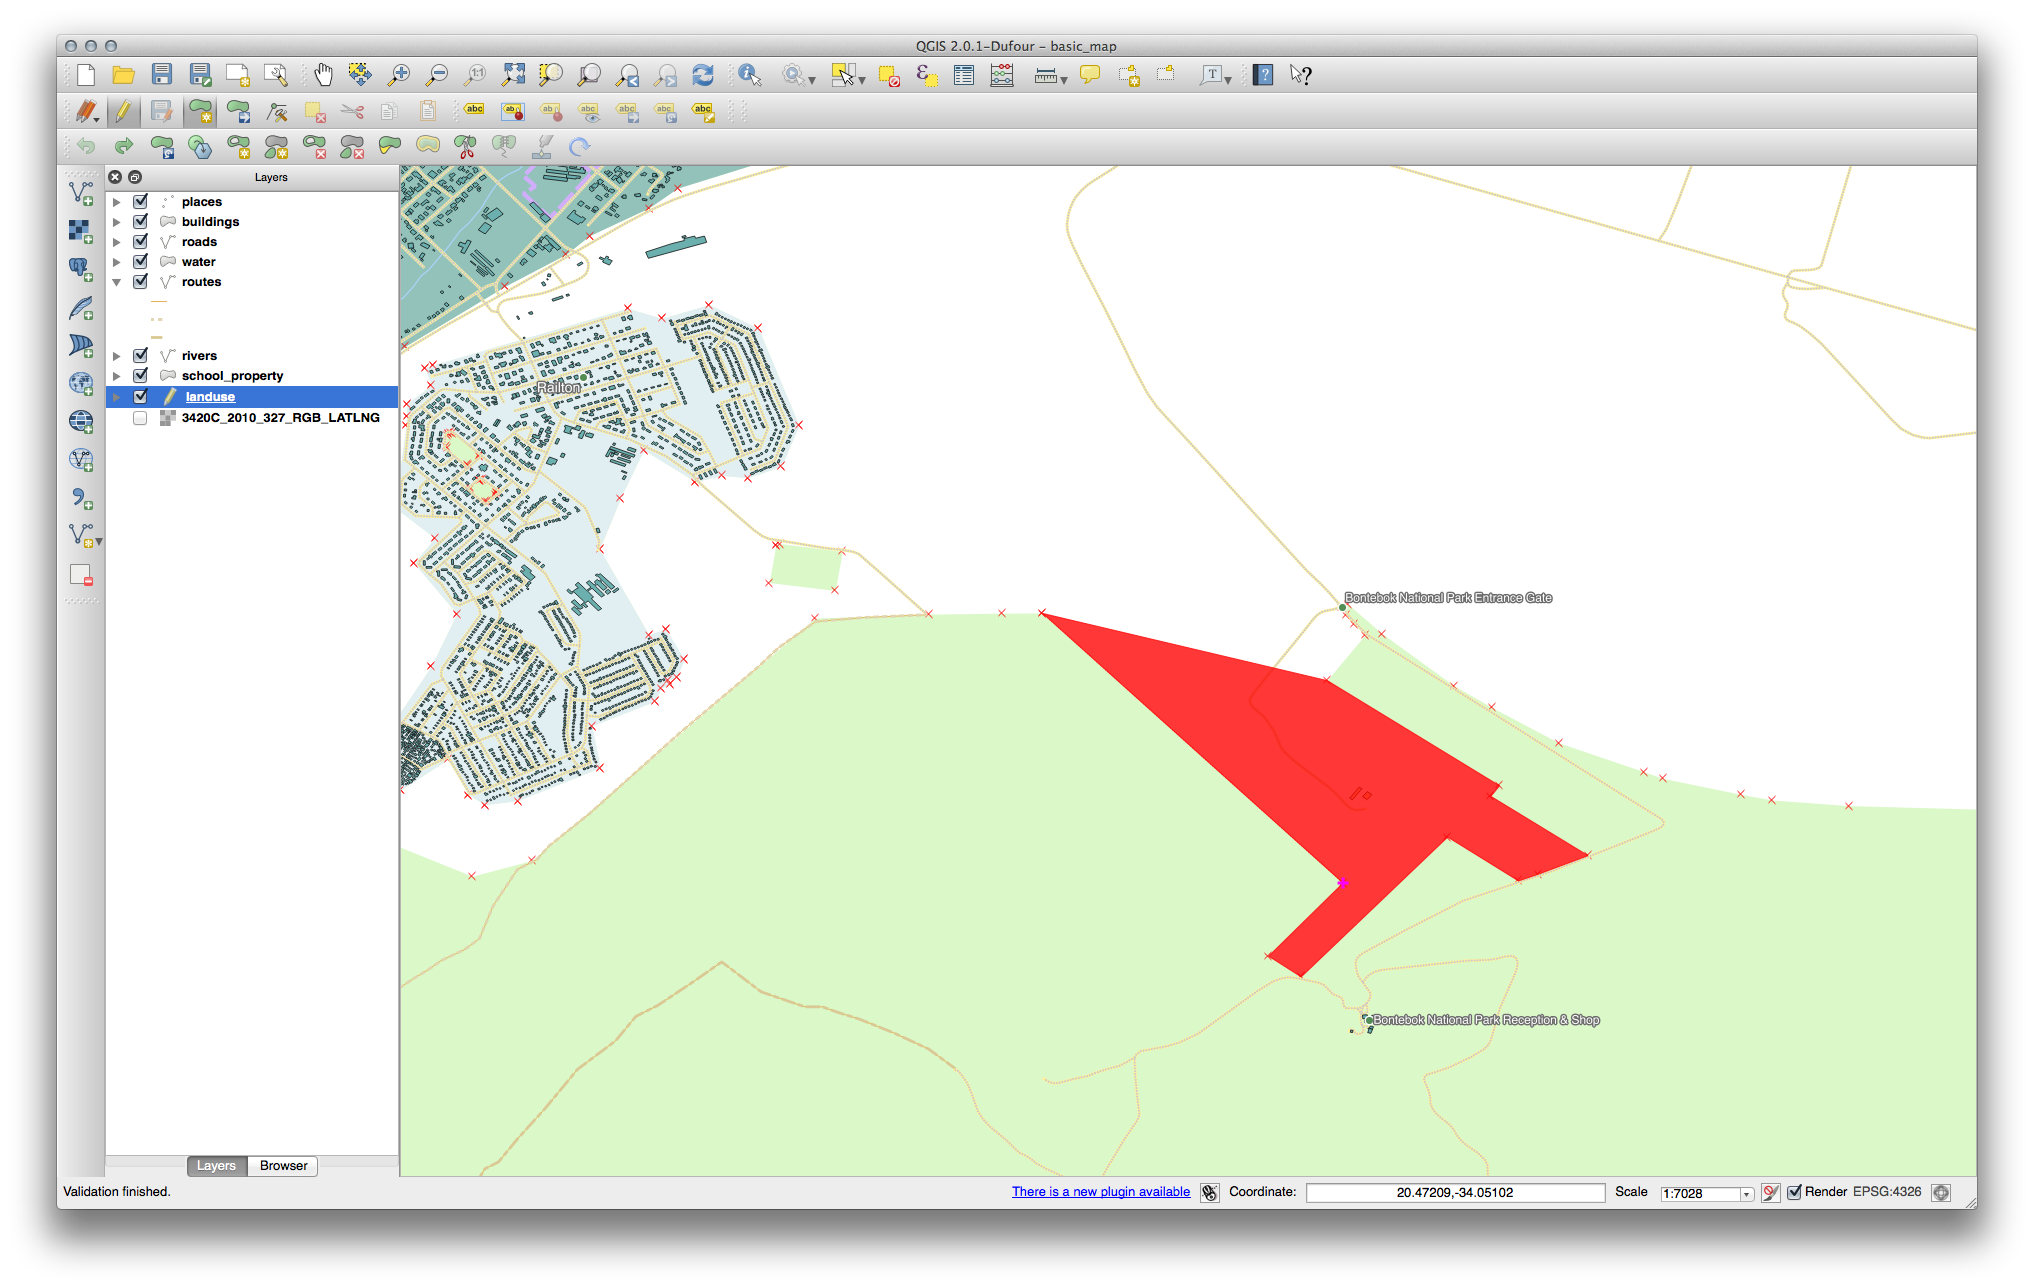
When prompted, give it a OGC_FID of 999, but feel free to leave the other values unchanged.
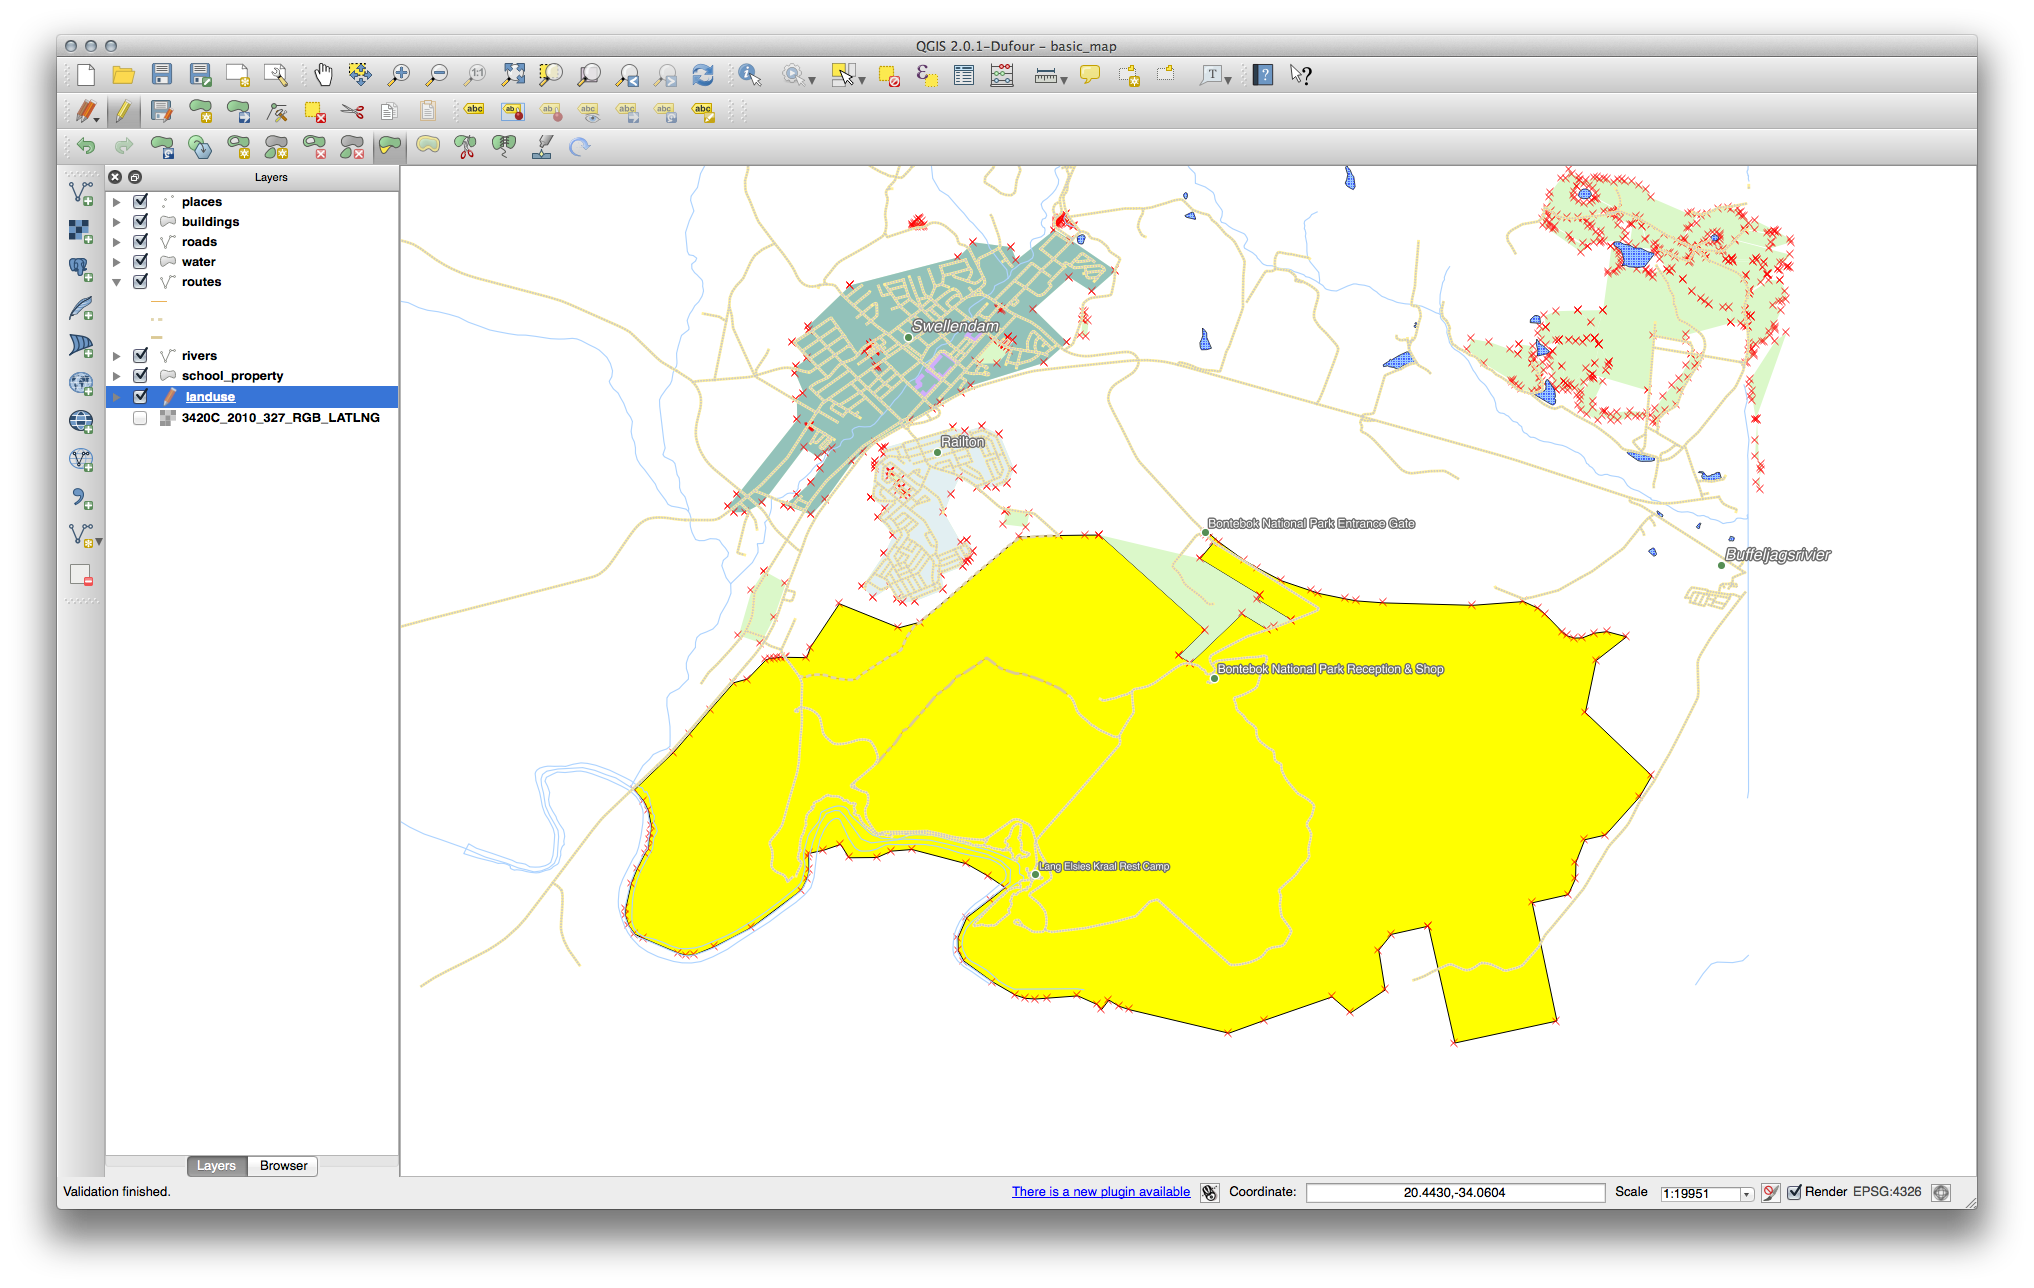
If you’re careful while digitizing and allow the cursor to snap to the vertices of adjoining farms, you’ll notice that there won’t be any gaps between your new farm and the existing farms adjacent to it.
Note the undo/redo tools in the Advanced Digitizing toolbar:


6.2.2. Follow Along: Correct Topological Features
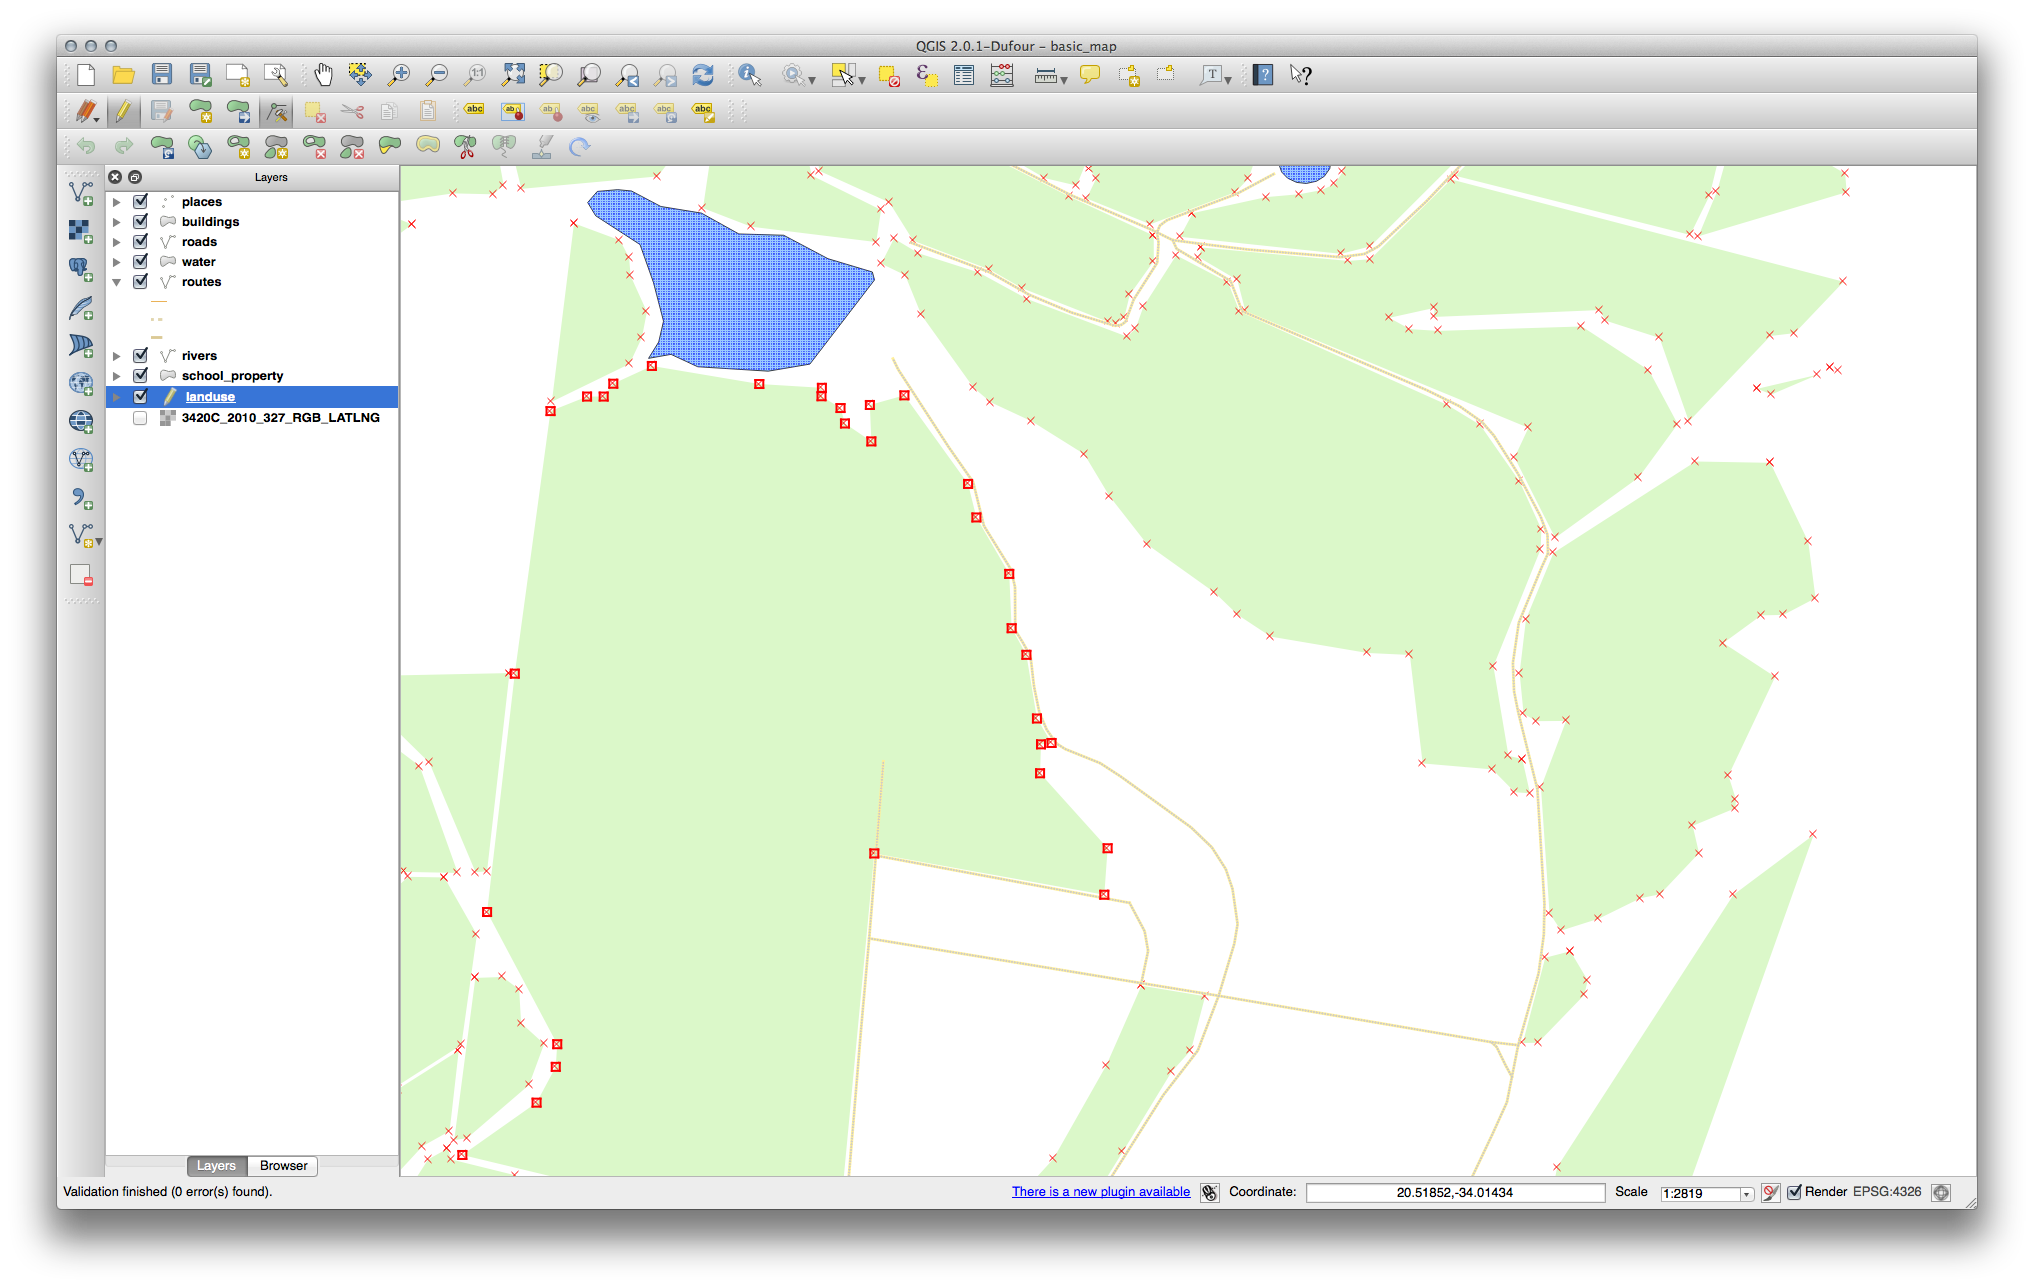
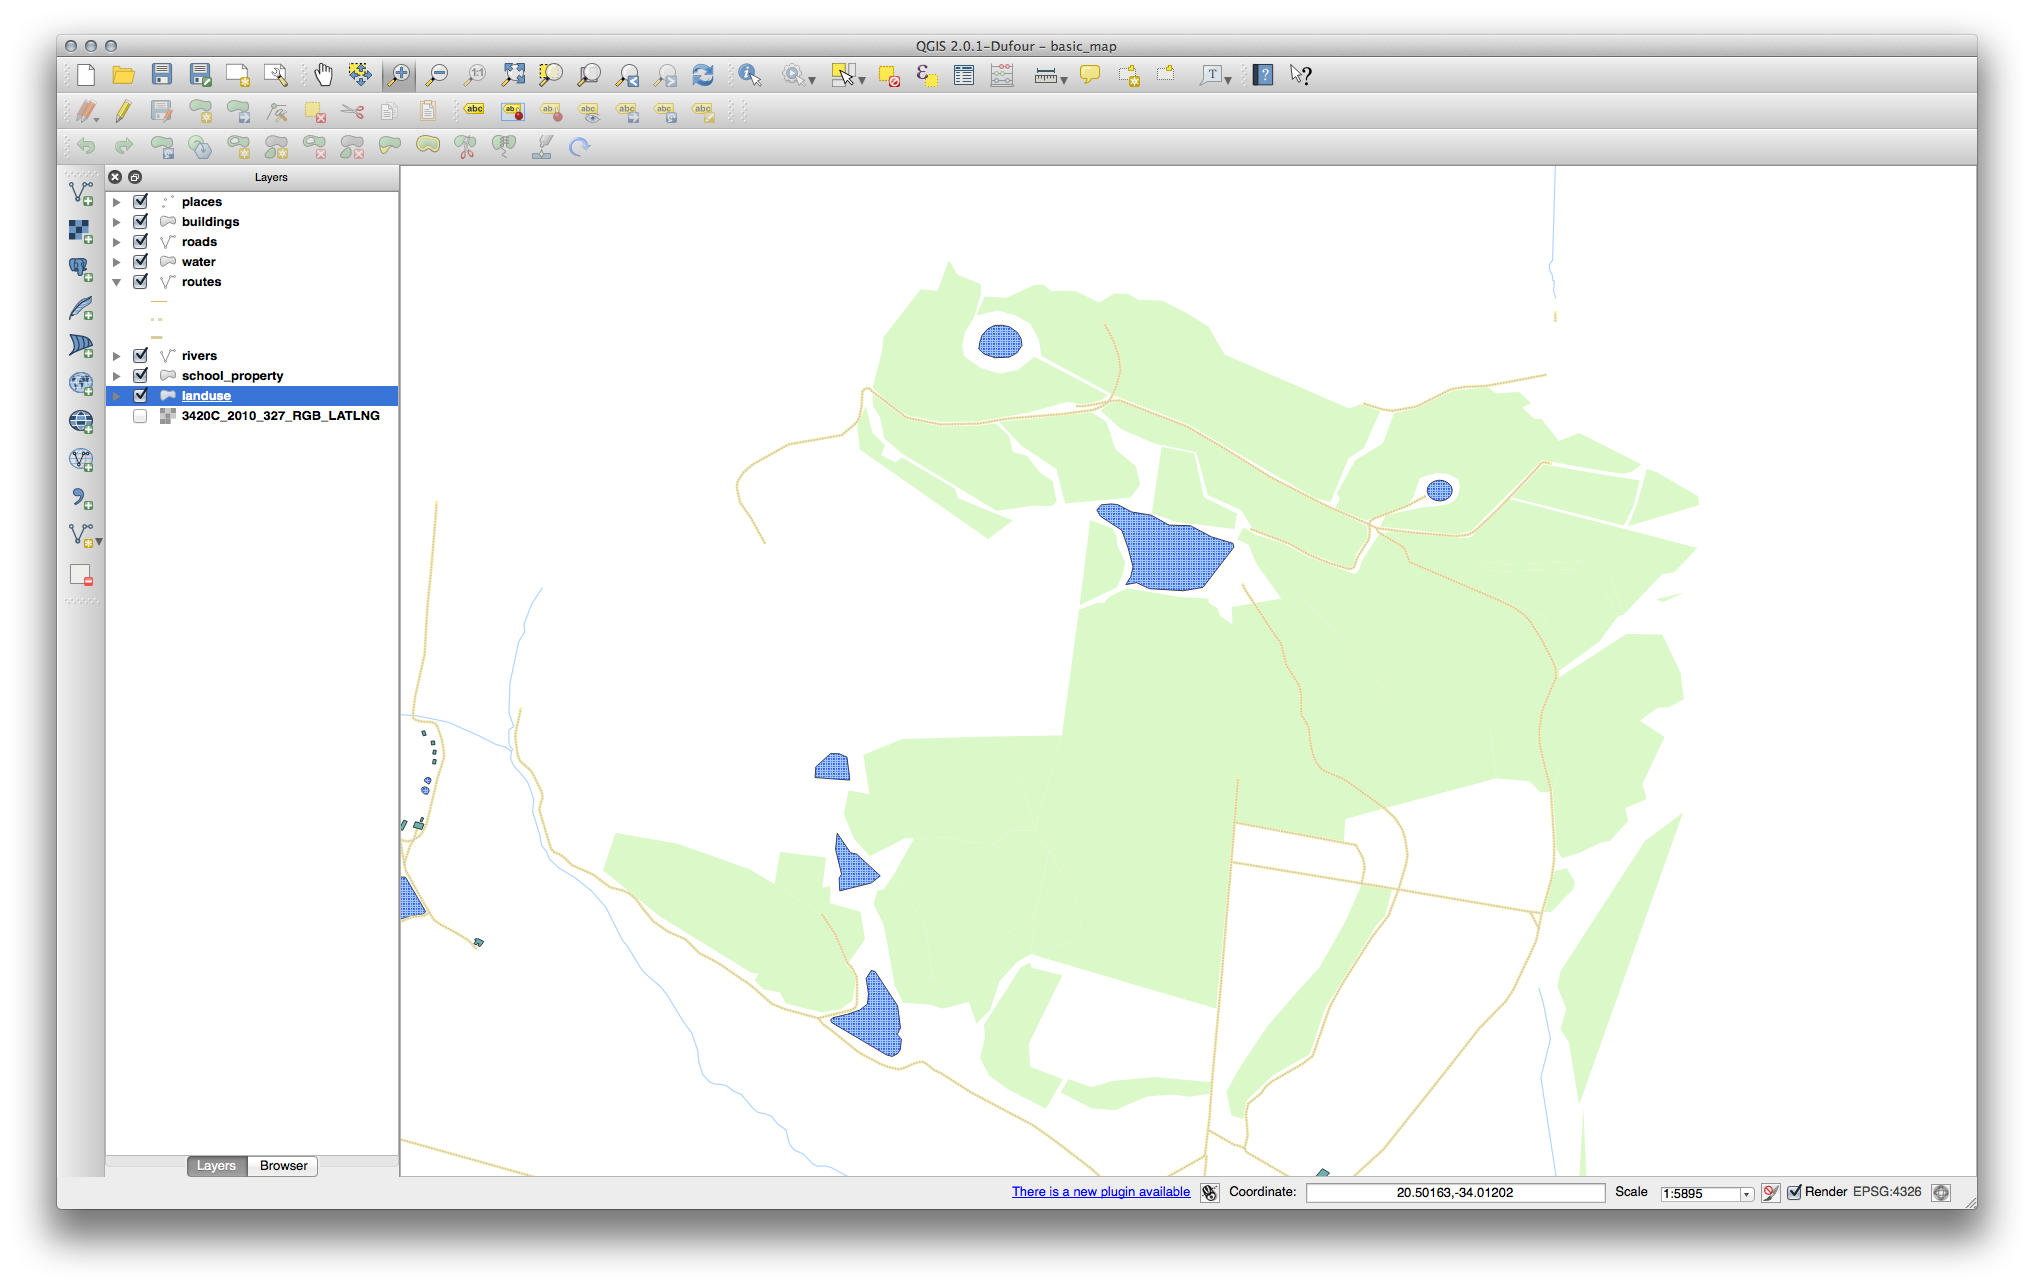
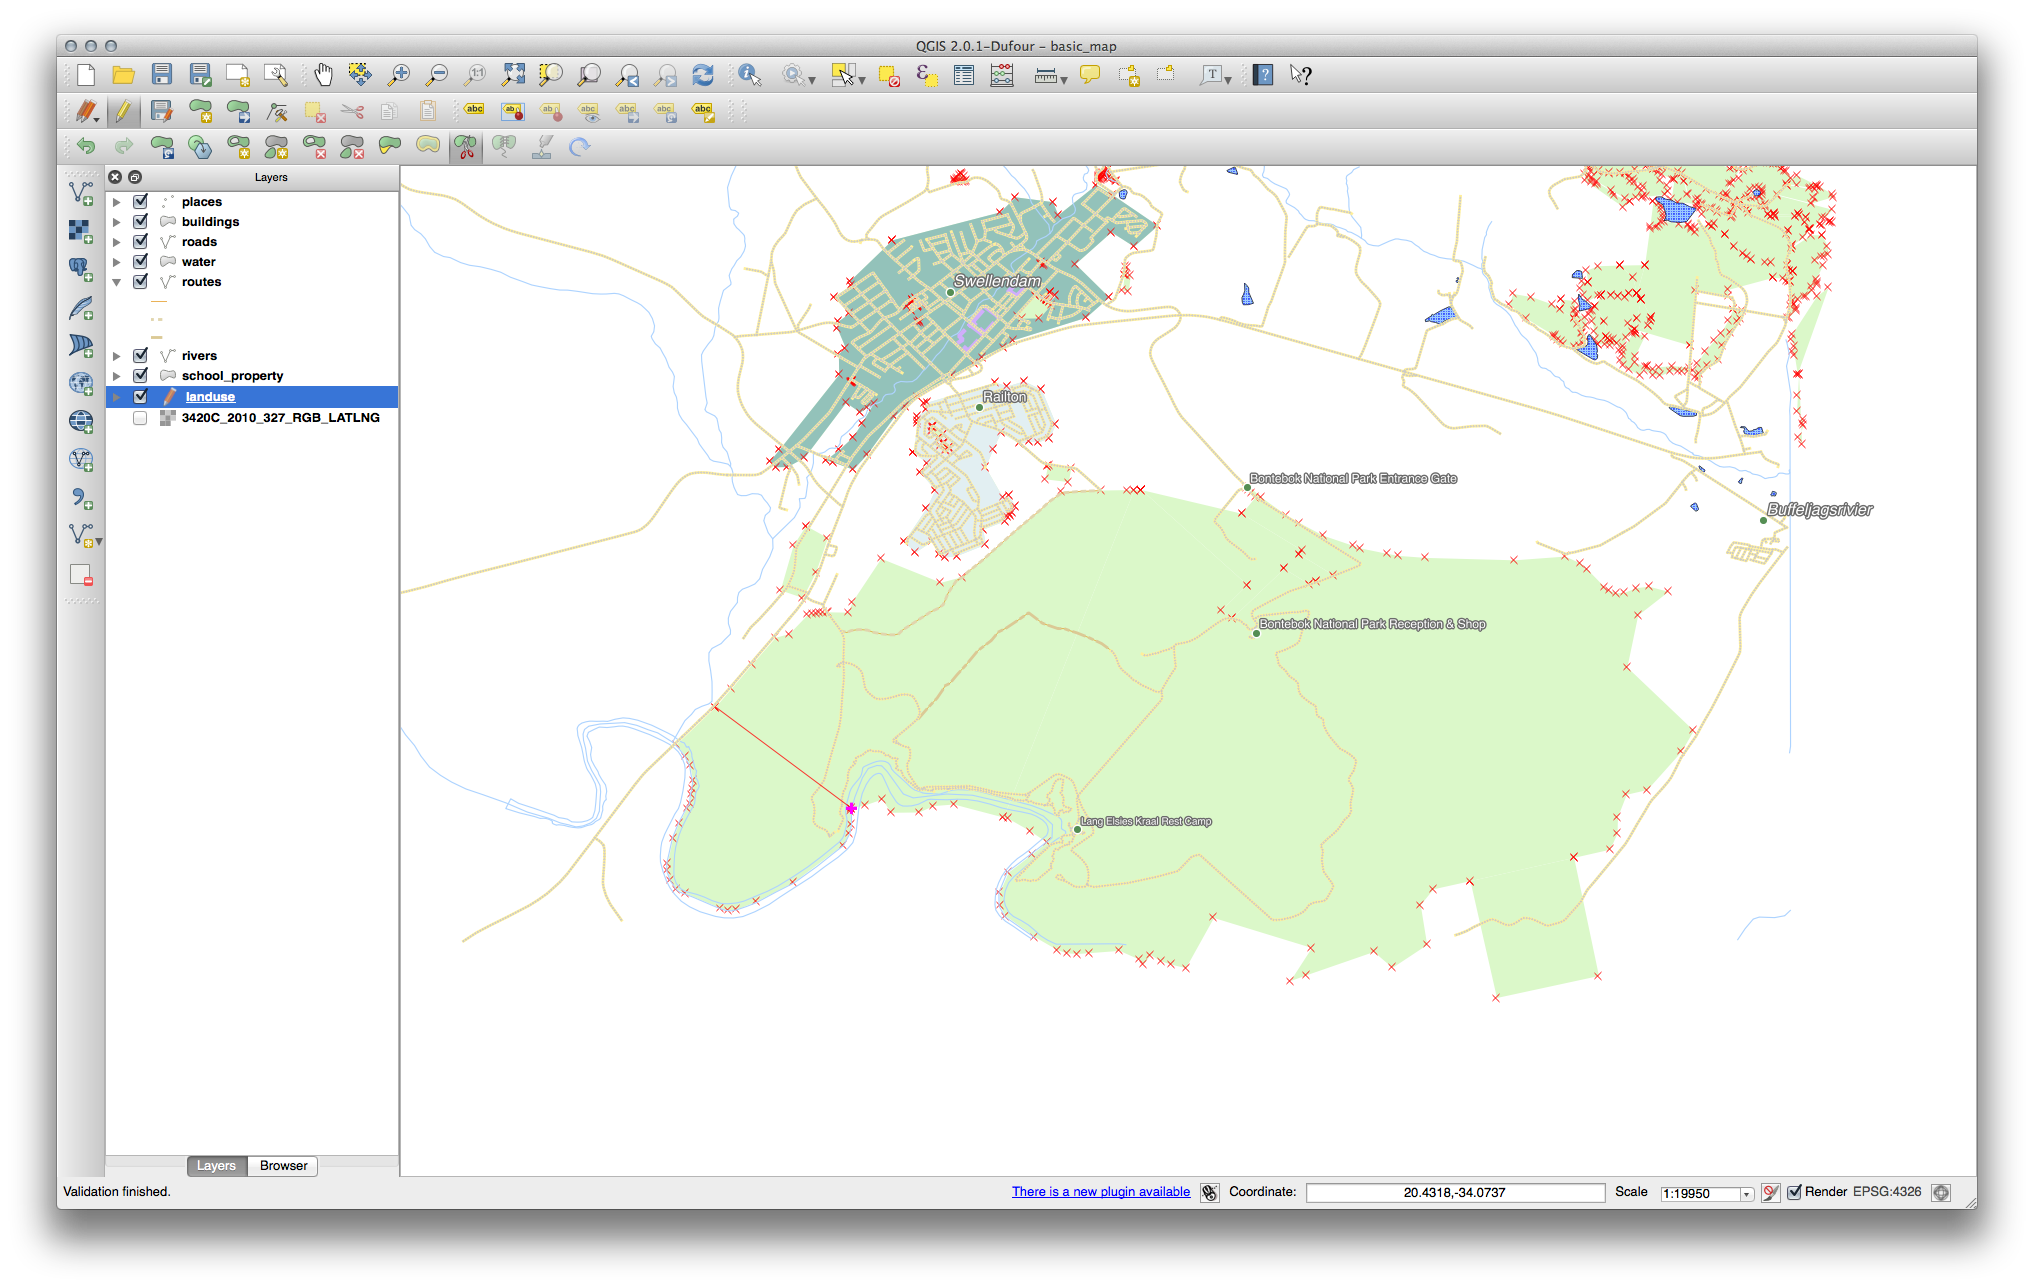
Topology features can sometimes need to be updated. In our example, the landuse layer has some complex forest areas which have recently been joined to form one area:

Instead of creating new polygons to join the forest areas, we’re going to use the Vertex Tool to edit the existing polygons and join them.
Enter edit mode, if it isn’t active already.
Select the Vertex Tool.
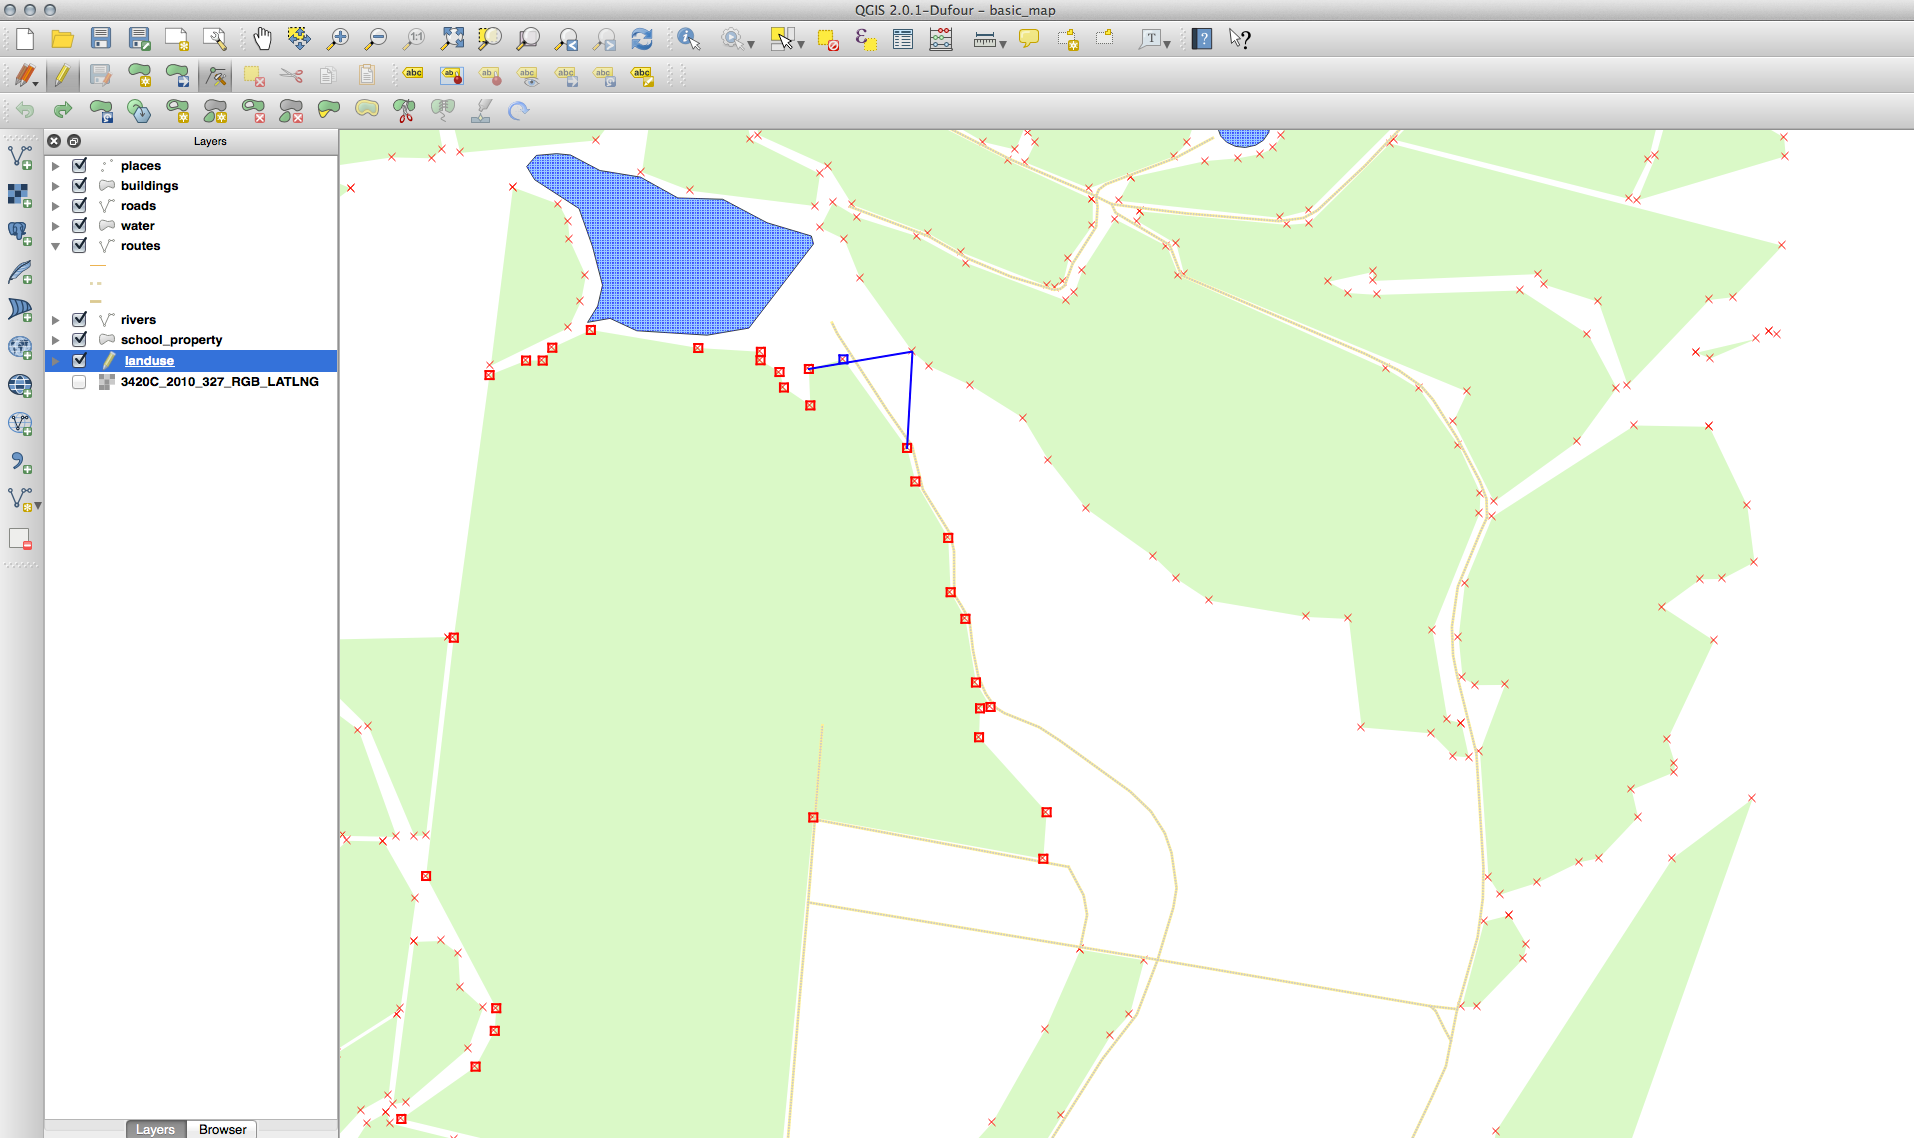
Pick an area of forest, select a corner and move it to an adjoining corner so two forest sections meet:
Click and drag the nodes until they snap into place.
The topologically correct border looks like this:
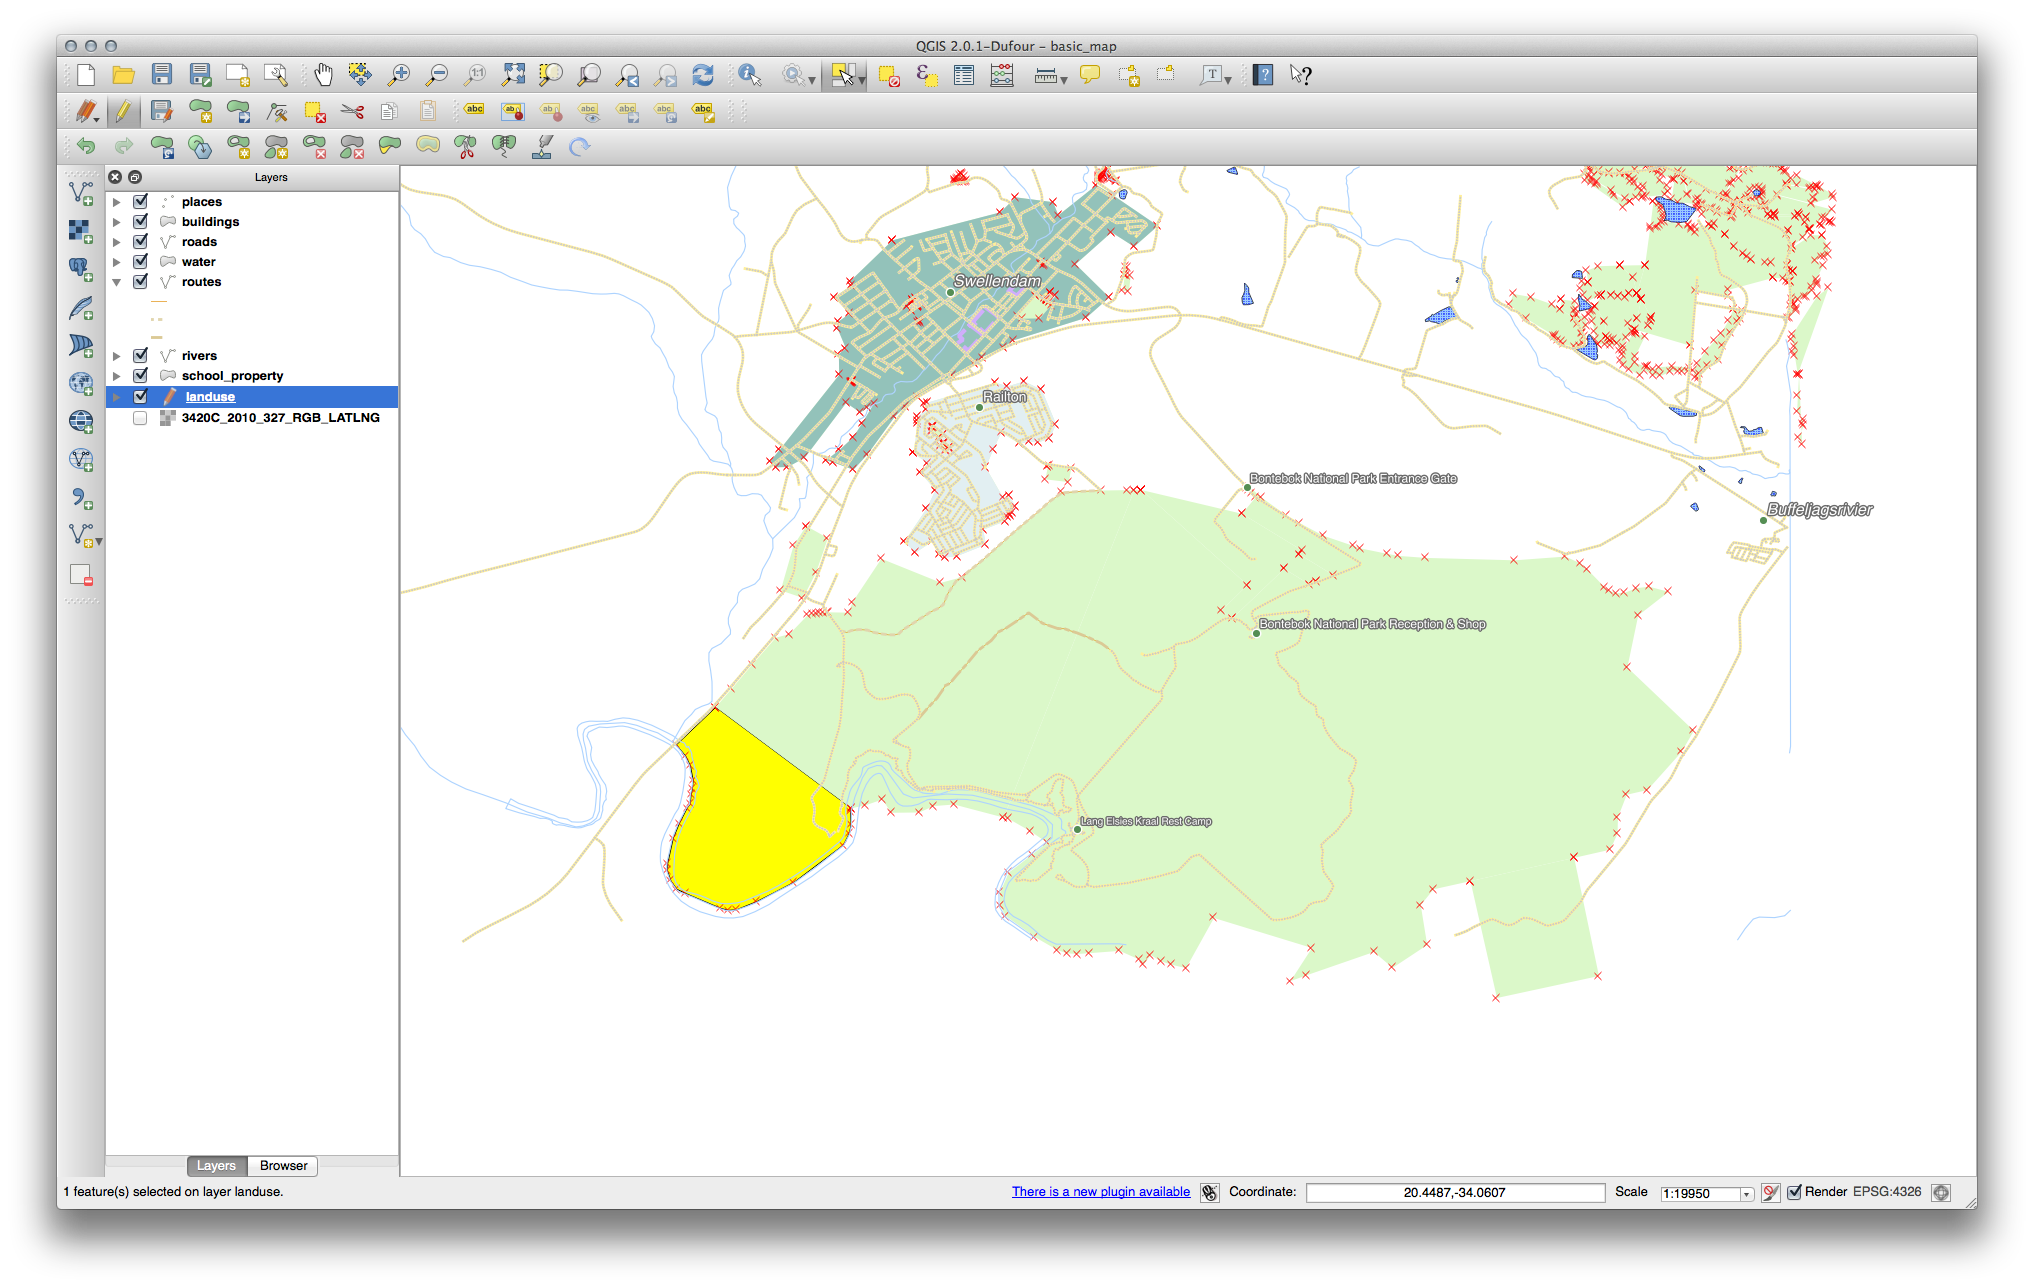
Go ahead and join a few more areas using the Vertex Tool. You can also use the Add Feature tool if it is appropriate. If you are using our example data, you should have a forest area looking something like this:
Don’t worry if you have joined more, less or different areas of forest.
6.2.3. Follow Along: Tool: Simplify Feature
This is the Simplify Feature tool:

Click on it to activate it.
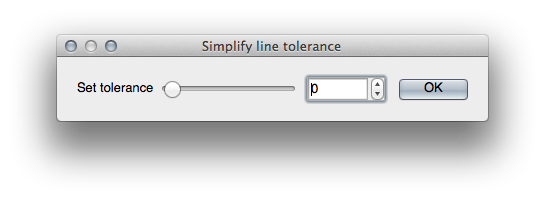
Click on one of the areas which you joined using either the Vertex Tool or Add Feature tool. You’ll see this dialog:
Move the slider from side to side and watch what happens:
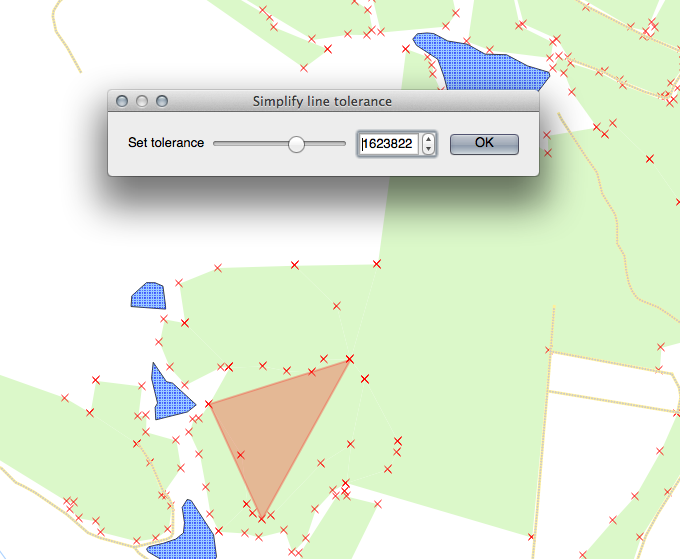
This allows you to reduce the amount of nodes in complex features.
Click Ok
Notice what the tool does to the topology. The simplified polygon is now no longer touching the adjacent polygons as it should. This shows that this tool is better suited to generalizing stand-alone features. The advantage is that it provides you with a simple, intuitive interface for generalization.
Before you go on, set the polygon back to its original state by undoing the last change.
6.2.4. Try Yourself Tool: Add Ring
This is the Add Ring tool:

It allows you to take a hole out of a feature, as long as the hole is bounded on all side by the feature. For example, if you’ve digitized the outer boundaries of South Africa and you need to add a hole for Lesotho, you’d use this tool.
If you experiment with this tool, you’ll notice that the current snapping options prevent you from creating a ring in the middle of the polygon. This would be fine if the area you wished to exclude linked to the polygon’s boundaries.
Disable snapping for the landuse layer via the dialog you used earlier.
Now try using the Add Ring tool to create a gap in the middle of the Bontebok National Park.
Delete your new feature by using the Delete Ring tool:

Note
You need to select a corner of the ring in order to delete it.
6.2.5. Try Yourself Tool: Add Part
This is the Add Part tool:

It allows you to create an extra part of the feature, not directly connected to the main feature. For example, if you’ve digitized the boundaries of mainland South Africa but you haven’t yet added the Prince Edward Islands, you’d use this tool to create them.
To use this tool, you must first select the polygon to which you wish to add the part by using the Select Features by area or single click tool:

Now try using the Add Part tool to add an outlying area to the Bontebok National Park.
Delete your new feature by using the Delete Part tool:

Note
You need to select a corner of the part in order to delete it.
6.2.6. Follow Along: Tool: Reshape Features
This is the Reshape Features tool:

It can add a bump to an existing feature. With this tool selected:
Left-click inside the Bontebok National Park to start drawing a polygon.
Draw a polygon with three corners, the last of which should be back inside the original polygon, forming an open-sided rectangle.
Right-click to finish marking points:
This will give a result similar to:
You can do the opposite, too:
Click outside the polygon.
Draw a rectangle into the polygon.
Right-click outside the polygon again:

The result of the above:

6.2.7. Try Yourself Tool: Split Features
The Split Features tool is similar to how you took part of the farm away, except that it doesn’t delete either of the two parts. Instead, it keeps them both.

First, re-enable snapping for the landuse layer.
We will use the tool to split a corner from the Bontebok National Park.
Select the Split Features tool and click on a vertex to begin drawing a line. Click the vertex on the opposite side of the corner you wish to split and right-click to complete the line:
At this point, it may seem as if nothing has happened. But remember that your symbology for the landuse layer does not have any border, so the new division line will not be shown.
Use the Select Single Feature tool to select the corner you just split; the new feature will now be highlighted:
6.2.8.  Try Yourself Tool: Merge Features
Now we will re-join the feature you just created to the original polygon:
Experiment with the Merge Selected Features and Merge Attributes of Selected Features tools.
Note the differences.
6.2.9. In Conclusion
Topology editing is a powerful tool that allows you to create and modify objects quickly and easily, while ensuring that they remain topologically correct.
6.2.10. What’s Next?
Now you know how to digitize the shape of the objects easily, but adding in the attributes is still a bit of a headache! Next we’ll show you how to use forms so that attribute editing is simpler and more effective.