Importante
La traducción es un esfuerzo comunitario puede unirse. Esta página está actualmente traducida en |progreso de traducción|.
20.2. Seguimiento de GPS en Vivo
QGIS puede ayudarle a realizar un seguimiento sobre el terreno con un receptor GPS. Esta operación de seguimiento en vivo se realiza utilizando la Barra de herramientas GPS 1. Alguna configuración del dispositivo puede ser necesitada antes de conectar QGIS y el receptor GPS.
20.2.1. Barra de herramientas GPS
La Barra de herramientas GPS proporciona las herramientas principales para controlar una sesión de seguimiento en directo. Puede activarse desde . Sigue el estado del proyecto, del GPS y del rastreo GPS actual, y activa acciones sólo cuando tienen sentido. Una vez que un dispositivo es detectado por QGIS, podrás interactuar con él:
 Conectarse al GPS
 Desconectar del GPS
 Recentrar mapa en posición GPS: el mapa se recentrará inmediatamente en la posición GPS actual independientemente del parámetro recentrado automático.
 Set destination layer for GPS digitized features: Predeterminado, QGIS Seguirá la capa activa para la digitalización de características, lo que significa que las herramientas de digitalización GPS se adaptarán a la capa seleccionada en el panel Capas y las características creadas se almacenarán en ella en consecuencia. Aunque esto puede ser útil en algunos contextos, también implica una interacción cuidadosa con otras capas para evitar almacenar inadvertidamente objetos espaciales en capas no deseadas. Esta opción le permite indicar explícitamente una capa para el almacenamiento de datos durante la sesión de rastreo en vivo, y podría cambiar dependiendo de sus necesidades. Las herramientas expuestas se adaptarán también al tipo de capa seleccionado.
La capa de destino GPS se hace editable automáticamente cuando se está creando un objeto espacial, y se notifica al usuario en consecuencia.
acciones para la creación de objetos espaciales:
 Añadir vértice a la traza GPS usando la localización GPS actual.
 Crear un nuevo objeto espacial de punto en la ubicación GPS actual.
 Crea un nuevo objeto espacial de línea utilizando la traza GPS actual.
 Crear un nuevo objeto espacial polígono usando la traza GPS actual.
 Restablecer traza
 Mostrar información GPS: abre el panel Información GPS
un cuadro de visualización para acceder rápidamente a algunos componentes de información del GPS que puedas necesitar:
 Mostrar ubicación
- Mostrar altitud (Geoide)
- Mostrar altitud (elipsoide WGS 84)
- Mostrar velocidad de avance
- Mostrar rumbo
- Mostrar la longitud total de la traza
- Mostrar distancia desde el inicio de la traza
El botón
 Configuración abre un menú desplegable con configuraciones comunes que se espera que se modifiquen en mitad de la sesión:
- Mostrar marcador de localización
- Mostrar línea de rumbo
- Rotar el mapa para que coincida con la dirección GPS
Opciones para controlar el recentrado del mapa:
 Siempre recentrar mapa cuando la posición GPS se desplaza del centro del lienzo del mapa una cierta distancia (en relación a la extensión del lienzo del mapa)
 Recentrar mapa al salir de la extensión
- Nunca recentrar
- Añadir automáticamente vértices de seguimiento cada vez que se reciban nuevas localizaciones desde el dispositivo GPS.
- Guardar automáticamente los objetos espaciales añadidos: los objetos espaciales creados a partir de localizaciones GPS se asignan inmediatamente a sus capas de destino (omitiendo el búfer de edición de capas habitual)
Destino de la marca de tiempo para ajustar el campo de almacenamiento de la marca de tiempo
- Registrar en GeoPackage/SpatiaLite…: Cuando se activa, se pedirá al usuario que seleccione un archivo GeoPackage/SpatiaLite existente o que introduzca un nuevo nombre de archivo. Se creará una tabla
gps_pointsygps_tracksen el archivo con una estructura predefinida.Todos los mensajes GPS entrantes se registrarán en la capa
gps_points, junto con la información de velocidad, rumbo, altitud y precisión del GPS.Cuando se desconecta el GPS (o se cierra QGIS), toda la pista GPS registrada se añadirá a la tabla
gps_tracks(junto con alguna información calculada como la longitud de la pista y las horas de inicio y fin). - Registrar sentencias NMEA…: activa el registro de todas las cadenas NMEA sin procesar desde el dispositivo a un archivo de texto.
- Configuración GPS… para acceder al diálogo GPS opciones globales
Truco
Información en tiempo real sobre la posición en la barra de estado
Cuando un dispositivo GPS está conectado y el usuario mueve el cursor sobre el lienzo del mapa, un mensaje de la barra de estado en vivo muestra la distancia y el rumbo desde el cursor hasta la posición GPS. En esta pantalla se respetan los ajustes de distancia y demora del proyecto. En un dispositivo de pantalla táctil, utilice un evento de pulsar y mantener para activar el mensaje de la barra de estado en directo.
20.2.2. Panel de información GPS
Para una monitorización completa de un seguimiento GPS en directo en QGIS, puede que necesite habilitar el Panel de Información GPS ( o pulse Ctrl+0).
En la esquina superior derecha del Panel de información GPS, pulse Conectar para iniciar la conexión entre QGIS y un receptor GPS conectado, o Desconectar.
En la parte superior izquierda del panel, se puede acceder a los siguientes botones:
- Posición: detalles en directo sobre la posición GPS y los sensores
 Signal: intensidad de la señal de las conexiones por satélite
|opciones| Configuración: menú desplegable para opciones de seguimiento en directo que puede necesitar modificar durante una sesión
20.2.2.1. Posición y atributos adicionales
En la pestaña Posición, si el GPS está recibiendo señales de satélites, verás tu posición en latitud, longitud y altitud junto con atributos adicionales.

Figura 20.3 Posición de rastreo GPS y atributos adicionales
Latitud
Longitud
Altitud (Geoide): Altitud/elevación por encima o por debajo del nivel medio del mar
Altitud (elipsoide WGS 84): Altitud/elevación por encima o por debajo del elipsoide terrestre WGS-84.
Separación geoidal: Diferencia entre el elipsoide terrestre WGS-84 y el nivel medio del mar (geoide),
-significa que el nivel medio del mar está por debajo del elipsoideHora del arreglo
Velocidad: Velocidad del terreno
Dirección: Rumbo medido en grados en el sentido de las agujas del reloj desde el norte verdadero hacia la dirección de desplazamiento.
HDOP: Dilución horizontal de la precisión
VDOP: Dilución vertical de la precisión
PDOP: Dilución de la precisión
Exactitud H: Precisión horizontal en metros
Exactitud V: Precisión vertical en metros
Exactitud 3D: Media cuadrática 3D (RMS) en metros
Modo: Modo 2D/3D de configuración del receptor GPS, puede ser
automáticoomanual.Dimensiones: Dimensión fija de la posición, puede ser
2D,3DoSin fijar.Calidad: Indicador de calidad de posicionamiento
Estado: Estado de fijación de la posición, puede ser
VálidooNo válido.Satélites: Número de satélites utilizados para obtener la posición
Longitud total de la traza: Distancia total de la traza GPS actual
Distancia desde el inicio de la pista: Distancia directa desde el primer vértice de la traza GPS actual hasta el último vértice.
20.2.2.2. Señal
Con la pestaña Señal, puede ver la intensidad de la señal de los satélites de los que está recibiendo señales.
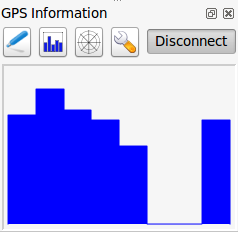
Figura 20.4 Intensidad de la señal de rastreo GPS
20.2.3. Conéctese a un GPS Bluetooth para seguimiento en vivo
Con QGIS puede conectar un GPS Bluetooth para la recopilación de datos de campo. Para realizar esta tarea, necesita un dispositivo GPS Bluetooth y un receptor Bluetooth en su computadora.
Al principio, debe permitir que su dispositivo GPS sea reconocido y emparejado con la computadora. Encienda el GPS, vaya al icono de Bluetooth en su área de notificación y busque un Dispositivo nuevo.
En el lado derecho de la máscara de selección de dispositivos, asegúrese de que todos los dispositivos estén seleccionados para que su unidad GPS probablemente aparezca entre los disponibles. En el siguiente paso debería estar disponible un servicio de conexión en serie, selecciónelo y haga clic en el botón Configurar.
Recuerde el número del puerto COM asignado a la conexión GPS como resultado de las propiedades de Bluetooth.
Una vez que se haya reconocido el GPS, realice el emparejamiento para la conexión. Normalmente, el código de autorización es 0000.
Ahora abra el panel Información GPS y cambie a Pantalla de opciones de GPS. Seleccione el puerto COM asignado a la conexión GPS y haga clic en Conectar. Después de un rato, debería aparecer un cursor que indica su posición.
Si QGIS no puede recibir datos de GPS, entonces debe reiniciar su dispositivo GPS, esperar de 5-10 segundos y luego intentar conectarse nuevamente. Por lo general, esta solución funciona. Si vuelve a recibir un error de conexión, asegúrese de que no tiene otro receptor Bluetooth cerca de usted, emparejado con la misma unidad GPS.
20.2.4. Ejemplos de conexión de dispositivos GPS en QGIS
20.2.4.1. Utilizando GPSMAP 60cs
MS Windows
La forma más fácil de hacerlo trabajar es usar un software intermedio (software gratuito, no abierto) llamado`GPSGate <https://gpsgate.com/gpsgate-splitter>`_.
Inicia el programa, haz que busque dispositivos GPS (funciona tanto para los USB como para los BT) y luego en QGIS:
En , detecte el dispositivo conectado. Puede utilizar el modo
Autodetectar.Pulse Conectar en el panel Información GPS
Ubuntu/Mint GNU/Linux
Para Windows la formas más fácil es usar un servidor en medio, en este caso GPSD, de manera
Instalar el programa
sudo apt install gpsd
Luego cargue el módulo del kernel
garmin_gpssudo modprobe garmin_gps
Y luego conecta la unidad y comprueba con
dmesgel dispositivo real que está utilizando la unidad, por ejemplo/dev/ttyUSB0.Ahora puedes lanzar gpsd
gpsd /dev/ttyUSB0
Y finalmente conectar con la herramienta de rastreo en vivo QGIS.
20.2.4.2. Usando el registrador de datos BTGP-38KM (solo Bluetooth)
Usar GPSD (bajo Linux) o GPSGate (bajo Windows) es sencillo.
20.2.4.3. Usando el registrador de datos BlueMax GPS-4044 (tanto BT como USB)
MS Windows
El seguimiento en directo funciona tanto para USB como para BT, usando GPSGate o incluso sin él, sólo tienes que usar el modo Autodetectar, o apuntar la herramienta al puerto correcto.
Ubuntu/Mint GNU/Linux
Para USB
El seguimiento en vivo funciona tanto con GPSD
gpsd /dev/ttyACM3
o sin él, conectando la herramienta de seguimiento en vivo de QGIS directamente al dispositivo (por ejemplo /dev/ttyACM3).
Para Bluetooth
El seguimiento en vivo funciona tanto con GPSD
gpsd /dev/rfcomm0
o sin él, conectando la herramienta de seguimiento en vivo de QGIS directamente al dispositivo (por ejemplo /dev/rfcomm0).