Important
翻译是一项社区工作:ref:你可以加入<translation_guidelines>。此页面目前翻译进度为 78.53%。
4. 浏览器面板
QGIS浏览器面板是浏览、搜索、检查、复制和加载QGIS资源的绝佳工具。只有QGIS知道如何处理的资源才会显示在浏览器中。
使用浏览器面板,您可以搜索、检查和添加数据,如 浏览器面板 所述。此外,浏览器面板还支持拖放许多QGIS资源,例如工程文件、Python脚本、处理脚本和处理模型。
Python脚本、处理脚本和处理模型也可以在外部编辑器和图形建模器中打开进行编辑。
You can drag and drop layers from the Layers panel to the Browser panel, for instance into a GeoPackage or a PostgreSQL database.
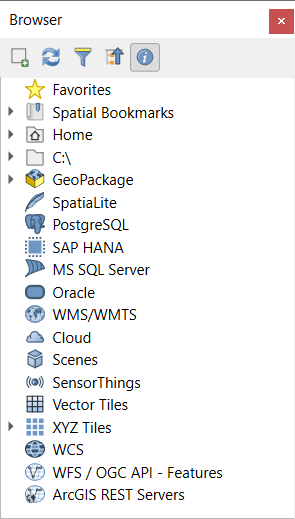
Fig. 4.1 浏览器面板
浏览器面板 (Fig. 4.1) 构成一个可扩展的层次结构,其中包含一些固定的顶级条目,用于组织浏览器处理的资源。通过单击条目名称左侧的  展开节点条目,单击
  可折叠分支,
 全部折叠 按钮可折叠所有顶级条目。
在 中可以禁用资源。例如,如果您不想在浏览器中显示Python脚本,可以取消勾选 条目;如果想在浏览器中排除您的主文件夹,可以取消勾选 条目。
过滤器 ( 过滤浏览器) 可用于根据条目名称 (层次结构中的目录条目和节点条目) 进行搜索。使用过滤器文本字段旁边的
  选项 下拉菜单,可以
切换 区分大小写 搜索
将 过滤模式语法 设置为
正常
通配符
正则表达式
属性控件 显示有关条目或资源的实用信息,可以使用  启用/禁用属性控件 按钮启用或禁用。启用后,它将在浏览器面板的底部打开,如 Fig. 4.2 所示。
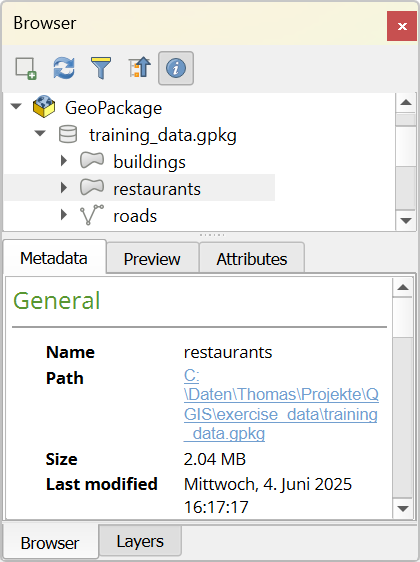
Fig. 4.2 属性控件
通过在 激活 浏览器 (2) 面板,可以打开第二个浏览器面板。当在位于浏览器层次结构的不同分支中的资源之间复制图层时,使用两个浏览器面板非常有用。
4.1. 从浏览器打开或运行资源
在浏览器面板可以完成很多工作
通过双击、拖动到地图画布或单击
 添加选中的图层 按钮 (选择图层后),将矢量、栅格和网孔图层添加到地图
双击或拖动到地图画布,运行Python脚本 (包括处理算法)
双击或拖动到地图画布,运行模型
使用上下文菜单从QGIS工程文件中 提取符号...
使用默认应用程序打开文件 (在上下文菜单中的 打开 <file type> 的外部编辑器...)。例如:HTML文件、电子表格、图像、PDF、文本文件...
复制条目
重命名和删除 (多个) 图层 (上下文菜单: )
打开文件资源管理器窗口,直接选择文件 在文件资源管理器中显示
以下列出了在顶级条目下排序的不同资源组的特定于资源的操作。
4.2. 浏览器面板顶级条目
4.2.1. 收藏夹
经常使用的文件系统位置可以标记为收藏夹,您标记的内容将显示在此处。
除了 主目录 中描述的操作外,上下文菜单还允许您 重命名收藏条目... 和 移除收藏条目 。
4.2.2. 空间书签
This is where you will find your spatial bookmarks, divided into Project Bookmarks and User Bookmarks.
级别 |
Contextual menu |
|---|---|
Spatial Bookmarks |
New Spatial Bookmark… |
Show the Spatial Bookmark Manager |
|
Import Spatial Bookmarks… |
|
Export Spatial Bookmarks… |
|
Bookmark group (Project Bookmarks and User Bookmarks) |
New Spatial Bookmark… |
Import Spatial Bookmarks… |
|
Export Spatial Bookmarks… |
|
Individual bookmark |
Zoom to Bookmark |
Edit Spatial Bookmark… |
|
Delete Spatial Bookmark |
4.2.3. 工程主目录
工程文件保存后可用, 工程主目录 条目即为一个文件夹,其中包含可在当前工程使用的数据和其他内容 (脚本、模型、文本等),并显示在浏览器面板中,允许您快速访问工程的数据和其他文件。
默认为工程文件夹,但可以通过 选项进行更改,或者右键单击浏览器面板的 工程主目录 项,然后选择 设置工程主目录... 。在QGIS工程未与数据集一起存储在组织的 '工程' 根文件夹中的情况下,自定义该文件夹特别有用。
4.2.4. 驱动器和文件系统
浏览器 面板的下一项取决于所使用的操作系统,并涉及其文件系统的顶级条目。
主要是:
主 文件夹,指向当前用户的主文件夹
在基于Unix的计算机上,是根 / 文件夹
连接的驱动器、本地驱动器或网络驱动器。根据操作系统的不同,直接通过 (如
C:\,D:\) 或/Volumes条目列出。
从这些每个文件夹或驱动器的上下文菜单中,您可以:
刷新内容
创建 该子项是 目录 、 地理包 或 ESRI 形状文件 格式数据集
隐藏目录 (从浏览器中隐藏)
设置颜色: 自定义文件夹图标的颜色,有助于复杂文件夹结构时的快速浏览器导航
启用 扫描:
 监控更改: 允许手动控制是否应该监控和自动更新特定目录。此设置适用于所选目录和所有子目录。这意味着,如果您知道没有问题,可以手动选择监控网络驱动器,或者手动选择不监控由于其他原因不希望监控的大型目录。默认不会自动监控远程或网络驱动器。
 快速扫描此目录
在文件管理器中打开目录 (打开目录...)
在终端窗口中打开目录 (在终端打开...)
检查 属性... 或父 目录属性...
4.2.5. 数据类型
Level and Context menu |
图层的类型 |
|||
|---|---|---|---|---|
|
|
|
|
|
File |
||||
删除文件<dataset name> |
|
|
||
在文件资源管理器中显示 |
|
|
|
|
|
|
|
|
|
File Properties… |
|
|
|
|
Open <file type> Externally… |
|
|||
Layer |
||||
添加图层到工程 |
|
|
|
|
|
|
|||
Layer Properties… |
|
|
|
|
Open with Data Source Manager… |
|
|
||
Execute SQL… |
|
|||


4.2.6. 数据库条目
根据所使用的操作系统和安装的驱动器,您可能有权访问要在QGIS中使用的不同数据库类型。下面列出了数据集树每个级别的上下文菜单的不同条目。
Level and Context menu |
数据库的类型 |
|||||
GeoPackage ([1]) |
SpatiaLite |
PostgreSQL |
SAP HANA |
MS SQL Server |
Oracle |
|
Top menu |
||||||
创建与现有数据库的 新建连接… |
|
|
|
|
|
|
创建数据库… |
|
|
||||
创建数据库和图层… |
|
|||||
保存连接… 详细信息到文件 |
|
|
|
|||
加载连接… |
|
|
|
|||
Connection / Database |
||||||
刷新 连接 |
|
|
|
|
||
编辑连接… 设置 |
|
|
|
|
||
删除连接 |
|
|
|
|
||
移除连接 |
|
|
|
|
|
|
Import Vector Layer… |
|
|
|
|
|
|
|
||||||
|
||||||
|
||||||
New Relationship... |
|
|||||
删除 <database_name> |
|
|
||||
压缩数据库 (Vacuum) |
|
|||||
Create a 新建架构… |
|
|
|
|||
创建 新建表格… |
|
|
|
|
||
执行SQL… 查询 |
|
|
|
|
||
Schema |
||||||
刷新 架构 |
|
|
|
|||
|
|
|
||||
|
|
|
||||
创建 新建表格… |
|
|
||||
执行SQL… 查询 |
|
|
||||
Table / Layer |
||||||
|
|
|
||||
|
|
|||||
执行SQL… 查询 |
|
|
|
|||
|
|
|
|
|
||
|
|
|
||||
|
|
|
|
|
||
|
|
|
|
|
||
|
|
|
|
|
||
|
|
|
|
|
||
|
|
|||||
打开 图层属性… 对话框 |
|
|
|
|
|
|
打开 文件属性… 对话框 |
|
|||||
Open with Data Source Manager |
|
|
||||
Fields |
||||||
添加新字段… |
|
|
|
|
||
字段 |
||||||
设置字段域 |
|
|||||
Rename Field ([2]) |
|
|
|
|||
设置别名… |
|
|||||
设置注释… |
|
|
||||
删除字段… |
|
|
|
|
||


4.2.6.1. Importing vector layers into databases using Browser panel
QGIS allows you to import vector layers directly into a database from the Browser panel.
This provides a simple way to transfer datasets into supported database
formats without using  DB Manager (see DB Manager Plugin).
You can start the import in two ways:
Drag and drop a single vector layer from the Browser panel or from the Project into a database connection or schema item.
Right-click on a database connection or schema item and choose Import Vector Layer... from the context menu.
Note
When multiple layers are dragged into a database, they are imported immediately without further options. All imports run in the background, so the QGIS interface remains responsive during the process.

Fig. 4.3 Import Vector Layer dialog
To add a layer using Import Vector Layer... follow these steps:
Add Source layer: the layer to import, chosen from the current QGIS project. To import only selected features of the source layer use the
Selected features only option.Set the Table name: the name of the destination table in the database. By default, it is taken from the source layer name but can be modified. You can also use the
Replace destination table (if exists)
to overwrite an existing table.Define the Output CRS: the coordinate reference system of the destination table. By default, it is the CRS of the source layer, but it can be changed using the CRS selector.
Configure the Attributes:
Source expression: expression used to populate the field. By default, this corresponds to the original source field.
Name: name of the field in the destination table.
Type: field data type (integer, text, real, etc.).
Length and Precision: length and precision of the field, where applicable.
Constraints: rules to enforce on the field values (e.g. NOT NULL, UNIQUE, DEFAULT). Support depends on the destination database.
Alias: an alternate display name for the field.
Comment: a description or note attached to the field.
You can use buttons on the right side to:
 Add new field to add a new field to the destination table.
 Delete selected field to remove a field from the destination table.
 Move selected field up or
  Move selected field down to reorder fields.
 Reset all fields to clear all fields and start from scratch.
 Convert All Fields To Lowercase or Convert All Fields To Uppercase,
to change the case of all field names.
Convert All Fields To Lowercase or Convert All Fields To Uppercase,
to change the case of all field names.
Optionally, apply a spatial filter with Filter by Extent. This restricts the import to features within a defined bounding box.
Optionally, apply an attribute filter with Feature filter. This allows you to use an expression to select which features are imported.
4.2.7. 瓦片和Web服务
Level and Context menu |
服务类型 |
||||
|---|---|---|---|---|---|
WMS / WMTS (参考) |
XYZ Tiles (参考) |
WCS (参考) |
WFS / OGC API - Features (参考) |
ArcGIS REST Servers (参考) |
|
Top menu |
|||||
创建 新建连接… |
|
|
|
|
|
保存连接… 详细信息到文件 |
|
|
|
|
|
加载连接… |
|
|
|
|
|
Connection |
|||||
刷新 连接 |
|
|
|
|
|
编辑连接… 设置 |
|
|
|
|
|
删除连接 |
|
|
|
|
|
移除连接 |
|
|
|
|
|
在Web浏览器 显示服务信息 |
|
||||
Table / Layer |
|||||
|
|
|
|
|
|
添加图层到工程 |
|
|
|
|
|
Add Filtered Layer to Project… |
|
||||
打开 图层属性… 对话框 |
|
|
|
|
|
在Web浏览器 显示服务信息 |
|
||||


Level and Context menu |
服务类型 |
||||
|---|---|---|---|---|---|
Vector Tiles (参考) |
Scene (参考) |
Cloud (参考) |
SensorThings (参考) |
STAC |
|
Top menu |
|||||
创建 新建连接… |
|
|
|
|
|
创建 新建通用连接… |
|
||||
创建 新建ArcGIS矢量瓦片服务器连接… |
|
||||
Save Connections… details to a file |
|
|
|
|
|
加载连接… |
|
|
|
|
|
Connection |
|||||
编辑连接… 设置 |
|
|
|
|
|
删除连接 |
|
|
|
|
|
Delete Connection… |
|
|
|
|
|
刷新 |
|
||||
Details… |
|
||||
Table / Layer |
|||||
|
|||||
添加图层到工程 |
|
|
|
||
打开 图层属性… 对话框 |
|
|
|
||
刷新 |
|
||||
Download assets… |
|
||||
Details… |
|
||||


4.2.8. 工程和支持的文件类型
文件类型 |
上下文菜单 |
|---|---|
QGIS 工程文件 (.qgz, .qgs) |
|
(打开样式管理器,允许您将符号导出为XML文件,添加到默认样式或者导出到PNG/SVG格式) |
|
QGIS 图层定义 (.qlr) |
|
处理模型 (.model3) |
|
打印Composer模板 (.qpt) |
|
Python 脚本(.py) |
|