Fontos
A fordítás közösségi munka eredménye, amelyhez itt tudsz csatlakozni. Ennek az oldalnak eddig a 1.52% részét fordítottuk le.
11.2. Lesson: Serving WMS
The data used for this exercise are available in the qgis-server-tutorial-data
subdirectory of the training data you downloaded.
For convenience and to avoid possible permissions problems, we will assume
that these files are stored in /home/qgis/projects directory.
Hence, adapt the following instructions to your path.
The demo data contains a QGIS project named world.qgs that is already
prepared to be served with QGIS Server.
If you want to use your own project or you want to learn how a project
is prepared see the Configure your project section.
Megjegyzés
This module presents the URLs so that the audience can easily distinguish the parameters and parameters values. While the normal format is:
...&field1=value1&field2=value2&field3=value3
this tutorial uses:
&field1=value1
&field2=value2
&field3=value3
Pasting them into Mozilla Firefox works properly but other web browsers
like Chrome may add unwanted spaces between the field:parameter pairs.
So, if you encounter this issue you can either use Firefox or modify
the URLs so that they’re in one line format.
Let’s make a WMS GetCapabilities request in the web browser or with curl:
http://qgisplatform.demo/cgi-bin/qgis_mapserv.fcgi
?SERVICE=WMS
&VERSION=1.3.0
&REQUEST=GetCapabilities
&map=/home/qgis/projects/world.qgs
In the Apache config from the previous lesson the QGIS_PROJECT_FILE variable
sets the default project to /home/qgis/projects/world.qgs. However, in
the above request we made use of the map parameter to be explicit and to
show it can be used to point at any project. If you delete the map parameter
from the above request QGIS Server will output the same response.
By pointing any WMS client to the GetCapabilities URL, the client gets in
response an XML document with metadata of the Web Map Server’s information,
e.g. what layers does it serve, the geographical coverage, in
what format, what version of WMS etc.
As QGIS is also a WMS/WMTS Client you can create a new WMS server connection with the help of the above GetCapabilities url. See the Lesson: Web Mapping Services or the Selecting WMS/WMTS Servers section on how to do it.
By adding the countries WMS layer to your QGIS project you should get an image
like the one below:
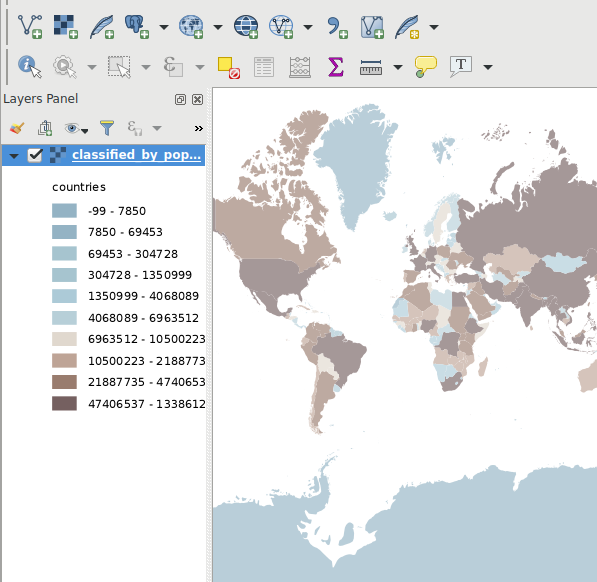
11.31. ábra QGIS Desktop consuming the QGIS Server countries layer WMS service
Megjegyzés
QGIS Server serves layers that are defined in the world.qgs project.
By opening the project with QGIS you can see there are multiple styles for
the countries layer. QGIS Server is also aware of this and you can choose
the style you want in your request. The classified_by_population style
was chosen in the above image.
11.2.1. Logging
When you’re setting up a server, the logs are always important as they show
you what’s going on. We have setup in the *.conf file the following logs:
QGIS Server log at
/logs/qgisserver.logqgisplatform.demoApache access log atqgisplatform.demo.access.logqgisplatform.demoApache error log atqgisplatform.demo.error.log
The log files are simply text files so you can use a text editor to check them
out. You can also use the tail command in a terminal:
sudo tail -f /logs/qgisserver.log.
This will continuously output in the terminal what’s written in that log file. You can also have three terminals opened for each of the log files like so:
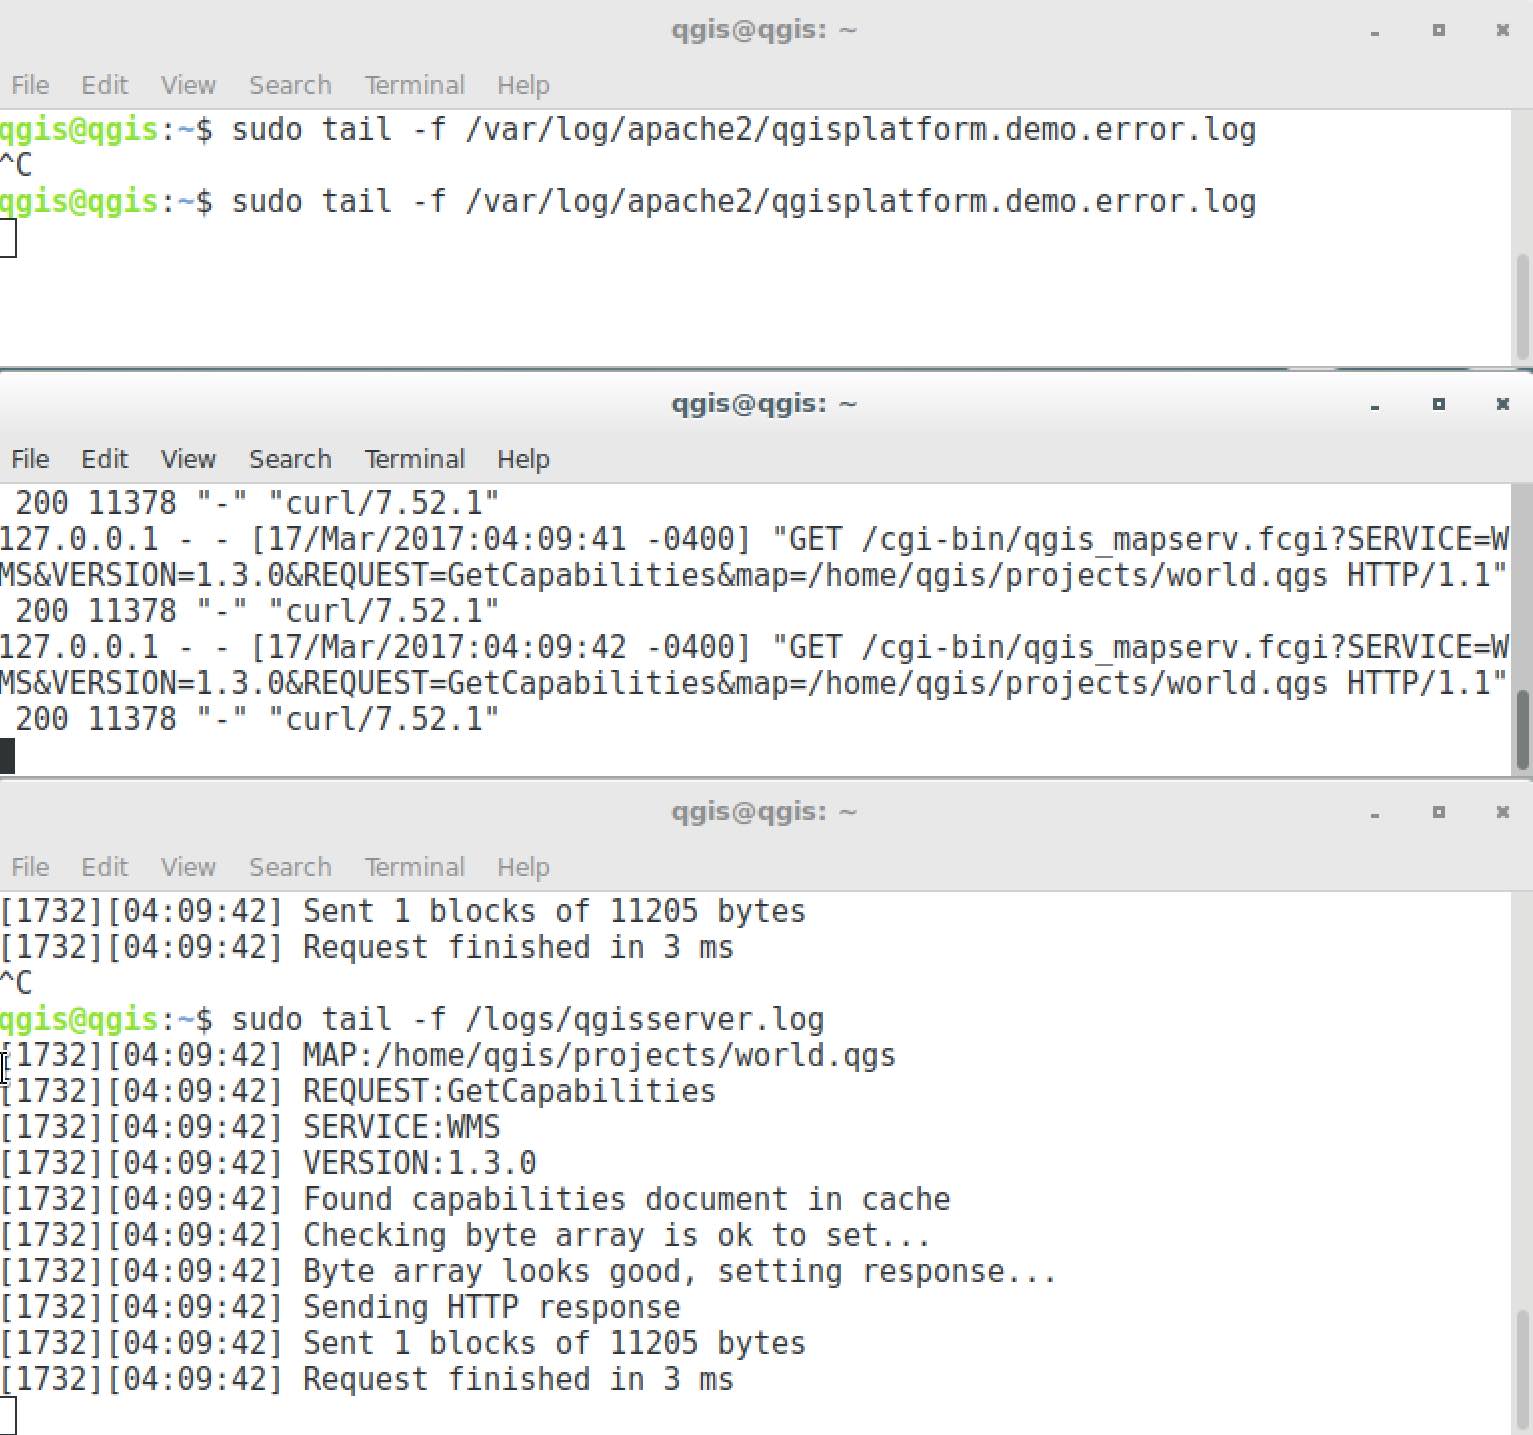
11.32. ábra Using the tail command to visualise QGIS Server logs output
When you use QGIS Desktop to consume the QGIS Server WMS services you will see all the requests QGIS sends to the Server in the access log, the errors of QGIS Server in the QGIS Server log etc.
Megjegyzés
If you look at the logs in the following sections you should get a better understanding on what’s happening.
By restarting Apache while looking in the QGIS Server log you can find some extra pointers on how things work.
11.2.2. GetMap requests
In order to display the countries layer, QGIS Desktop, like any other WMS
client, is using GetMap requests.
A simple request looks like:
http://qgisplatform.demo/cgi-bin/qgis_mapserv.fcgi
?MAP=/home/qgis/projects/world.qgs
&SERVICE=WMS
&VERSION=1.3.0
&REQUEST=GetMap
&BBOX=-432786,4372992,3358959,7513746
&SRS=EPSG:3857
&WIDTH=665
&HEIGHT=551
&LAYERS=countries
&FORMAT=image/jpeg
The above request should output the following image:
Figure: simple GetMap request to QGIS Server
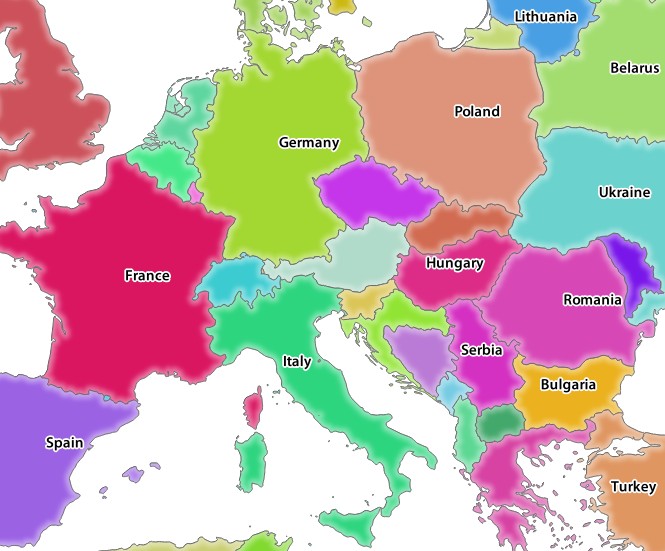
11.33. ábra Qgis Server response after a simple GetMap request
11.2.3. ★★☆ Try Yourself: Change the Image and Layers parameters
Based on the request above, let’s replace the countries layer with another.
In order to see what other layers are available you could open up the
world.qgs project in QGIS and look at its contents. Keep in mind
though that the WMS clients don’t have access to the QGIS project, they just
look at the capabilities document contents.
Also, there’s a configuration option so that some of the layers existing in the QGIS project are ignored by QGIS when serving the WMS service.
So, you could look at the layer list when you point QGIS Desktop to the
GetCapabilities URL or you could try yourself finding other layer names
in the GetCapabilities XML response.
One of the layer names that you could find and works is countries_shapeburst.
You may find others but keep in mind some may not be visible at such a small
scale so you could get a blank image as response.
You can also play around with others parameters from above, like changing the
returned image type to image/png.
11.2.4. ★★☆ Follow Along: Use Filter, Opacities and Styles parameters
Let’s do another request that adds another layer, some basic parameters, FILTER and OPACITIES, but also uses the standard STYLES parameter.
http://qgisplatform.demo/cgi-bin/qgis_mapserv.fcgi
?MAP=/home/qgis/projects/world.qgs
&SERVICE=WMS
&VERSION=1.3.0
&REQUEST=GetMap
&BBOX=-432786,4372992,3358959,7513746
&SRS=EPSG:3857
&WIDTH=665
&HEIGHT=551
&FORMAT=image/jpeg
&LAYERS=countries,countries_shapeburst
&STYLES=classified_by_name,blue
&OPACITIES=255,30
&FILTER=countries:"name" IN ( 'Germany' , 'Italy' )
The above request should output the following image:
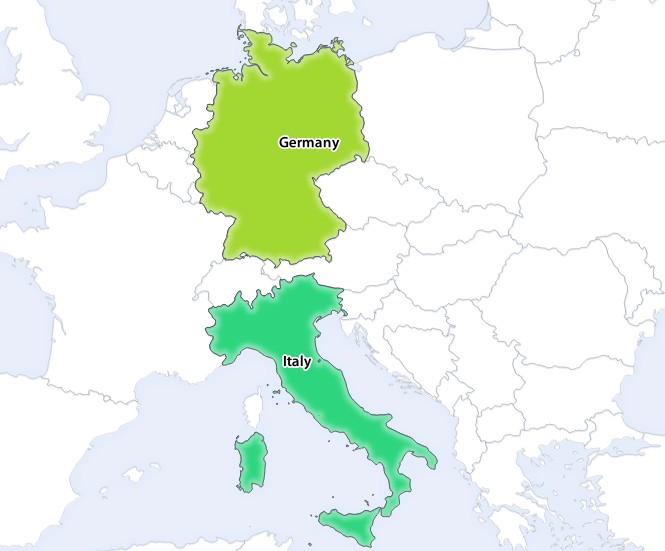
11.34. ábra Response to a GetMap request with FILTER and OPACITIES parameters
As you can see from the above image, among other things, we told QGIS Server to render only Germany and Italy from the countries layer.
11.2.5. ★★☆ Follow Along: Use Redlining
Let’s do another GetMap request that makes use of the redlining feature and of the SELECTION parameter detailed in the Basics section:
http://qgisplatform.demo/cgi-bin/qgis_mapserv.fcgi
?MAP=/home/qgis/projects/world.qgs
&SERVICE=WMS
&VERSION=1.3.0
&REQUEST=GetMap
&BBOX=-432786,4372992,3358959,7513746
&SRS=EPSG:3857
&WIDTH=665
&HEIGHT=551
&LAYERS=countries,countries_shapeburst
&FORMAT=image/jpeg
&HIGHLIGHT_GEOM=POLYGON((590000 6900000, 590000 7363000, 2500000 7363000, 2500000 6900000, 590000 6900000))
&HIGHLIGHT_SYMBOL=<StyledLayerDescriptor><UserStyle><Name>Highlight</Name><FeatureTypeStyle><Rule><Name>Symbol</Name><LineSymbolizer><Stroke><SvgParameter name="stroke">%233a093a</SvgParameter><SvgParameter name="stroke-opacity">1</SvgParameter><SvgParameter name="stroke-width">1.6</SvgParameter></Stroke></LineSymbolizer></Rule></FeatureTypeStyle></UserStyle></StyledLayerDescriptor>
&HIGHLIGHT_LABELSTRING=QGIS Tutorial
&HIGHLIGHT_LABELSIZE=30
&HIGHLIGHT_LABELCOLOR=%23000000
&HIGHLIGHT_LABELBUFFERCOLOR=%23FFFFFF
&HIGHLIGHT_LABELBUFFERSIZE=3
&SELECTION=countries:171,65
Pasting the above request in your web browser should output the following image:
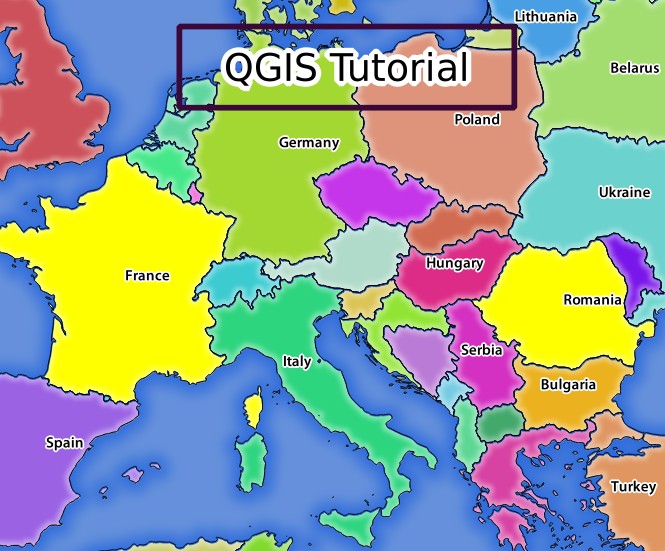
11.35. ábra Response to a request with the REDLINING feature and SELECTION parameter
You can see from the above image that the countries with the 171 and 65 ids were highlighted in yellow (Romania and France) by using the SELECTION parameter and we used the REDLINING feature to overlay a rectangle with the QGIS Tutorial label.
11.2.6. GetPrint requests
One very nice feature of QGIS Server is that it makes use of the QGIS Desktop print layouts. You can learn about it in the GetPrint section.
If you open the world.qgs project with QGIS Desktop you will find a
print layout named Population distribution. A simplified GetPrint
request that exemplifies this amazing feature is:
http://qgisplatform.demo/cgi-bin/qgis_mapserv.fcgi
?map=/home/qgis/projects/world.qgs
&SERVICE=WMS
&VERSION=1.3.0&
REQUEST=GetPrint
&FORMAT=pdf
&TRANSPARENT=true
&SRS=EPSG:3857
&DPI=300
&TEMPLATE=Population distribution
&map0:extent=-432786,4372992,3358959,7513746
&LAYERS=countries
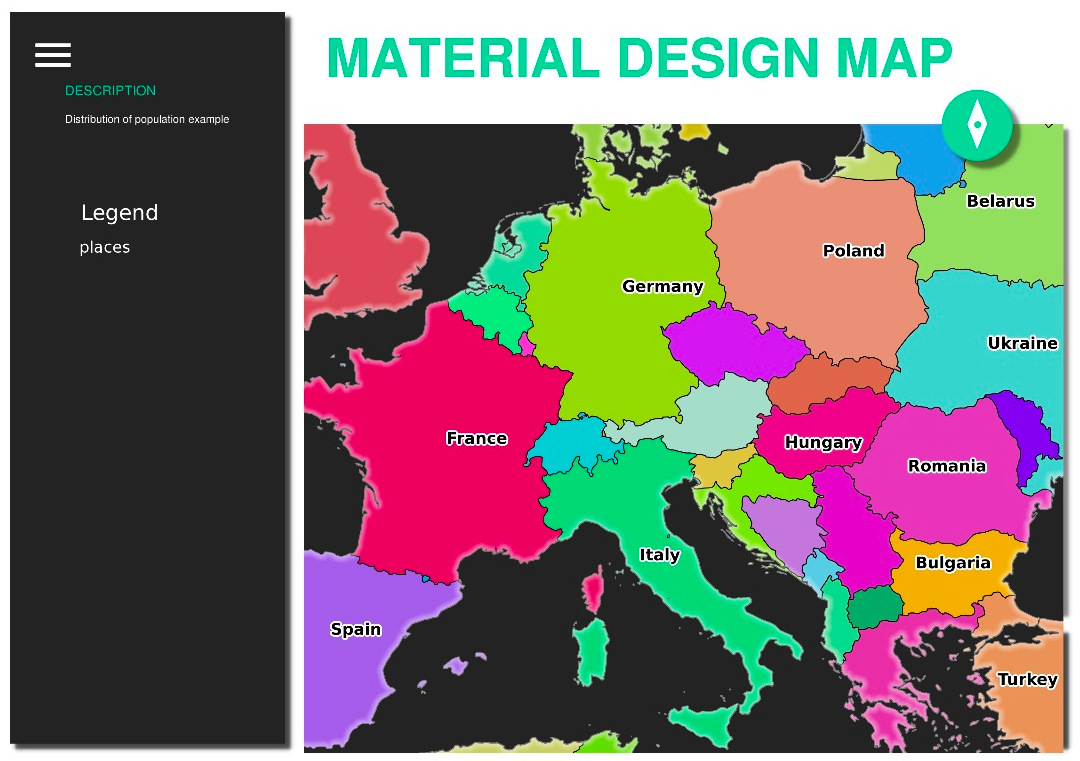
11.36. ábra Shows the pdf resulted from the above GetPrint request
Naturally, it’s hard to write your GetMap, GetPrint etc. requests.
QGIS Web Client or QWC is a Web client project that can work alongside QGIS Server so that you can publish your projects on the Web or help you create QGIS Server requests for a better understanding about the possibilities.
You can install it like this:
As user
qgisgo to the home directory withcd /home/qgis.Download the QWC project from here and unzip it.
Make a symbolic link to the
/var/www/htmldirectory as it’s theDocumentRootthat we’ve setup in the virtual host configuration. If you unzipped the archive under/home/qgis/Downloads/QGIS-Web-Client-masterwe can do that withsudo ln -s /home/qgis/Downloads/QGIS-Web-Client-master /var/www/html/.Access http://qgisplatform.demo/QGIS-Web-Client-master/site/qgiswebclient.html?map=/home/qgis/projects/world.qgs from your Web browser.
Now you should be able to see the Map as in the following figure:
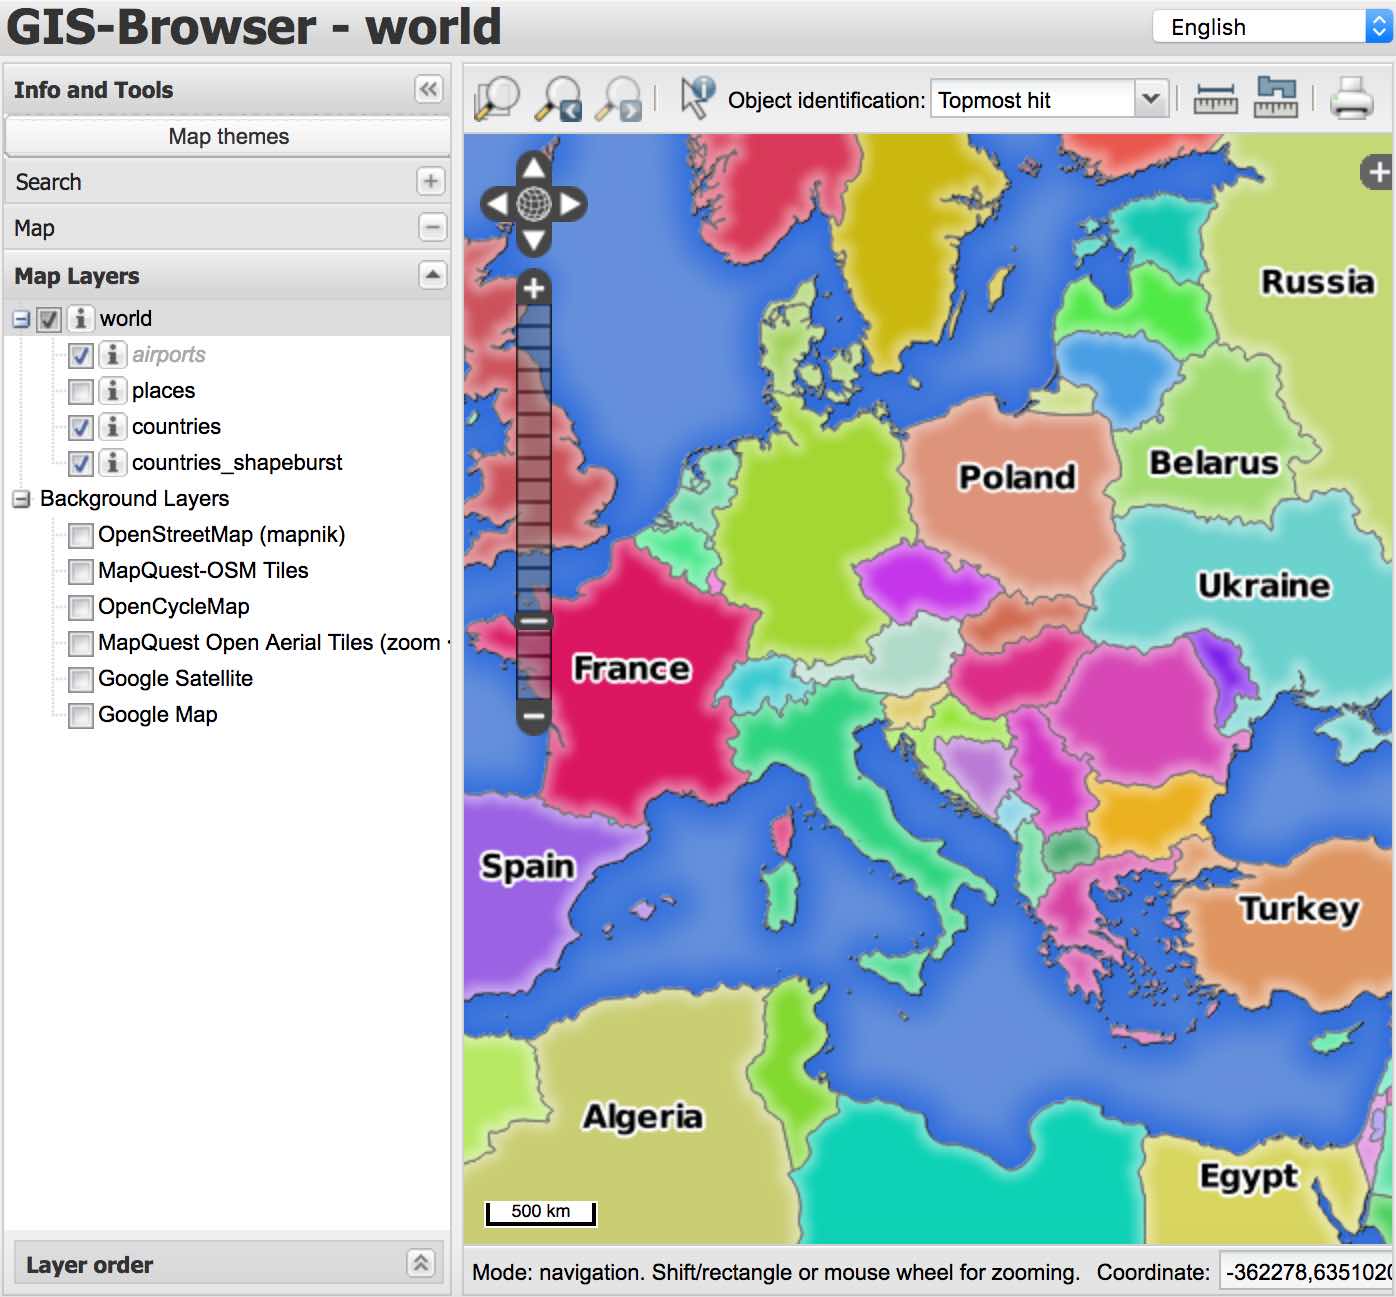
11.37. ábra QGIS Web Client consuming the world.qgs project
If you click the Print button in QWC you can interactively create GetPrint
requests. You can also click the ? icon in the QWC to access the available
help so that you can better discover the QWC possibilities.
11.2.7. In Conclusion
You learned how use QGIS Server to provide WMS Services.
11.2.8. What’s Next?
Next, you’ll see how to use QGIS as a frontend for the famous GRASS GIS.