23.5. Die Grafische Modellierung
Der Grafische Modellierer ermöglicht es Ihnen, komplexe Modelle über eine einfache und leicht zu bedienende Schnittstelle zu erstellen. Wenn Sie mit einem GIS arbeiten, sind die meisten Analyseoperationen nicht isoliert, sondern Teil einer Kette von Operationen. Mit dem grafischen Modellierer kann diese Kette von Operationen in einen einzigen Prozess verpackt werden, so dass sie später bequem mit einem anderen Satz von Eingaben ausgeführt werden kann. Unabhängig davon, wie viele Schritte und verschiedene Algorithmen es umfasst, wird ein Modell als ein einziger Algorithmus ausgeführt, was Zeit und Mühe spart.
Der grafische Modellierer kann über das Menü Verarbeitung geöffnet werden ().
Der Modellierer hat eine Arbeitsfläche, auf der die Struktur des Modells und der Arbeitsablauf, den es repräsentiert, gezeigt werden. Der linke Teil des Fensters ist ein Bereich mit fünf Registerkarten, die zum Hinzufügen neuer Elemente zum Modell verwendet werden können:
Modelleigenschaften: Sie können den Namen des Modells und die Gruppe, zu der es gehört, angebenInputs: alle Eingaben, die Ihr Modell formen werdenAlgorithmen: die verfügbaren VerarbeitungsalgorithmenVariablen: Sie können auch Variablen definieren, die nur im Grafischen Modeler verfügbar sind.Geschichte rückgängig machen: Dieses Panel registriert alles, was im Modellierer geschieht, und macht es Ihnen leicht, Dinge, die Sie falsch gemacht haben, rückgängig zu machen.
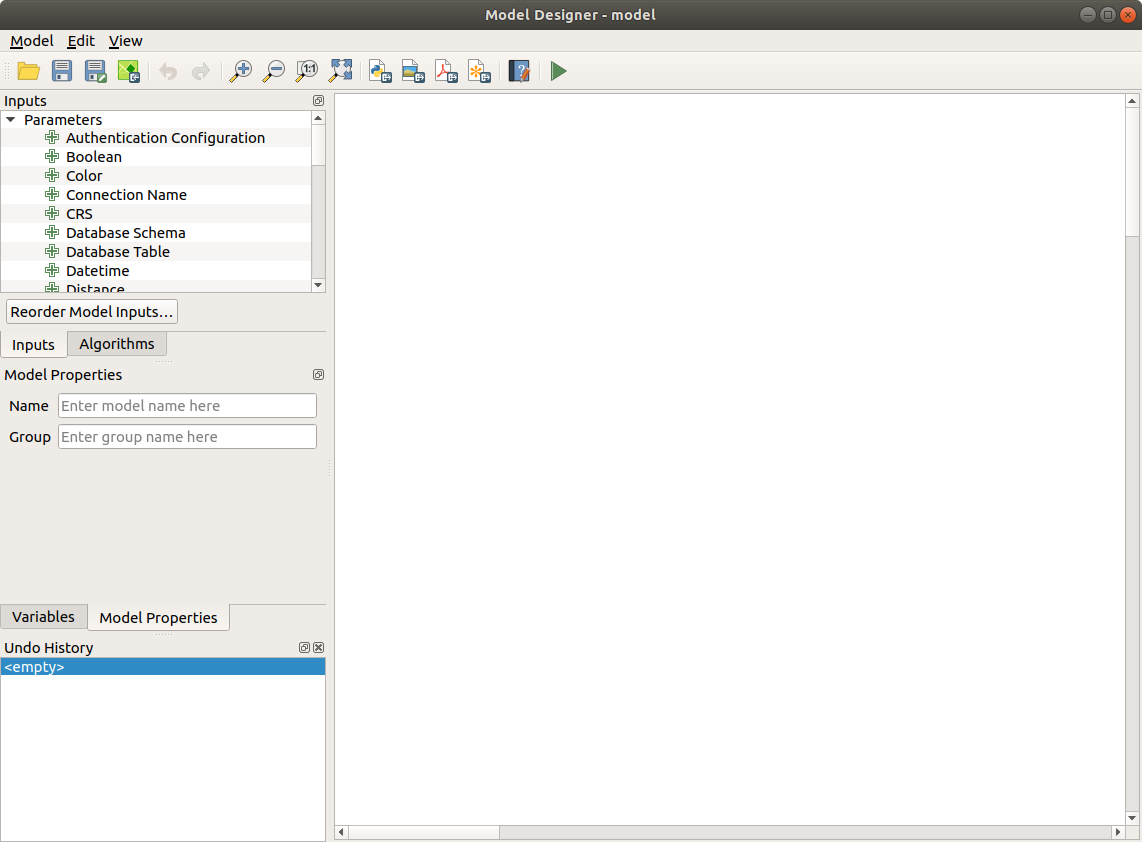
Abb. 23.16 Modellierung
Das Erstellen eines Modells beinhaltet zwei grundlegende Schritte:
Definition von erforderlichen Eingaben. Diese Eingaben werden dem Paramterfenster hinzugefügt, so dass der Anwender Ihre Werte einstellen kann wenn er das Modell ausführt. Das Modell selber ist ein Algorithmus, also wird das Parameterfenster automatisch erstellt, so wie es mit allen Algorithmen, die in der Verarbeiten Umgebung zur Verfügung stehen, passiert.
Definition des Arbeitsablaufs. Der Arbeitsablauf wird definiert, indem Algorithmen hinzugefügt werden. In diesen wird festgelegt, wie sie die definierten Eingaben oder die von anderen Algorithmen im Modell erzeugten Ausgaben verwenden.
23.5.1. Definition von Eingaben
Der erste Schritt besteht darin, die Eingaben für das Modell zu definieren. Die folgenden Elemente befinden sich auf der Registerkarte :guilabel: Eingaben auf der linken Seite des Modellierfensters:
Authentifikationskonfiguration
Boolean
Farbe
Verbindungsname
Koordinaten Operation
KBS
Datenbankschema
Datenbanktabelle
Datum/Uhrzeit
Abstand
Aufzählung
Ausdruck
Ausdehnung
Field Aggregates
Feldabbildung
Datei/Ordner
Geometry
Kartenlayer
Karten-Thema
Matrix
Mesh Layer
Mehrfacheingabe
Number
Punkt
Drucklayout
Drucklayout Element
Bereich
Rasterkanal
Rasterlayer
Maßstab
Zeichenkette
TIN Creation Layers
Vektorobjekte
Vektorfeld
Vektorlayer
Vektor Tilewriter Layer
Bemerkung
Wenn Sie mit der Maus über die Eingaben fahren, wird ein Tooltip mit zusätzlichen Informationen angezeigt.
Wenn Sie auf ein Element doppelklicken, wird ein Dialog angezeigt, in dem Sie seine Eigenschaften definieren können. Je nach Parameter enthält der Dialog mindestens ein Grundelement (die Beschreibung, die der Benutzer bei der Ausführung des Modells sieht). Wenn Sie einen numerischen Wert hinzufügen, wie in der nächsten Abbildung zu sehen ist, müssen Sie, zusätzlich zur Beschreibung des Parameters, einen Standardwert und den Bereich der gültigen Werte festlegen.

Abb. 23.17 Definition der Modellparameter
Sie können Ihre Eingabe als zwingend für Ihr Modell definieren, indem Sie das Kontrollkästchen  Zwingend ankreuzen. Durch Ankreuzen des Kontrollkästchens
  :sup: Erweitert können Sie die Eingabe so einstellen, dass sie sich im Abschnitt Erweitert befindet. Dies ist besonders nützlich, wenn das Modell viele Parameter hat und einige davon nicht trivial sind, Sie diese aber dennoch wählen möchten.
The Comments tab allows you to tag the input with more information,
to better describe
the parameter. Comments are visible only in the modeler canvas and not in the
final algorithm dialog.
Für jede hinzugefügte Eingabe wird der Modellierungsebene ein neues Element hinzugefügt.

Abb. 23.18 Modellparameter
Sie können Eingaben auch hinzufügen, indem Sie den Eingabetyp aus der Liste an die gewünschten Stelle im Modellierungsfenster ziehen. Wenn Sie einen Parameter einer bestehenden Eingabe ändern möchten, doppelklicken Sie einfach darauf, und es erscheint der gleiche Dialog.
23.5.2. Definition des Arbeitsablaufs
In the following example we will add two inputs and two algorithms. The aim of
the model is to copy the elevation values from a DEM raster layer to a line layer
using the Drape algorithm, and then calculate the total ascent of the line
layer using the Climb Along Line algorithm.
In the Inputs tab, choose the two inputs as Vector Layer for the line and
Raster Layer for the DEM.
We are now ready to add the algorithms to the workflow.
Die Algorithmen finden Sie auf der Registerkarte Algorithmen, ähnlich gruppiert wie in der Verarbeitungs-Werkzeugkiste.
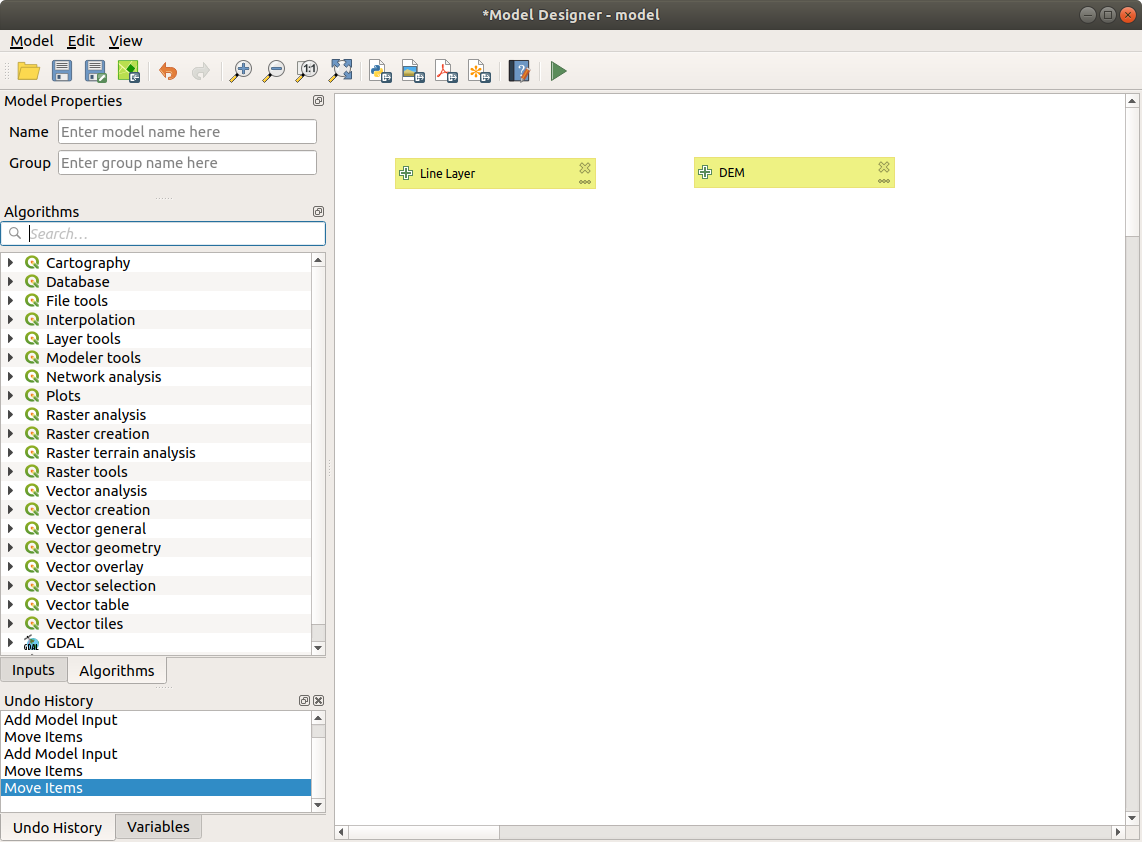
Abb. 23.19 Modell-Eingaben
To add an algorithm to a model, double-click on its name or drag and
drop it, just like for inputs. As for the inputs you can change the description
of the algorithm and add a comment.
When adding an algorithm, an execution dialog will appear, with a content similar
to the one found in the execution panel that is shown when executing the
algorithm from the toolbox.
The following picture shows both the Drape (set Z value from raster) and the
Climb along line algorithm dialogs.
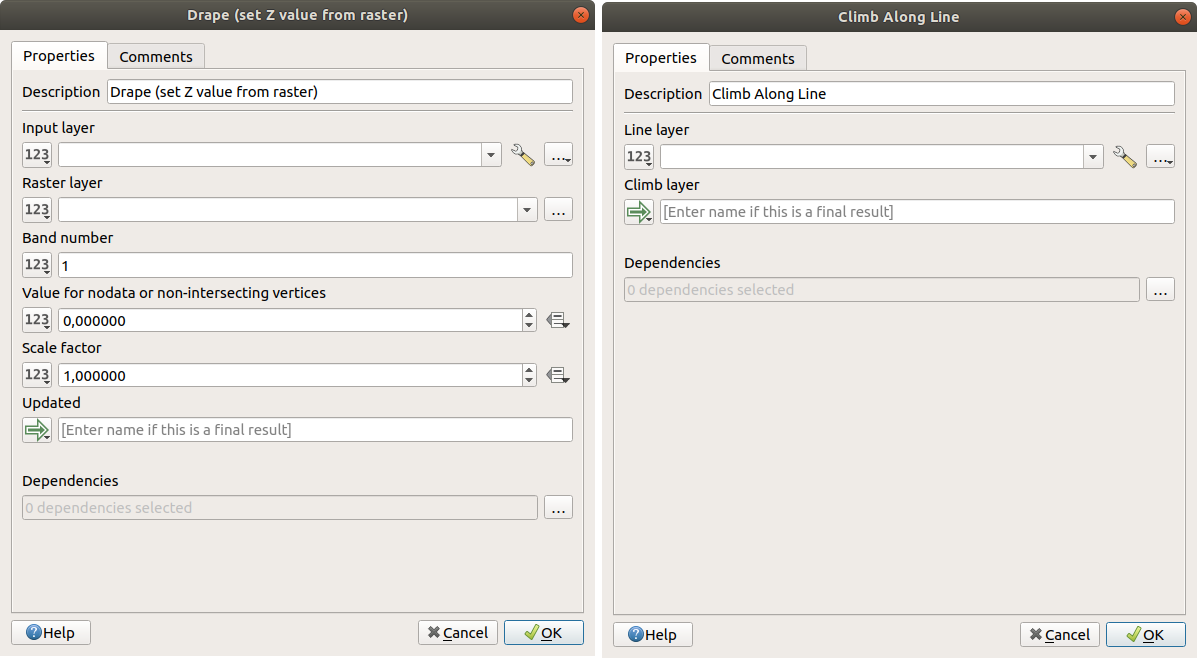
Abb. 23.20 Modell-Algorithmus-Parameter
As you can see there are some differences.
You have four choices to define the algorithm inputs:

Value: allows you to set the parameter from a loaded layer in the QGIS project or to browse a layer from a folder
Pre-calculated Value: with this option you can open the Expression Builder and define your own expression to fill the parameter. Model inputs together with some other layer statistics are available as variables and are listed at the top of the Search dialog of the Expression Builder
Model Input: choose this option if the parameter comes from an input of the model you have defined. Once clicked, this option will list all the suitable inputs for the parameter
Algorithm Output: is useful when the input parameter of an algorithm is an output of another algorithm
Algorithm outputs have the addditional 
Model Output
option that makes the output of the algorithm available in the model.
If a layer generated by the algorithm is only to be used as input to another algorithm, don’t edit that text box.
In the following picture you can see the two input parameters defined as
Model Input and the temporary output layer:
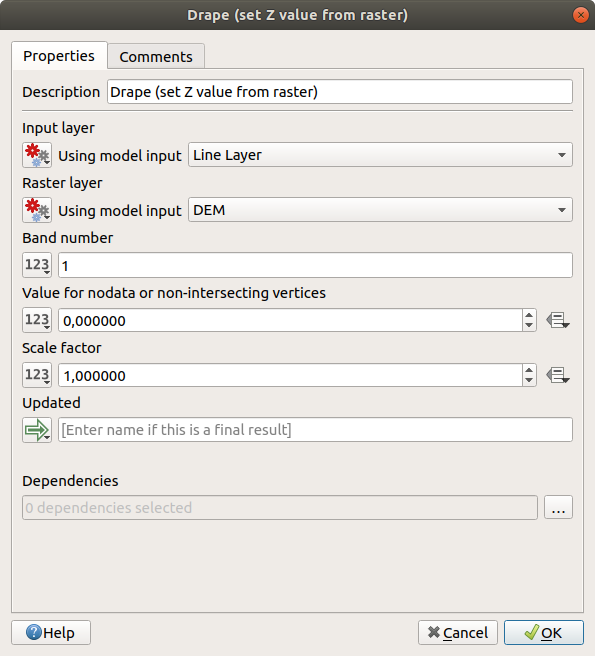
Abb. 23.21 Algorithm Input and Output parameters
In all cases, you will find an additional parameter named Dependencies that is not available when calling the algorithm from the toolbox. This parameter allows you to define the order in which algorithms are executed, by explicitly defining one algorithm as a parent of the current one. This will force the parent algorithm to be executed before the current one.
Wenn Sie die Ausgabe eines vorherigen Algorithmus als Eingabe Ihres Algorithmus verwenden, wird der vorherige Algorithmus implizit als übergeordneter Algorithmus des aktuellen festgelegt (und der entsprechende Pfeil im Modellierungsfenster platziert). In einigen Fällen kann ein Algorithmus jedoch von einem anderen Algorithmus abhängen, selbst wenn er kein Ausgabeobjekt von diesem verwendet (z.B. ein Algorithmus, der einen SQL-Satz auf einer PostGIS-Datenbank ausführt und ein anderer, der einen Layer in dieselbe Datenbank importiert). In diesem Fall wählen Sie einfach den vorherigen Algorithmus im Parameter Dependencies aus und sie werden in der richtigen Reihenfolge ausgeführt.
Sobald allen Parametern gültige Werte zugewiesen wurden, klicken Sie auf OK und der Algorithmus wird der Oberfläche hinzugefügt. Er wird mit den Elementen auf der Oberfläche (Algorithmen oder Eingaben) verknüpft, die Objekte liefern, die als Eingaben für den Algorithmus verwendet werden.
Elemente können an eine andere Position auf der Oberfläche gezogen werden. Dies ist nützlich, um die Struktur des Modells klarer und intuitiver zu gestalten. Sie können auch die Größe von Elementen ändern. Dies ist besonders nützlich, wenn die Beschreibung der Eingabe oder des Algorithmus lang ist.
Die Verknüpfungen zwischen den Elementen werden automatisch aktualisiert, und am oberen und unteren Rand jedes Algorithmus sehen Sie einen Plus-Button. Wenn Sie auf die Schaltfläche klicken, werden alle Ein- und Ausgaben des Algorithmus aufgelistet, so dass Sie sich einen schnellen Überblick verschaffen können.
Sie können mit dem Mausrad hinein- und herauszoomen.
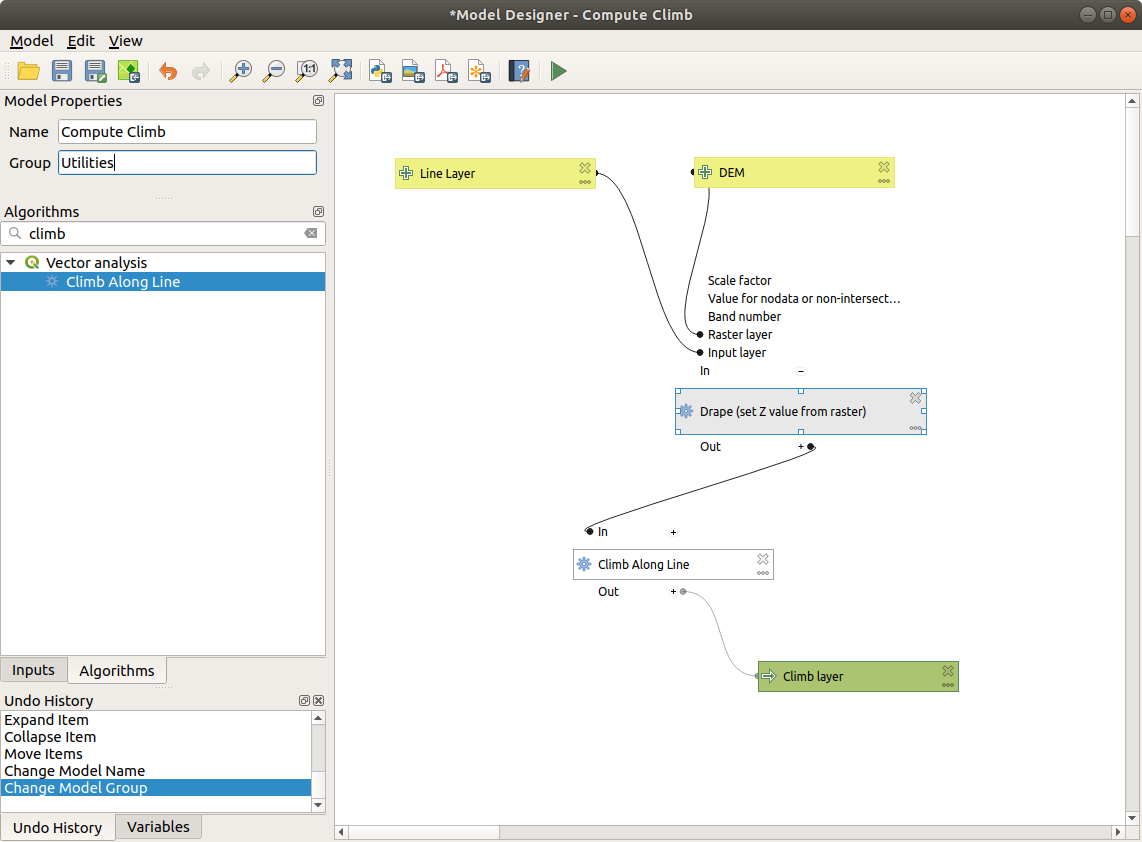
Abb. 23.22 Ein komplettes Modell
Sie können Ihren Algorithmus jederzeit ausführen, indem Sie auf die Schaltfläche  klicken. Um den Algorithmus aus der Toolbox heraus zu verwenden, muss er gespeichert und der Modellierdialog geschlossen werden, damit die Toolbox ihren Inhalt aktualisieren kann.
23.5.3. Interacting with the canvas and elements
You can use the  ,
,  ,
,  and
and  buttons
to zoom the modeler canvas. The behavior of the buttons is basically the same
of the main QGIS toolbar.
buttons
to zoom the modeler canvas. The behavior of the buttons is basically the same
of the main QGIS toolbar.
The Undo History panel together with the  and
and  buttons are
extremely useful to quickly rollback to a previous situation. The
buttons are
extremely useful to quickly rollback to a previous situation. The Undo History
panel lists everything you have done when creating the workflow.
You can move or resize many elements at the same time by first selecting them, dragging the mouse.
If you want to snap the elements while moving them in the canvas you can choose .
The menu contains some very useful options to interact with your model elements:
 Select All: select all elements of the model
Snap Selected Components to Grid: snap and align the elements into a grid- Undo: undo the last action
- Redo: redo the last action
 Cut: cut the selected elements
 Copy: copy the selected elements
 Paste: paste the elements
 Delete Selected Components: delete all the selected
elements from the model
Delete Selected Components: delete all the selected
elements from the modelAdd Group Box: add a draggable box to the canvas. This feature is very useful in big models to group elements in the modeler canvas and to keep the workflow clean. For example we might group together all the inputs of the example: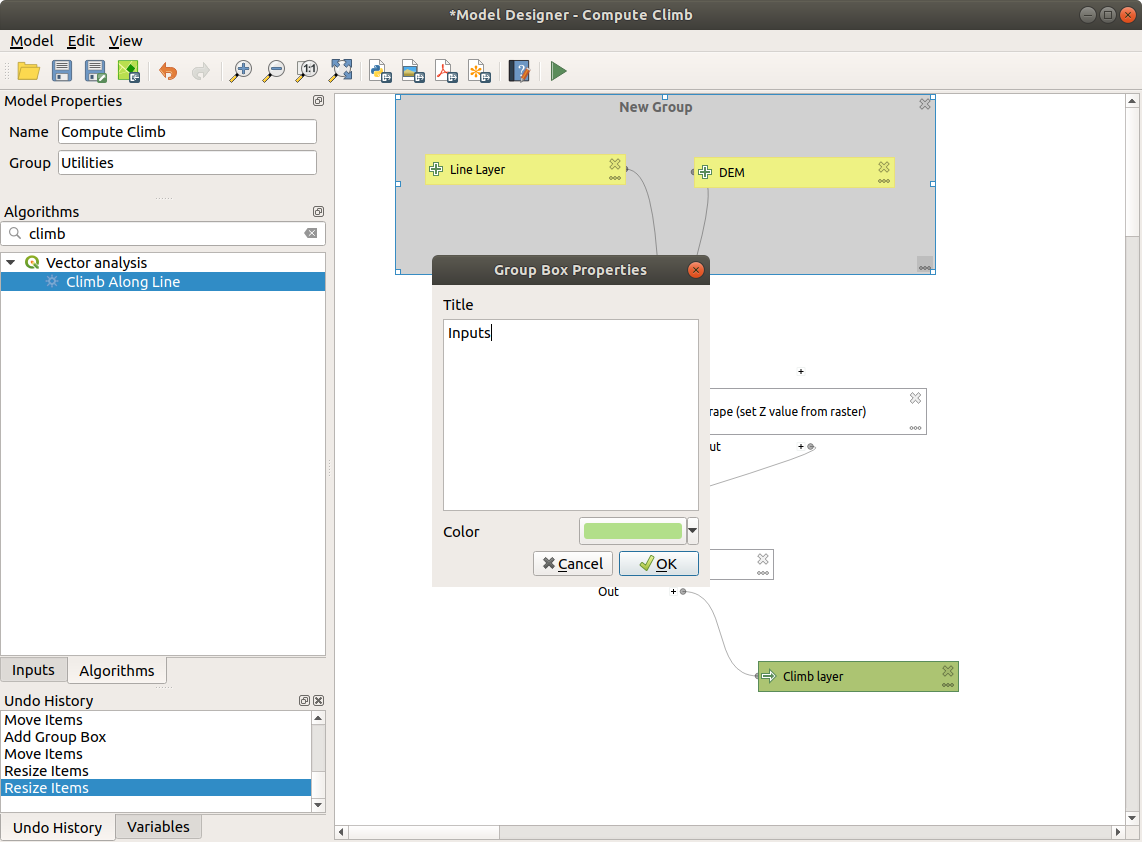
Abb. 23.23 Model Group Box
You can change the name and the color of the boxes. Group boxes are very useful when used together with . This allows you to zoom to a specific part of the model.
You might want to change the order of the inputs and how they are listed in the
main model dialog. At the bottom of the Input panel you will find the
Reorder Model Inputs... button and by clicking on it a new dialog pops up
allowing you to change the order of the inputs:
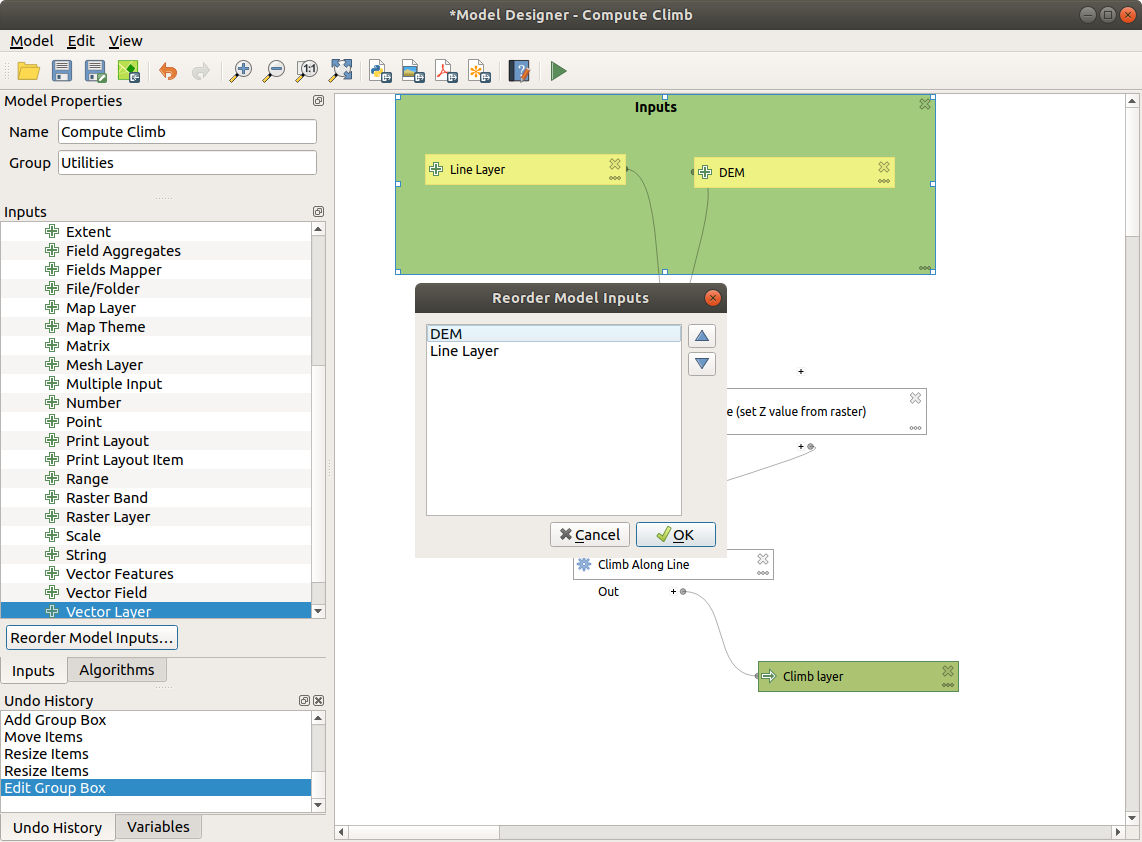
Abb. 23.24 Reorder Model Inputs
23.5.4. Speichern und laden von Modellen
Use the  Save model button to save the current model and the
 Open Model button to open a previously saved model.
Models are saved with the
Open Model button to open a previously saved model.
Models are saved with the .model3 extension.
If the model has already been saved from the modeler window,
you will not be prompted for a filename.
Since there is already a file associated with the model, that file
will be used for subsequent saves.
Bevor Sie ein Modell speichern, müssen Sie in den Textfeldern im oberen Teil des Fensters einen Namen und eine Gruppe für das Modell eingeben.
Modelle, die im Ordner models gespeichert sind (der Standardordner, wenn Sie zur Eingabe eines Dateinamens zum Speichern des Modells aufgefordert werden), erscheinen in der Toolbox in der entsprechenden Rubrik. Wenn die Toolbox aufgerufen wird, durchsucht sie den Ordner models nach Dateien mit der Erweiterung .model3 und lädt die darin enthaltenen Modelle. Da ein Modell selbst ein Algorithmus ist, kann es wie jeder andere Algorithmus zur Toolbox hinzugefügt werden.
Modelle können auch innerhalb der Projektdatei mit der Schaltfläche  Modell im Projekt speichern gespeichert werden. Modelle, die mit dieser Methode gespeichert werden, werden nicht als :file:``.model3` Dateien auf die Platte geschrieben, sondern in die Projektdatei eingebettet.
Projektmodelle sind im Menü  Projektmodelle der Toolbox verfügbar.
Die Verarbeitungsmodellierung kann im Verarbeitungskonfigurationsdialog in der Models Gruppe eingestellt werden.
Modelle, die aus dem Ordner models geladen wurden, erscheinen nicht nur in der Toolbox, sondern auch in der Algorithmenliste im Reiter Algorithms des Modellierfensters. Das bedeutet, dass Sie ein Modell als Teil eines größeren Modells einbinden können, genau wie andere Algorithmen.
Die Modelle werden im Panel Browser angezeigt und können von dort aus gestartet werden.
23.5.4.1. Exportieren eines Modells als Bild, PDF oder SVG
A model can also be exported as an image, SVG or PDF (for illustration
purposes) by clicking  Export as image,
 Export as PDF or
  Export as SVG.
23.5.5. Ein Modell editieren
Sie können das Modell, das Sie gerade erstellen, bearbeiten und dabei den Workflow und die Beziehungen zwischen den Algorithmen und Eingaben, die das Modell definieren, ändern.
Wenn Sie mit der rechten Maustaste auf einen Algorithmus in der Leinwand klicken, sehen Sie ein Kontextmenü wie das folgende:
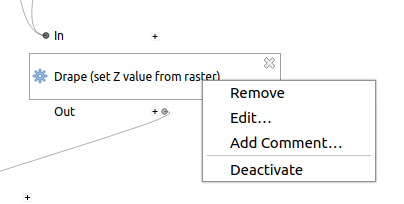
Abb. 23.25 Rechtsklick auf den Modeler
Wird die Remove Option gewählt, bewirkt dies, dass der ausgewählte Algorithmus entfernt wird. Ein Algorithmus kann nur entfernt werden wenn keine weiteren Algorithmen von ihm abhängen. Das heißt, wenn keine Ausgabe des Algorithmus in einem anderen als Eingabe verwendet wird. Wenn Sie versuchen einen Algorithmus, von dem andere abhängen, zu entfernen, wird eine Warnmeldung wie die, die Sie unten sehen können, gezeigt:
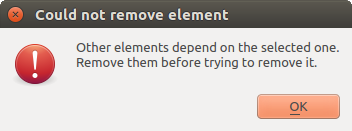
Abb. 23.26 Kann Algorithmus nicht entfernen
Wenn Sie die Option :guilabel: Bearbeiten wählen, wird der Parameterdialog des Algorithmus angezeigt, so dass Sie die Eingaben und Parameterwerte ändern können. Es werden nicht alle im Modell verfügbaren Eingabeelemente als verfügbare Eingaben angezeigt. Layer oder Werte, die bei einem weiter entwickelten Schritt des Arbeitsablaufes erzeugt wurden, sind nicht verfügbar, wenn sie zirkuläre Abhängigkeiten verursachen.
Wählen Sie die neuen Werte aus und klicken Sie wie gewohnt auf die Schaltfläche OK. Die Verbindungen zwischen den Modellelementen ändern sich in der Modellierungsarbeitsfläche entsprechend.
The Add comment… allows you to add a comment to the algorithm to better describe the behavior.
A model can be run partially by deactivating some of its algorithms. To do it, select the Deactivate option in the context menu that appears when right-clicking on an algorithm element. The selected algorithm, and all the ones in the model that depend on it will be displayed in grey and will not be executed as part of the model.
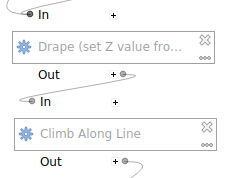
Abb. 23.27 Modell mit deaktivierten Algorithmen
Wenn Sie mit der rechten Maustaste auf einen Algorithmus klicken, der nicht aktiv ist, sehen Sie die Menüoption :guilabel: Aktivieren, mit der Sie den Algorithmus reaktivieren können.
23.5.6. Editieren der Modell-Hilfe Datei und der Metainformationen
You can document your models from the modeler itself.
Click on the  Edit model help button, and a
dialog like the one shown next will appear.
Edit model help button, and a
dialog like the one shown next will appear.
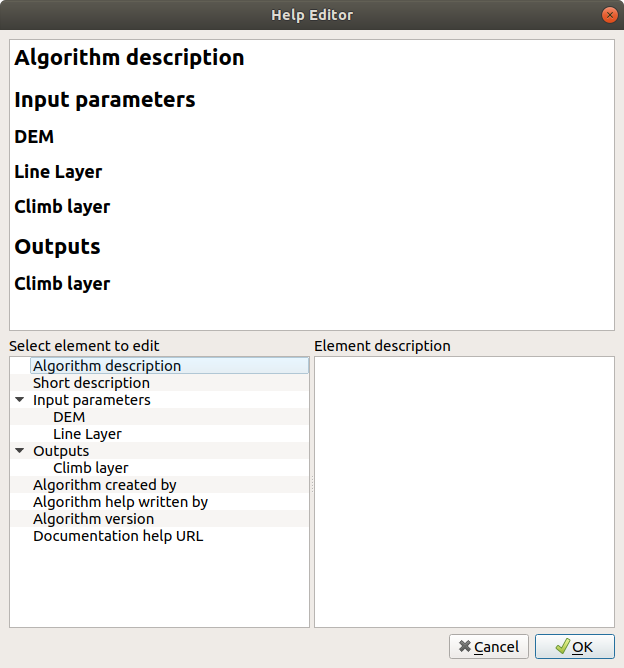
Abb. 23.28 Hilfe bearbeiten
Auf der rechten Seite finden Sie eine einfache HTML-Seite, die anhand der Eingabeparameter und Ausgaben des Algorithmus erstellt wurde, zusammen mit einigen zusätzlichen Einträgen wie eine allgemeine Beschreibung des Modells und seines Autors. Wenn Sie den Hilfeeditor das erste Mal öffnen, sind alle diese Beschreibungen leer, Sie können Sie aber mit Hilfe der Elemente auf der linken Seite des Dialogs bearbeiten. Wählen Sie ein Element im oberen Teil aus und schreiben Sie seine Beschreibung in das Textfeld unten.
Modell-Hilfe wird als Teil des Modells selbst gespeichert.
23.5.7. Exportieren eines Modells als Python Skript
As we will see in a later chapter, Processing algorithms can be called from the QGIS Python console, and new Processing algorithms can be created using Python. A quick way to create such a Python script is to create a model and then export it as a Python file.
To do so, click on the  Export as Script Algorithm…
in the modeler canvas or right click on the name of the model in the Processing
Toolbox and choose Export Model as Python Algorithm….
Export as Script Algorithm…
in the modeler canvas or right click on the name of the model in the Processing
Toolbox and choose Export Model as Python Algorithm….
23.5.8. Zu den verfügbaren Algorithmen
Möglicherweise stellen Sie fest, dass einige Algorithmen, die über die Toolbox ausgeführt werden können, beim Entwurf eines Modells nicht in der Liste der verfügbaren Algorithmen erscheinen. Um in ein Modell aufgenommen zu werden, muss ein Algorithmus die richtige Semantik haben. Wenn ein Algorithmus nicht über eine so gut definierte Semantik verfügt (z. B. wenn die Anzahl der Ausgabelayer nicht im Voraus bekannt ist), kann er nicht in einem Modell verwendet werden, und er erscheint nicht in der Liste der Algorithmen, die Sie im Modellierungsdialog finden.