래스터와 백터 형식을 서로 변환하는 작업을 통해 GIS 문제 해결 시 래스터와 벡터 데이터를 동시에 사용할 수 있는 것은 물론, 이 두 지리 데이터 형식에 각각 특화된 다양한 분석 방법도 함께 사용할 수 있게 됩니다. GIS 문제 해결에 쓰이는 데이터소스 및 처리 방법을 고려할 때, 이 변환 작업으로 유연성이 향상됩니다.
래스터 및 벡터 분석을 결합하려면, 한 데이터 형식을 다른 형식으로 변환해야 합니다. 이전 강의의 결과물인 래스터를 벡터로 변환해봅시다.
이전 모듈에사 사용한 raster_analysis.qgs 맵에서 시작합니다. 이 맵에 이전 실습에서 계산했던 all_conditions_simple.tif 파일이 포함되어 있을 것입니다.
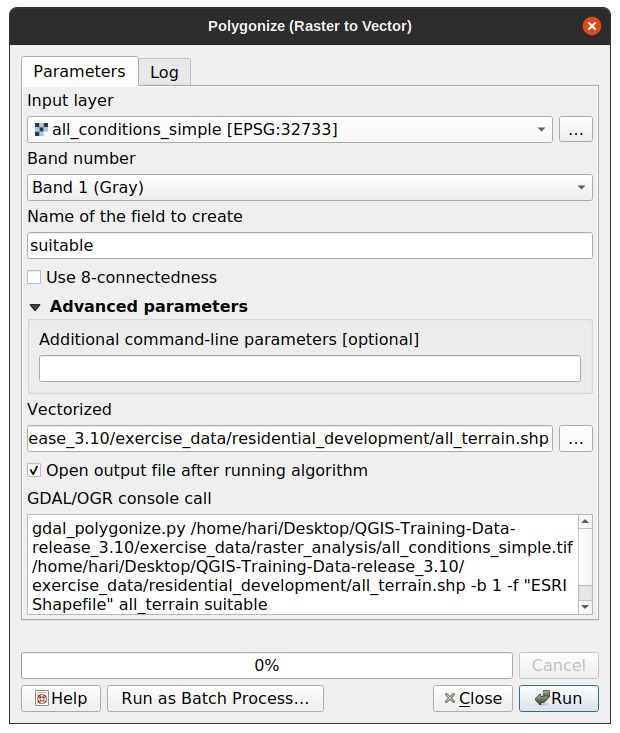
메뉴에서 Raster ► Conversion ► Polygonize (Raster to Vector) 를 클릭하십시오. 도구 대화 창이 뜰 것입니다.
다음과 같이 설정하십시오.
래스터의 값을 설명하는 Field name 을 suitable 로 변경하십시오.
Save the layer under exercise_data/residential_development
as all_terrain.shp.
Now you have a vector file which contains all the values of the raster, but
the only areas you’re interested in are those that are suitable; i.e., those
polygons where the value of suitable is 1. You can change the
style of this layer if you want to have a clearer visualization of it.
Although unnecessary for our current problem, it’s useful to know about the
opposite conversion from the one performed above. Convert to raster the
suitable_terrain.shp vector file you just created in previous step.
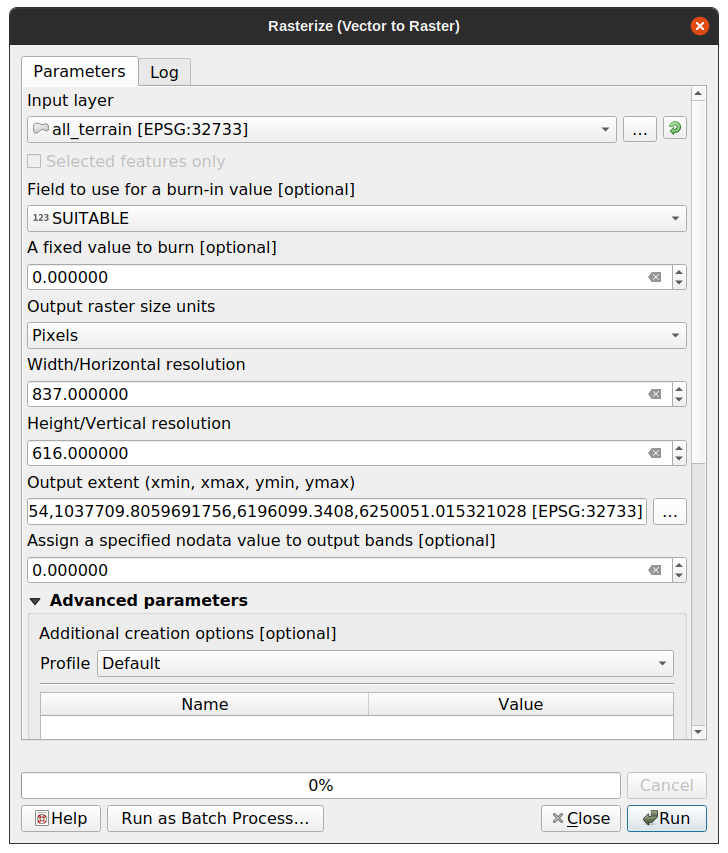
메뉴에서 Raster ► Conversion ► Rasterize (Vector to Raster) 를 클릭해서 도구를 실행한 다음, 다음 스크린샷과 동일하게 설정하십시오.
Input layer is all_terrain.
Field name is suitable.
Output raster size units is Pixels.
Width and Height are 837 and 661,
respectively.
Get the Output extent from the all_terrain layer.
Set output file Rasterized to
exercise_data/residential_development/raster_conversion.tif.
참고
여기서 설정한 산출 이미지의 크기는 벡터화되었던 원래 래스터와 동일합니다. 이미지의 크기를 보려면 해당 이미지의 메타데이터( Layer Properties 에 있는 Metadata 탭)를 열어보십시오.
대화 창의 OK 를 클릭해서 변환 처리 과정을 시작합니다.
변환 완료 시, 새 래스터와 원래 래스터를 비교해서 성공률을 측정해보십시오. 두 래스터는 픽셀 단위까지 완전히 일치해야 정상입니다.
 Follow Along: Raster to Vector 도구