9.2. Lesson: Útiles Complementos de QGIS
Ahora que puedes instalar, habilitar y deshabilitar complementos, veamos cómo pueden ayudarte en la práctica mirando algunos útiles ejemplos de complementos.
El objetivo de esta lección: Familiarizarte con la interfaz de complementos y conocer algunos complementos útiles.
9.2.1.  Follow Along: O Complemento QuickMapServices
O complemento QuickMapServices é um complemento simples e fácil de usar que adiciona mapas básicos ao seu projeto QGIS. Possui muitas opções e configurações diferentes, vamos começar a explorar alguns de seus recursos.
Start a new map and add the roads layer from the
training_dataGeopackage.Instale o complemento QuickMapServices.
Abra a guia de pesquisa do plugin clicando em . Esta opção do complemento permite filtrar os mapas base disponíveis pela extensão atual da tela do mapa.
Click on the Filter by extent and you should see one service available.
Click on the Add button next to the map to load it.
The base map will be loaded and you will have a satellite background for the map.
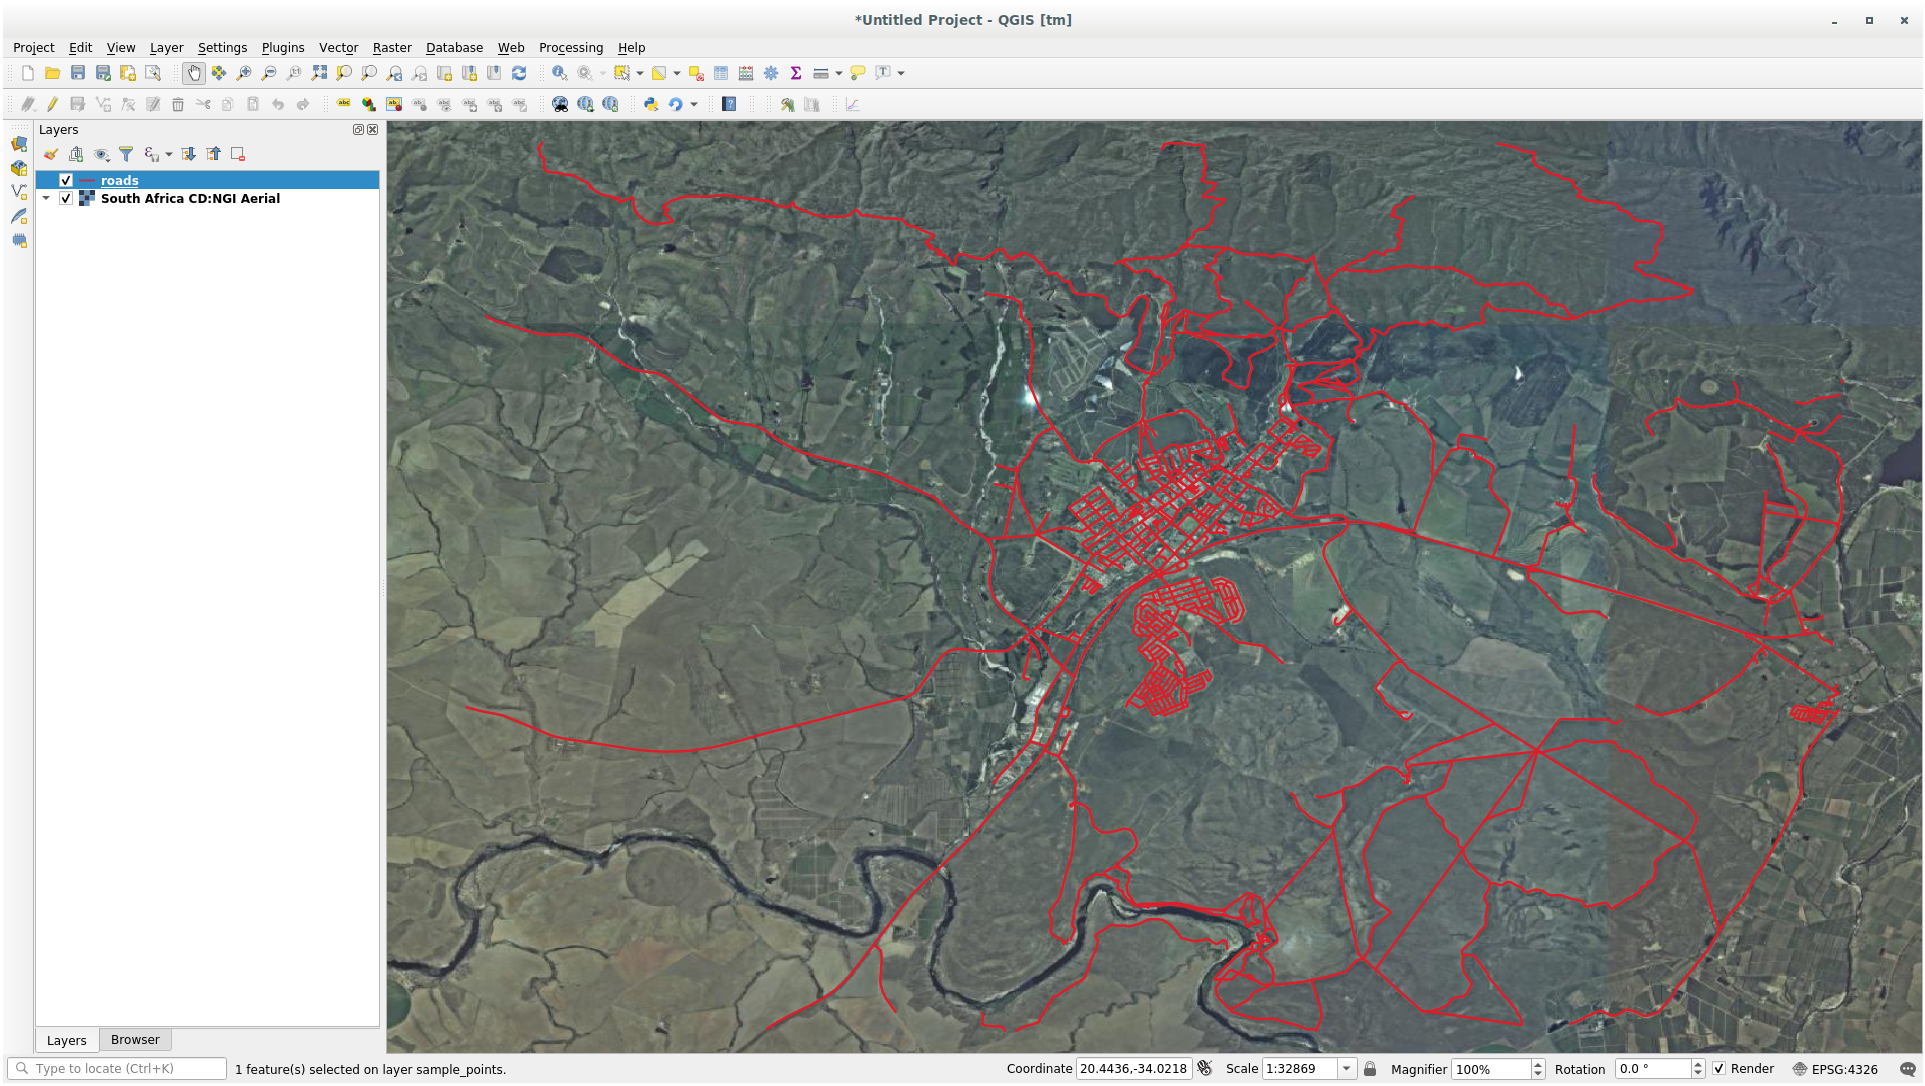
O plugin QuickMapServices disponibiliza muitos mapas básicos.
Close the Search QMS panel we opened before
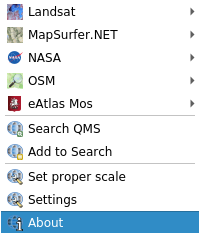
Click again on . The first menu lists different map providers with available maps:
But there is more.
If the default maps are not enough for you, you can add other map providers.
Click on and go to the More services tab.
Read carefully the message of this tab and if you agree click on the Get Contributed pack button.
Se você agora abrir o menu :menu:`Web --> QuickMapServices`, verá que mais fornecedores estão disponíveis. Escolha o que melhor se adapta às suas necessidades!
9.2.2. Follow Along: O Complemento QuickOSM
Com uma interface simples e incrível, o complemento QuickOSM permite que você baixe dados do OpenStreetMap.
Start a new empty project and add the roads layer from the
training_dataGeoPackage.Instale o complemento QuickOSM. O complemento adiciona dois novos botões na barra de ferramentas QGIS e pode ser acessado no menu .
Abra a caixa de diálogo QuickOSM. O complemento possui muitas abas diferentes: nós usaremos a Consulta Rápida.
You can download specific features by selecting a generic Key or be more specific and choose a specific Key and Value pair.
Dica
if you are not familiar with the Key and Value system, click on the Help with key/value button. It will open a web page with a complete description of this concept of OpenStreetMap.
Look for railway in the Key menu and let the Value be empty: so we are downloading all the railway features without specifying any values.
Select Layer Extent in the next drop-down menu and choose roads.
Click on the Run query button.
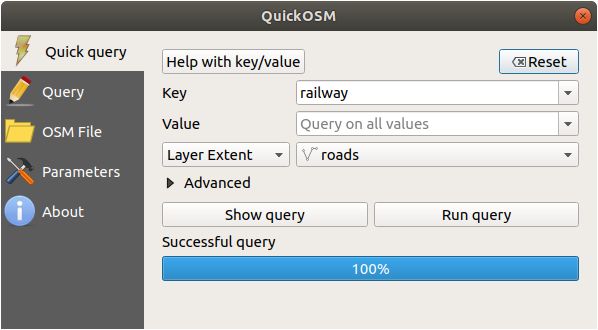
Após alguns segundos, o complemento baixará todos os recursos marcados no OpenStreetMap como railway e os carregará diretamente no mapa.
Nothing more! All the layers are loaded in the legend and are shown in the map canvas.
Aviso
QuickOSM creates temporary layer when downloading the data. If you
want to save them permanently, click on the  icon next to the
layer and choose the options you prefer. Alternatively you can open the
Advanced menu in QuickOSM and choose where to save the data in the
Directory menu.
icon next to the
layer and choose the options you prefer. Alternatively you can open the
Advanced menu in QuickOSM and choose where to save the data in the
Directory menu.
9.2.3.  Follow Along: The QuickOSM Query engine
A maneira mais rápida de baixar dados do complemento QuickOSM é usando a guia Consulta rápida e defina alguns parâmetros. Mas se você precisar de alguns dados mais específicos?
Se você é um mestre de consultas do OpenStreetMap, pode usar o complemento QuickOSM também com suas consultas pessoais.
QuickOSM has an incredible data parser that, together with the amazing query engine of Overpass, lets you download data with your specific needs.
For example: we want to download the mountain peaks that belongs into a specific mountain area known as Dolomites.
You cannot achieve this task with the Quick query tab, you have to be more specific and write your own query. Let’s try to do this.
Comece um novo projeto.
Abra o complemento QuickOSM e clique na guia Consulta.
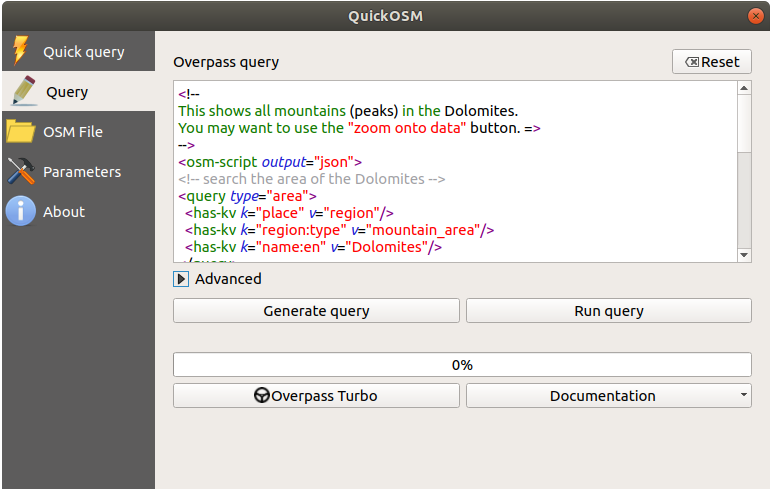
Copy and paste the following code into the query canvas:
  <!--
This shows all mountains (peaks) in the Dolomites.
You may want to use the "zoom onto data" button. =>
-->
<osm-script output="json">
<!-- search the area of the Dolomites -->
<query type="area">
  <has-kv k="place" v="region"/>
  <has-kv k="region:type" v="mountain_area"/>
  <has-kv k="name:en" v="Dolomites"/>
</query>
<print mode="body" order="quadtile"/>
<!-- get all peaks in the area -->
<query type="node">
  <area-query/>
  <has-kv k="natural" v="peak"/>
</query>
<print mode="body" order="quadtile"/>
<!-- additionally, show the outline of the area -->
<query type="relation">
  <has-kv k="place" v="region"/>
  <has-kv k="region:type" v="mountain_area"/>
  <has-kv k="name:en" v="Dolomites"/>
</query>
<print mode="body" order="quadtile"/>
<recurse type="down"/>
<print mode="skeleton" order="quadtile"/>
</osm-script>
Nota
This query is written in a
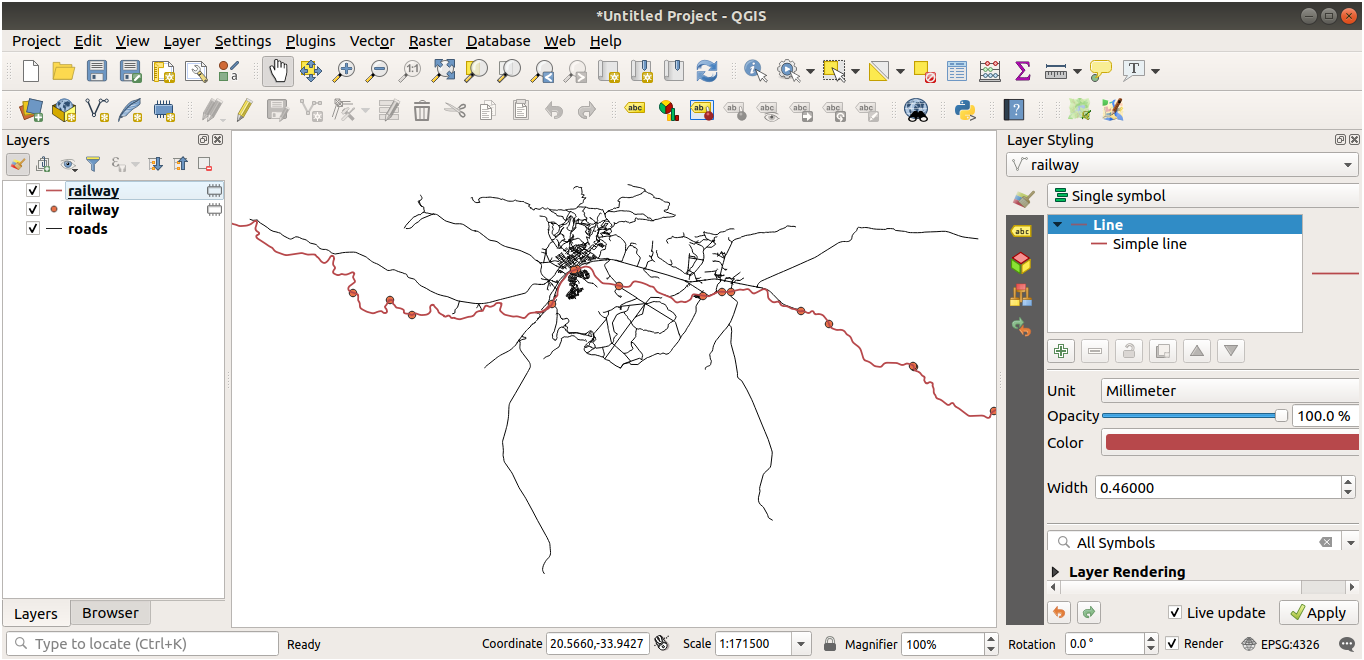
xmllike language. If you are more used to theOverpass QLyou can write the query in this language.And click on Run Query:
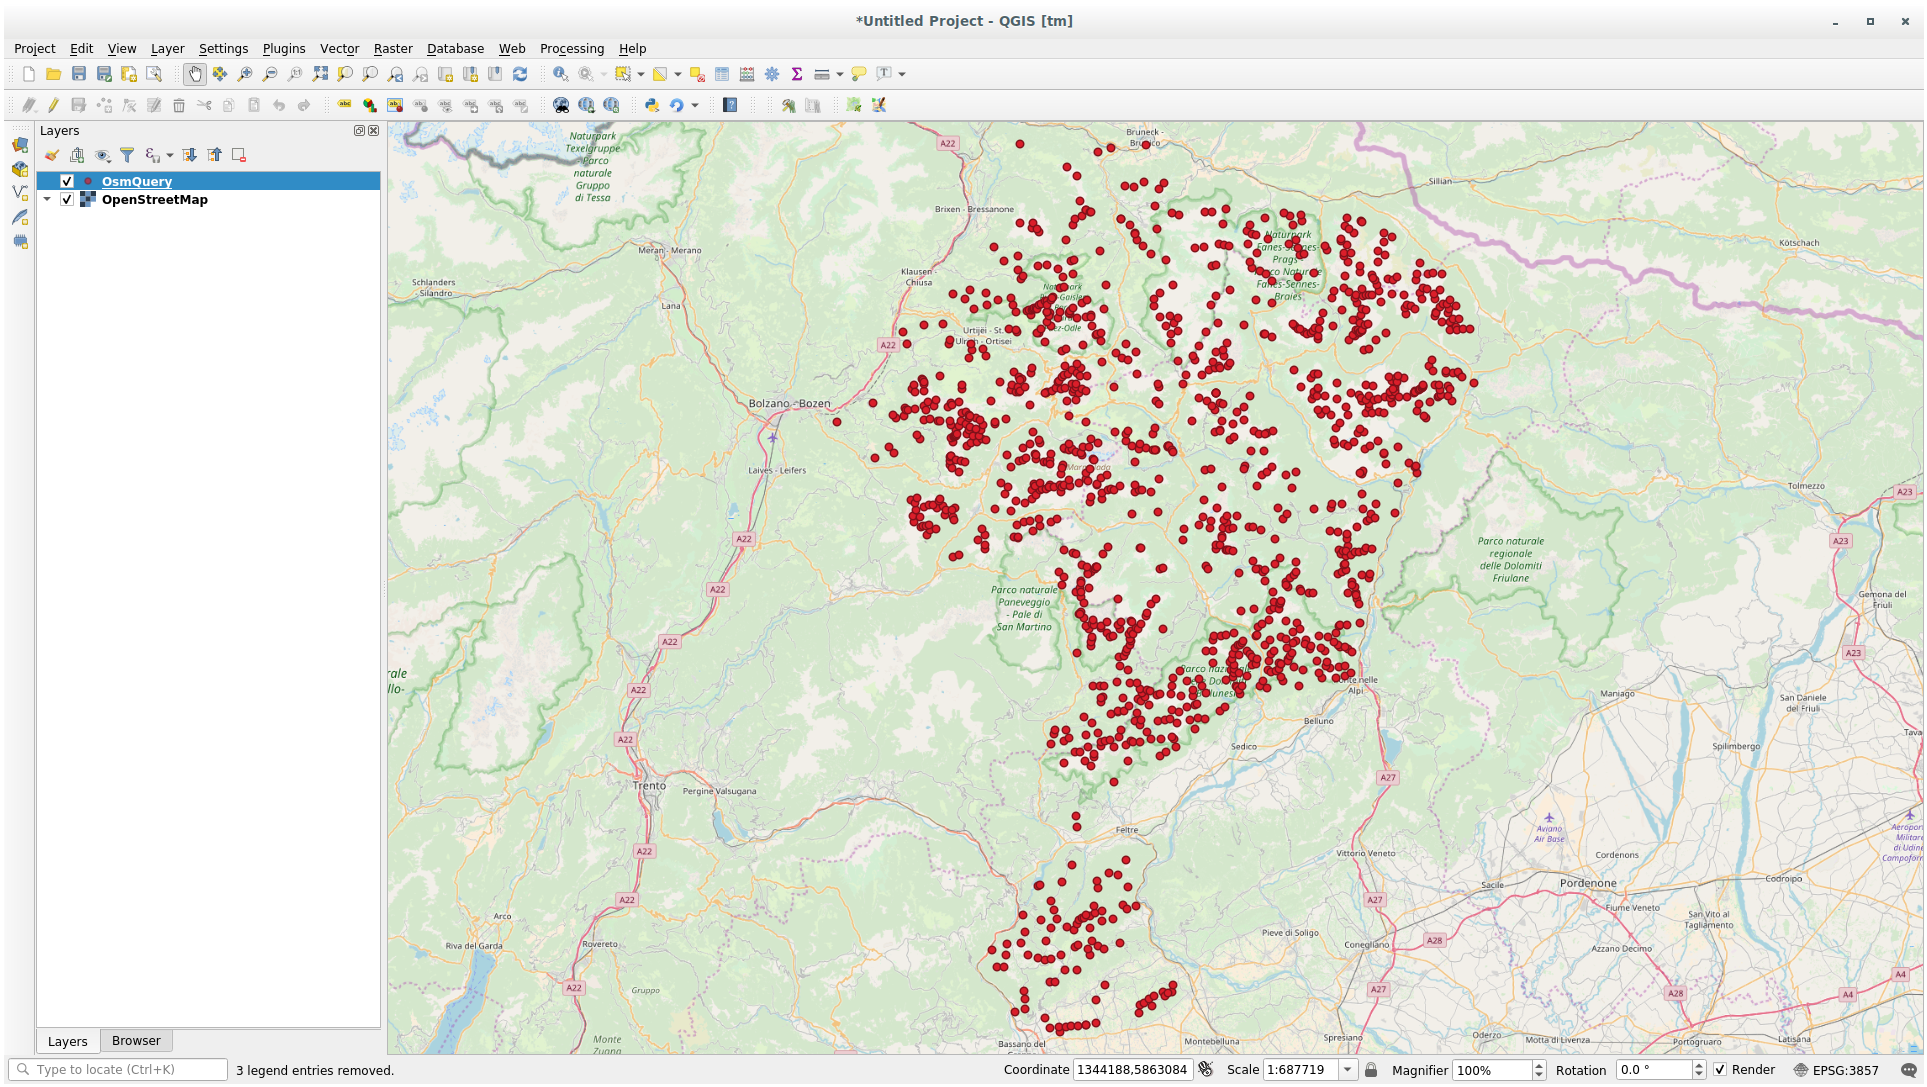
The mountain peaks layer will be downloaded and shown in QGIS:
You can write complex queries using the Overpass Query language. Take a look at some example and try to explore the query language.
9.2.4. Follow Along: O Complemento DataPlotly
O complemento DataPlotly permite criar D3 gráficos de dados de atributos de vetores, graças à biblioteca plotly.
Start a new project
Carregue a camada sample_points na pasta
exercise_data/pluginsInstale o compelemento seguindo as orientações descritas em Follow Along: Instalación de Nuevos Complementos procurando Data Plotly
Abra o complemento clicando no novo ícone na barra de ferramentas ou no menu
In the following example we are creating a simple Scatter Plot of two fields
of the sample_points layer.
In the DataPlotly Panel:
Choose sample_points in the Layer filter, cl for the X Field and mg for the Y Field:
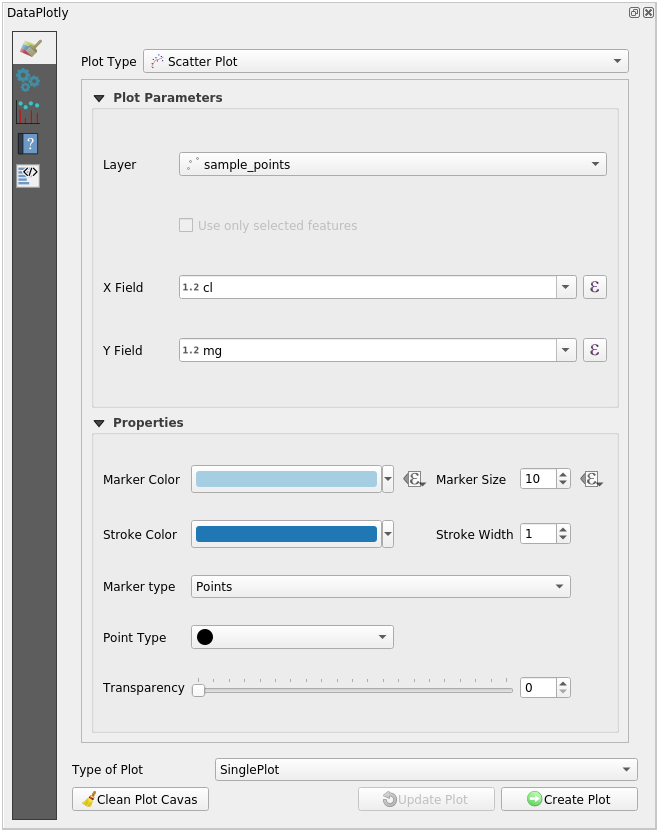
If you want you can change the colors, the marker type, the transparency and many other settings: try to change some parameters to create the plot below.
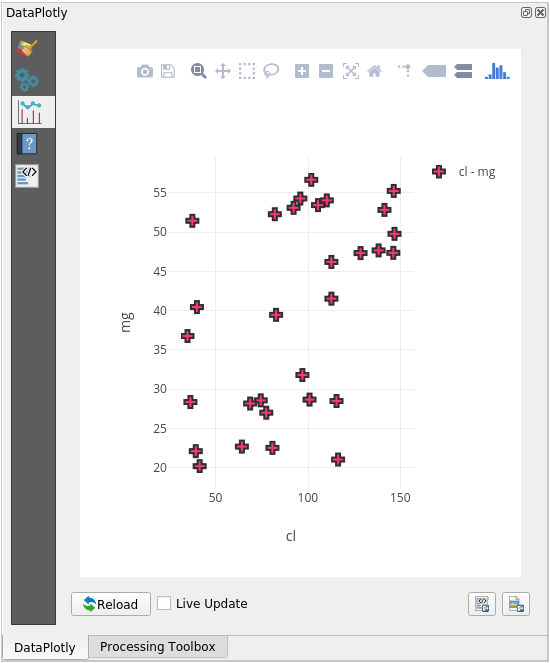
Once you have set all the parameters, click on the Create Plot button to create the plot.
The plot is interactive: this means you can use all the upper buttons to resize, move, or zoom in/out the plot canvas. Moreover, each element of the plot is interactive: by clicking or selecting one or more point on the plot, the corresponding point(s) will be selected in the plot canvas.
You can save the plot as a png static image or as an html file by clicking
on the  or on the
  button in the lower right corner
of the plot.
button in the lower right corner
of the plot.
Há mais. Às vezes, pode ser útil ter dois (ou mais) gráficos mostrando diferentes tipos de gráficos com variáveis diferentes na mesma página. Vamos fazer isso!
Volte para a guia principal de configurações de plotagem, clicando no botão
 botão no canto superior esquerdo do painel do complemento
Change the Plot Type to Box Plot
Choose group as Grouping Field and ph as Y Field
In the lower part of the panel, change the Type of Plot from SinglePlot to SubPlots and let the default option Plot in Rows selected.
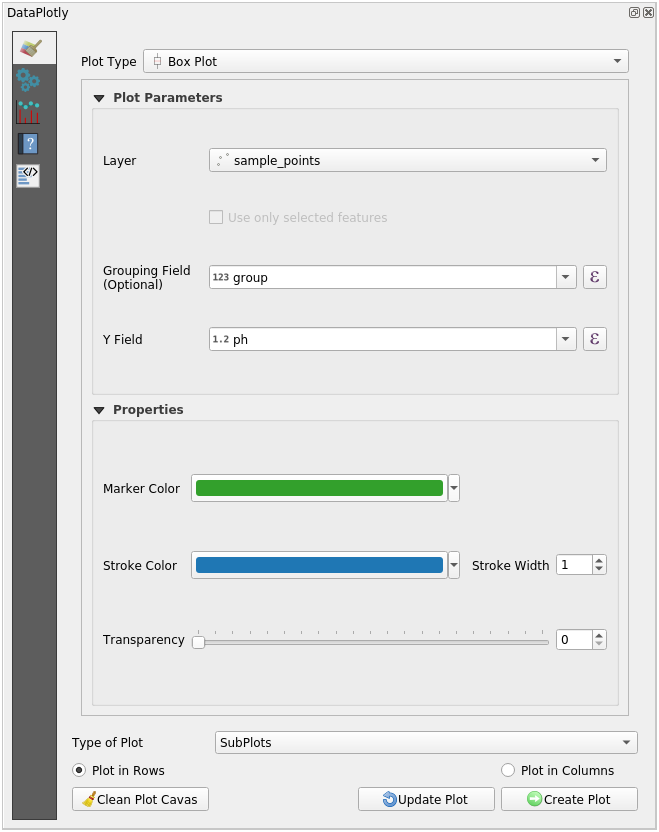
Once done click on the Create Plot button to draw the plot
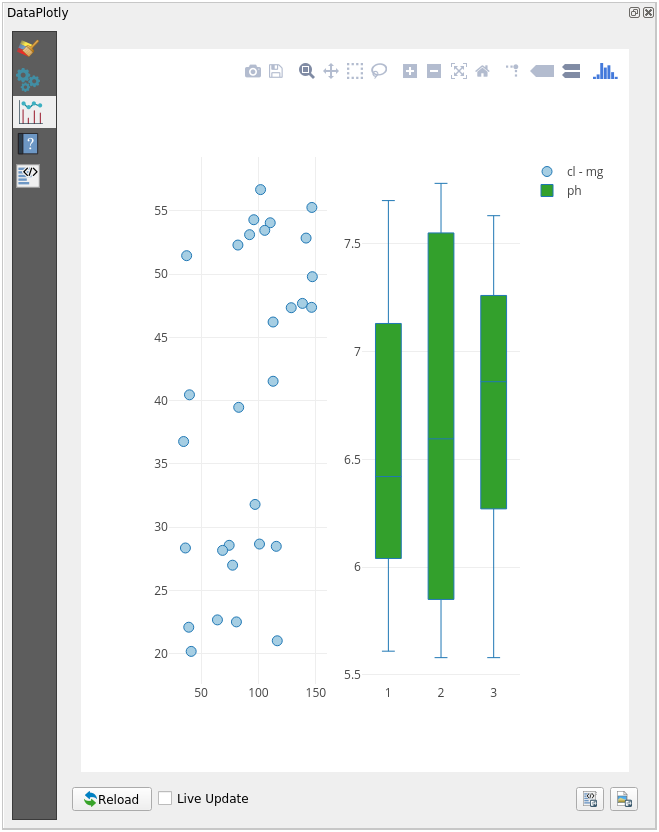
Now both scatter plot and box plot are shown in the same plot page. You still have the chance to click on each plot item and select the corresponding features in the map canvas.
Dica
Each plot has its own manual page available in the  tab.
Try to explore all the plot types and see all the other settings available.
tab.
Try to explore all the plot types and see all the other settings available.
9.2.5. In Conclusion
Hay muchos complementos útiles disponibles para QGIS. Utilizando las herramientas incluidas para instalar y manejar esos complementos, puedes encontrar nuevos y realizar un uso óptimo de ellos.
9.2.6. What’s Next?
Lo siguiente será ver cómo utilizar capas que están alojadas en servicios remotos a tiempo real.