중요
번역은 여러분이 참여할 수 있는 커뮤니티 활동입니다. 이 페이지는 현재 66.67% 번역되었습니다.
17.12. 범위 정의하기
참고
이 수업에서 일부 알고리즘, 특히 래스터 관련 알고리즘이 필요로 하는 범위를 정의하는 방법을 배울 것입니다.
일부 알고리즘은 자신이 수행하는 분석이 커버해야 할 영역을 정의하는 범위를 필요로 합니다. 일반적으로 이 범위는 결과물 레이어의 범위를 정의하게 됩니다.
범위가 필요할 경우, 범위를 정의하는 값 4개(min X, min Y, max X, max Y)를 직접 입력해서 정의할 수 있지만, 좀 더 실용적이고 재미있는 방식으로 정의할 수도 있습니다. 이번 수업에서 그 모든 방식을 다룰 것입니다.
First, let’s open an algorithm that requires an extent to be defined. Open the Rasterize (vector to raster) algorithm, which creates a raster layer from a vector layer.

마지막 2개를 제외한 모든 파라미터는 어떤 레이어를 래스터화할지 정의하고, 래스터화 과정을 어떻게 작업할지 설정하는 데 쓰입니다. 그러나 마지막 파라미터 2개는 산출 레이어의 특성을 정의합니다. 다시 말해 (입력 벡터 레이어가 커버하는 영역과 일치하지 않을 수도 있는) 커버할 영역과, (벡터 레이어에는 셀이 없기 때문에 벡터 레이어에서 가져올 수 없는) 해상도/셀 크기를 정의합니다.
여러분이 처음 할 수 있는 일은 앞에서 설명한 4개의 정의 값을 쉼표로 구분해서 입력하는 것입니다.

별도의 설명은 필요 없을 것입니다. 이 작업이 가장 유연한 옵션이기는 하지만, 어떤 경우 실용적이지 않을 수도 있습니다. 이것이 다른 옵션들이 존재하는 이유입니다. 이 옵션들에 접근하려면, Output extent(xmin, xmax, ymin, ymax) 텍스트란 오른쪽에 있는 버튼을 클릭해야 합니다.
이 옵션들이 어떤 일을 하는지 하나씩 알아봅시다.
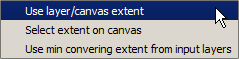
The first option is Use layer/canvas extent, which will show the selection dialog shown below.
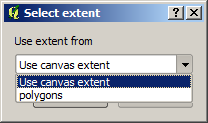
캔버스의 (현재 줌 단계에서 커버하는) 범위 혹은 사용할 수 있는 레이어 가운데 아무 범위나 선택할 수 있습니다. 선택한 다음 OK 를 클릭하면, 텍스트란에 자동적으로 상응하는 값을 채울 것입니다.
The second option is Select extent on canvas. In this case, the algorithm dialog disappears and you can click and drag on the QGIS canvas to define the desired extent.
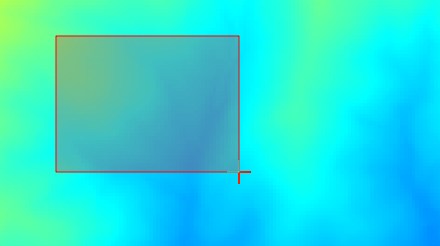
마우스 버튼을 놓으면 대화창이 다시 나타나는데, 정의한 범위에 상응하는 값이 이미 텍스트란을 채우고 있을 것입니다.
The last option is Use min covering extent from input layers, which is the default option. This will compute the min covering extent of all layers used to run the algorithm, and there is no need to enter any value in the text box. In the case of a single input layer, as in the algorithm we are running, the same extent can be obtained by selecting that same input layer in the Use layer/canvas extent that we already saw. However, when there are several input layers, the min covering extent does not correspond to any of the input layer extent, since it is computed from all of them together.
래스터화 알고리즘을 실행하는 데 이 마지막 방식을 사용하겠습니다.
Fill the parameters dialog as shown next, and press OK.
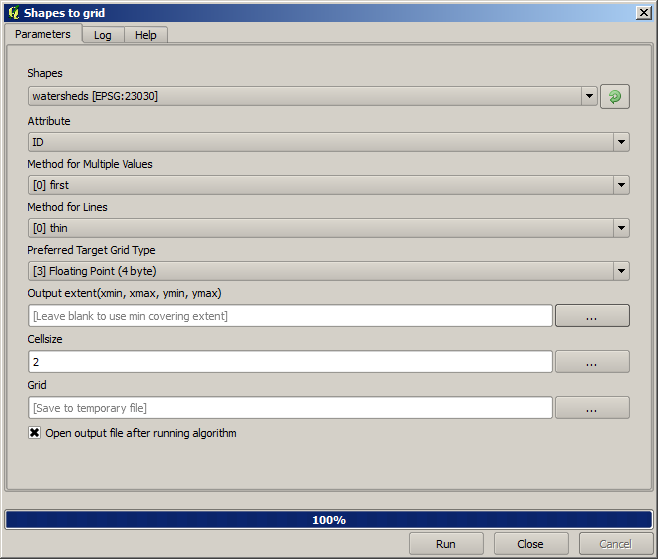
참고
In this case, better use an Integer (1 byte) instead of a
Floating point (4 byte), since the NAME is an integer with maximum
value=64. This will result in a smaller file size and faster computations.
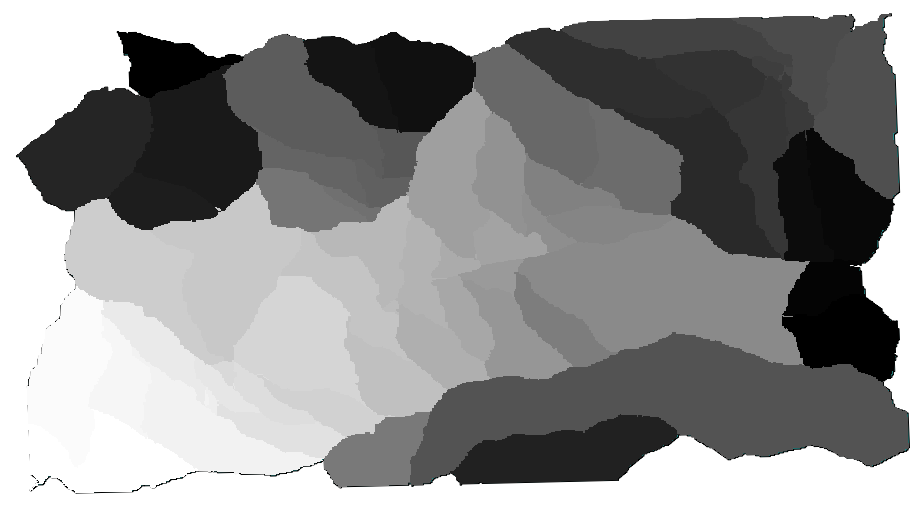
원래 벡터 레이어와 정확히 동일한 영역을 커버하는, 래스터화된 레이어를 얻을 것입니다.
In some cases, the last option, Use min covering extent from input layers, might not be available. This will happen in those algorithm that do not have input layers, but just parameters of other types. In that case, you will have to enter the value manually or use any of the other options.
선택 집합이 존재할 경우에도 범위를 계산하는 데 선택 집합을 사용하지 않으며, 선택한 피처들에 대해서만 래스터화를 했다고 하더라도 피처 집합 전체의 범위가 레이어의 범위라는 사실을 유념하십시오. 이런 경우 선택 집합에서 새 레이어를 생성한 다음 해당 레이어를 입력 레이어로 사용해야 할 수도 있습니다.