중요
번역은 여러분이 참여할 수 있는 커뮤니티 활동입니다. 이 페이지는 현재 41.18% 번역되었습니다.
17.26. 배치 공간 처리 인터페이스
참고
이 수업에서 여러 개의 서로 다른 입력값들로 단일 알고리즘을 실행할 수 있게 해주는 배치(batch) 공간 처리 인터페이스를 소개합니다.
가끔 지정한 알고리즘을 서로 다른 입력물들을 사용해서 몇 번이고 실행해야 할 때가 있습니다. 이를 테면 입력 파일 한 무리를 기존 포맷에서 다른 포맷으로 변환해야 하는 경우입니다. 또는 지정한 투영체를 사용하는 레이어 몇 개를 다른 투영체로 변환해야 하는 경우도 있겠죠.
In that case, calling the algorithm repeatedly on the toolbox is not the best option. Instead, the batch processing interface should be used, which greatly simplifies performing a multiple execution of a given algorithm. To run an algorithm as a batch process, find it in the toolbox, and instead of double-clicking on it, right-click on it and select Run as batch process.
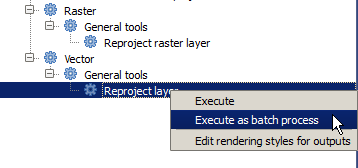
For this example, we will use the Reproject layer algorithm, so find it and do as described above. You will get to the following dialog.
이 수업을 위한 데이터를 살펴보았다면, 셰이프파일 3개를 담고 있지만 QGIS 프로젝트 파일은 없다는 것을 알 수 있을 것입니다. 왜냐 하면 알고리즘을 배치 공간 처리로 실행할 때, 입력 레이어를 현재 QGIS 프로젝트 또는 파일에서 선택할 수 있기 때문입니다. 이렇게 하면, 예를 들어 지정한 폴더 안에 있는 모든 레이어와 같은, 많은 레이어를 더 쉽게 처리할 수 있게 해줍니다.
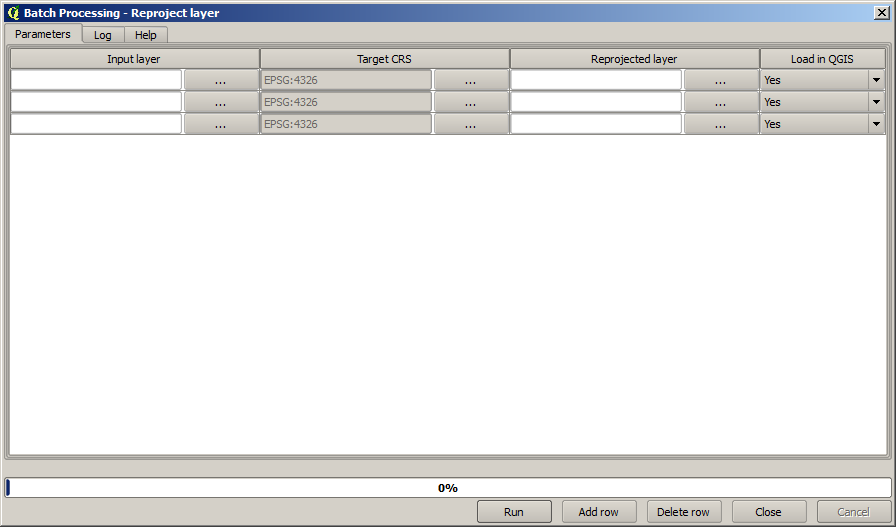
배치 공간 처리 대화창에 있는 테이블의 각 행은 해당 알고리즘의 각 실행을 나타냅니다. 각 행의 셀들은 알고리즘에 필요한 파라미터에 해당합니다. 이 파라미터들은 일반적인 단일 실행 대화창처럼 위아래로 배열되어 있는 것이 아니라 각 행에 나란히 배열되어 있습니다.
이 테이블을 대응하는 값들로 채워 실행할 배치 공간 처리를 정의하십시오. 대화창에 이 작업을 쉽게 할 수 있는 몇몇 도구들이 있습니다.
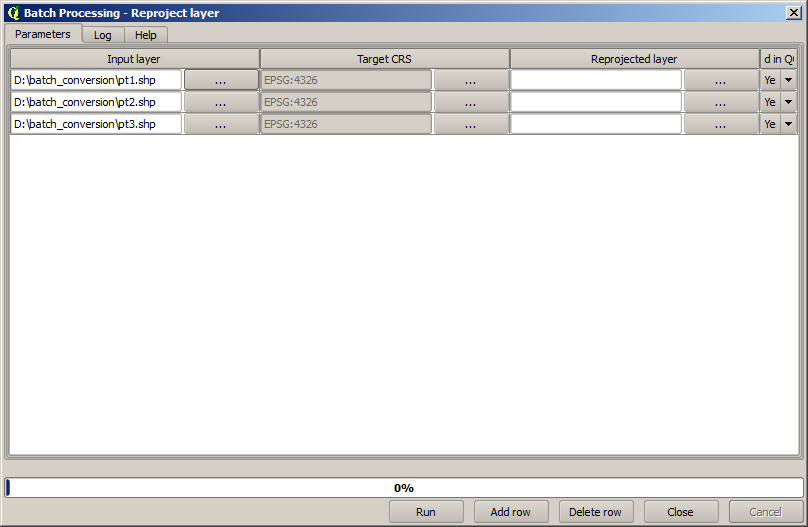
Let’s start filling the fields one by one. The first column to fill is the Input layer one. Instead of entering the names of each one of the layers we want to process, you can select all of them and let the dialog put one in each row. Click on the button in the upper-left cell, and in the file selection dialog that will popup, select the three files to reproject. Since only one of them is needed for each row, the remaining ones will be used to fill the rows underneath.
The default number of rows is 3, which is exactly the number of layers we have to convert, but if you select more layers, new rows will be added automatically. If you want to fill the entries manually, you can add more rows using the Add row button.
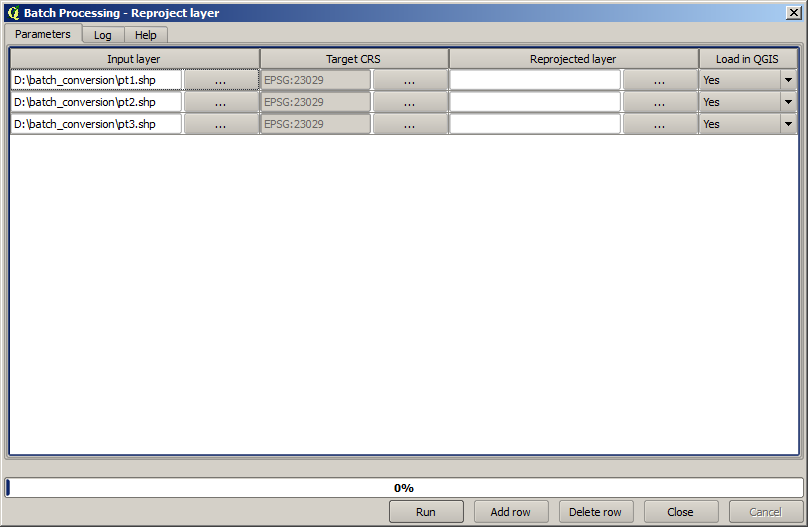
We are going to convert all those layers to the EPSG:23029 CRS, so we have to
select that CRS in the second field. We want the same on for all rows, but we
do not have to do it for every single row. Instead, set that CRS for the first
row (the one at the top) using the button in the corresponding cell, and then
double click on the column header. That causes all the cells in the column to
be filled using the value of the top cell.
Finally, we have to select an output file for each execution, which will contain
the corresponding reprojected layer. Once again, let’s do it just for the first row.
Click on the button in the upper cell and, in a folder where you want to put
your output files, enter a filename (for instance, reprojected.shp).
Now, when you click OK on the file selection dialog, the file does not automatically gets written to the cell, but an input box like the following one is shown instead.

If you select the first option, only the current cell will be filled. If you
select any of the other ones, all the rows below will be filled with a given
pattern. In this case, we are going to select the Fill with parameter value
option, and then the Input Layer value in the drop down menu below.
That will cause the value in the Input Layer (that is, the layer name) to
be added to the filename we have added, making each output filename different.
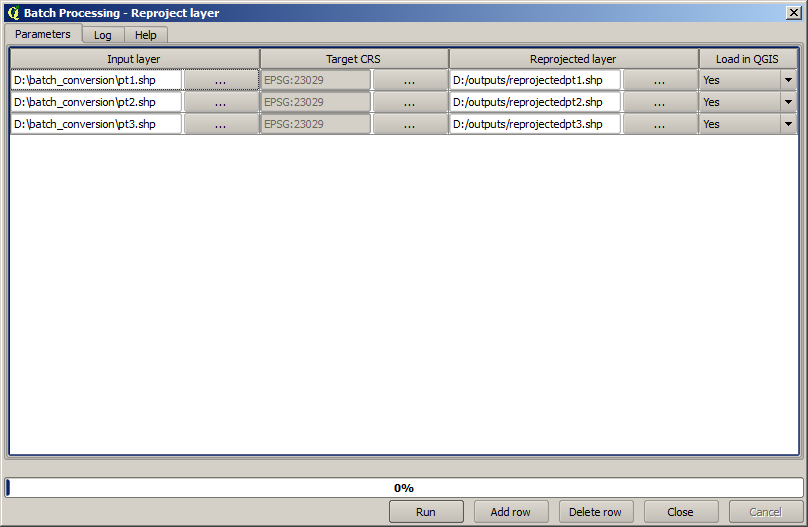
The batch processing table should now look like this.
The last column sets whether or not to add the resulting layers to the
current QGIS project. Leave the default Yes option, so you can see your
results in this case.
Click on OK and the batch process will be run. If everything went fine, all your layers will have been processed, and 3 new layers would have been created.