Outdated version of the documentation. Find the latest one here.

` `

Het item Attributentabel

It is possible to add parts of a vector attribute table to the Print Composer canvas: Click the openTable Add attribute table icon, click and drag with the left mouse button on the Print Composer canvas to place and size the item. You can better position and customize its appearance in the Item Properties panel.

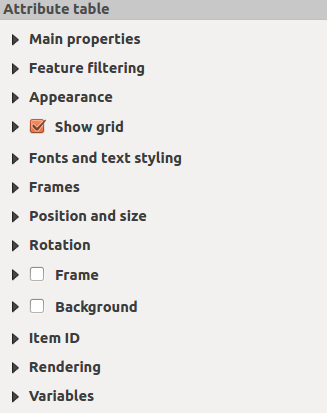
The Item properties panel of an attribute table provides the following functionalities (see figure_composer_table):

../../../../_images/attribute_properties.png

Paneel Attributentabel Item-eigenschappen

Algemene eigenschappen

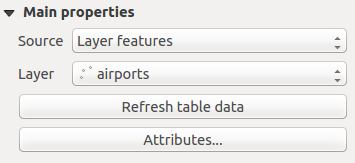
The Main properties dialog of the attribute table provides the following functionalities (see figure_composer_table_ppt):
../../../../_images/attribute_mainproperties.png

Attribute table Main properties Dialog

  • For Source you can normally select only Layer features.
  • With Layer you can choose from the vector layers loaded in the project.
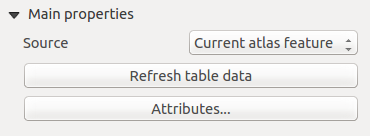
  • In case you activated the checkboxGenerate an atlas option in the Atlas generation panel, there are two additional Source possible:
    • Current atlas feature (see figure_composer_table_atlas): you won’t see any option to choose the layer, and the table item will only show a row with the attributes from the current feature of the atlas coverage layer.
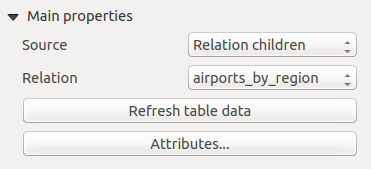
    • and Relation children (see figure_composer_table_relation): an option with the relation names will show up. This feature can only be used if you have defined a relation using your atlas coverage layer as parent, and the table will show the children rows of the atlas coverage layer’s current feature (for further information about the atlas generation, see Een atlas genereren).
  • The button [Refresh table data] can be used to refresh the table when the actual contents of the table has changed.
../../../../_images/attribute_mainatlas.png

Attributentabel Algemene eigenschappen voor ‘Huidig atlas-object’
../../../../_images/attribute_mainrelation.png

Attributentabel Algemene eigenschappen voor ‘Relatie kinderen’

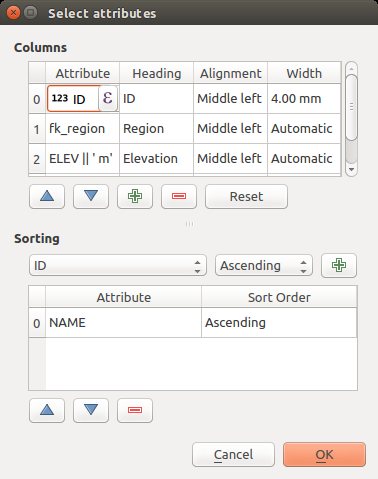
  • The button [Attributes...] starts the Select attributes menu, see figure_composer_table_select, that can be used to change the visible contents of the table. After making changes use the [OK] button to apply changes to the table. The upper part of the window shows the list of the attributes to display and the lower part helps to set the way the data is sorted.
    ../../../../_images/attribute_select.png

    Dialoogvenster Attributentabel Selecteer attributen

    In het gedeelte Kolommen kunt u:

    • Remove an attribute, just select an attribute row by clicking anywhere in the row and press the minus button to remove the selected attribute.
    • Add a new attribute use the plus button. At the end a new empty row appears and you can select empty cell of the column Attribute. You can select a field attribute from the list or you can select to build a new attribute using a regular expression (expression button). Of course you can modify every already existing attribute by means of a regular expression.
    • Use the up and down arrows to change the order of the attributes in the table.
    • Select a cell in the Headings column and, to change the heading, just type in a new name.
    • set a precise Alignment (mixing vertical and horizontal alignment options) for each column.
    • Select a cell in the Width column and change it from Automatic to a width in mm, just type a number. When you want to change it back to Automatic, use the cross.
    • The [Reset] button can always be used to restore it to the original attribute settings.

    In het gedeelte Sorteren kunt u:

    • Add an attribute to sort the table with. Select an attribute and set the sorting order to ‘Ascending’ or ‘Descending’ and press the plus button. A new line is added to the sort order list.
    • select a row in the list and use the up and down button to change the sort priority on attribute level. Selecting a cell in the Sort Order column helps you change the sorting order of the attribute field.
    • use the minus button to remove an attribute from the sort order list.

Objecten filteren

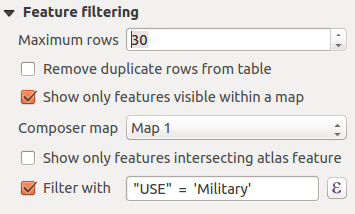
The Feature filtering dialog of the attribute table provides the following functionalities (see figure_composer_table_filter):

../../../../_images/attribute_filter.png

Attribute table Feature filtering Dialog

U kunt:

  • Het Maximaal aantal rijen, dat moet worden weergegeven, definiëren.

  • Activeren checkbox Duplicaat-rijen uit tabel verwijderen om alleen unieke records weer te geven.

  • Activate checkbox Show only visible features within a map and select the corresponding Composer map to display the attributes of features only visible on selected map.

  • Activate checkbox Show only features intersecting Atlas feature is only available when checkbox Generate an atlas is activated. When activated it will show a table with only the features which intersect the current atlas feature.

  • Activeer checkbox Filteren met en verschaf een filter door die in de invoerregel te typen of door een reguliere expressie te gebruiken met behulp van de verschafte knop expression. Een aantal voorbeelden van argumenten om te filteren die u kunt gebruiken wanneer u de laag Airports uit de voorbeeld gegevensset heeft geladen:

    • ELEV > 500
    • NAME = 'ANIAK'
    • NAME NOT LIKE 'AN%

    • regexp_match( attribute( $currentfeature, 'USE' )  , '[i]')

    De laatste reguliere expressie zal alleen de vliegvelden opnemen die de letter ‘i’ in het attribuutveld ‘USE’ hebben.

Uiterlijk

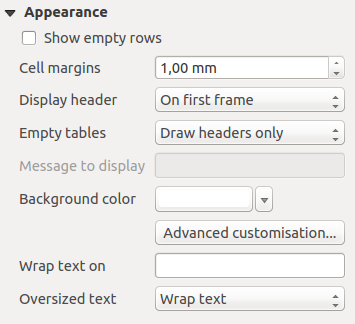
The Appearance dialog of the attribute table provides the following functionalities (see figure_composer_table_appearance):

../../../../_images/attribute_appearance.png

Attribute table appearance Dialog

  • Klik op checkbox Lege rijen tonen zal de attributentabel vullen met lege cellen. Deze optie kan ook worden gebruikt om aanvullende lege cellen te maken wanneer u een resultaat wilt weergeven!

  • Met Celmarges kunt u de marge rondom de tekst in elke cel van de tabel definiëren.

  • Met kop weergeven kunt u één optie uit een lijst selecteren, ‘Op eerste frame’, ‘Op alle frames’ standaard optie, of ‘Geen kop’.

  • De optie Lege tabel beheert wat zal worden weergegeven als de selectie van het resultaat leeg is.

    • Alleen koppen tekenen, zal alleen de kop tekenen, tenzij u ‘Geen kop’ heeft gekozen voor Kop weergeven.

    • Gehele tabel verbergen, zal alleen de achtergrond van de tabel tekenen. U kunt checkbox Geen achtergrond tekenen als frame leeg is activeren in Frames om de tabel volledig te verbergen.

    • Ingesteld bericht tonen, zal de kop tekenen en voegt een cel toe die zich uitstrekt over alle kolommen en geeft een bericht weer als ‘Geen resultaten’ die kan worden opgegeven in de optie Weer te geven bericht

  • De optie Weer te geven bericht tonen wordt alleen geactiveerd wanneer u Ingesteld bericht tonen voor Lege tabel heeft geselecteerd. Het opgegeven bericht zal worden weergegeven in de eerste rij van de tabel, als het resultaat een lege tabel is.

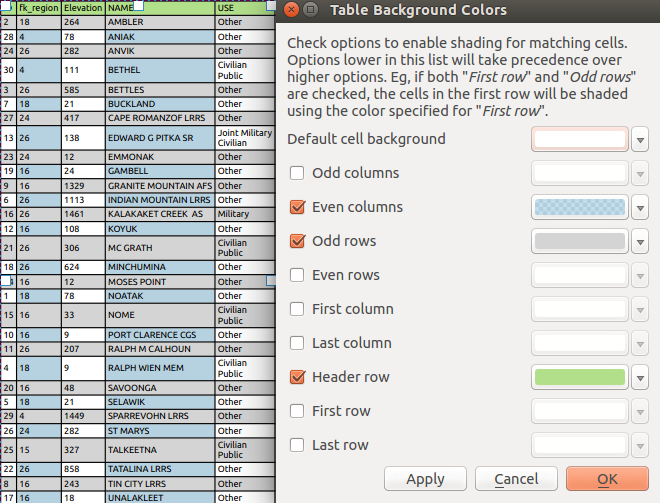
  • With Background color you can set the background color of the table. The Advanced customization option helps you define different background colors for each cell (see figure_composer_table_background)
../../../../_images/attribute_background.png

Dialoogvenster Attributentabel Geavanceerd Achtergrondkleur

  • Met de optie Tekstterugloop aan kunt u een teken definiéren waarbij de celinhoud naar een nieuwe regel gaat als het teken wordt tegengekomen

  • With Oversized text you define the behaviour when the width set for a column is smaller than its content’s length. It can be Wrap text or Truncate text.

Raster tonen

The Show grid dialog of the attribute table provides the following functionalities (see figure_composer_table_grid):

../../../../_images/attribute_grid.png

Attribute table Show grid Dialog

  • Activate checkbox Show grid when you want to display the grid, the outlines of the table cells.
  • Met Lijndikte kunt u de dikte van de lijnen, die in het raster worden gebruikt, instellen.

  • The Color of the grid can be set using the color selection dialog.

Opmaak lettertypen en tekst

The Fonts and text styling dialog of the attribute table provides the following functionalities (see figure_composer_table_fonts):

../../../../_images/attribute_fonts.png

Attribute table Fonts and text styling Dialog

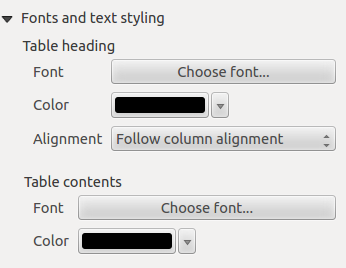
  • You can define Font and Color for Table heading and Table contents.
  • For Table heading you can additionally set the Alignment to Follow column alignment or override this setting by choosing Left, Center or Right. The column alignment is set using the Select Attributes dialog (see Figure_composer_table_select ).

Frames

The Frames dialog of the attribute table provides the following functionalities (see figure_composer_table_frames):

../../../../_images/attribute_frame.png

Attribute table Frames Dialog

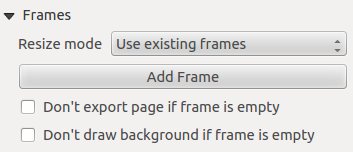
  • Met Modus Formaat wijzigen kunt u selecteren hoe de inhoud van de attributentabel moet worden gerenderd:

    • Use existing frames displays the result in the first frame and added frames only.
    • Extend to next page will create as many frames (and corresponding pages) as necessary to display the full selection of attribute table. Each frame can be moved around on the layout. If you resize a frame, the resulting table will be divided up between the other frames. The last frame will be trimmed to fit the table.
    • Repeat until finished will also create as many frames as the Extend to next page option, except all frames will have the same size.
  • Use the [Add Frame] button to add another frame with the same size as selected frame. The result of the table that will not fit in the first frame will continue in the next frame when you use the Resize mode Use existing frames.
  • Activate checkbox Don’t export page if frame is empty prevents the page to be exported when the table frame has no contents. This means all other composer items, maps, scalebars, legends etc. will not be visible in the result.
  • Activeren van checkbox Geen achtergrond tekenen als frame leeg is voorkomt dat de achtergrond wordt getekend als het tabelframe geen inhoud heeft.