Outdated version of the documentation. Find the latest one here.

` `

속성 테이블 항목

It is possible to add parts of a vector attribute table to the Print Composer canvas: Click the openTable Add attribute table icon, click and drag with the left mouse button on the Print Composer canvas to place and size the item. You can better position and customize its appearance in the Item Properties panel.

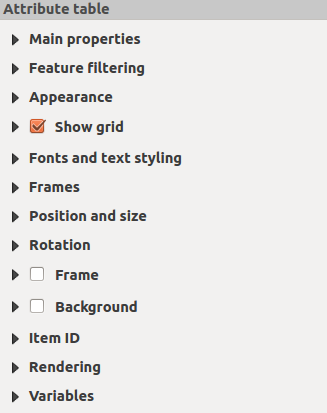
The Item properties panel of an attribute table provides the following functionalities (see figure_composer_table):

../../../../_images/attribute_properties.png

속성 테이블 항목 속성 패널

주요 속성

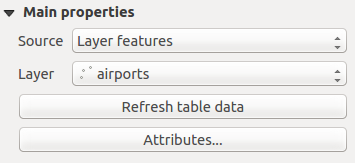
The Main properties dialog of the attribute table provides the following functionalities (see figure_composer_table_ppt):
../../../../_images/attribute_mainproperties.png

Attribute table Main properties Dialog

  • For Source you can normally select only Layer features.
  • With Layer you can choose from the vector layers loaded in the project.
  • In case you activated the checkboxGenerate an atlas option in the Atlas generation panel, there are two additional Source possible:
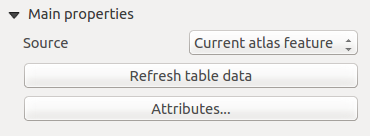
    • Current atlas feature (see figure_composer_table_atlas): you won’t see any option to choose the layer, and the table item will only show a row with the attributes from the current feature of the atlas coverage layer.
    • and Relation children (see figure_composer_table_relation): an option with the relation names will show up. This feature can only be used if you have defined a relation using your atlas coverage layer as parent, and the table will show the children rows of the atlas coverage layer’s current feature (for further information about the atlas generation, see 지도책 생성).
  • The button [Refresh table data] can be used to refresh the table when the actual contents of the table has changed.
../../../../_images/attribute_mainatlas.png

‘Current atlas feature’에 대한 속성 테이블 주요 속성
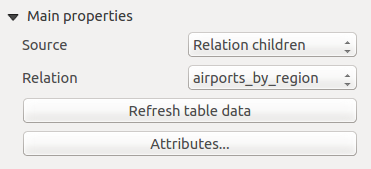
../../../../_images/attribute_mainrelation.png

‘Relation children’에 대한 속성 테이블 주요 속성

  • The button [Attributes...] starts the Select attributes menu, see figure_composer_table_select, that can be used to change the visible contents of the table. After making changes use the [OK] button to apply changes to the table. The upper part of the window shows the list of the attributes to display and the lower part helps to set the way the data is sorted.
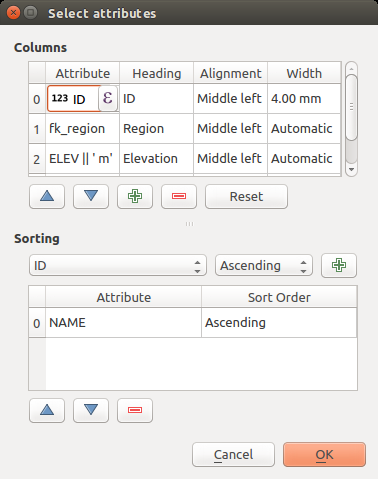
    ../../../../_images/attribute_select.png

    속성 테이블 속성 선택 대화창

    Columns 부분에서 다음 작업을 할 수 있습니다:

    • Remove an attribute, just select an attribute row by clicking anywhere in the row and press the minus button to remove the selected attribute.
    • Add a new attribute use the plus button. At the end a new empty row appears and you can select empty cell of the column Attribute. You can select a field attribute from the list or you can select to build a new attribute using a regular expression (expression button). Of course you can modify every already existing attribute by means of a regular expression.
    • Use the up and down arrows to change the order of the attributes in the table.
    • Select a cell in the Headings column and, to change the heading, just type in a new name.
    • set a precise Alignment (mixing vertical and horizontal alignment options) for each column.
    • Select a cell in the Width column and change it from Automatic to a width in mm, just type a number. When you want to change it back to Automatic, use the cross.
    • The [Reset] button can always be used to restore it to the original attribute settings.

    Sorting 부분에서 다음 작업을 할 수 있습니다:

    • Add an attribute to sort the table with. Select an attribute and set the sorting order to ‘Ascending’ or ‘Descending’ and press the plus button. A new line is added to the sort order list.
    • select a row in the list and use the up and down button to change the sort priority on attribute level. Selecting a cell in the Sort Order column helps you change the sorting order of the attribute field.
    • use the minus button to remove an attribute from the sort order list.

객체 필터링

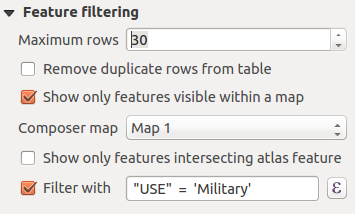
The Feature filtering dialog of the attribute table provides the following functionalities (see figure_composer_table_filter):

../../../../_images/attribute_filter.png

Attribute table Feature filtering Dialog

이 대화창에서 다음 작업을 할 수 있습니다:

  • Maximum rows 옵션에서 표시할 최대 행 개수를 정의할 수 있습니다.

  • checkbox Remove duplicate rows from table 옵션을 활성화하면 유일한 레코드만 표시할 수 있습니다.

  • Activate checkbox Show only visible features within a map and select the corresponding Composer map to display the attributes of features only visible on selected map.

  • Activate checkbox Show only features intersecting Atlas feature is only available when checkbox Generate an atlas is activated. When activated it will show a table with only the features which intersect the current atlas feature.

  • checkbox Filter with 옵션을 활성화하면 입력 란에 필터를 직접 입력하거나 또는 옆에 있는 expression 버튼을 눌러 정규 표현식을 삽입할 수 있습니다. 다음은 QGIS 예시 데이터셋에서 airports 레이어를 불러온 경우 사용할 수 있는 필터링 선언문의 몇몇 예시입니다:

    • ELEV > 500
    • NAME = 'ANIAK'
    • NAME NOT LIKE 'AN%'
    • regexp_match( attribute( $currentfeature, 'USE' )  , '[i]')

    마지막 정규 표현식은 ‘USE’ 속성 필드에 i 문자가 있는 공항만 포함시킬 것입니다.

모양

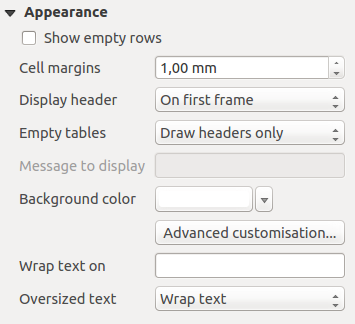
The Appearance dialog of the attribute table provides the following functionalities (see figure_composer_table_appearance):

../../../../_images/attribute_appearance.png

Attribute table appearance Dialog

  • checkbox Show empty rows 를 체크하면 속성 테이블에 빈 셀들이 표시됩니다. 사용자가 표시해야 할 산출물이 있는 경우 빈 셀들을 추가하는 데 이 옵션을 쓸 수도 있습니다!

  • Cell margins 옵션에서 테이블의 각 셀에 있는 텍스트 주위의 여백을 정의할 수 있습니다.

  • Display header 콤보박스 목록에서 헤더 표시를 ‘On first frame’, 기본 값인 ‘On all frames’, 또는 ‘No header’ 가운데 하나로 설정할 수 있습니다.

  • Empty tables 옵션은 산출물 집합이 비어 있는 경우 무엇을 표시할 것인지 제어합니다.

    • Draw headers only: Display header 옵션에서 ‘No header’를 선택하지 않았다면, 헤더만 렌더링합니다.

    • Hide entire table: 테이블의 배경만 렌더링합니다. 테이블을 완전히 숨기려면 Frames 대화창에 있는 checkbox Don’t draw background if frame is empty 옵션을 활성화해야 합니다.

    • Show set message: 헤더를 렌더링하고 모든 열들을 포괄하는 셀을 추가한 다음 ‘No result’ 같은 메시지를 표시합니다. Message to display 옵션에서 이 메시지를 지정할 수 있습니다.

  • Message to display 옵션은 Empty tables 에서 Show set message 를 선택한 경우에만 활성화됩니다. 여기에 입력한 메시지는 산출물이 빈 테이블인 경우 테이블의 첫 행에 표시될 것입니다.

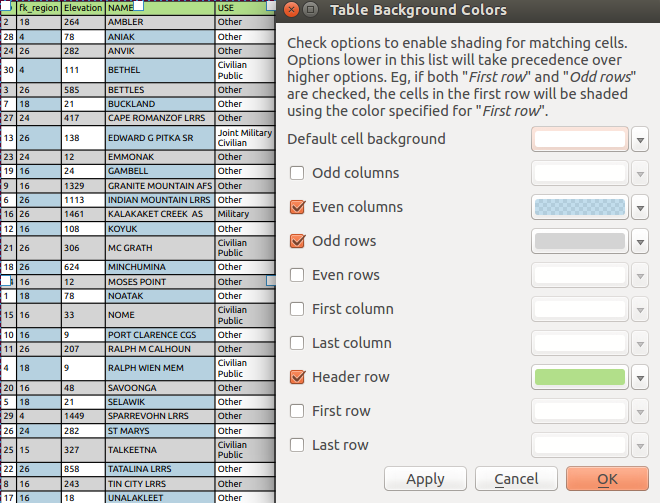
  • With Background color you can set the background color of the table. The Advanced customization option helps you define different background colors for each cell (see figure_composer_table_background)
../../../../_images/attribute_background.png

속성 테이블 고급 배경 대화창

  • Wrap text on 옵션에서 셀 내부의 행갈이 문자를 정의할 수 있습니다.

  • With Oversized text you define the behaviour when the width set for a column is smaller than its content’s length. It can be Wrap text or Truncate text.

그리드 표시

The Show grid dialog of the attribute table provides the following functionalities (see figure_composer_table_grid):

../../../../_images/attribute_grid.png

Attribute table Show grid Dialog

  • Activate checkbox Show grid when you want to display the grid, the outlines of the table cells.
  • Line width: 그리드에 사용되는 라인의 두께를 설정합니다.

  • The Color of the grid can be set using the color selection dialog.

폰트 및 텍스트 스타일

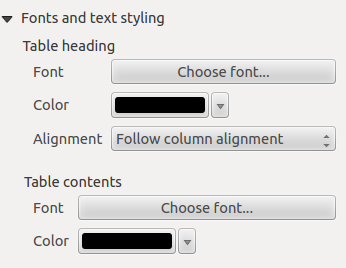
The Fonts and text styling dialog of the attribute table provides the following functionalities (see figure_composer_table_fonts):

../../../../_images/attribute_fonts.png

Attribute table Fonts and text styling Dialog

  • You can define Font and Color for Table heading and Table contents.
  • For Table heading you can additionally set the Alignment to Follow column alignment or override this setting by choosing Left, Center or Right. The column alignment is set using the Select Attributes dialog (see Figure_composer_table_select ).

프레임

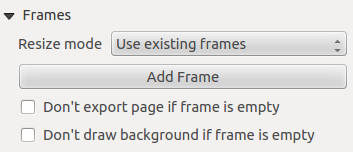
The Frames dialog of the attribute table provides the following functionalities (see figure_composer_table_frames):

../../../../_images/attribute_frame.png

Attribute table Frames Dialog

  • Resize mode 콤보박스 목록에서 속성 테이블의 내용을 어떻게 렌더링할지 선택할 수 있습니다:

    • Use existing frames displays the result in the first frame and added frames only.
    • Extend to next page will create as many frames (and corresponding pages) as necessary to display the full selection of attribute table. Each frame can be moved around on the layout. If you resize a frame, the resulting table will be divided up between the other frames. The last frame will be trimmed to fit the table.
    • Repeat until finished will also create as many frames as the Extend to next page option, except all frames will have the same size.
  • Use the [Add Frame] button to add another frame with the same size as selected frame. The result of the table that will not fit in the first frame will continue in the next frame when you use the Resize mode Use existing frames.
  • Activate checkbox Don’t export page if frame is empty prevents the page to be exported when the table frame has no contents. This means all other composer items, maps, scalebars, legends etc. will not be visible in the result.
  • checkbox Don’t draw background if frame is empty 옵션을 활성화하면, 테이블 프레임에 아무 내용도 없을 때 배경을 렌더링할 수 없게 됩니다.