15.8. Lesson: レーザー測量データからのDEM
さまざまな背景画像を使用することで、地図の外観を改善できます。基本地図も以前に使用してきた空撮画像も使用できますが、地形の陰影起伏ラスターが見栄えを良くする状況もあるでしょう。
LAStoolsを使用してレーザー測量データセットからDEMを抽出し、その後、地図のプレゼンテーションで使用する陰影起伏ラスターを作成します。
このレッスンの目標: LAStoolsをインストールし、レーザー測量データと陰影起伏ラスターからDEMを計算します。
15.8.1.  Follow Along: LAStoolsをインストールする
Managing LiDAR data within QGIS is possible using the Processing framework and the algorithms provided by LAStools.
レーザー測量点群からデジタル標高モデル(DEM)を取得して、プレゼンテーション目的のために、視覚的により直感的な陰影起伏ラスターを作成できます。最初に、 プロセッシング フレームワークの設定を、LAStoolsで動作するように適切に設定する必要があります。
QGISをすでに開始している場合は閉じます。
古いライダープラグインは、フォルダ C:/Program Files/QGISValmiera/apps/qgis/python/plugins/processing/ 内のシステムにデフォルトでインストールされる可能性があります。
名前 lidar のフォルダがある場合、それを削除します。これは、QGIS 2.2および2.4の一部のインストールのために有効です。
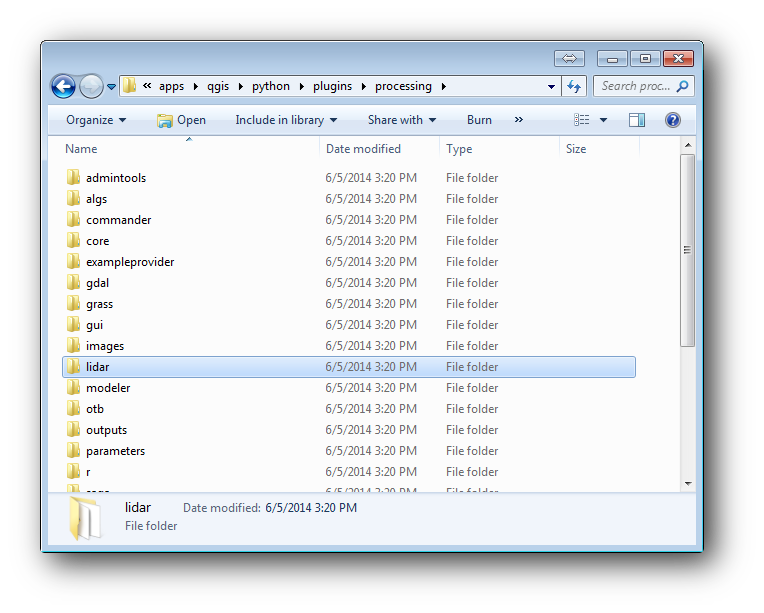
- Go to the exercise_data\forestry\lidar\ folder, there you can find the file QGIS_2_2_toolbox.zip. Open it and extract the lidar folder to replace the one you just deleted.
- If you are using a different QGIS version, you can see more installation instructions in this tutorial.
Now you need to install the LAStools to your computer. Get the newest lastools version here and extract the content of the lastools.zip file into a folder in your system, for example, c:\lastools\. The path to the lastools folder cannot have spaces or special characters.
ノート
lastools フォルダ内部の LICENSE.txt ファイルをお読みください。LAStoolsの一部はオープンソースであり、他は、クローズドソースであり、ほとんどの商用および政府の使用のライセンスが必要です。教育と評価の目的のためには、必要なだけLAStoolsを使用してテストできます。
今プラグインと実際のアルゴリズムはお手元のコンピュータにインストールされ、使用する準備がほぼできていますので、それらの使用を開始するために処理フレームワークを設定することが必要であるだけです。
QGISで新しいプロジェクトを開きます。
プロジェクトのCRSを ETRS89 / ETRS-TM35FIN に設定してください。
プロジェクトを forest_lidar.qgs として保存します。
QGISでLAStoolsを設定するには:
プロセッシング ‣ オプションと構成 に行きます。
処理オプション ダイアログで、 プロバイダー に、その後 LiDARデータのためのツール に行きます。
Activate をチェックします。
LAStoolsフォルダ について C:\lastools\ (またはLAStoolsを展開したフォルダ)を設定します。

15.8.2. Follow Along: LAStoolsとDEMの計算
いくつかのSAGAアルゴリズムを実行するために、 Lesson: 空間統計 中の プロセッシング ツールボックスはすでに使用してきました。ここではLAStoolsプログラムを実行するためにそれを使用しようとしています。
プロセッシング ‣ ツールボックス を開きます。
一番下にあるドロップダウンメニューで、高度なインターフェイス を選択します。
レーザー測量データ カテゴリのツールが表示されるはずです。
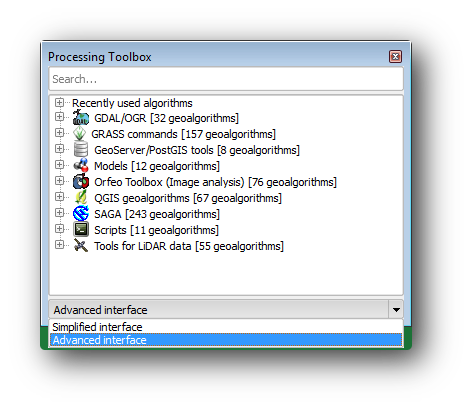
利用可能なツールが見えるようにそれを展開し、さらに LAStools カテゴリを展開します(アルゴリズムの数は変化する場合があります)。
lasview アルゴリズムが見つかるまで下にスクロールし、見つかったらダブルクリックして開きます。
- At Input LAS/LAZ file, browse to exercise_data\forestry\lidar\ and select the rautjarvi_lidar.laz file.

実行 をクリックします。
今、 ほんの少しLASとLAZダイアログウィンドウビューア 内にLiDARデータを見ることができます:
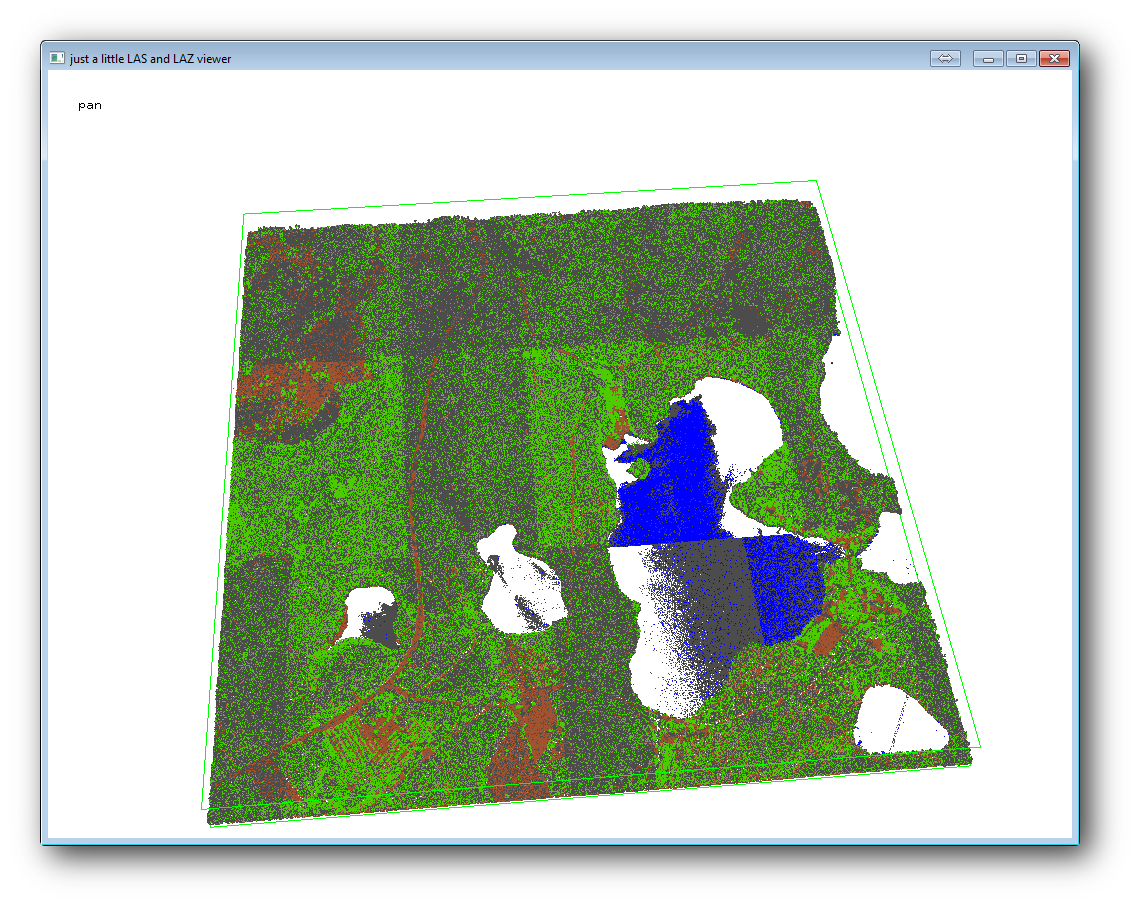
このビューア内ではいろいろなことができますが、今はビューアをクリックおよびドラッグしてLiDAR点群にパンし、それがどのように見えるかを確認できます。
ノート
If you want to know further details on how the LAStools work, you can read the README text files about each of the tools, in the C:\lastools\bin\ folder. Tutorials and other materials are available at the Rapidlasso webpage.
準備ができたら、ビューアを閉じます。
LAStoolsとDEMの作成は2段階で行うことができます。第1は点群を 基準 と 非基準 点に分類すること、次は 基準 点のみ使用してDEMを計算すること。
処理ツールボックス に戻ります。
検索... ボックス注意して、 lasground と書いてください。
ダブルクリックして lasground ツールを開き、この画像のように設定します:

- The output file is saved to the same folder where the rautjarvi_lidar.laz is located and it is named rautjarvi_lidar_1.las.
それを確認したい場合は、lasview で開くことができます。
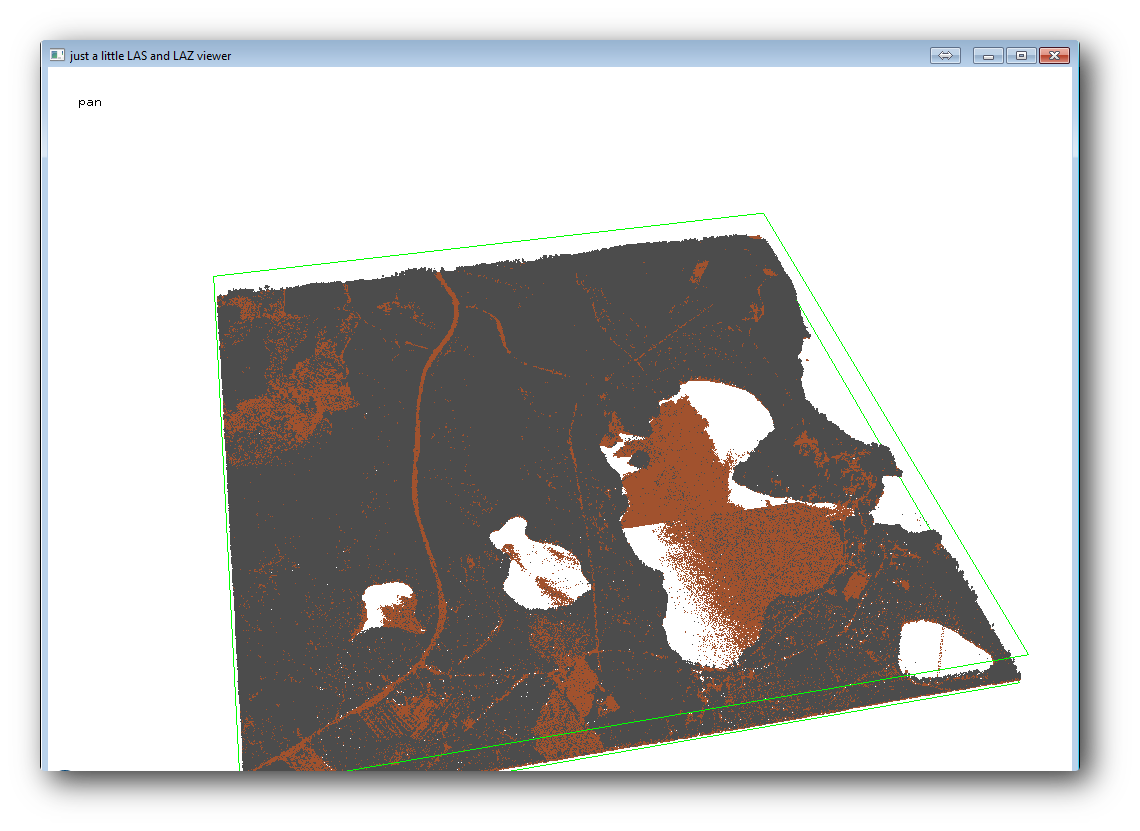
The brown points are the points classified as ground and the gray ones are the rest, you can click the letter g to visualize only the ground points or the letter u to see only the unclassified points. Click the letter a to see all the points again. Check the lasview_README.txt file for more commands. If you are interested, also this tutorial about editing LiDAR points manually will show you different operations within the viewer.
再びビューアを閉じます。
プロセッシングツールボックス で las2dem を検索します。
las2dem ツールを開き、この画像に示すように設定します。

結果DEMは、 出力ラスターファイル という一般的な名前で地図に追加されます。
ノート
lasground と las2dem ツールはライセンスが必要です。ライセンス・ファイルに示されるように、無免許でツールを使用できますが、画像結果にはっきりわかる対角線が出ます。
15.8.3. Follow Along: 地形陰影起伏を作成する
For visualization purposes, a hillshade generated from a DEM gives a better visualization of the terrain:
ラスター ‣ 地形分析 ‣ 陰影 を開きます。
- As the Output layer, browse to exercise_data\forestry\lidar\ and name the file hillshade.tif.
デフォルトの設定でパラメーターの残りの部分を残します。
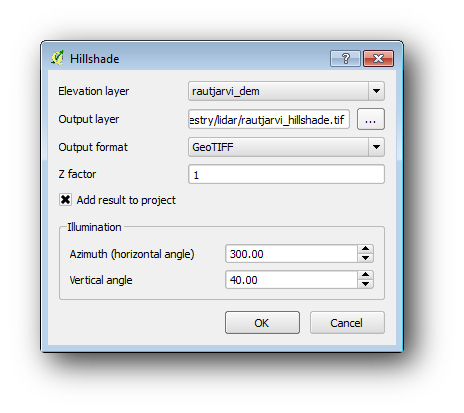
プロンプトが表示されたら ETRS89 / ETRS-TM35FIN をCRSとして選択します。
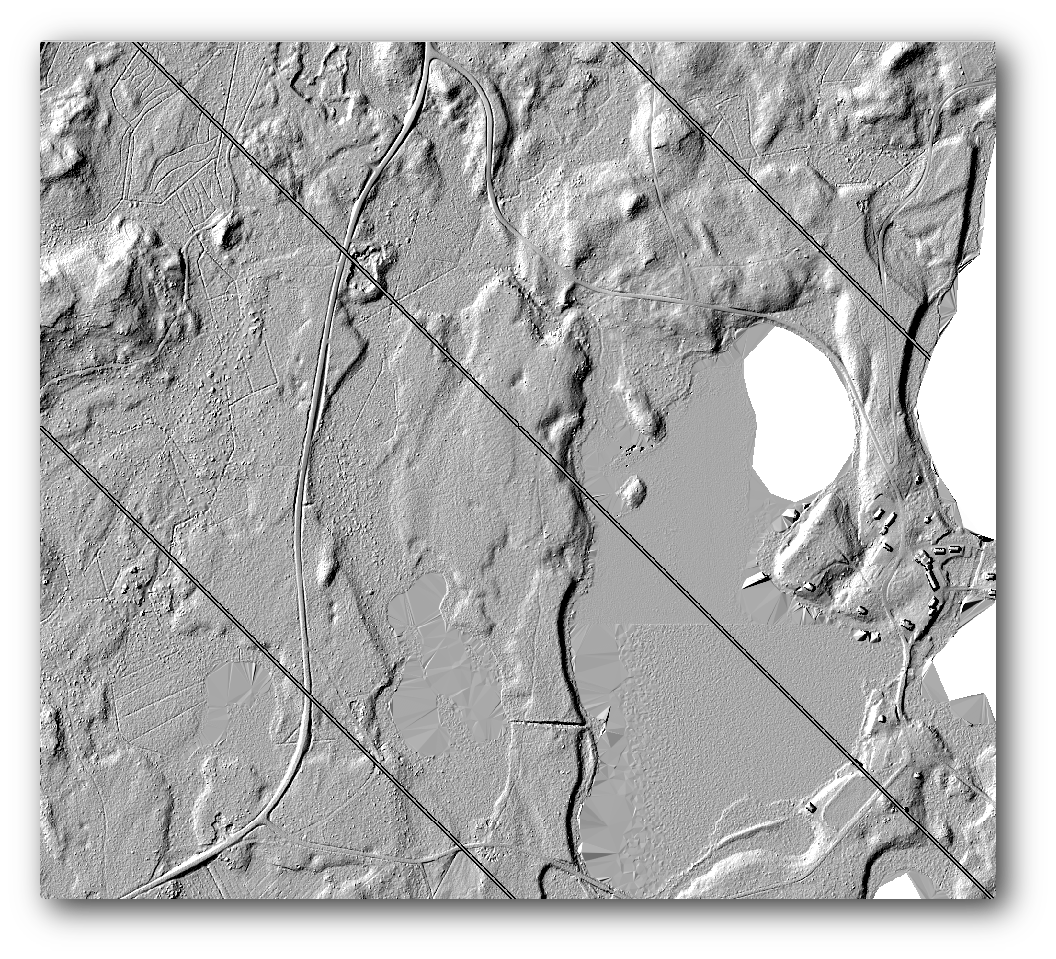
陰影起伏ラスター結果に残っている対角線にもかかわらず、明らかに地域の正確な起伏を見ることができます。森に掘られている異なる土壌の排水も見ることができます。
15.8.4. In Conclusion
Using LiDAR data to get a DEM, specially in forested areas, gives good results with not much effort. You could also use ready LiDAR derived DEMs or other sources like the SRTM 9m resolution DEMs. Either way, you can use them to create a hillshade raster to use in your map presentations.
15.8.5. What’s Next?
次の、そしてこのモジュールの最後のステップの、レッスンでは、陰影起伏ラスターと森林目録の結果を使用して、結果の地図のプレゼンテーションを作成します。