12.1. Lesson: GRASSのセットアップ
QGISでGRASSを使用するにはインターフェイスを少し異なる方法で考える必要があります。QGISで直接作業しているのではなくQGIS を通じて GRASSで作業していることを覚えておいて下さい。したがって、GrassをサポートするQGIS Desktopがインストールされていることを確認してください。
 To open a QGIS session with GRASS available on Windows you have to click
on the
To open a QGIS session with GRASS available on Windows you have to click
on the QGIS Desktop with GRASS icon.
このレッスンの目標: QGISでGRASSのプロジェクトを始めます。
12.1.1.  Follow Along: Start a New GRASS Session
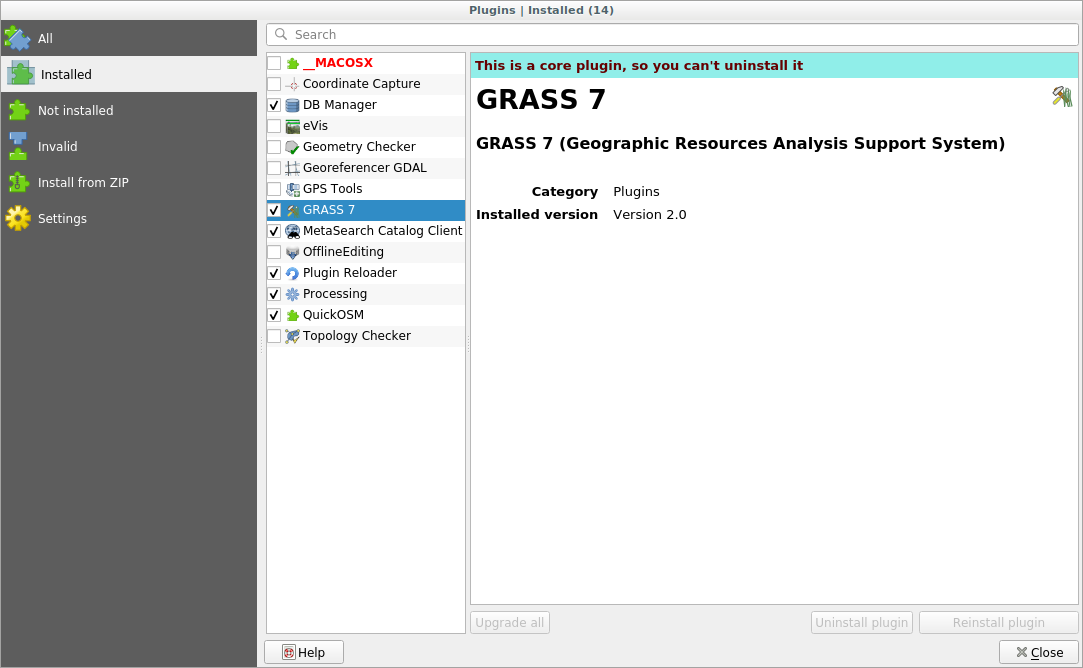
To launch GRASS from within QGIS, you need to activate it as with any other plugin:
First, open a new QGIS project.
プラグインマネージャ で GRASS を有効にします:
The GRASS toolbar and the GRASS panel will appear:

図 12.28 GRASS toolbar
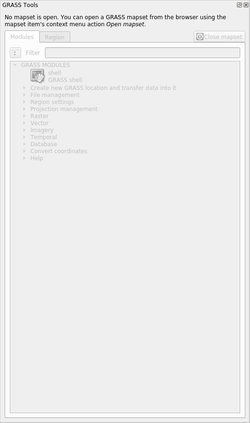
図 12.29 GRASS Panel
GRASSパネルはアクティブではありません。なぜならGRASSを使用する前に Mapset を作成する必要があるためです。GRASSは常にデータベース環境で動作します。つまり、使用するすべてのデータをGRASSデータベースにインポートする必要があります。
GRASSデータベースは、一見すると非常に複雑に見えても、単純な構造になっています。知っておくべき最も重要なことは、データベースの上位レベルが「Location」であることです。各 Location には異なる Mapset を含めることができます:すべての Mapset 中には、GRASSによってデフォルトで作成されるため、 PERMANENT マップセットがあります。各 Mapset には特定の構造でデータ(ラスタ、ベクタなど)が含まれますが、心配しないでください。GRASSがこれを処理してくれます。
Just remember: Location contains Mapset that contains the data. For more
information visit the GRASS website.
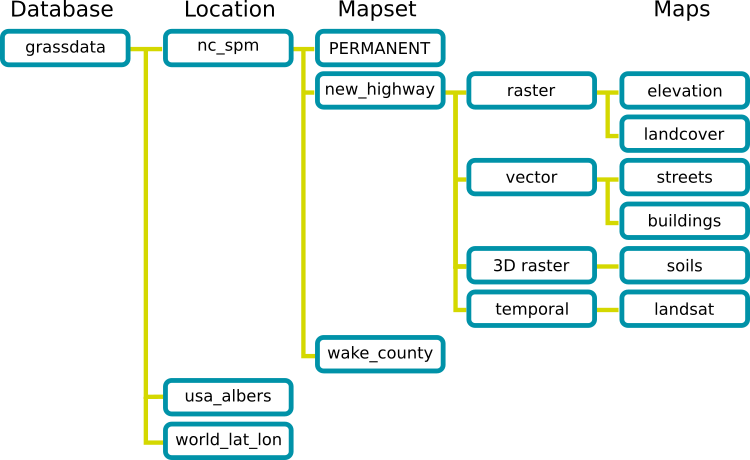
図 12.30 GRASS database structure (from GRASS docs)
12.1.2. Follow Along: 新しいGRASSプロジェクトの開始
Click on the Plugins --> GRASS --> New Mapset menu:

You'll be asked to choose the location of the GRASS database.
データベースを構成するためにそれをGRASSが使用するディレクトリとして設定します:
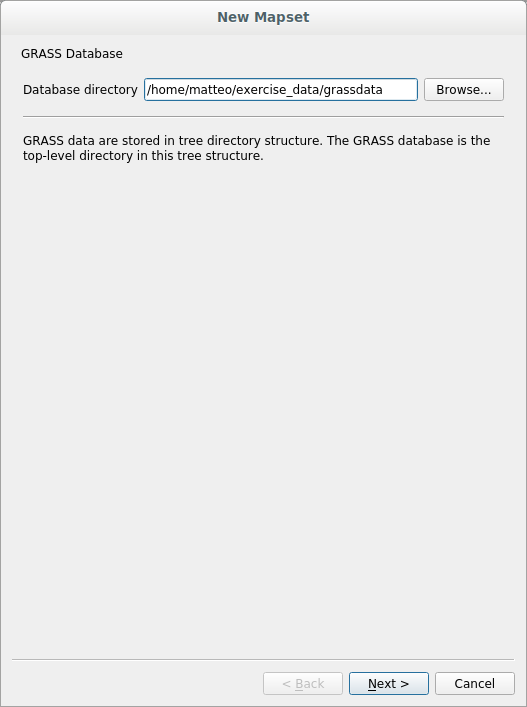
次へ をクリックします。
GRASSでは Location を作成する必要があります。 Location は作業しようとしている地理的領域(Grass Region ともいわれる)の最大範囲を定義します。
注釈
Region は、GRASSですべてのレイヤーが考慮されるエリアを記述するため、GRASSにとって非常に重要です。外にあるものはすべて考慮されません。でもご心配なく、場所が作成された後、いつでもGRASSリージョンの範囲を変更できます
Call the new location
SouthAfrica: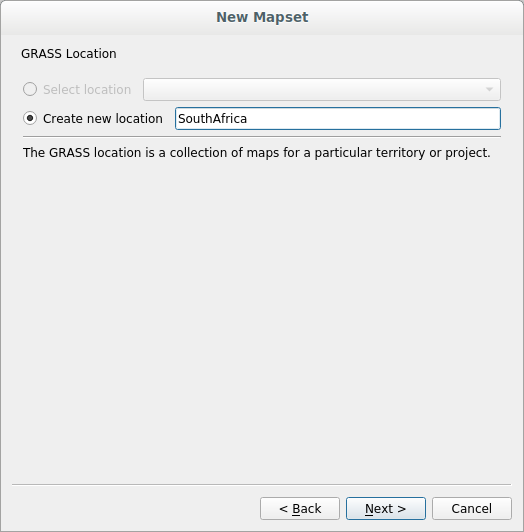
次へ をクリックします。
We'll be working with
WGS 84, so search for and select this CRS: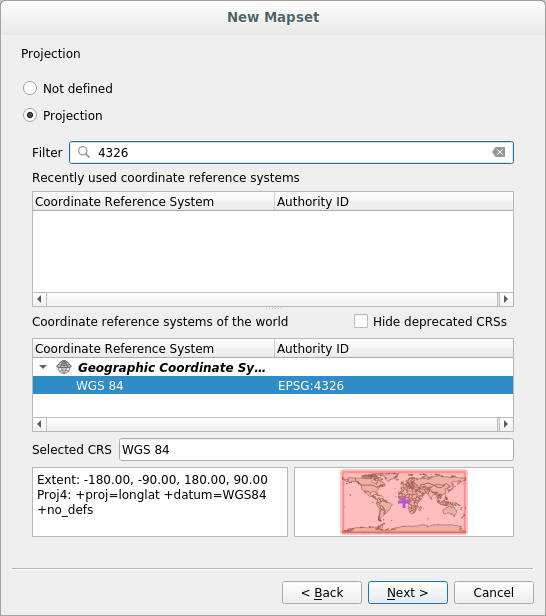
次へ をクリックします。
ドロップダウンリストから South Africa の領域を選択して、 設定 をクリックします:
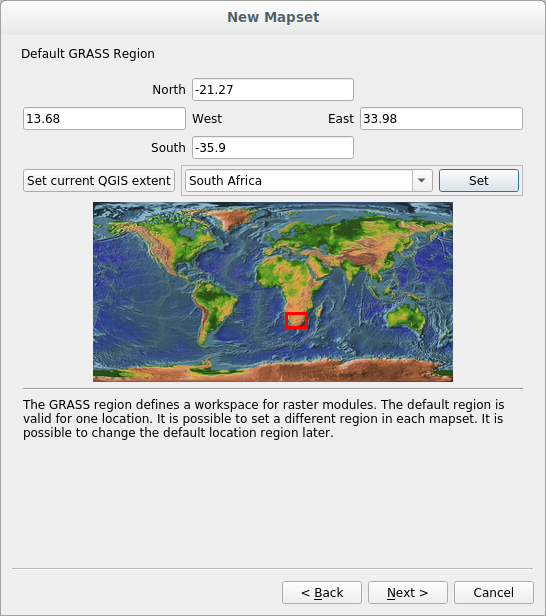
次へ をクリックします。
マップセットを作成します。あなたがこれから作業するマップファイルです。
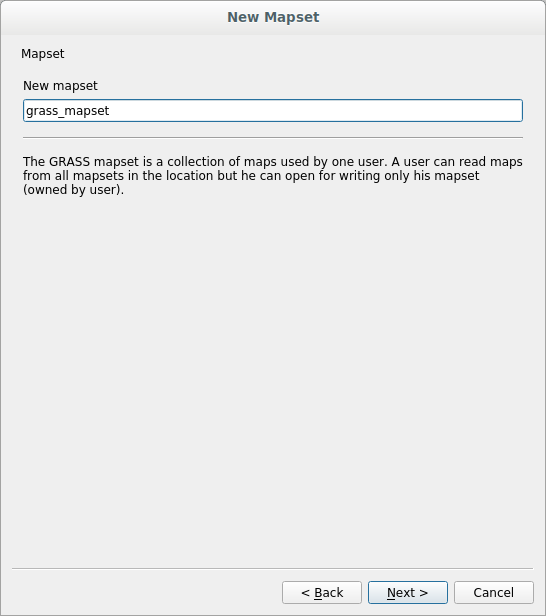
Once you're done, you'll see a dialog asking with a summary of all the information entered.
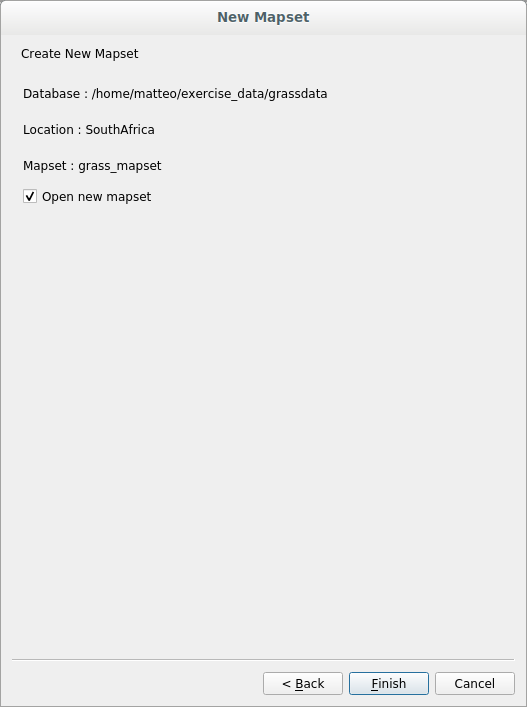
完了 をクリックします。
成功ダイアログで OK をクリックします。
You will see that the GRASS Panel will become active and you can start to use all GRASS tools.
12.1.3. Follow Along: GRASSにベクターデータを読み込む
今はマップは空白であり、すべてのGRASSツールの使用を開始するには、データをGRASSデータベース、特に Mapset にロードする必要があります。 GRASS Mapset にロードされていないレイヤーではGRASSツールを使用できません。
There are many different ways to load data in the GRASS database. Let's start with the first one.
Follow Along: Load data using the QGIS Browser
In section ブラウザパネル we saw that the easiest and quickest way to load the data in QGIS is the Browser Panel.
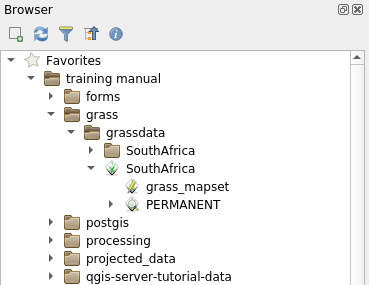
GRASSデータはQGISブラウザから 実際の GRASSデータとして認識され、GRASSマップセットの隣にGRASSアイコンが表示されるため気付くことができます。さらに、開いているマップセットの横に  アイコンが表示されます。
注釈
You will see a replication of the GRASS Location as normal folder:
GRASS Mapset data are those within the  folder
You can easily drag and drop layers from a folder to the GRASS Mapset.
Let's try to import the roads layer into the grass_mapset Mapset
of the SouthAfrica Location.
Go to the Browser, and simply drag the roads layer from the
training_data.gpkg GeoPackage file into the grass_mapset Mapset.
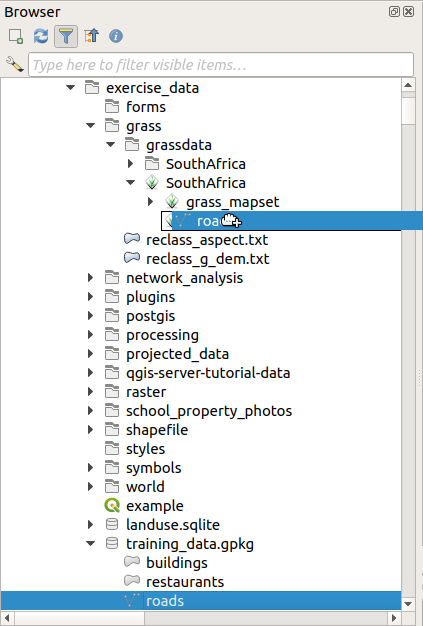
それでおしまい!マップセットを展開すると、インポートされた roads レイヤが表示されます。これで、インポートされたレイヤを他のすべてのレイヤと同様にQGISにロードできます。
ちなみに
レイヤ凡例パネルからブラウザパネルのマップセットにレイヤを読み込むこともできます。これにより、ワークフローが驚くほど高速になります!
Follow Along: Load data using the GRASS Panel
We will use now the long method to load the rivers.shp layer into the
same Mapset.
Load data into QGIS as usual. Use the
rivers.shpdataset (found in theexercise_data/shapefile/folder)ロードされたらすぐに、「GRASS Panel」の Filter ボックスをクリックし、「v.in.ogr.qgis」という用語を入力してベクタインポートツールを見つけます。
警告
似たようなツールが2つあります:
v.in.ogr.qgisとv.in.ogr.qgis.loc。探しているのは 1つめ です。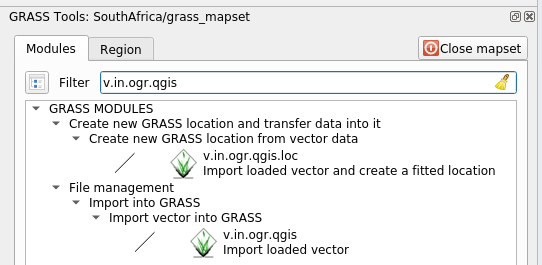
v は ベクタ 、
inはGRASSデータベースにデータをインポートする関数を意味します。ogrはベクタデータの読み込みに使用されるソフトウェア・ライブラリです。そしてqgisは、そのツールがQGISに既に読み込まれたベクタの中からベクタを探すことを意味します。Once you've found this tool, click on it to bring up the tool itself. Choose the rivers layer in the Loaded Layer box and type and name it
g_riversto prevent confusion: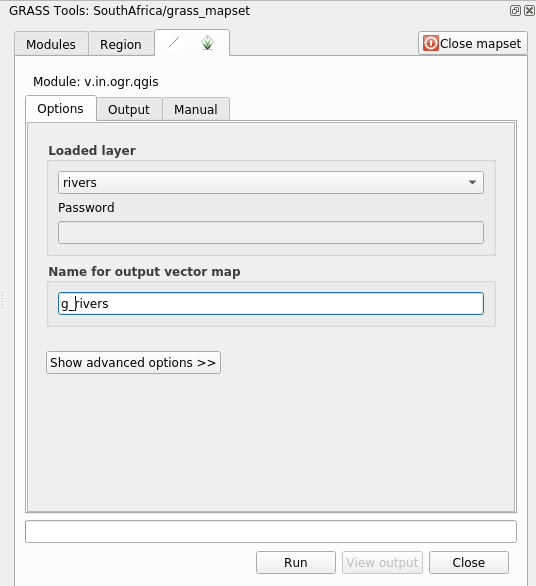
注釈
 別のインポートオプションが アドバンスドオプション で提供されています。データのインポートに使用するSQLクエリのWHERE句を追加する機能が含まれます。
実行 をクリックしてインポートを開始します。
それが終わったら 出力を見る をクリックして新しくインポートされたGRASSレイヤを地図に表示します。
まずインポートツールを閉じて (出力を見る のすぐ右にある 閉じる ボタンをクリックします)、そして GRASSツール ウィンドウを閉じます。
Remove the original rivers layer.
今、QGISの地図に表示されているのはインポートされたGRASSレイヤーだけです。
12.1.4. Follow Along: GRASSにラスターデータを読み込む
You can import a raster layer in the same ways we imported vector layers.
We are going to import in the GRASS Mapset the layer srtm_41_19_4326.tif.
注釈
ラスタレイヤは既に正しいCRS、「WGS 84」にあります。レイヤが異なるCRSにある場合は、GRASSマップセットの同じCRSに再投影する必要があります
Load the
srtm_41_19_4326.tiflayer in QGISGRASSツール ダイアログを再度開きます。
モジュールリスト タブをクリックします。
Search for
r.in.gdal.qgisand double click the tool to open the tool's dialog.Set it up so that the input layer is
srtm_41_19_4326.tifand the output isg_dem.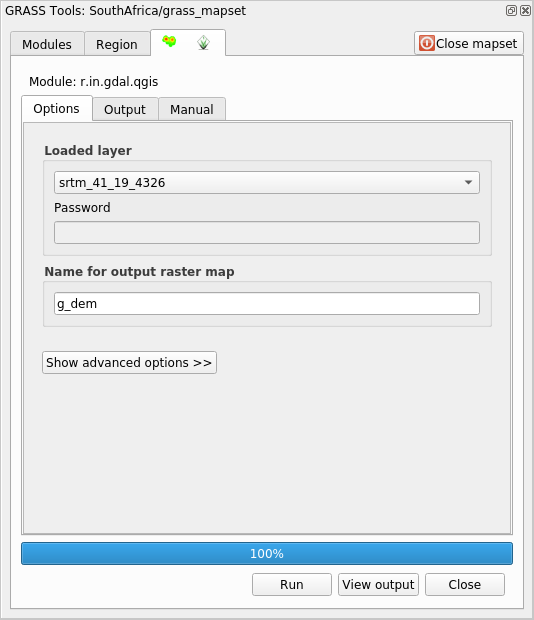
実行 をクリックします。
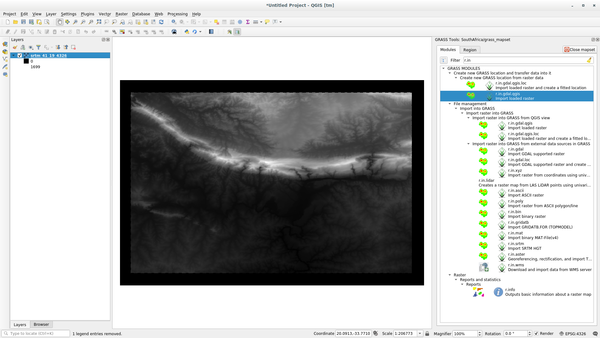
処理が完了したら 出力を見る をクリックします。
現在のタブを閉じ、そしてダイアログボックスを閉じます。
You may now remove the original
srtm_41_19_4326.tiflayer.
12.1.5. Try Yourself Add Layers to Mapset
Try to import in the GRASS Mapset the vector layers water.shp and
places.shp from the exercise_data/shapefile/ folder. As we did
for rivers rename the imported layer as g_water and g_places
to avoid confusion
12.1.6. Open an existing GRASS Mapset
If you have an existing GRASS Mapset you can easily reopen it in another session of QGIS.
You have several method to open a GRASS Mapset, let's explore some of them.
Let's close the Mapset by clicking on the Close Mapset button of the GRASS Tools window.
Follow Along: Using the GRASS plugin
Click on the Plugins --> GRASS --> Open Mapset menu next to the Plugins --> GRASS --> New Mapset menu that we saw in the previous section.
GRASSデータベースフォルダを参照します。注意してください! GRASSマップセットのフォルダではなく、親フォルダを選択する必要があります。実際、GRASSはデータベースのすべての「ロケーション」と各「ロケーション」のすべての「マップセット」を読み取ります:
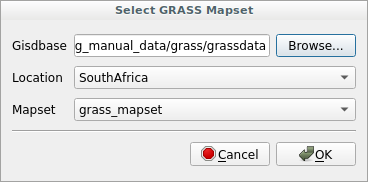
Choose the
LocationSouthAfrica and theMapsetgrass_mapset that we have created before.
That's it! The GRASS Panel will become active meaning that the Mapset has been correctly opened.
Follow Along: Using the QGIS Browser
Even faster and easier is opening a Mapset using the QGIS Browser:
GRASS Tools ウィンドウの Close Mapset ボタンをクリックして、Mapsetを閉じます(開いている場合)。
In the QGIS Browser, browse to the folder of the GRASS database.
Right click on the Mapset (remember, the Mapset has the
GRASS icon
next to it). You will see some options.Click on Open mapset:
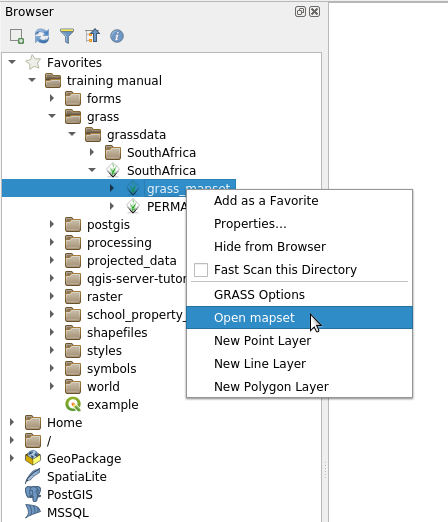
The Mapset is now open and ready to use!
ちなみに
Right click on a GRASS Mapset offers you a lot of different settings. Try to explore them and see all the useful options.
12.1.7. In Conclusion
GRASSはデータを空間データベース構造にロードするため、GRASSのデータ収集ワークフローはQGISの方法とは多少異なります。しかし、フロントエンドとしてQGISを使用することによってGRASSのデータソースとしてQGIS内の既存レイヤーを使用でき、GRASSマップセットのセットアップを簡単にすることができます。
12.1.8. What's Next?
データはGRASSにインポートされました。GRASSの高度な分析操作を見ることができます。