18.2. Lesson: Utilizzo di DB Manager per lavorare con i Database Spaziali in QGIS
Abbiamo già visto come eseguire molte operazioni sui database con QGIS così come con altri strumenti, ma ora è il momento di guardare lo strumento DB Manager che fornisce molte di queste stesse funzionalità così come strumenti di gestione più avanzati.
L’obiettivo di questa lezione: Imparare a interagire con i database spaziali usando il QGIS DB Manager.
18.2.1.  Follow Along: Gestione dei database PostGIS con DB Manager
Dovresti prima aprire l’interfaccia DB Manager selezionando :guilabel:`Database –> DB Manager… ` nel menu o selezionando l’icona DB Manager sulla barra degli strumenti.

Dovresti già vedere le connessioni precedenti che abbiamo configurato ed essere in grado di espandere la sezione myPG e il suo schema public per vedere le tabelle con cui abbiamo lavorato nelle sezioni precedenti.
La prima cosa che puoi notare è che ora puoi vedere alcuni metadati sugli schemi contenuti nel tuo database.
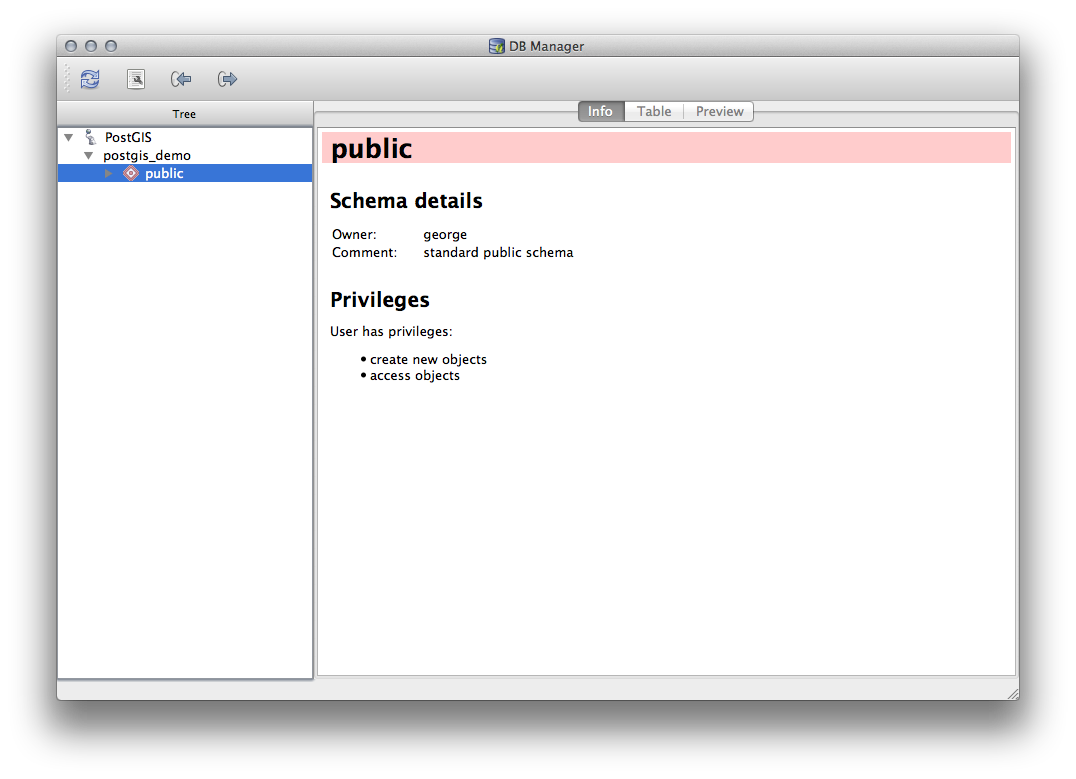
Gli schemi sono un modo di raggruppare tabelle di dati e altri oggetti in un database PostgreSQL e un contenitore per permessi e altri vincoli. La gestione degli schemi PostgreSQL va oltre lo scopo di questo manuale, ma si possono trovare maggiori informazioni su di essi in PostgreSQL documentation on Schemas. Puoi usare il DB Manager per creare nuovi schemi, ma avrai bisogno di usare uno strumento come pgAdmin III o l’interfaccia a riga di comando per gestirli efficacemente.
DB Manager può anche essere usato per gestire le tabelle all’interno del tuo database. Abbiamo già visto vari modi per creare e gestire tabelle nella linea di comando, ma ora vediamo come fare questo in DB Manager.
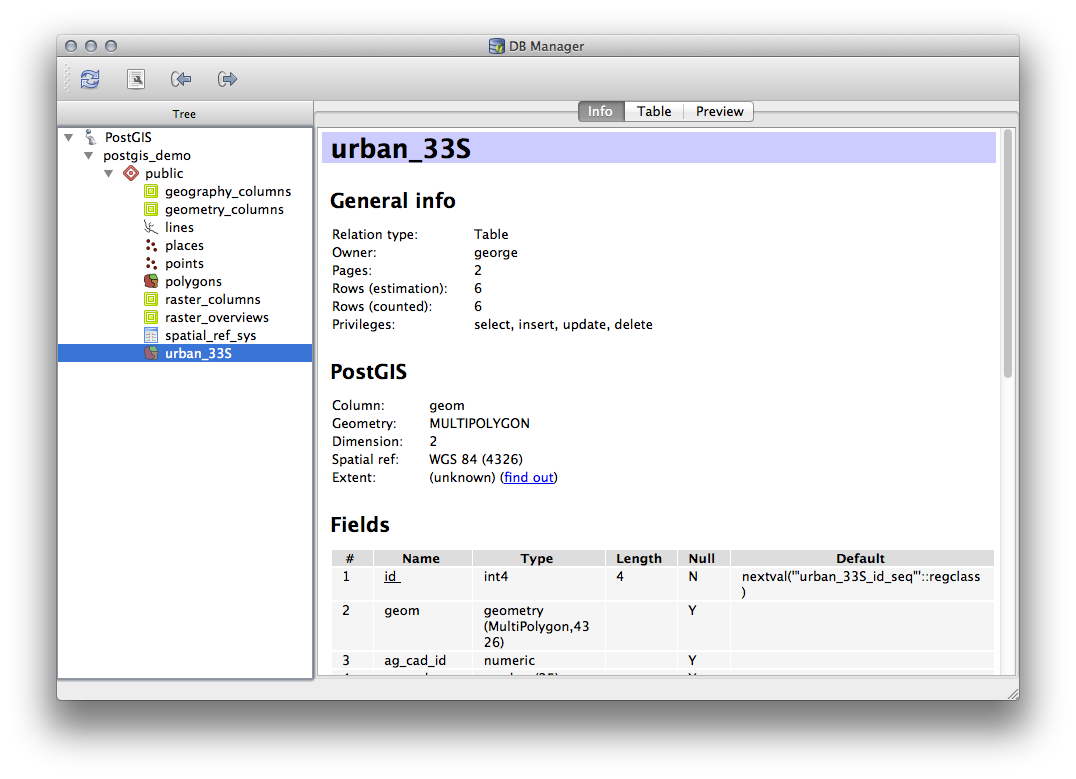
First, its useful to just look at a table’s metadata by clicking on its name in tree and looking in the Info tab.
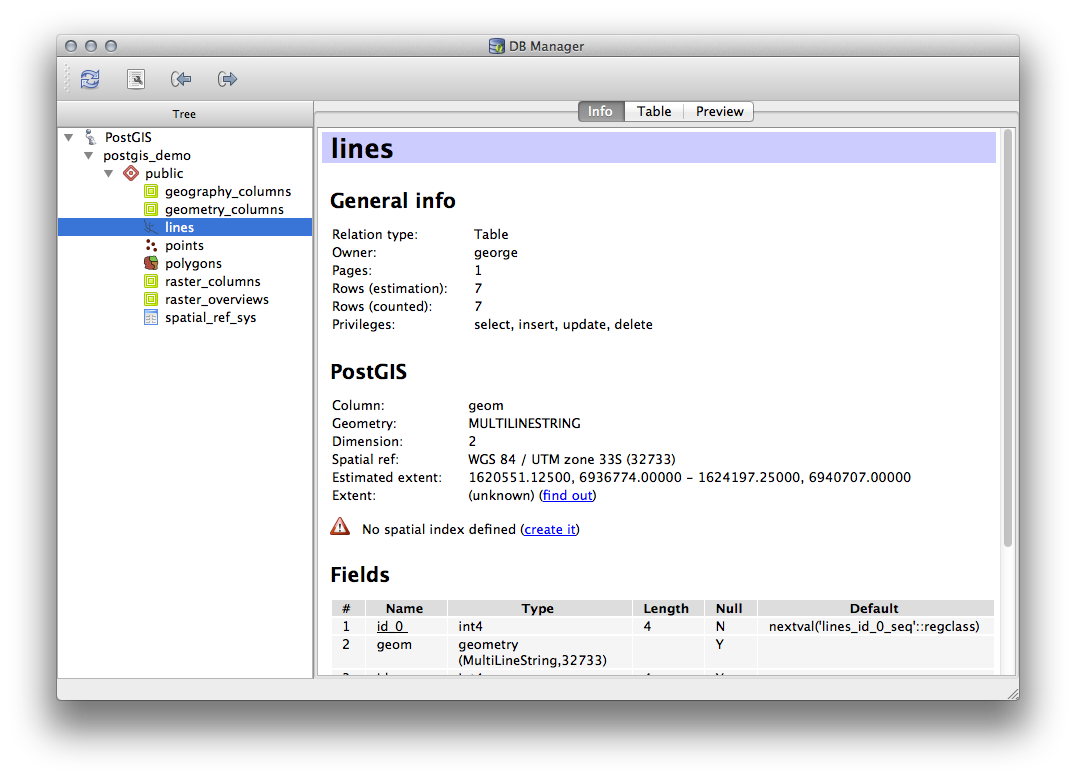
In this panel you can see the General Info about the table as well the information that the PostGIS extension maintains about the geometry and spatial reference system.
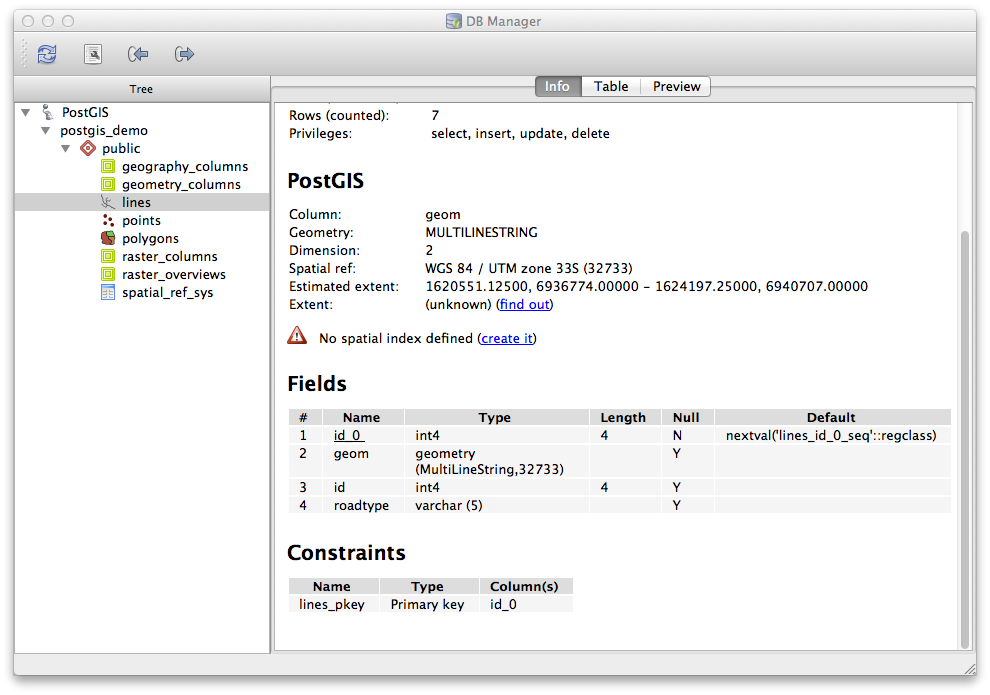
If you scroll down in the Info tab, you can see more information about the Fields, Constraints and Indexes for the table you are viewing.
Its also very useful to use DB Manager to simply look at the records in the database in much the same way you might do this by viewing the attribute table of a layer in the Layer Tree. You can browse the data by selecting the Table tab.
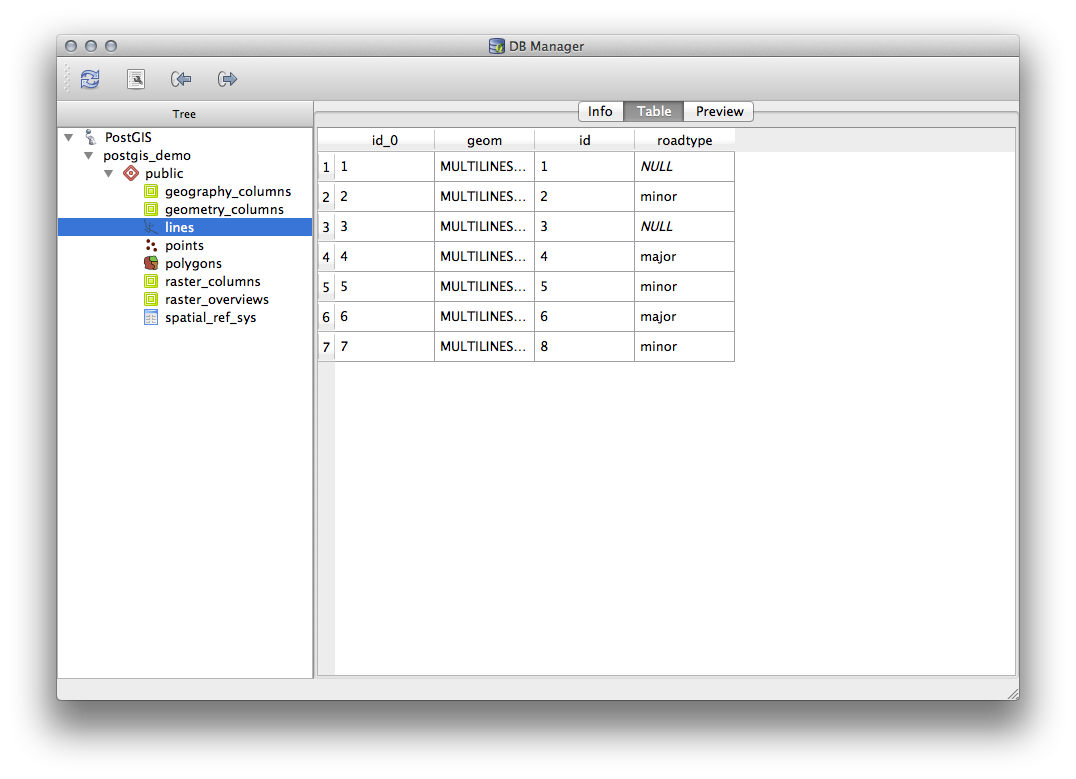
There is also a Preview tab which will show you the layer data in a map preview.
Right-clicking on a layer in the tree and clicking Add to Canvas will add this layer to your map.
Finora abbiamo solo visualizzato il database, i suoi schemi e le sue tabelle e i suoi metadati, ma cosa succederebbe se volessimo alterare la tabella per aggiungere una colonna aggiuntiva, ad esempio? DB Manager vi permette di farlo direttamente.
Seleziona la tabella che vuoi modificare nell’albero
Select from the menu, to open the Table Properties dialog.
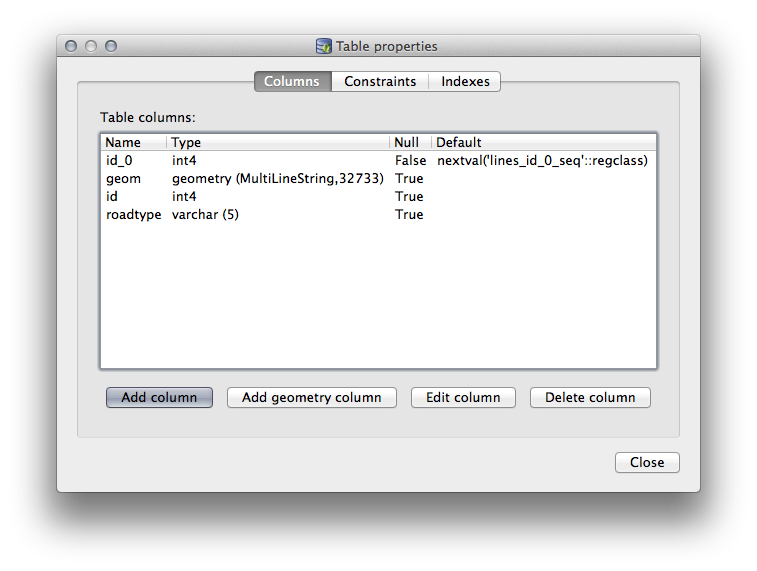
Puoi usare questa finestra di dialogo per Aggiungere Colonne, aggiungere Colonne Geometria, modificare colonne esistenti o rimuovere completamente una colonna.
Using the Constraints tab, you can manage which fields are used as the primary key or to drop existing constraints.

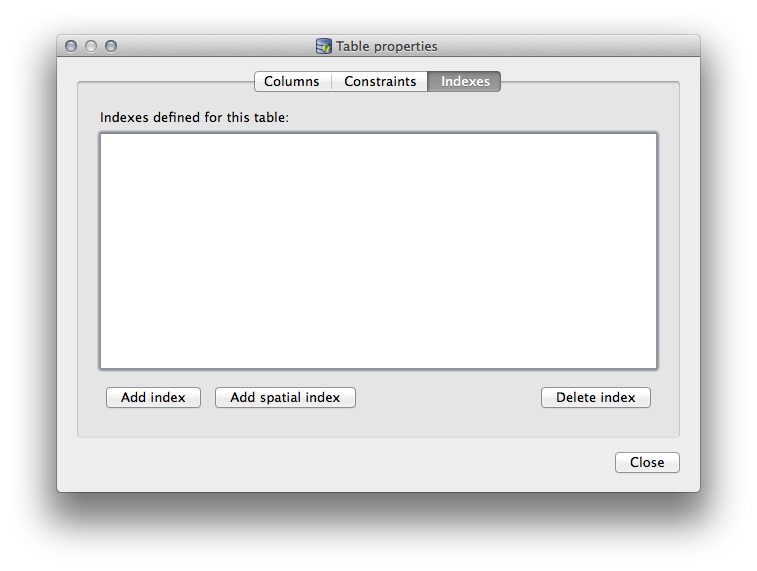
The Indexes tab can be used to add and delete both spatial and normal indexes.
18.2.2. Follow Along: Creare una Nuova Tabella
Ora che abbiamo esaminato il processo di lavoro con le tabelle esistenti nel nostro database, usiamo DB Manager per creare una nuova tabella.
Se non è già aperta, apri la finestra DB Manager ed espandi l’albero finché non vedi la lista delle tabelle già presenti nel tuo database.
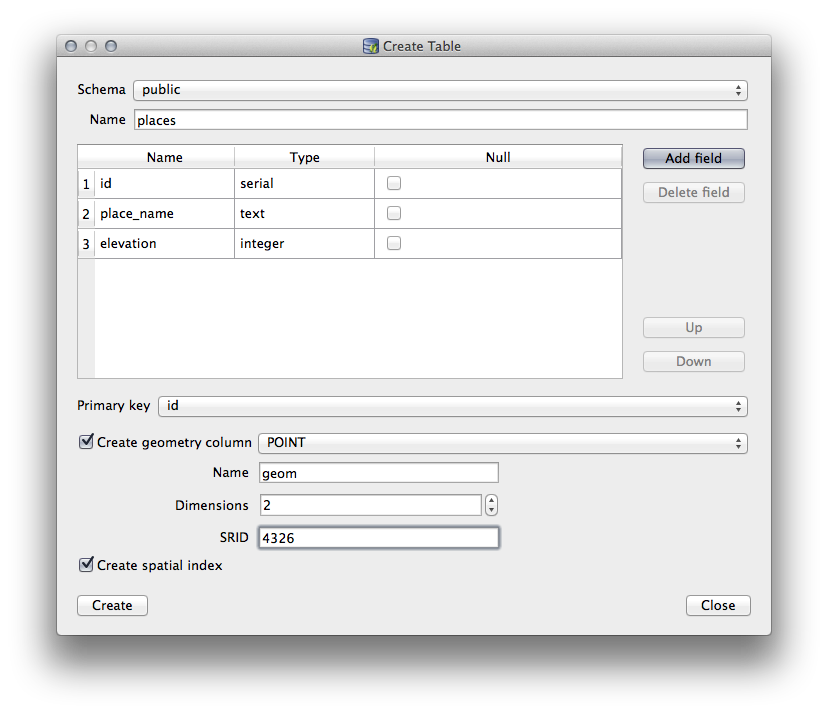
From the menu select Table –> Create Table to bring up the Create Table dialog.
Use the default
Publicschema and name the tableplaces.Aggiungi i campi
id,place_nameeelevationcome mostrato qui sottoAssicurati che il campo
idsia impostato come chiave primaria.Click the checkbox to Create geometry column and make sure it is set to a
POINTtype and leave it namedgeomand specify4326as the SRID.Click the checkbox to Create spatial index and click Create to create the table.
Dismiss the dialog letting you know that the table was created and click Close to close the Create Table Dialog.
You can now inspect your table in the DB Manager and you will of course find that there is no data in it. From here you can Toggle Editing on the layer menu and begin to add places to your table.
18.2.3. Follow Along: Gestione di base del database
Il DB Manager ti permetterà anche di fare alcune attività di base per l’amministrazione del database. Non è certamente un sostituto per uno strumento più completo per l’amministrazione del database, ma fornisce alcune funzionalità che puoi usare per gestire il tuo database.
Le tabelle dei database possono spesso diventare piuttosto grandi e le tabelle che vengono modificate frequentemente possono finire per lasciare in giro residui di record che non sono più necessari a PostgreSQL. Il comando VACUUM si occupa di fare una sorta di pulizia per compattare e facoltativamente analizzare le tue tabelle per migliorare le prestazioni.
Let us take a look at how we can perform a VACUUM ANALYZE command from within DB Manager.
Seleziona una delle tue tabelle nell’albero del DB Manager
Select from the menu
PostgreSQL ora eseguirà l’operazione. A seconda di quanto è grande la tua tabella, questo potrebbe richiedere del tempo per essere completato.
Puoi trovare maggiori informazioni sul processo VACUUM ANALYZE nella PostgreSQL Documentation on VACUUM ANALYZE.
18.2.4. Follow Along: Esecuzione di query SQL con DB Manager
DB Manager fornisce anche un modo per scrivere query sulle tabelle del tuo database e per visualizzare i risultati. Abbiamo già visto questo tipo di funzionalità nel pannello Browser, ma vediamo di nuovo qui con DB Manager.
Select the
linestable in the tree.Select the SQL window button in the DB Manager toolbar.

Compose the following SQL query in the space provided:
select * from lines where roadtype = 'major';
Click the Execute (F5) button to run the query.
You should now see the records that match in the Result panel.
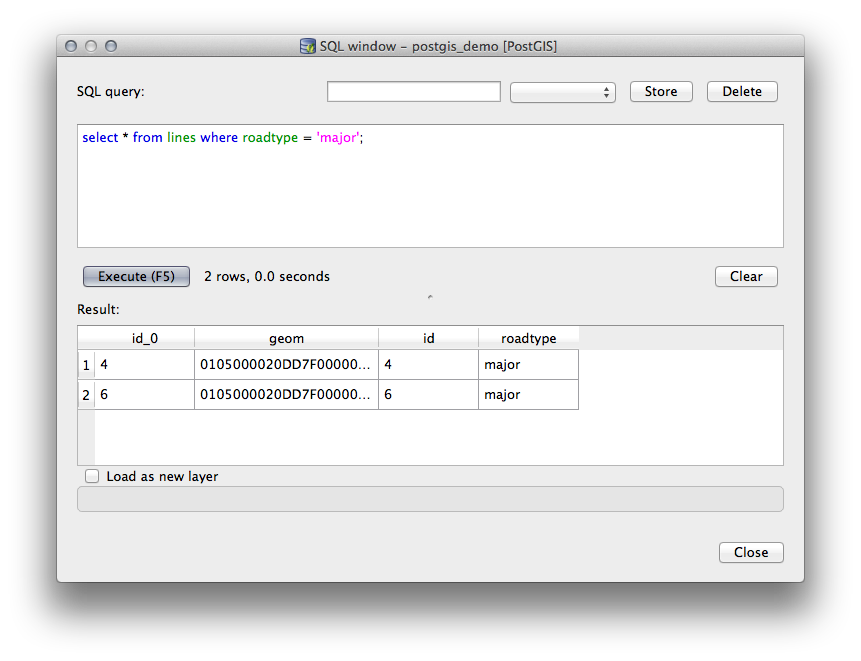
Click the checkbox for Load as new layer to add the results to your map.
Select the
idcolumn as the Column with unique integer values and thegeomcolumn as the Geometry column.Enter
roads_primaryas the Layer name (prefix).Click Load now! to load the results as a new layer into your map.

I layer che corrispondono alla tua query sono ora visualizzati sulla tua mappa. Naturalmente puoi usare questo strumento di interrogazione per eseguire qualsiasi comando SQL arbitrario, inclusi molti di quelli che abbiamo visto nei moduli e nelle sezioni precedenti.
18.2.5. Importare dati in un database con DB Manager
Abbiamo già visto come importare dati in un database spaziale usando strumenti a linea di comando, ora impariamo come usare DB Manager per fare importazioni.
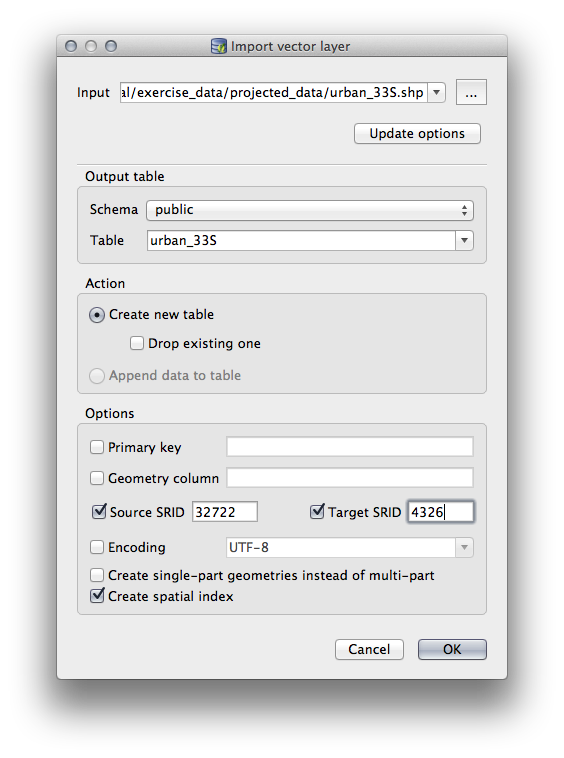
Click the Import layer/file button on the toolbar in the DB Manager dialog.

Select the
urban_33S.shpfile fromexercise_data/projected_dataas the input datasetClick the Update Options button to pre-fill some of the form values.
Make sure that the Create new table option is selected
Specify the Source SRID as
32722and the Target SRID as4326Enable the checkbox to Create Spatial Index
Fai clic su OK per eseguire l’importazione
Abbandona la finestra di dialogo che ti fa sapere che l’importazione ha avuto successo
Click the Refresh button on the DB Manager Toolbar
You can now inspect the table in your database by clicking on it in
the Tree.
Verify that the data has been reprojected by checking that the
Spatial ref: is listed as WGS 84 (4326).
Right clicking on the table in the Tree and a selecting Add to Canvas will add the table as a layer in your map.
18.2.6. Esportare dati da un database con DB Manager
Naturalmente DB Manager può anche essere usato per esportare dati dai vostri database spaziali, quindi diamo un’occhiata a come si fa.
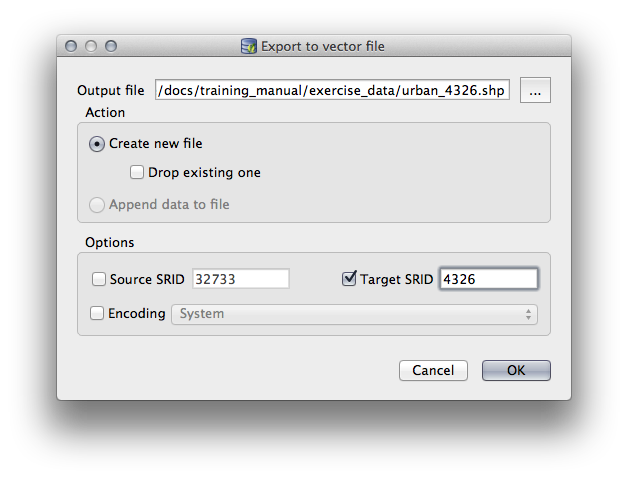
Select the
lineslayer in the Tree and click the Export to File button on the toolbar to open the Export to vector file dialog.Click the … button to select the Output file and save the data to your
exercise_datadirectory asurban_4326.Set the Target SRID as
4326.Fai clic su OK per inizializzare l’esportazione.
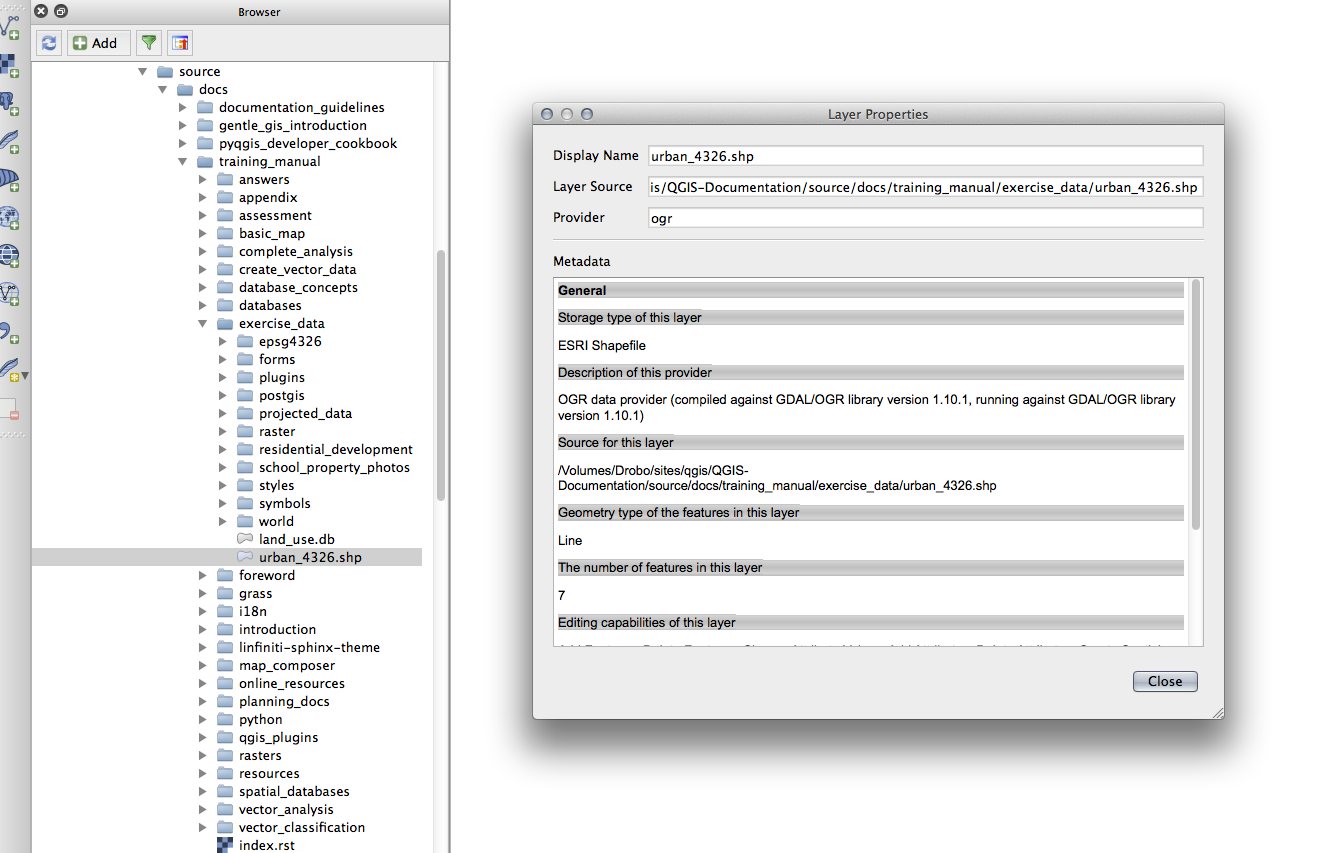
Chiudi la finestra di dialogo che ti informa che l’esportazione ha avuto successo e chiudi il DB Manager.
Ora puoi ispezionare lo shapefile che hai creato con il pannello Browser.
18.2.7. In Conclusion
Ora hai visto come usare l’interfaccia DB Manager in QGIS per gestire i tuoi database spaziali, per eseguire query SQL sui tuoi dati e come importare ed esportare dati.
18.2.8. What’s Next?
Di seguito, vedremo come usare molte di queste stesse tecniche con i database SpatiaLite.