16.2. Lesson: Simple Feature Model
How can we store and represent geographic features in a database? In this lesson we’ll cover one approach, the Simple Feature Model as defined by the OGC.
The goal for this lesson: To learn what the SFS Model is and how to use it.
16.2.1. What is OGC
The Open Geospatial Consortium (OGC), an international voluntary consensus standards organization, originated in 1994. In the OGC, more than 370+ commercial, governmental, nonprofit and research organizations worldwide collaborate in an open consensus process encouraging development and implementation of standards for geospatial content and services, GIS data processing and data sharing. - Wikipedia
16.2.2. What is the SFS Model
The Simple Feature for SQL (SFS) Model is a non-topological way to store geospatial data in a database and defines functions for accessing, operating, and constructing these data.
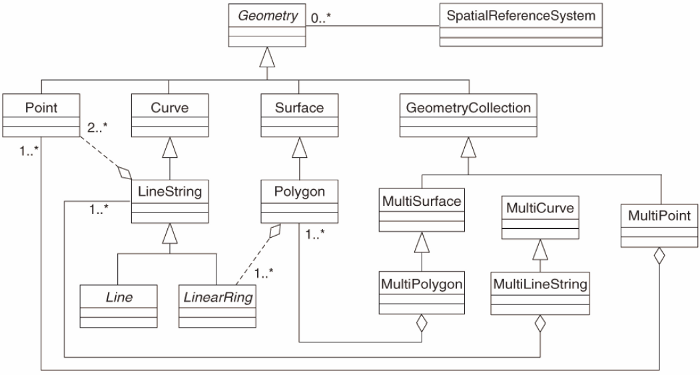
The model defines geospatial data from Point, Linestring, and Polygon types (and aggregations of them to Multi objects).
For further information, have a look at the OGC Simple Feature for SQL standard.
16.2.3. Add a geometry field to table
Let’s add a point field to our people table:
alter table people add column the_geom geometry;
16.2.4. Add a constraint based on geometry type
You will notice that the geometry field type does not implicitly specify what type of geometry for the field - for that we need a constraint:
alter table people
add constraint people_geom_point_chk
    check(st_geometrytype(the_geom) = 'ST_Point'::text
          OR the_geom IS NULL);
This adds a constraint to the table so that it will only accept a point geometry or a null value.
16.2.5. Try Yourself 
Create a new table called cities and give it some appropriate columns, including a geometry field for storing polygons (the city boundaries). Make sure it has a constraint enforcing geometries to be polygons.
16.2.6. Populate geometry_columns table
At this point you should also add an entry into the geometry_columns table:
insert into geometry_columns values
  ('','public','people','the_geom',2,4326,'POINT');
Why? geometry_columns is used by certain applications to be aware of which tables in the database contain geometry data.
Note
If the above INSERT statement causes an error, run this
query first:
select * from geometry_columns;
If the column f_table_name contains the value people, then this table has already been registered and you don’t need to do anything more.
The value 2 refers to the number of dimensions; in this case, two: X
and Y.
The value 4326 refers to the projection we are using; in this case, WGS 84, which is referred to by the number 4326 (refer to the earlier discussion about the EPSG).
16.2.6.1. Try Yourself 
Add an appropriate geometry_columns entry for your new cities layer
16.2.7. Add geometry record to table using SQL
Now that our tables are geo-enabled, we can store geometries in them:
insert into people (name,house_no, street_id, phone_no, the_geom)
        values ('Fault Towers',
                 34,
                 3,
                 '072 812 31 28',
                 'SRID=4326;POINT(33 -33)');
Note
In the new entry above, you will need to specify which projection (SRID) you want to use. This is because you entered the geometry of the new point using a plain string of text, which does not automatically add the correct projection information. Obviously, the new point needs to use the same SRID as the data-set it is being added to, so you need to specify it.
If at this point you were using a graphical interface, for example, specifying the projection for each point would be automatic. In other words, you usually won’t need to worry about using the correct projection for every point you want to add if you’ve already specified it for that data-set, as we did earlier.
Now is probably a good time to open QGIS and try to view your people table. Also, we should try editing / adding / deleting records and then performing select queries in the database to see how the data has changed.
To load a PostGIS layer in QGIS, use the menu option or toolbar button:

This will open the dialog:
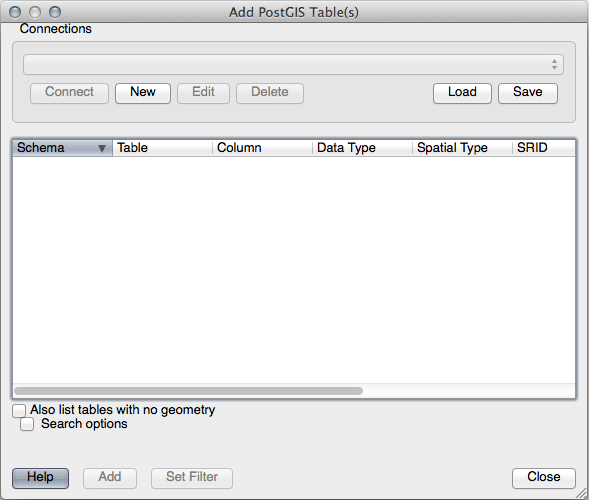
Click on the New button to open this dialog:
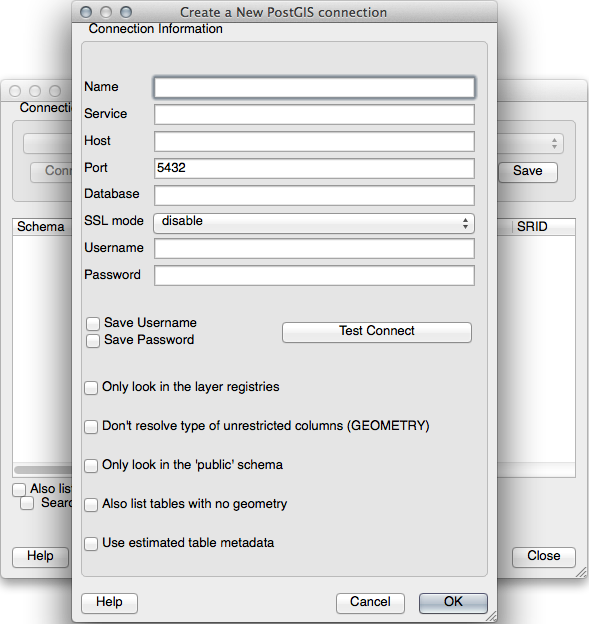
Then define a new connection, e.g.:
Name: myPG
Service:
Host: localhost
Port: 5432
Database: address
User:
Password:
To see whether QGIS has found the address database and that your username and password are correct, click Test Connect. If it works, check the boxes next to Save Username and Save Password. Then click OK to create this connection.
Back in the Add PostGIS Layers dialog, click Connect and add layers to your project as usual.
16.2.7.1. Try Yourself 
Formulate a query that shows a person’s name, street name and position (from the the_geom column) as plain text.
16.2.8. In Conclusion
You have seen how to add spatial objects to your database and view them in GIS software.
16.2.9. What’s Next?
Next you’ll see how to import data into, and export data from, your database.