라벨 항목
To add a label, click the  Add label icon, place the element
with the left mouse button on the Print Composer canvas and position and
customize its appearance in the label Item Properties panel.
Add label icon, place the element
with the left mouse button on the Print Composer canvas and position and
customize its appearance in the label Item Properties panel.
The Item Properties panel of a label item provides the following
functionality for the label item (see Figure_composer_label):
- Define Font by clicking on the [Font...] button or a
Font color selecting a color using the color selection tool.
- You can specify different horizontal and vertical margins in mm. This is
the margin from the edge of the composer item. The label can be positioned
outside the bounds of the label e.g. to align label items with other items.
In this case you have to use negative values for the margin.
- Using the Alignment is another way to position your label. Note
that when e.g. using the Horizontal alignment in
 Center Position the Horizontal margin feature is
disabled.
Center Position the Horizontal margin feature is
disabled.
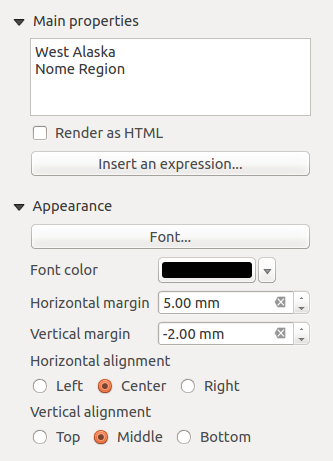
 Render as HTML: 이 옵션을 활성화하면 라벨을 HTML 코드로 해석시킬 수 있습니다. URL, 웹페이지로 연결되는 클릭할 수 있는 이미지, 또는 더 복잡한 무언가를 삽입할 수 있습니다.