Overview of the Print Composer
The Print Composer provides growing layout and printing capabilities. It allows
you to add elements such as the QGIS map canvas, text labels, images, legends,
scale bars, basic shapes, arrows, attribute tables and HTML frames. You can size,
group, align, position and rotate each element and adjust their properties to
create your layout. The layout can be printed or exported to image formats,
PostScript, PDF or to SVG (export to SVG is not working properly with some
recent Qt4 versions; you should try and check individually on your system).
You can save the layout as a template and load it again in another session.
Finally, generating several maps based on a template can be done through the
atlas generator.
Before you start to work with the Print Composer, you need to load some raster
or vector layers in the QGIS map canvas and adapt their properties to suit your
own convenience. After everything is rendered and symbolized to your liking,
click the  New Print Composer icon in the toolbar or
choose . You will be prompted to
choose a title for the new Composer.
地図の作成手順を実際に示します. 次のように操作してみてください.
左側ツールバーの  新規地図を追加 ボタンを選び,左マウスボタンを押しながらキャンバスに四角形を描きます. すると四角形の内部にQGIS地図ビューが描かれます.
- Select the
 Add new scalebar toolbar button and click
with the left mouse button on the Print Composer canvas. A scalebar will be
added to the canvas.
左側ツールバーの  新規凡例追加 ボタンを選び,左マウスボタンを押しながらキャンバスに四角形を描きます. すると四角形の内部に凡例が描かれます.
左側ツールバーの  アイテムを選択/移動 ボタンを選び,キャンバスの地図を選んで少し動かします.
地図アイテムが選ばれている間は地図アイテムのサイズも変更できます。地図のコーナーの小さな白い四角形のところで左マウスボタンを押し、新しい位置までドラッグしてサイズを変更します。
左下側パネルの アイテムのプロパティ パネルをクリックし、地図の傾きの値を確認します。 地図の傾き を ‘15.00° ‘ に変更してください。地図の傾きが変わります。
- Now, you can print or export your print composition to image formats, PDF or
to SVG with the export tools in Composer menu.
- Finally, you can save your print composition within the project file with the
 Save Project button.
You can add multiple elements to the Composer. It is also possible to have more
than one map view or legend or scale bar in the Print Composer canvas, on one or
several pages. Each element has its own properties and, in the case of the map,
its own extent. If you want to remove any elements from the Composer canvas you
can do that with the Delete or the Backspace key.
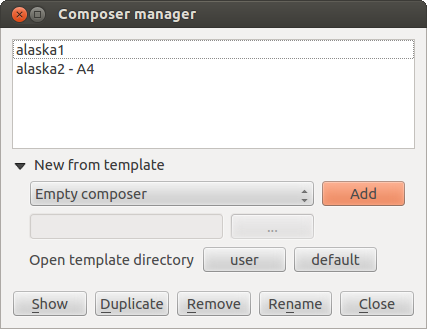
The Composer Manager is the main window to manage print composers in the project.
It helps you add new print composer, duplicate an existing one, rename or delete
it. To open the composer manager dialog, click on the  Composer Manager button in the toolbar or choose . It can also be reached from the main window of QGIS with
.
The composer manager lists in its upper part all the available print composers
in the project. The bottom part shows tools that help to:
- show the selected composer(s): you can open multiple print composers in
one-click
- duplicate the selected composer (available only if one print composer is
selected): it creates a new composer using the selected composer as template.
You’ll be prompted to choose a new title for the new composer
- rename the composer (also available only if one print composer is selected):
You’ll be prompted to choose a new title for the composer. Note that you can
also rename the composer by double-clicking on its title in the upper part
- remove the composer: the selected print composer(s) will be deleted from the
project.
With the Composer Manager, it’s also possible to create new print composers as
an empty composer or from a saved template. By default, QGIS will look for
templates in user directory (~/.qgis2/composer_templates) or
application’s one (ApplicationFolder/composer_templates).
QGIS will retrieve all the available templates and propose them in the combobox.
The selected template will be used to create a new composer when clicking
Add button.
You can also save composer templates in another folder.
Choosing specific in the template list offers the ability to select such
template and use it to create a new print composer.
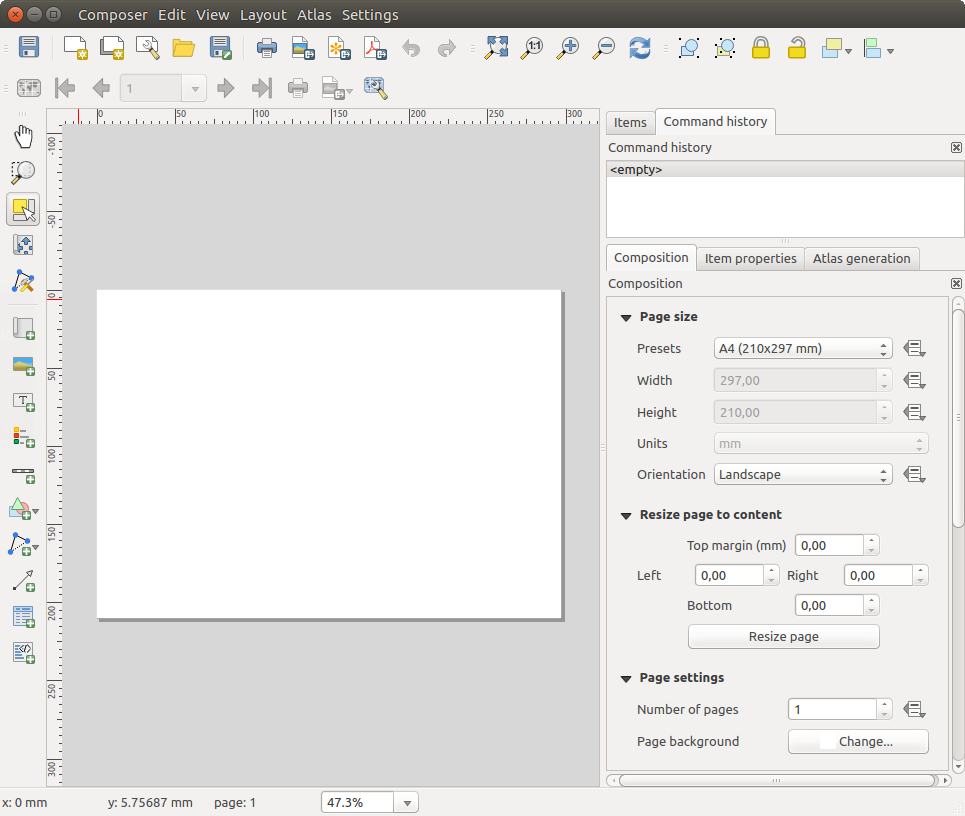
Opening the Print Composer provides you with a blank canvas that represents the
paper surface when using the print option. Initially you find buttons on the
left beside the canvas to add map composer items: the current QGIS map canvas,
text labels, images, legends, scale bars, basic shapes, arrows, attribute tables
and HTML frames. In this toolbar you also find toolbar buttons to navigate,
zoom in on an area and pan the view on the composer and toolbar buttons to
select a map composer item and to move the contents of the map item.
Figure_composer_overview shows the initial view of the Print Composer before
any elements are added.
On the right beside the canvas you find two set of panels. The upper one holds
the panels Items and Command History and the lower holds
the panels Composition, Item properties
and Atlas generation.
- The Items panel provides a list of all map composer items added to
the canvas.
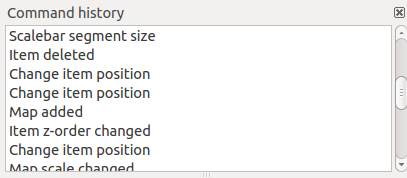
- The Command history panel displays a history of all changes applied
to the Print Composer layout. With a mouse click, it is possible to undo and
redo layout steps back and forth to a certain status.
- The Composition panel allows you to set paper size, orientation, the
page background, number of pages and print quality for the output file in dpi.
Furthermore, you can also activate the
 Print as raster
checkbox. This means all items will be converted to raster before printing or
saving as PostScript or PDF.
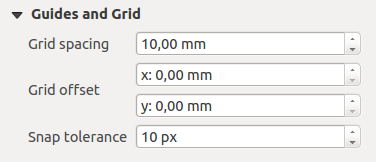
In this panel, you can also customize settings for grid and smart guides.
- The Item Properties panel displays the properties for the selected
item. Click the
 Select/Move item icon to select
an item (e.g., legend, scale bar or label) on the canvas. Then click the
Item Properties panel and customize the settings for the selected
item (see Composer Items for detailed information on each item
settings).
- The Atlas generation panel allows you to enable the generation of an
atlas for the current Composer and gives access to its parameters
(see 地図帳を作成 for detailed information on atlas
generation usage).
In the bottom part of the Print Composer window, you can find a status bar with
mouse position, current page number, a combo box to set the zoom level,
the number of selected items if applicable and, in the case of atlas generation,
the number of features.
In the upper part of the Print composer window, you can find menus and other
toolbars. All Print Composer tools are available in menus and as icons in a
toolbar. See a list of tools in table_composer_tools.
The toolbars and the panels can be switched off and on using the right mouse
button over any toolbar or through or
.
In the Composition panel, you can define the global settings of the
current composition.
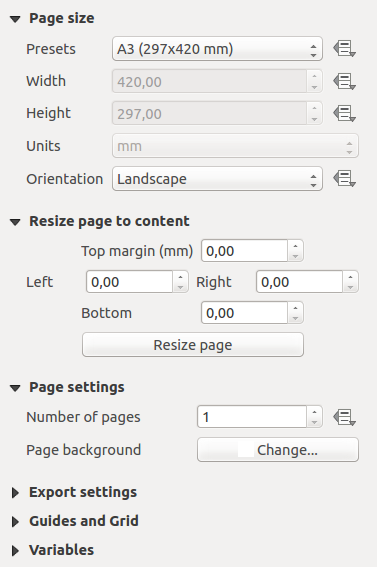
You can choose one of the Presets formats for your paper sheet,
or enter your custom width, height and units.
You can also choose the page Orientation to use.
Composition can be divided into several pages. For instance, a first page can show
a map canvas, and a second page can show the attribute table associated with a
layer, while a third one shows an HTML frame linking to your organization website.
Set the Number of pages to the desired value. you can also custom the
Page Background with the color or the symbol you want.
The Page size options apply to all the pages in the composition. However, you
can modify the values using the data defined override options
(see Data Defined Override Buttons).
A custom page size can also be set, using the Resize page tool.
This creates an unique page composition, resizes the page to fit the current
contents of the composition (with optional margins).
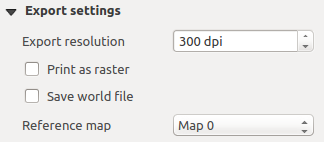
You can define a resolution to use for all exported maps in Export
resolution. This setting can, however, be overridden each time you are
exporting a map.
When checked,  print as raster means all elements will be
rasterized before printing or saving as PostScript or PDF.
While exporting to an image file format, you can choose to generate a world file
by checking  Save world file and select a map item in
 Reference map. The world file is created beside
the exported map, has the same name and contains information to georeference
it easily.
You can put some reference marks on your composition paper sheet to help you
place some items. These marks can be:
- simple lines (called Guides) put at the position you want. To do that,
ensure that Show Rulers and Show Guides in
menu are checked. Then, click and drag from within the ruler to the paper sheet.
A vertical or horizontal line is added to the paper and you can set its position
following the coordinates displayed at the left bottom of the composer dialog.
- or regular Grid.
Whether grids or guides should be shown is set in menu.
There, you can also decide if they might be used to snap composer items. The
Grid and guides section lets you customize grid settings like
Grid spacing, Grid offset and Snap tolerance
to your need. The tolerance is the maximum distance below which an item is snapped
to a grid or a guide.
In the menu in QGIS main canvas, you can
also set the spacing, offset and snap tolerance of the grid as much as its style
and color. These options are applied by default to any new print composer.
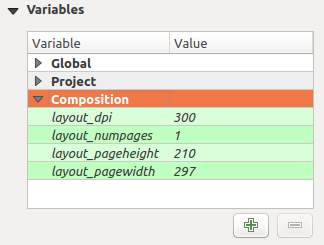
The Variables lists all the variables available at
the composition’s level (which includes all global and project’s variables).
It also allows the user to manage composition-level variables. Click the
 button to add a new custom composition-level variable. Likewise,
select a custom composition-level variable from the list and click the
 button to remove it.
More information on variables usage in the General Tools
Variables section.
During the layout process, it is possible to revert and restore changes.
This can be done with the revert and restore tools:
 最後の変更を戻す
 最後の変更を元に戻す
This can also be done by mouse click within the Command history
panel (see figure_composer). The History panel lists the last actions done
within the composer.
Just select the point you want to revert to and once you do new action all
the actions done after the selected one will be removed.
The Items panel offers some options to manage selection and
visibility of items.
All the items added to the print composer canvas are shown in a list and
selecting an item makes the corresponding row selected in the list as well as
selecting a row does select the corresponding item in the print composer canvas.
This is thus a handy way to select an item placed behind another one.
Note that a selected row is shown as bold.
選択されたアイテムに対し:
 set it visible or not,
 lock or unlock its position,
- order its Z position. You can move up and down each item in the list with a
click and drag. The upper item in the list will be brought to the foreground
in the print composer canvas.
By default, a newly created item is placed in the foreground.
- change the name by double-clicking the text.
アイテムが正しい位置に配置されたら、  列のボックスをチェックしてロックできます。ロックされたアイテムはキャンバスで選択 できません 。ロックされたアイテムは パネルで選んでチェックを外すか、ツールバーのアイコンを使って操作します。
 New Print Composer icon in the toolbar or
choose File ‣ New Print Composer. You will be prompted to
choose a title for the new Composer.
 新規地図を追加 ボタンを選び,左マウスボタンを押しながらキャンバスに四角形を描きます. すると四角形の内部にQGIS地図ビューが描かれます.
 Add new scalebar toolbar button and click
with the left mouse button on the Print Composer canvas. A scalebar will be
added to the canvas.
 新規凡例追加 ボタンを選び,左マウスボタンを押しながらキャンバスに四角形を描きます. すると四角形の内部に凡例が描かれます.
 Save Project button.
 Composer Manager button in the toolbar or choose Composer
‣ Composer Manager. It can also be reached from the main window of QGIS with
Project ‣ Composer Manager.