중요
번역은 여러분이 참여할 수 있는 커뮤니티 활동입니다. 이 페이지는 현재 100.00% 번역되었습니다.
4.1. 수업: 인쇄 조판 사용하기
이제 맵을 완성했으니, 맵을 인쇄하거나 문서로 내보낼 수 있어야 합니다. 그 이유는 GIS 맵 파일이 이미지가 아니기 때문입니다. 그보다는 GIS 프로그램의 특정 상태를 모든 레이어들과 그 라벨, 색상 등등을 가리키는 참조와 함께 저장한 것이라고 봐야겠죠. 즉 해당 데이터 또는 (QGIS 같은) 동일한 GIS 프로그램을 가지고 있지 않은 사람에겐 맵 파일이 무용지물일 것입니다. 다행히도, QGIS는 맵 파일을 어떤 사람의 컴퓨터에서든 읽을 수 있는 것은 물론 프린터가 연결되어 있다면 인쇄할 수도 있는 포맷으로 내보낼 수 있습니다. 이 내보내기와 인쇄하기는 둘 다 인쇄 조판(Print Layout) 을 통해 처리됩니다.
이 수업의 목표: QGIS 인쇄 조판 을 사용해서 필요한 모든 설정을 한 기본 맵을 생성하기.
4.1.1. ★☆☆ 따라해보세요: 조판 관리자
QGIS는 동일한 맵 파일을 사용해서 여러 가지 맵을 생성할 수 있습니다. 이런 이유로, QGIS는 조판 관리자(Layout Manager) 라는 도구를 가지고 있습니다.
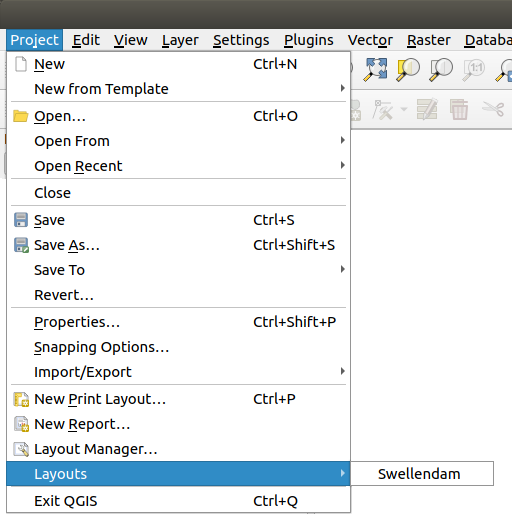
이 도구를 열려면 메뉴 항목을 클릭하십시오. 텅 비어 있는 Layout manager 대화창이 나타날 것입니다.

New from Template 아래에 있는 Empty layout 을 선택한 다음, Create… 버튼을 누르십시오.
새 조판의 이름을 Swellendam 이름으로 하고 OK 를 입력하십시오.
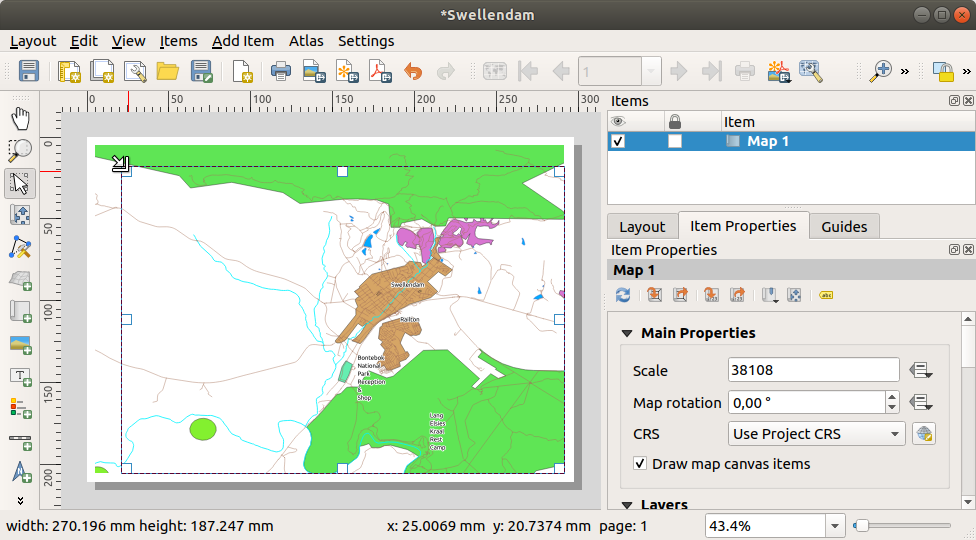
이제 인쇄 조판 창을 보게 될 것입니다:
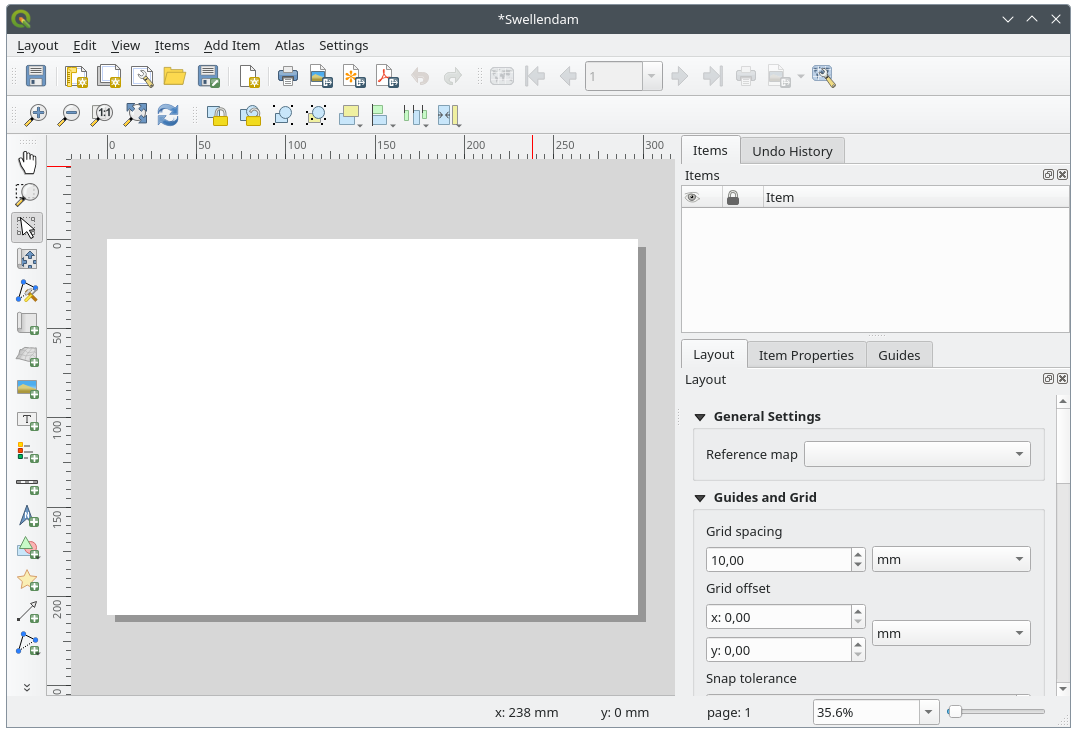
메뉴 항목을 통해서도 이 새 조판을 생성할 수 있습니다.
어떤 방법을 쓰든, 아래 그림처럼 메뉴에서 이 새 인쇄 조판에 접근할 수 있습니다.
4.1.2. ★☆☆ 따라해보세요: 기본 맵 구성
이 예제에서 맵은 이미 우리가 원하는 대로 구성돼 있습니다. 여러분의 맵도 마찬가지인지 확인하십시오.
조판 창의 가운데 부분에 있는 시트(sheet)를 오른쪽 클릭하고 컨텍스트 메뉴에서 Page properties… 를 선택하십시오.
Item Properties 탭에 있는 값들이 다음과 같이 설정되어 있는지 확인하십시오:
Size:
A4Orientation:
Landscape
이제 원하는 대로 페이지 레이아웃을 설정했지만, 이 페이지는 아직도 비어 있습니다. 맵을 불러와봅시다!
 Add Map 버튼을 클릭하십시오.
이 도구를 활성화시키면, 페이지 위에 맵을 배치할 수 있게 됩니다.
빈 페이지 위에 클릭&드래그로 사각형을 그리십시오.
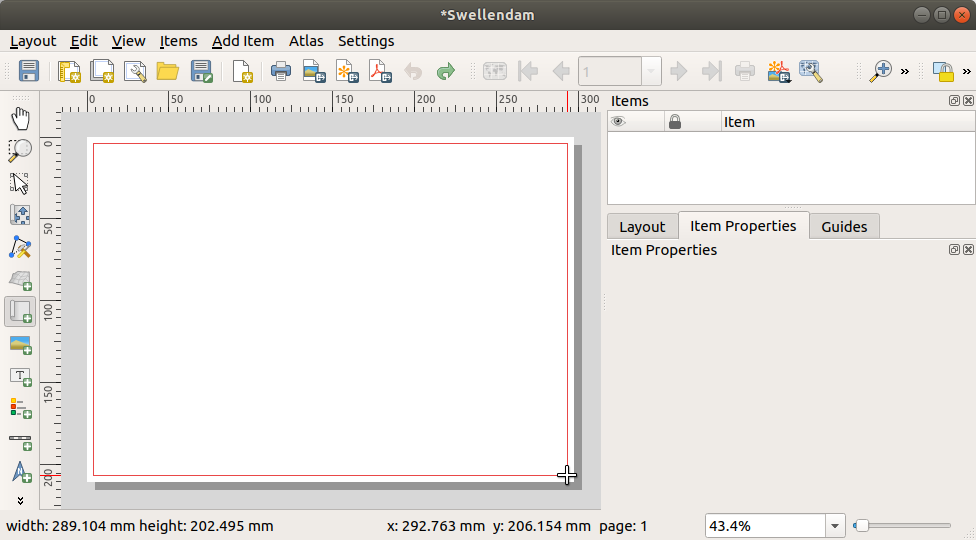
페이지 상에 맵이 나타날 것입니다.
클릭&드래그로 맵을 이리저리 옮겨보십시오:
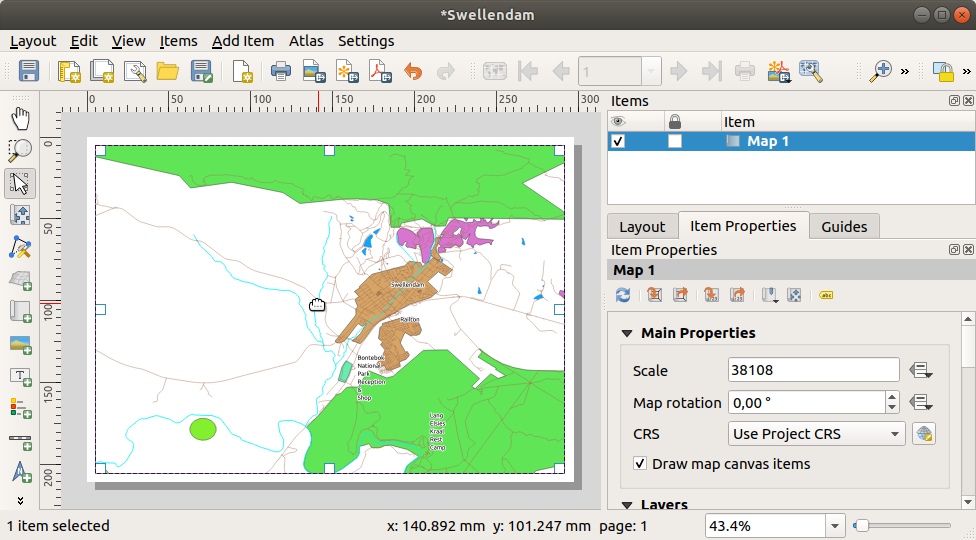
사각형의 경계선을 클릭&드래그해서 크기를 조정해보십시오:
참고
물론 여러분의 맵은 예제와 달라보일 겁니다! 여러분 자신의 프로젝트 설정에 따라 달라보입니다. 하지만 걱정하지 마세요! 이 강의는 일반적인 지침이므로 맵 자체가 어떻게 보이든지 상관없이 동일하게 작동할 것입니다.
경계선 주변을 따라 여백을 남기고, 위쪽에 제목을 위한 공간을 남겨두십시오.
다음 버튼들을 사용해서 (맵이 아니라) 페이지를 확대/축소해보십시오:


QGIS 메인 창에서 맵을 확대/축소하고 이동해보십시오.
 Move item content 도구도 맵을 이동시킬 수 있습니다.
여러분이 확대 또는 축소하는 대로 맵 뷰가 업데이트됩니다.
어떤 이유로든, 맵 뷰가 정확하게 새로고침되지 않는 경우
 Refresh view 버튼을 클릭해서 맵을 강제로 새로고침시킬 수 있습니다.
여러분이 맵에 지정했던 크기와 위치가 꼭 마지막일 필요는 없다는 사실을 기억하십시오. 여러분이 만족스럽지 않다면, 언제라도 다시 변경해도 됩니다. 지금은 이 맵 상에서의 여러분의 작업을 저장했는지 확인해야 합니다. 왜냐하면 QGIS에서 인쇄 조판 은 주 맵 파일의 일부이기 때문에, 프로젝트를 반드시 저장해야만 합니다.
 메뉴 항목을 클릭하십시오. 주 대화창에 있는 저장 기능을 가리키는 편리한 지름길입니다.
4.1.3. ★☆☆ 따라해보세요: 제목 추가하기
여러분의 맵이 이제 페이지 위에 보기 좋게 자리했지만, 여러분의 독자/사용자에게 이게 어떤 맵인지 알려줘야 합니다. 그들에겐 어떤 맥락이 필요한데, 여러분이 맵 요소들을 추가해서 제공해줄 것입니다. 먼저, 제목을 추가해보죠.
 Add Label 버튼을 클릭하십시오.
페이지 상에서 맵 위쪽을 클릭하고, New Item Properties 대화창에 나타나는 추천 값들을 받아들이면, 맵 위쪽에 라벨이 나타날 것입니다.
라벨이 페이지의 상단 한가운데로 오도록 크기와 위치를 조정합니다. 맵의 크기와 위치를 조정한 방법 그대로 제목을 조정할 수 있습니다.
제목을 이동하면 페이지 한가운데 맞출 수 있도록 지시선이 나타나는 것을 알 수 있습니다.
하지만, 제목을 (페이지가 아니라) 맵을 기준으로 배치할 수 있게 해주는 액션 툴바(Actions Toolbar)의 도구도 존재합니다:

맵을 클릭해서 선택한 다음,
키보드의 Shift 키를 누른 채 라벨을 클릭해서 맵과 라벨을 둘 다 선택하십시오.
- Align selected items left 버튼을 찾아서 그 옆에 있는 드롭다운 화살표를 클릭하면 배치 옵션들이 나타납니다.
 Align center 를 클릭하십시오:
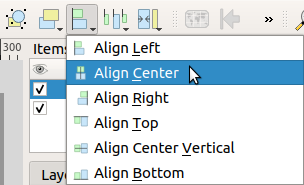
이제 라벨 프레임이 맵 위 한가운데 위치로 왔지만, 라벨의 내용은 아직 아닙니다. 라벨의 내용을 한가운데로 정렬시키려면:
라벨을 클릭해서 선택합니다.
조판 창의 사이드 패널에 있는 Item Properties 탭을 클릭하십시오.
라벨 텍스트를 “Swellendam” 으로 변경하십시오:
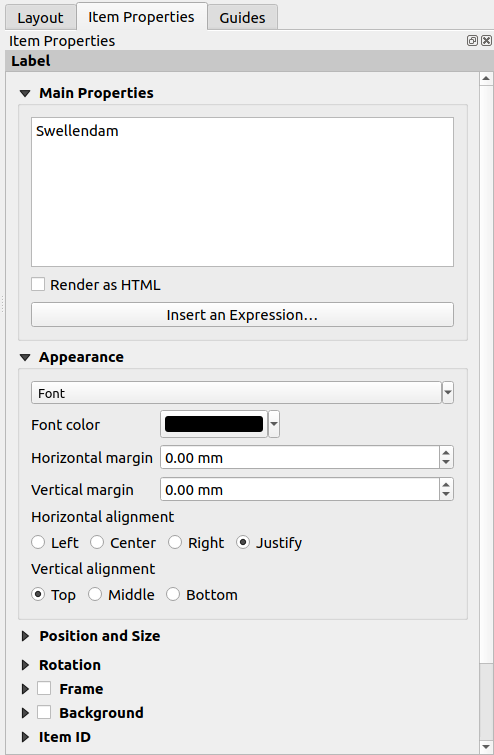
이 인터페이스를 통해 Appearance 부분에서 글꼴과 정렬 옵션들을 설정하십시오:
크고 적합한 글꼴을 선택하십시오. (이 예제에서는 크기가
36인 기본 글꼴을 사용할 것입니다.)Horizontal Alignment 를 Center 로 설정하십시오.
글꼴 색상도 바꿀 수 있지만, 기본 설정인 검은색을 유지하는 것이 최선일 것입니다.
제목 텍스트 상자에 테두리를 두르지 않는 것이 기본 설정입니다. 그러나 테두리를 두르고 싶다면 그렇게 할 수 있습니다:
Item Properties 탭에서 아래 방향으로 스크롤해서 Frame 옵션을 찾으십시오.
Frame 체크박스를 클릭해서 테두리를 활성화합니다. 또 테두리의 색상 및 굵기도 바꿀 수 있습니다.
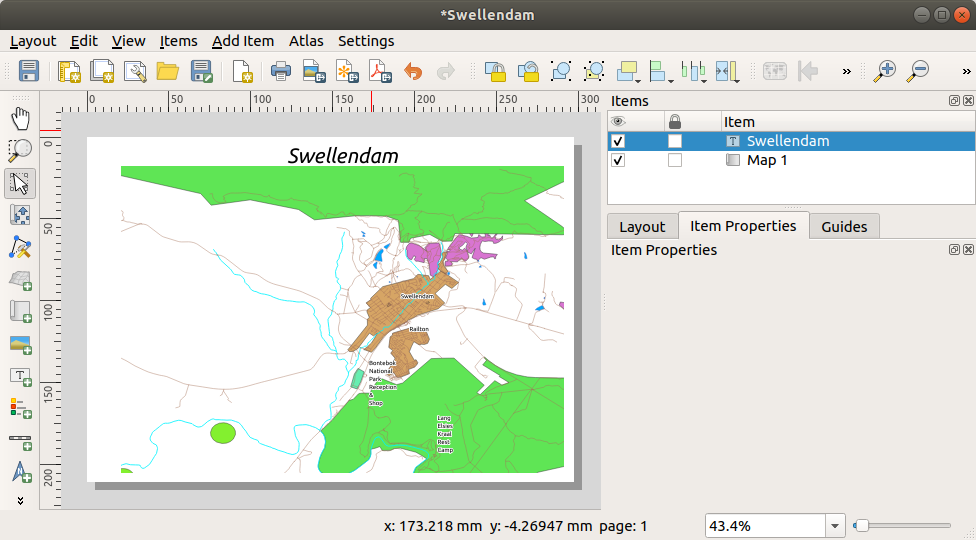
이 예제에서는 테두리를 활성화하지 않을 것이기 때문에, 페이지가 다음과 같이 보입니다:
이제 맵 요소들을 정렬시켰으니, 실수로 이 요소들을 움직이지 않도록 이들을 그 자리에 고정시킬 수 있습니다:
라벨과 맵 항목을 둘 다 선택하십시오.
액션 툴바에 있는
 Lock Selected Items 버튼을 클릭하십시오.
참고
이 항목들을 다시 편집하려면 액션 툴바에 있는
 Unlock All Items 버튼을 클릭하면 됩니다.
4.1.4. ★☆☆ 따라해보세요: 범례 추가하기
맵을 읽는 사람들이 맵 상에 있는 여러 가지가 정확하게 무슨 뜻인지도 알 수 있어야 합니다. 장소의 이름 같은 몇몇 경우, 이 사실은 자명합니다. 삼림의 색상 같은 다른 경우엔 추측하기가 더 어렵습니다. 새로운 범례를 추가해봅시다.
 Add Legend 버튼을 클릭하십시오.
페이지 상에서 범례를 배치할 위치를 클릭하고, New Item Properties 대화창에 나타나는 추천 값들을 받아들이면,
주 대화창에 설정된 대로 레이어 심볼들을 보여주는 범례가 조판 페이지에 추가됩니다.
다른 작업들과 마찬가지로, 범례를 클릭해서 여러분이 원하는 곳으로 이동시킬 수 있습니다:
4.1.5. ★★☆ 따라해보세요: 범례 항목 사용자 정의하기
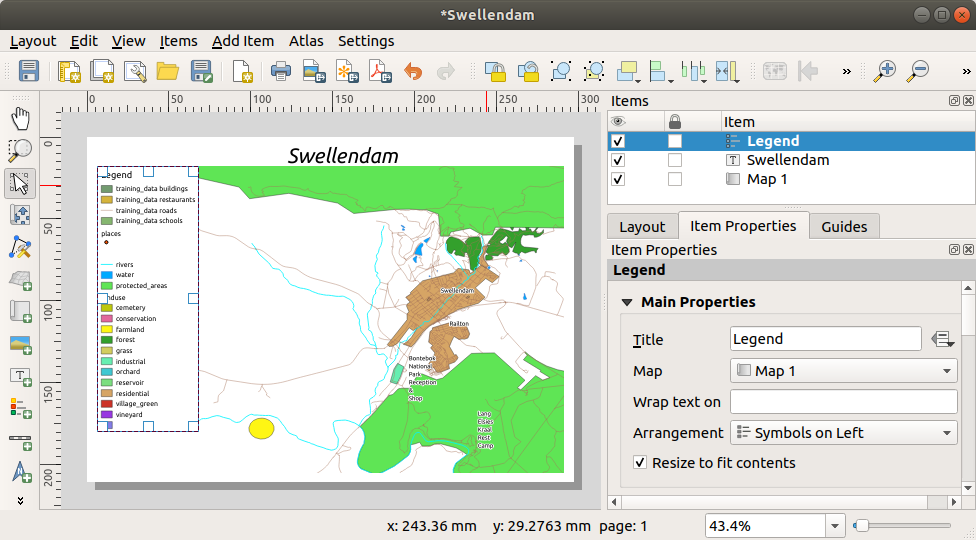
범례에 보이는 모든 것이 꼭 필요한 것은 아닙니다. 따라서 필요하지 않은 일부 항목을 제거해보겠습니다.
Item Properties 탭에 Legend items 그룹이 있습니다.
 Auto update 체크박스를 체크 해제하면 범례 항목들을 직접 수정할 수 있습니다.
buildings 항목을 선택하십시오.
 버튼을 클릭해서 범례에서 해당 항목을 삭제하십시오.
항목의 명칭을 바꿀 수도 있습니다.
동일한 목록에서 레이어를 선택한 다음,
 Edit selected item properties 버튼을 클릭하십시오.
레이어들의 이름을
Places,Roads and Streets,Surface Water, 그리고Rivers로 바꾸십시오.
항목들을 다시 정렬시킬 수도 있습니다:
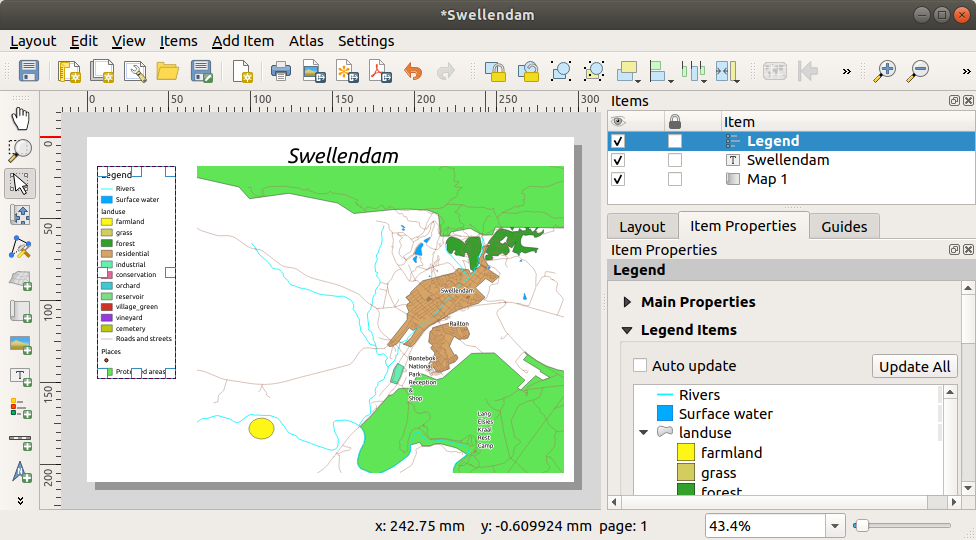
이때 범례가 새 레이어 이름 때문에 너비가 늘어날 수 있으므로, 범례 또는 맵을 이동하거나 크기를 조정해야 할 수도 있습니다. 그 결과는 다음과 같습니다:
4.1.6. ★☆☆ 따라해보세요: 맵 내보내기
참고
여러분의 작업을 자주 저장해야 한다는 사실을 기억하시나요?
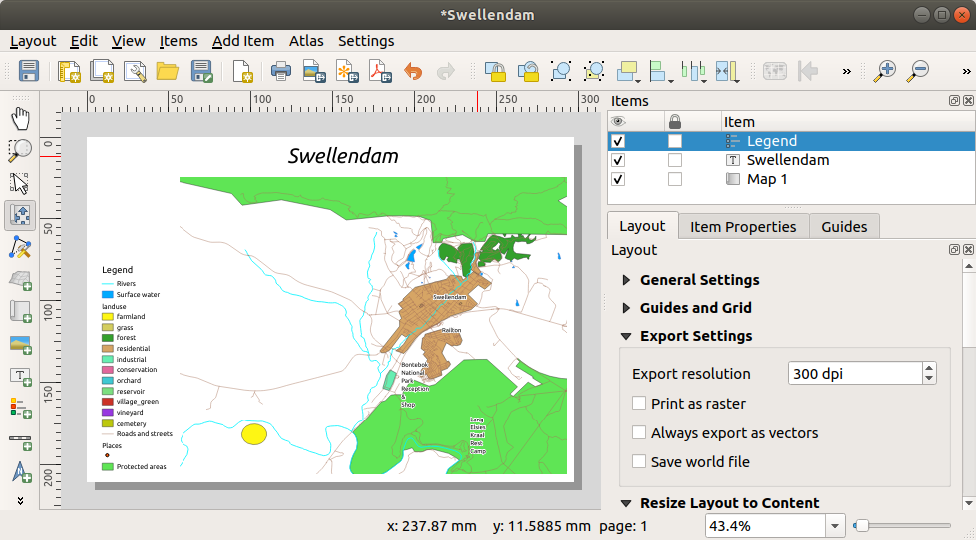
이제야 맵을 내보낼 준비가 끝났습니다! 조판 창의 좌상단 구석에 내보내기 버튼들이 보일 것입니다:
 Print Layout: 프린터를 사용하기 위한 인터페이스입니다. 여러분이 사용하는 프린터 모델에 따라 프린터 옵션이 달라질 것이기 때문에, 이 주제에 대해서 더 많은 정보를 알고 싶다면 프린터 매뉴얼이나 인쇄를 위한 일반 지침을 찾아보는 편이 나을 것입니다.
다른 버튼들은 맵 페이지를 파일로 내보낼 수 있습니다.
 Export as Image: 자주 쓰이는 여러 이미지 포맷들 가운데 하나를 선택할 수 있습니다. 가장 단순한 옵션이겠지만, 이 버튼으로 생성된 이미지는 “죽은” 이미지이기 때문에 편집하기 어렵습니다.
 Export as SVG: (출판을 위해 맵을 편집하길 원할 수도 있는) 지도 제작자에게 맵을 보내는 경우, SVG 파일로 내보내는 것이 가장 낫습니다. SVG는 “Scalable Vector Graphics”의 약자로, 잉크스케이프 또는 다른 벡터 이미지 편집 소프트웨어로 가져올 수 있는 포맷입니다.
 Export as PDF: 클라이언트에게 맵을 보내야 하는 경우, PDF 파일을 사용하는 경우가 가장 많습니다. 왜냐하면 PDF에 대한 인쇄 옵션을 설정하는 것이 가장 쉽기 때문입니다. 몇몇 지도 제작자들도 PDF를 선호할 수 있습니다. 이 포맷을 가져와서 편집할 수 있는 프로그램을 소유하고 있는 경우에 말이죠.
이 예제에서는 PDF 포맷을 사용하겠습니다.
- Export as PDF 버튼을 누르십시오.
보통 때와 마찬가지로 저장 위치와 파일 이름을 선택하십시오. 다음 대화창이 열릴 것입니다.
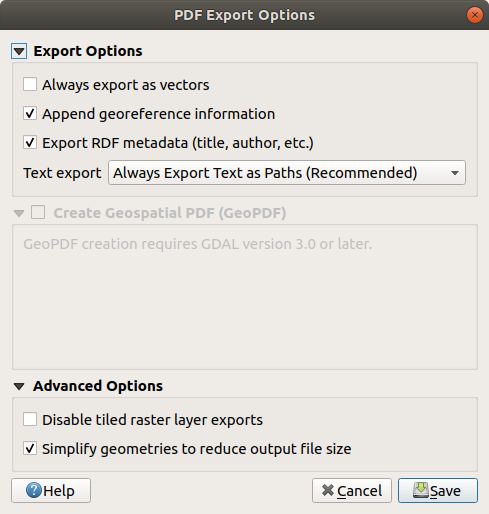
이제 안전하게 기본값을 사용해서 Save 를 클릭하면 됩니다.
QGIS가 맵 내보내기를 진행하고, 완료되자마자 인쇄 조판 대화창 상단에 메시지를 띄울 것입니다.
메시지에 있는 하이퍼링크를 클릭해서 여러분의 시스템의 파일 관리자에서 PDF가 저장된 폴더를 여십시오.
PDF 파일을 열어 여러분의 조판이 어떻게 보이는지 살펴보십시오.
다 괜찮나요? 여러분의 첫 번째 QGIS 맵 프로젝트가 완료된 것을 축하드립니다!
만족스럽지 않은 부분이 있나요? QGIS 창으로 돌아가서, 알맞은 수정을 한 다음 다시 내보내보십시오.
프로젝트 파일을 저장하는 것을 잊지 마세요.
4.1.7. 결론
이제 기본 정적 맵 조판을 생성하는 방법을 알게 되었습니다. 여기에서 한 발짝 더 나아가, 더 많은 조판 항목을 사용해서 동적으로 조정되는 맵 조판을 생성할 수 있습니다.