18.2. Lesson: DBマネージャを使用してQGISで空間データベースと連携する
すでにQGISや他のツールで多くのデータベース操作を実行する方法を見てきましたが、今度は、この同じ機能の多くに加えてさらに管理指向のツールを提供するDB管理者ツールを検討します。
このレッスンの目標: QGISのDBマネージャを使用して、空間データベースと対話する方法を学びます。
18.2.1.  Follow Along: DBマネージャでPostGISデータベースを管理する
最初にDBマネージャのインターフェイスを開く必要があります。それには データベース --> DBマネージャ --> DBマネージャ メニューを選択するか、ツールバー上のDBマネージャアイコンを選択します。

You should already see the previous connections we have configured
and be able to expand the myPG section and its public schema
to see the tables we have worked with in previous sections.
気づくかもしれない最初の事は、今データベースに含まれるスキーマに関するいくつかのメタデータを見ることができることです。
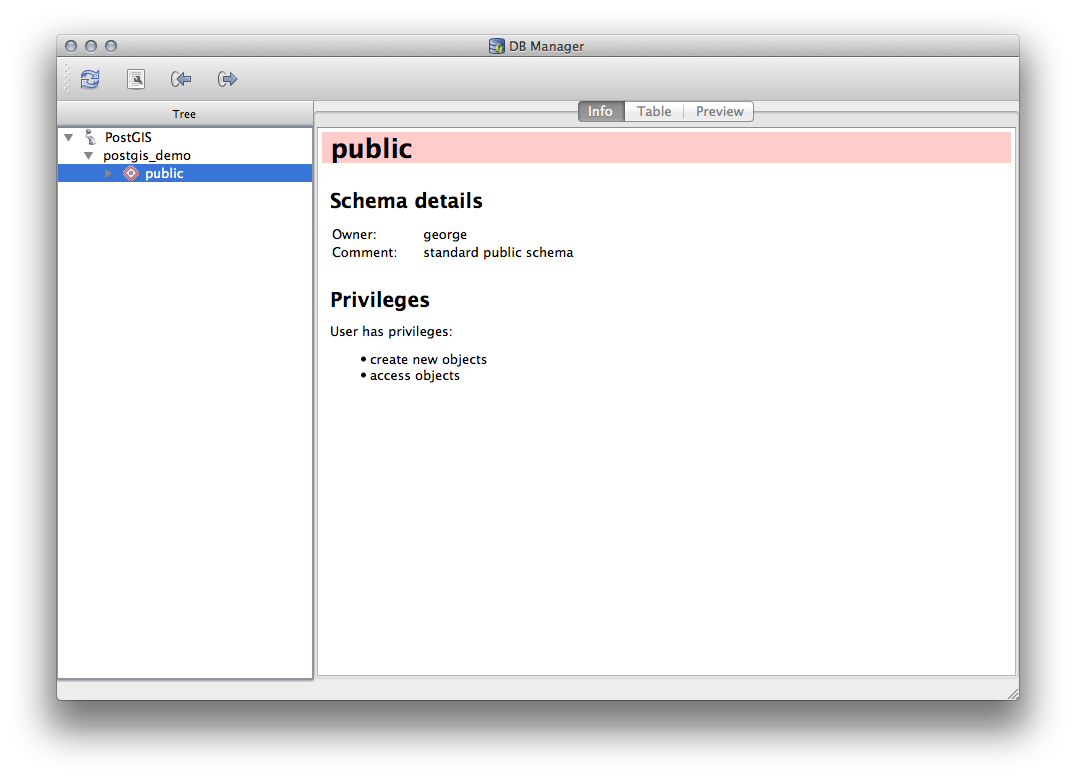
Schemas are a way of grouping data tables and other objects in a PostgreSQL database and a container for permissions and other constraints. Managing PostgreSQL schemas is beyond the scope of this manual, but you can find more information about them in the PostgreSQL documentation on Schemas. You can use the DB Manager to create new Schemas, but will need to use a tool like pgAdmin III or the command line interface to manage them effectively.
DBマネージャは、データベース内のテーブルを管理するために使用できます。すでに、コマンドライン上でテーブルを作成し管理するためのさまざまな方法を見てきていますが、ここでDBマネージャでこれを行う方法を見てみましょう。
まず、ツリー内の名前をクリックして 情報 タブの中を見ることで、テーブルのメタデータを見てみることは有用です。
このパネルでは、テーブルについての 一般情報 も、ジオメトリと空間参照系に関してPostGIS拡張が維持している情報を見ることができます。
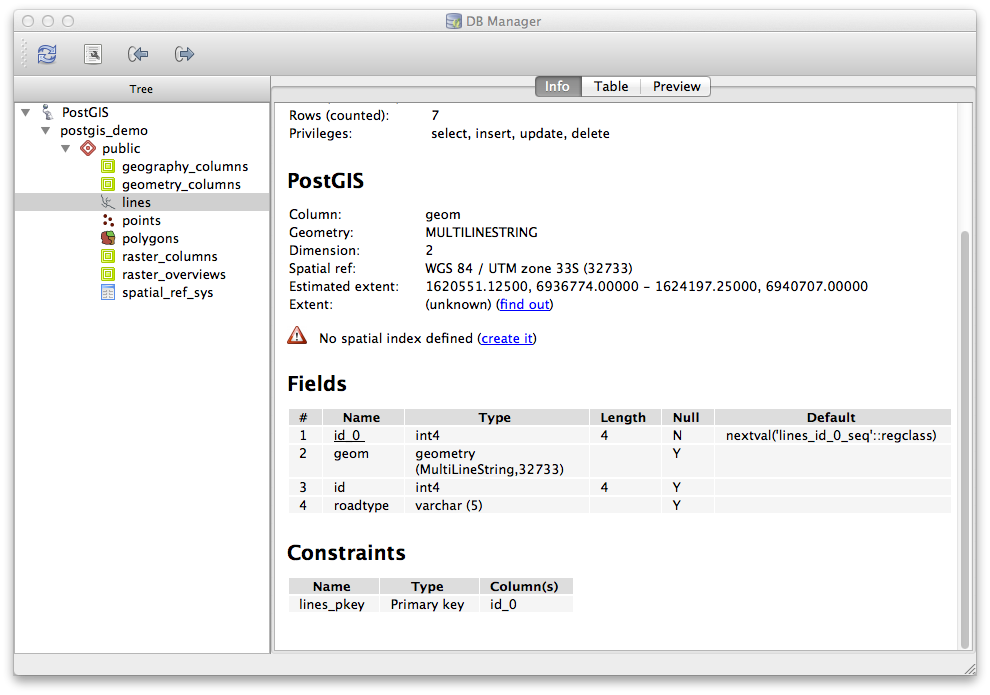
情報 タブで下にスクロールした場合、表示しているテーブルに対して、 フィールド 、 制約 、 索引 についての詳細な情報を見ることができます。
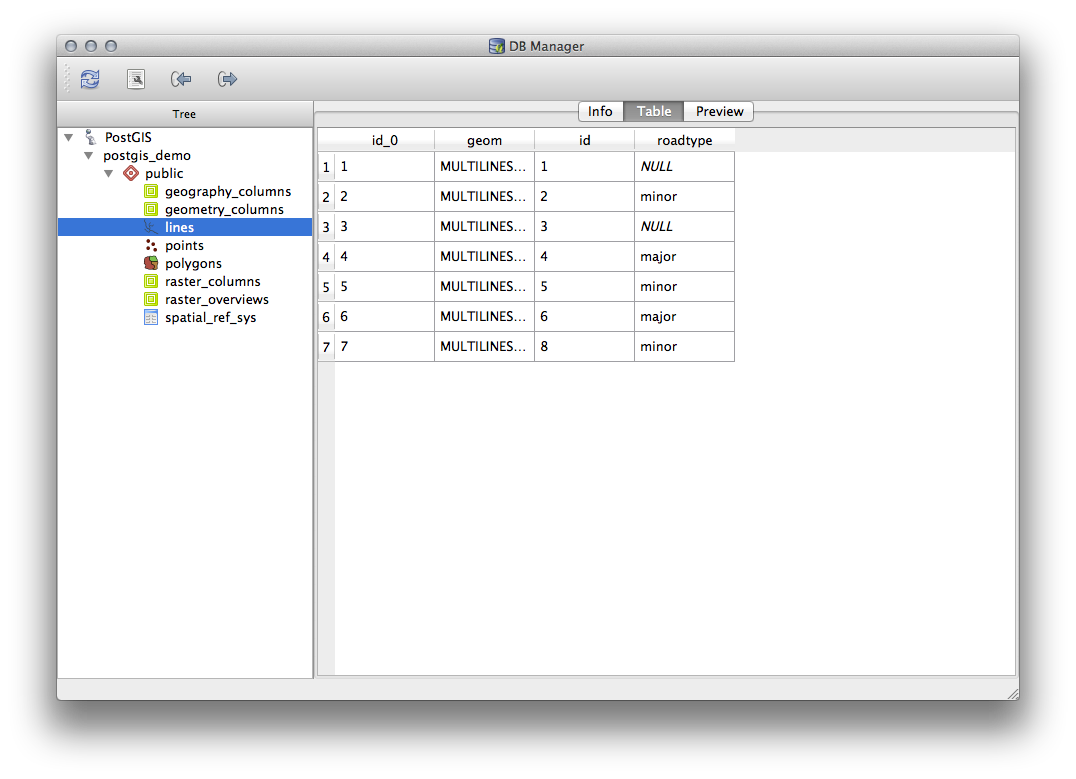
単にレイヤーツリーにレイヤーの属性テーブルを表示することによって、これを行う可能性がありますほとんど同じ方法でデータベース内のレコードを見てDBマネージャを使用することも非常に便利。 テーブル タブを選択して、データを閲覧できます。
地図プレビューでレイヤーのデータが表示される プレビュー タブもあります。
ツリー中のレイヤーを右クリックし、 キャンバスに追加 をクリックすると地図にこのレイヤーが追加されます。
これまでのところはデータベース、そのスキーマとテーブル、それらのメタデータを閲覧しているだけですが、おそらく追加の列を追加するとかテーブルを変更したい場合はどう?DBマネージャでは、直接これを行うことができます。
ツリーで、編集するテーブルを選択します
Select from the menu, to open the Table Properties dialog.
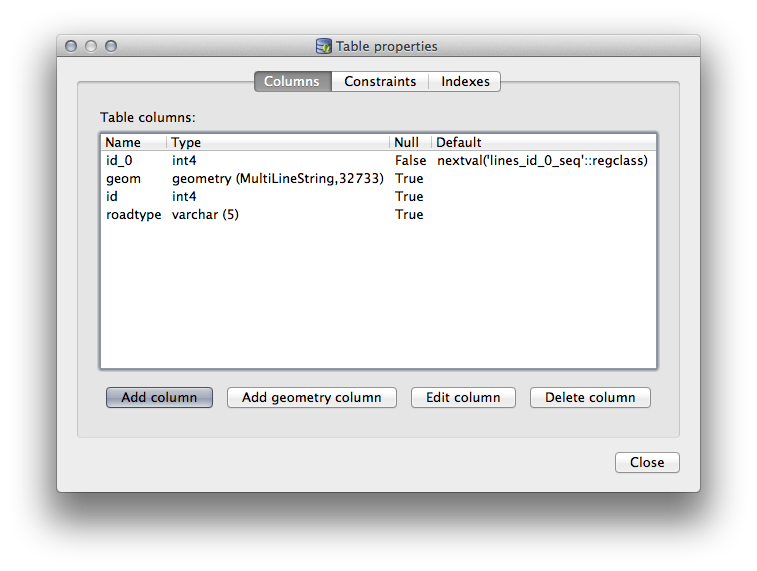
列を追加するには、このダイアログを使用してジオメトリ列を追加し、既存の列を編集したり、列を完全に削除できます。
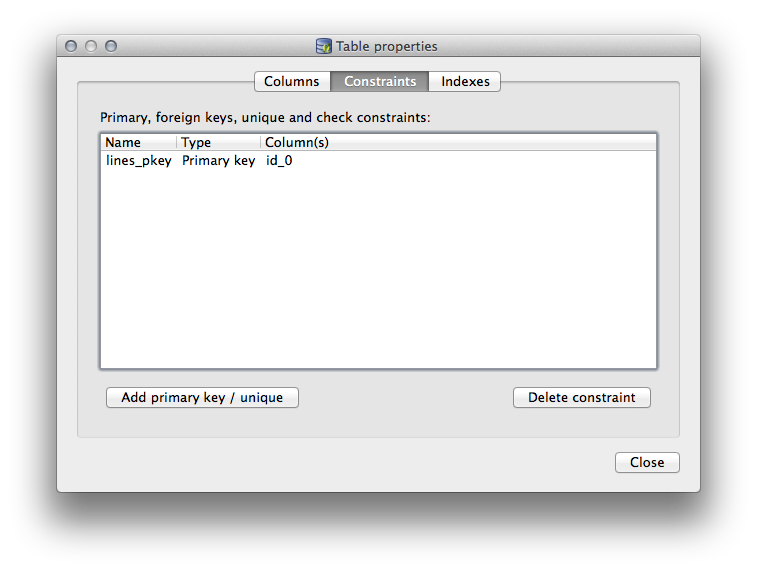
制約 タブを使用、どのフィールドが主キーとして使用されるか、既存の制約を削除するために管理できます。
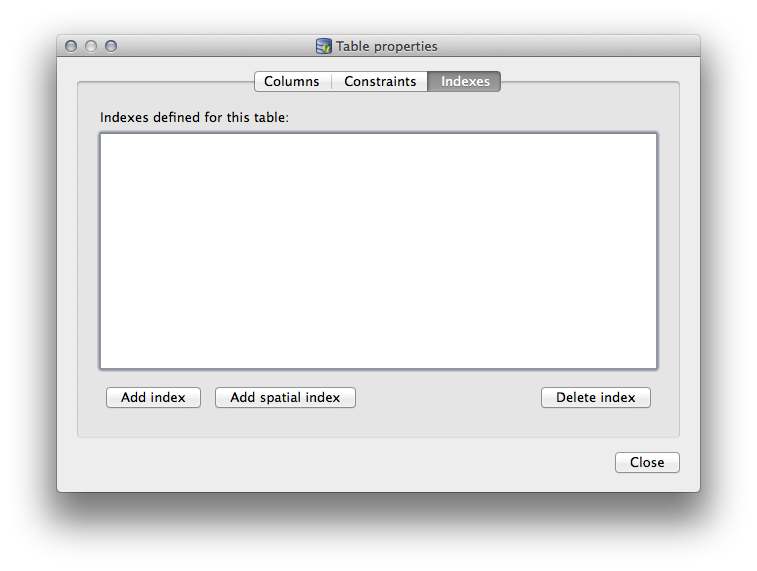
索引 タブは、空間索引と通常の索引の両方を追加および削除するために使用できます。
18.2.2. Follow Along: 新しいテーブルを作成する
データベース内の既存のテーブルでの作業のプロセスを一通り終えましたので、ここでDB マネージャを使用して新しいテーブルを作成してみましょう。
If it is not already open, open the DB Manager window, and expand the tree until you see the list of tables already in your database.
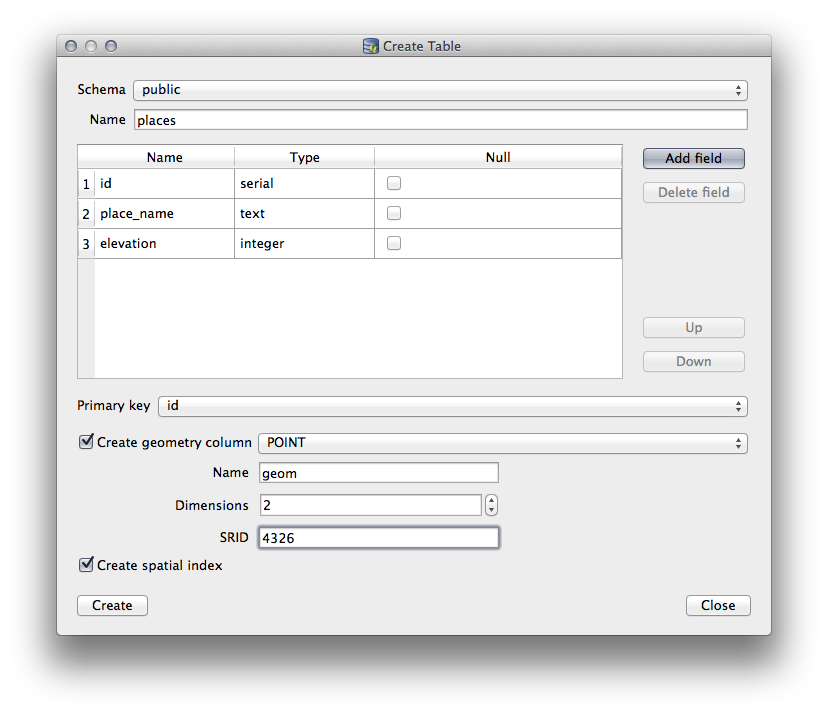
メニューから テーブル --> テーブルを作成 を選択し、 [テーブルの作成]ダイアログを開きます。
Use the default
Publicschema and name the tableplaces.Add the
id,place_name, andelevationfields as shown belowMake sure the
idfield is set as the primary key.Click the checkbox to Create geometry column and make sure it is set to a
POINTtype and leave it namedgeomand specify4326as the SRID.空間索引を作成 の横にあるチェックボックスをクリックし、作成 をクリックしてテーブルを作成します。
テーブルが作成されたことを知らせるダイアログを閉じ、 閉じる をクリックして「表を作成」ダイアログを閉じます。
これで、DBマネージャで、テーブルを検査できますし、もちろんその中にデータがないことがわかります。ここからレイヤーのメニューで 編集を切替 できます、テーブルに場所の追加を開始します。
18.2.3. Follow Along: 基本的なデータベース管理
The DB Manager will also let you do some basic database administration tasks. It is certainly not a substitute for a more complete database administration tool, but it does provide some functionality that you can use to maintain your database.
データベーステーブルは、多くの場合、非常に大きくなることがありえますし、頻繁に変更されているテーブルは、もはやPostgreSQLで必要とされてないレコードの残渣を残したままにすることがあります。 VACUUM コマンドでは、ガベージコレクションのようなものをして、パフォーマンス向上のためにテーブルを圧縮したりオプションで分析します。
Let us take a look at how we can perform a VACUUM ANALYZE command from within DB Manager.
Select one of your tables in the DB Manager Tree
Select from the menu
PostgreSQL will now perform the operation. Depending on how big your table is, this may take some time to complete.
You can find more information about the VACUUM ANALYZE process in the PostgreSQL Documentation on VACUUM ANALYZE.
18.2.4. Follow Along: DB マネージャでSQLクエリを実行する
DBマネージャはまた、データベーステーブルに対してクエリを記述し、結果を表示するための方法を提供します。すでに ブラウザ パネルの中のこの種の機能を見てきましたが、再びここでDBマネージャでそれを見てみましょう。
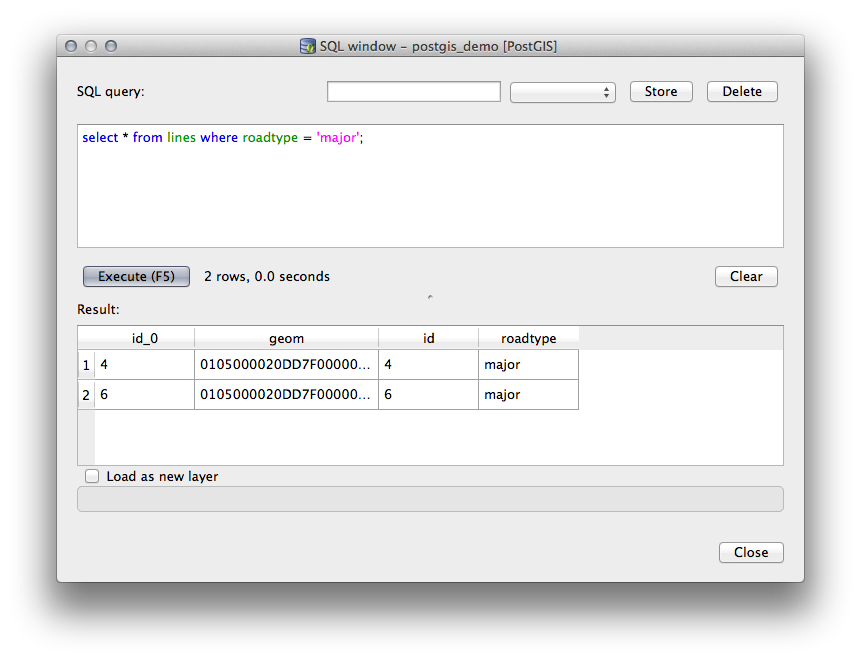
Select the
linestable in the tree.[DB マネージャ]ツールバーで SQLウィンドウ ボタンを選択します。

次の SQLクエリ を与えられたスペースに構成します
select * from lines where roadtype = 'major';
クエリを実行するには、 実行(F5) ボタンをクリックします。
Result パネルに一致するレコードが表示されているはずです。
新しいレイヤーとしてロード のチェックボックスをクリックして地図に結果を追加します。
Select the
idcolumn as the Column with unique integer values and thegeomcolumn as the Geometry column.Enter
roads_primaryas the Layer name (prefix).今すぐロード! をクリックして地図に新しいレイヤーとして結果をロードします。
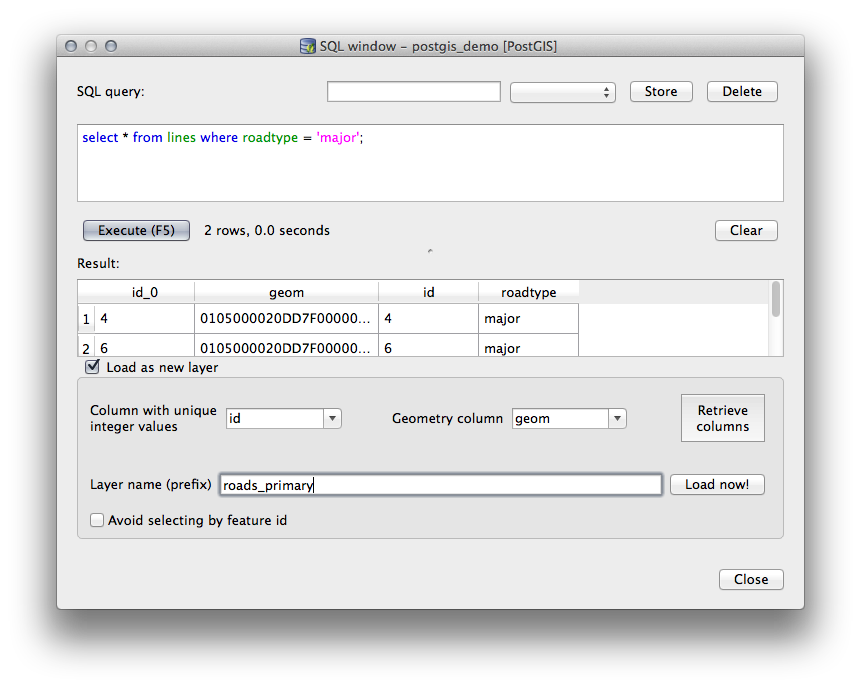
クエリと一致したレイヤーは今、地図上に表示されます。もちろんこのクエリツールは、以前のモジュールとセクション中で見たものなど、任意のSQLコマンドを実行するために使用できます。
18.2.5. DBマネージャを使用したデータベースへのデータのインポート
コマンドラインツールを使用して空間データベースにデータをインポートする方法をすでに見てきました。次に、DBマネージャを使用してインポートを行う方法を学習しましょう。
[DBマネージャ]ダイアログボックスのツールバー上の レイヤー/ファイルを読み込み ボタンをクリックしてください。

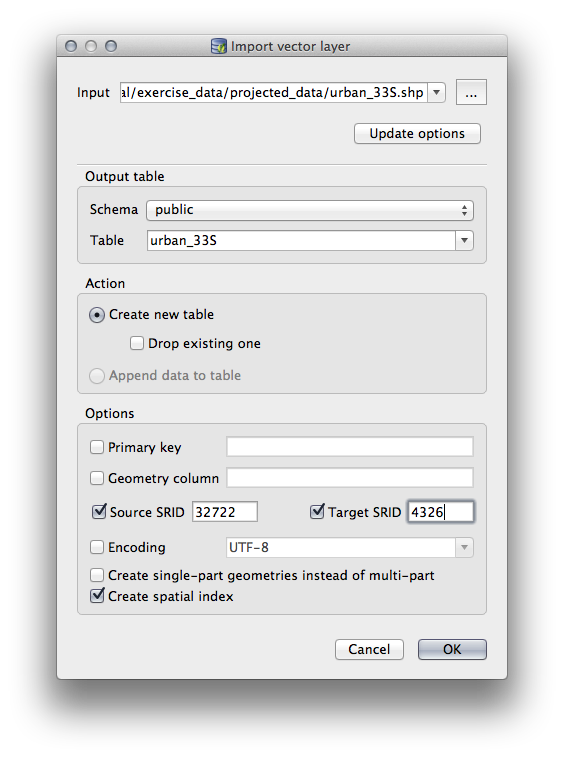
Select the
urban_33S.shpfile fromexercise_data/projected_dataas the input datasetフォームの値の一部を事前に埋めるために、 オプションを更新 ボタンをクリックしてください。
新しいテーブルを作成 オプションが選択されていることを確認してください
Specify the Source SRID as
32722and the Target SRID as4326空間索引を作成 の横にあるチェックボックスをオンにします。
Click OK to perform the import
読み込みが成功したことを知らせるダイアログを閉じます
Click the Refresh button on the DB Manager Toolbar
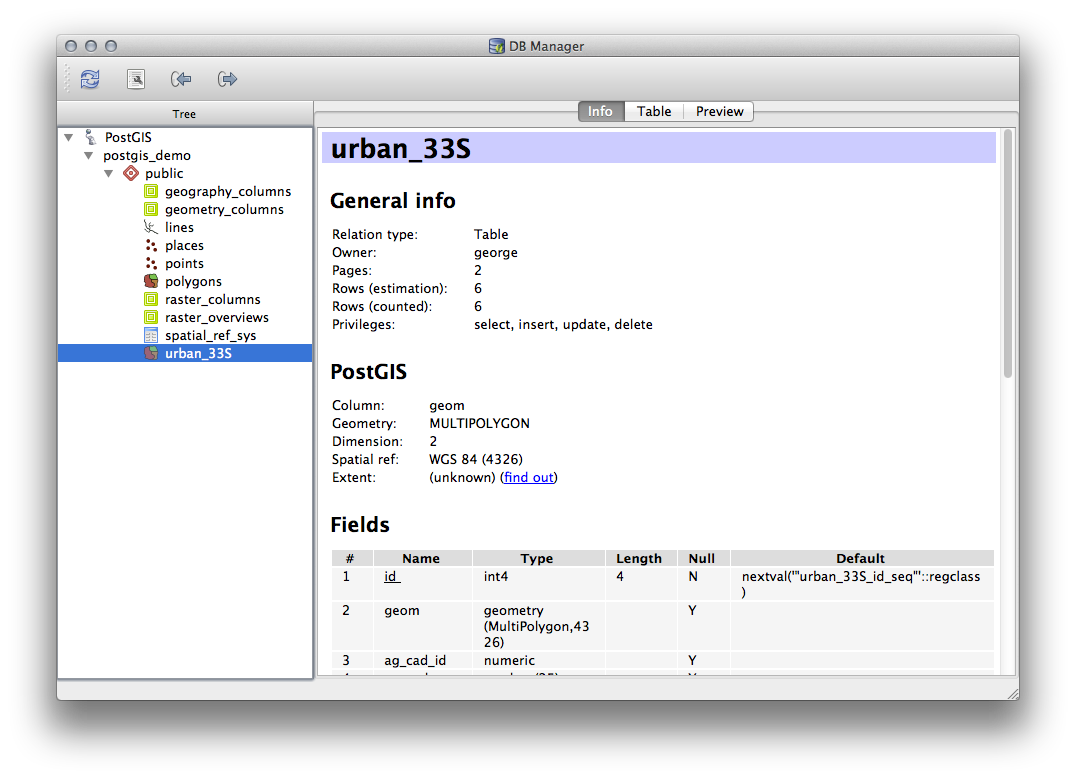
You can now inspect the table in your database by clicking on it in
the Tree.
Verify that the data has been reprojected by checking that the
Spatial ref: is listed as WGS 84 (4326).
ツリー中のテーブルを右クリックして キャンバスに追加 を選択すると地図にレイヤーとしてテーブルが追加されます。
18.2.6. DBマネージャを使用したデータベースからのデータの書き出し
DB マネージャは空間データベースからデータを書き出すためにも当然使用できますので、それがどのように行われるかを見てみましょう。
Select the
lineslayer in the Tree and click the Export to File button on the toolbar to open the Export to vector file dialog.Click the ... button to select the Output file and save the data to your
exercise_datadirectory asurban_4326.Set the Target SRID as
4326.OK をクリックして書き出しを初期化します。
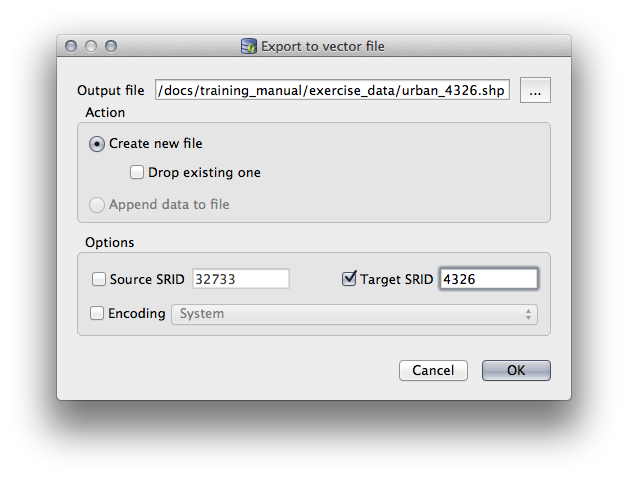
書き出しが成功したことを知らせるダイアログを閉じ、DBマネージャを閉じます。
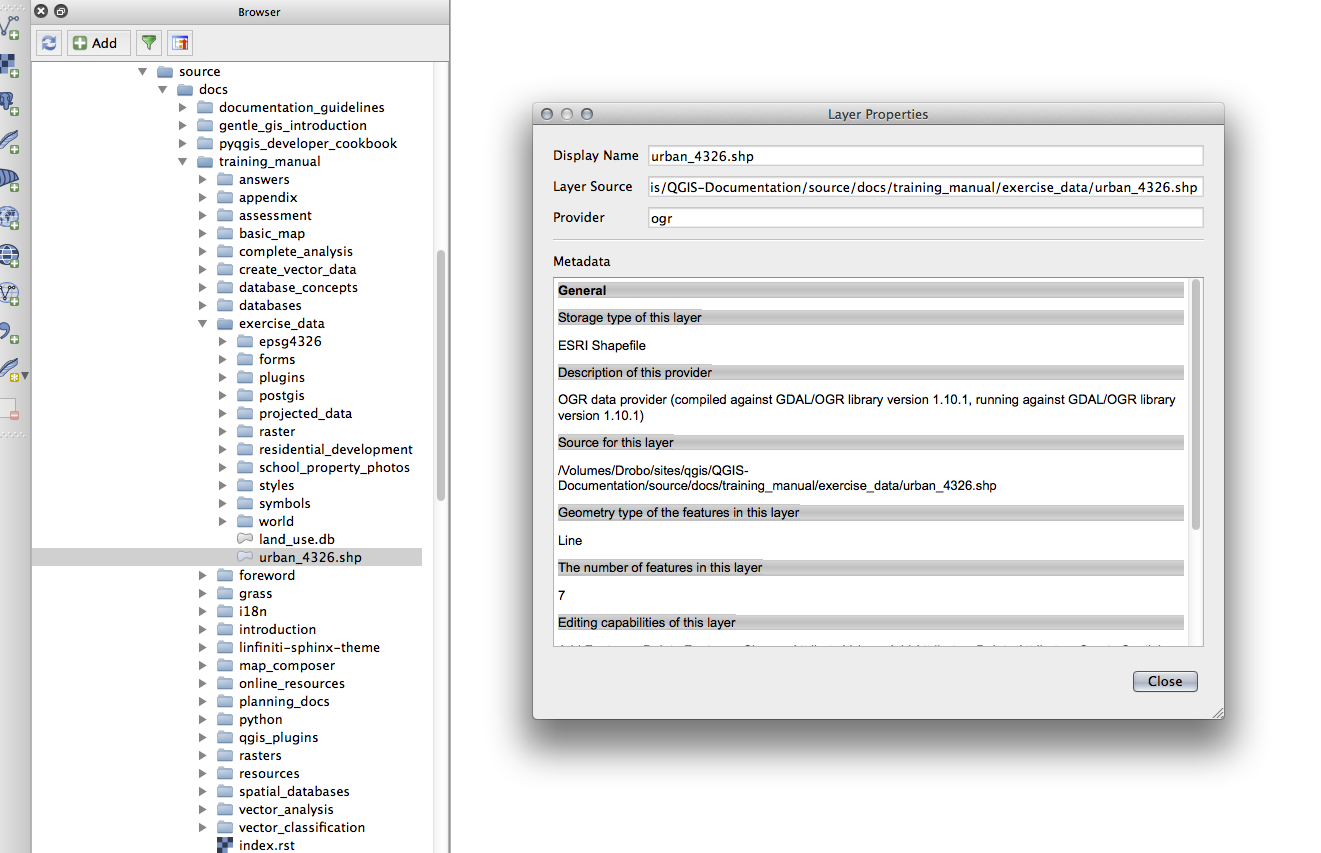
ブラウザパネルで作成したシェープファイルを検査できます。
18.2.7. In Conclusion
You have now seen how to use the DB Manager interface in QGIS to manage your spatial databases, to execute SQL queries against your data and how to import and export data.
18.2.8. What's Next?
Next, we will look at how to use many of these same techniques with SpatiaLite databases.