17.26. The batch processing interface
Megjegyzés
This lesson introduces the batch processing interface, which allows to execute a single algorithm with a set of different input values.
Sometimes a given algorithm has to be executed repeatedly with different inputs. This is, for instance, the case when a set of input files have to be converted from one format to another, or when several layers in a given projection must be converted into another projection.
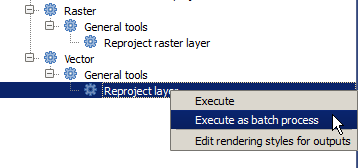
In that case, calling the algorithm repeatedly on the toolbox is not the best option. Instead, the batch processing interface should be used, which greatly simplifies performing a multiple execution of a given algorithm. To run an algorithm as a batch process, find it in the toolbox, and instead of double–clicking on it, right–click on it and select Run as batch process.
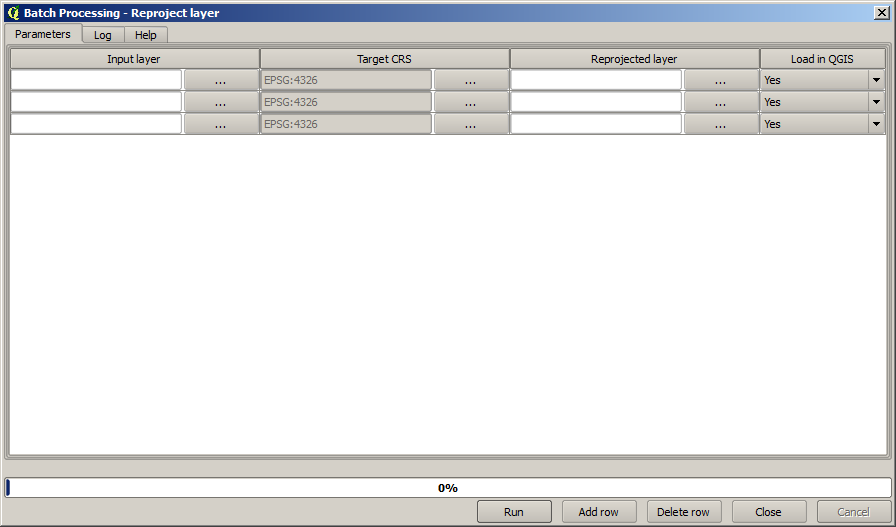
For this example, we will use the Reproject algorithm, so find it and do as described above. You will get to the following dialog.
If you have a look at the data for this lesson, you will see that it contains a set of three shapefiles, but no QGIS project file. This is because, when an algorithm is run as a batch process, layer inputs can be selected either from the current QGIS project or from files. That makes it easier to process large amounts of layers, such as, for instance, all the layers in a given folder.
Each row in the table of the batch processing dialog represents a single execution of the algorithm. Cells in a row correspond to the parameter needed by the algorithm, which are not arranged one above the other, as in the normal single–execution dialog, but horizontally in that row.
Defining the batch process to run is one by filling the table with the corresponding values, and the dialog itself contains several tools to make this task easier.
Let’s start filling the fields one by one. The first column to fill is the Input layer one. Instead of entering the names of each one of the layers we want to process, you can select all of them and let the dialog put one in each row. Click on the button in the upper-left cell, and in the file selection dialog that will popup, select the three files to reproject. Since only one of them is needed for each row, the remaining ones will be used to fill the rows underneath.
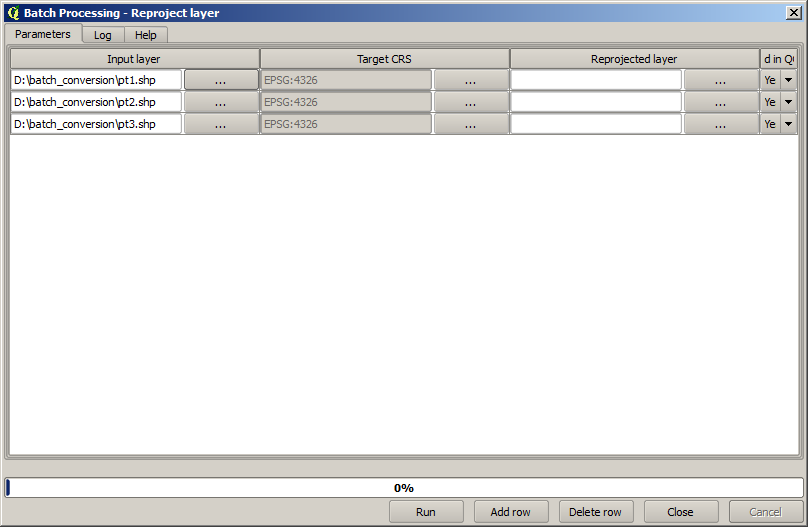
The default number of rows is 3, which is exactly the number of layers we have to convert, but if you select more layers, new rows will be added automatically. If you want to fill the entries manually, you can add more rows using the Add row button.
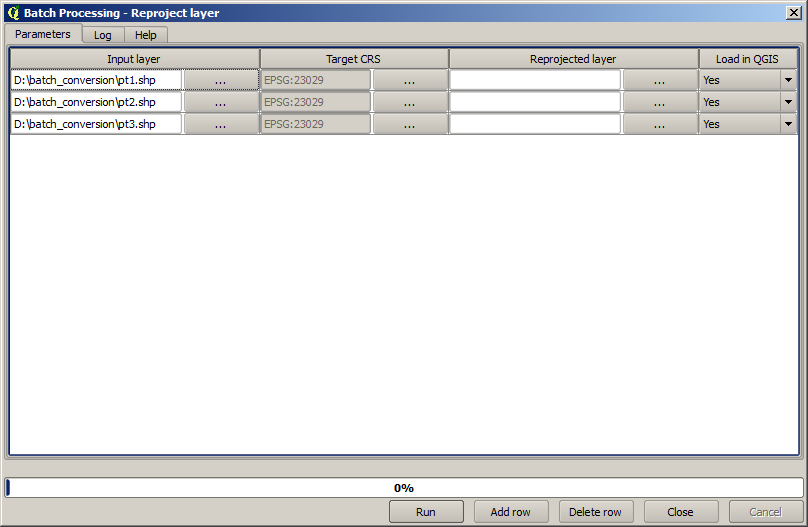
We are going to convert all those layers to the EPSG:23029 CRS, so we have to select that CRS in the second field. We want the same on for all rows, but we do not have to do it for every single row. Instead, set that CRS for the first row (the one at the top) using the button in the corresponding cell, and then double click on the column header. That causes all the cells in the column to be filled using the value of the top cell.
Finally, we have to select an output file for each execution, which will contain
the corresponding reprojected layer. Once again, let’s do it just for the first row.
Click on the button in the upper cell and, in a folder where you want to put
your output files, enter a filename (for instance, reprojected.shp).
Now, when you click OK on the file selection dialog, the file does not automatically gets written to the cell, but an input box like the following one is shown instead.
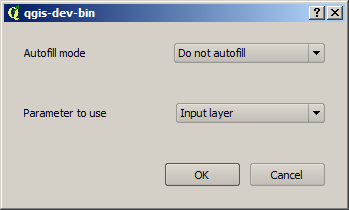
If you select the first option, only the current cell will be filled. If you select any of the other ones, all the rows below will be filled with a given pattern. In this case, we are going to select the Fill with parameter value option, and then the Input Layer value in the drop down menu below. That will cause the value in the Input Layer (that is, the layer name) to be added to the filename we have added, making each output filename different. The batch processing table should now look like this.
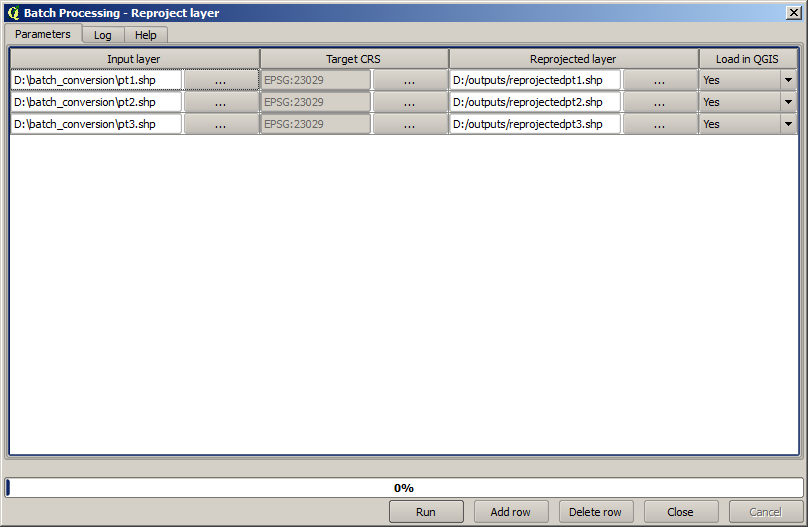
The last column sets whether or not to add the resulting layers to the current QGIS project. Leave the default Yes option, so you can see your results in this case.
Click on OK and the batch process will be run. If everything went fine, all your layers will have been processed, and 3 new layers would have been created.