12.2. Lesson: GRASS Tools
In this lesson we will present a selection of tools to give you an idea of the capabilities of GRASS.
12.2.1.  Follow Along: Create an aspect map
Open the GRASS Tools tab
Load the
g_demraster layer from the grass_mapset MapsetLook for the r.aspect module by searching for it in the Filter field of the Modules List tab
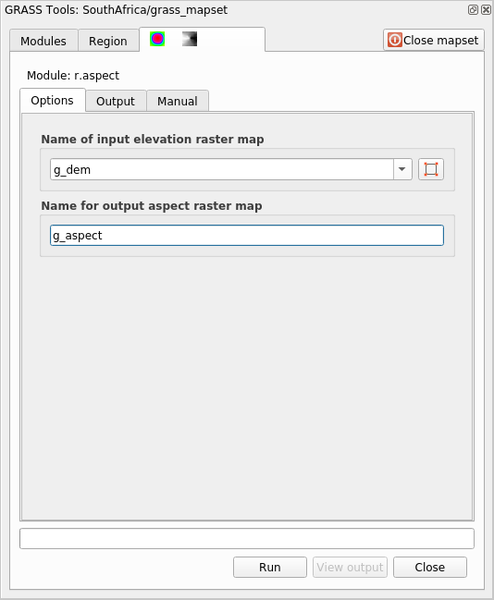
Open the tool and set it up like this and click on the Run button:
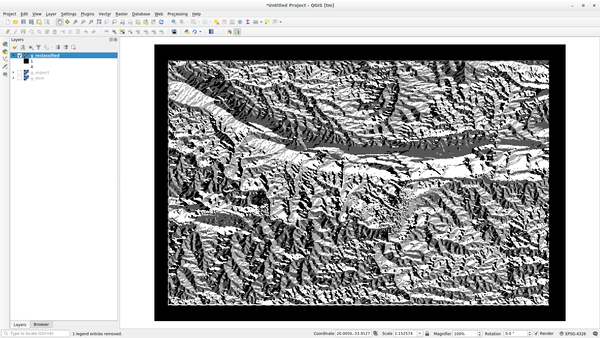
When the process is finished click on View Output to load the resulting layer in the canvas:
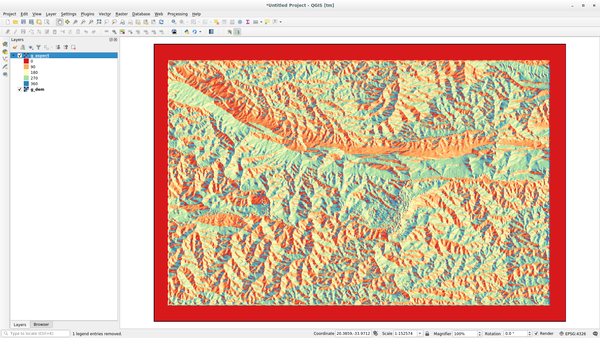
The g_aspect layer is stored within the grass_mapset Mapset
so you can remove the layer from the canvas and reload it whenever you want.
12.2.2. Follow Along: Get basic statistic of raster layer
We want to know some basic statistics of the g_dem raster layer.
Open the GRASS Tools tab
Load the
g_demraster layer from the grass_mapset MapsetLook for the r.info module by searching for it in the Filter field of the Modules List tab
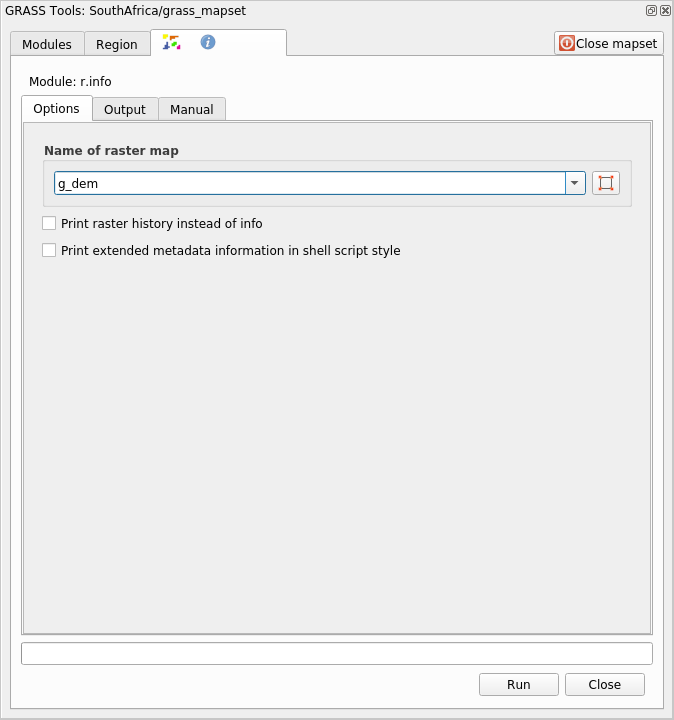
Set up the tool like this and click on Run:
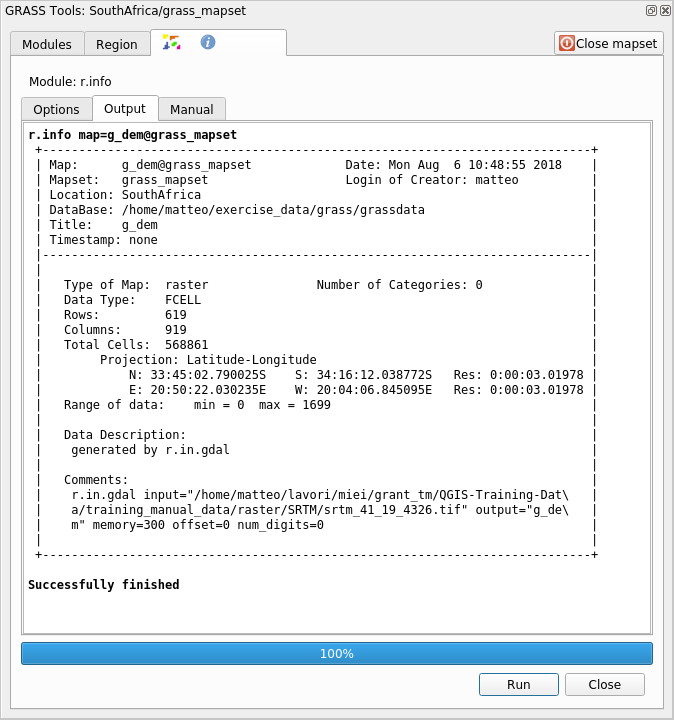
Within the Output tab you will see some raster information printed, like the path of the file, the number of rows and columns and other useful information:
12.2.3.  Follow Along: The Reclass Tool
Reclassifying a raster layer is a very useful task. We just created the
g_aspect layer from the g_dem one. The value range gets from 0
(North) passing through 90 (East), 180 (South), 270 (West) and finally to 360
(North again). We can reclassify the g_aspect layer to have just 4
categories following specific rules (North = 1, East = 2, South = 3 and
West = 4).
Grass reclassify tool accepts a txt file with the defined rules. Writing the
rules is very simple and the GRASS Manual contains very good description.
Tip
Each GRASS tool has its own Manual tab. Take the time to read the description of the tool you are using to don’t miss some useful parameters
Load the
g_aspectlayer or, if you don’t have create it, go back to the Follow Along: Create an aspect map section.Look for the r.reclass module by searching for it in the Filter field of the Modules List tab
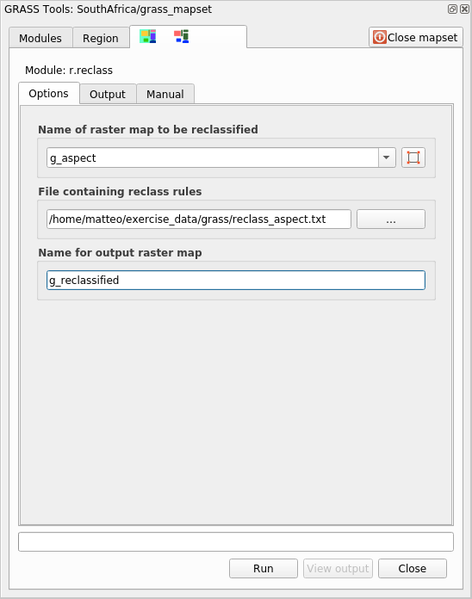
Open the tool and set it up like the following picture. The file containing the rules is in the
exercise_data/grass/folder, namedreclass_aspect.txt.Click on Run and wait until the process is finished:
Click on View Output to load the reclassified raster in the canvas
The new layer is made up by just 4 values (1, 2, 3, and 4) and it is easier to manage and to process.
Tip
Open the reclass_aspect.txt with a text editor to see the rules
and to start becoming used to them. Moreover, take a deep look at the GRASS
manual: a lot of different examples are pointed out.
12.2.4. Try Yourself Reclassify with your rules
Try to reclassify the g_dem layer into 3 new categories:
from 0 to 1000, new value = 1
from 1000 to 1400, new value = 2
from 1400 to the maximum raster value, new value = 3
12.2.5. Follow Along: The Mapcalc Tool
The Mapcalc tools is similar to the Raster Calculator of QGIS. You can perform mathematical operation on one or more raster layers and the final result will be a new layer with the calculated values.
The aim of the next exercise is to extract the values greater than 1000 from the
g_dem raster layer.
Look for the r.mapcalc module by searching for it in the Filter field of the Modules List tab.
Start the tool.
The Mapcalc dialog allows you to construct a sequence of analyses to be performed on a raster, or collection of rasters. You will use these tools to do so:

In order, they are:
Add map: Add a raster file from your current GRASS mapset.
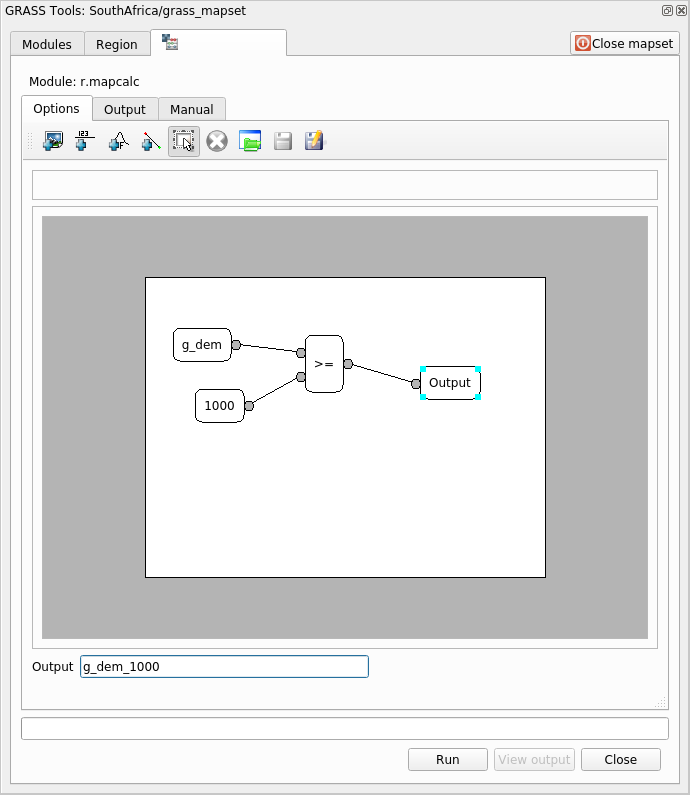
Add constant value: Add a constant value to be used in functions, 1000 in this case
Add operator or function: Add an operator or function to be connected to inputs and outputs, we will use the operator
greater equals thanAdd connection: Connect elements. Using this tool, click and drag from the red dot on one item to the red dot on another item. Dots that are correctly connected to a connector line will turn gray. If the line or dot is red, it is not properly connected!
Select item: Select an item and move selected items.
Delete selected item: Removes the selected item from the current mapcalc sheet, but not from the mapset (if it is an existing raster)
Open: Open an existing file with the operation defined
Save: Save all the operation in a file
Save as: Save all the operations as a new file on the disk.
Using these tools, construct the following algorithm:
Click on Run and then on View output to see the output displayed in your map:
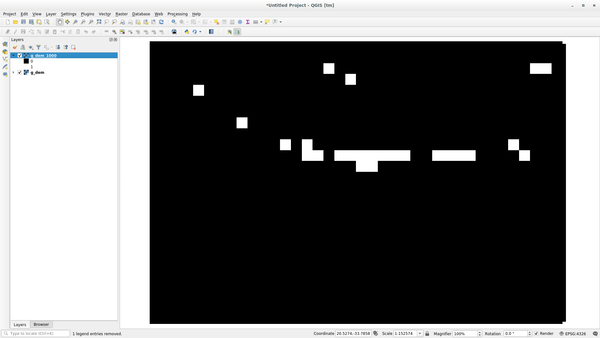
This shows all the areas where the terrain is higher than 1000 meters.
Tip
You can also save the formula you have created and load it in another QGIS project by clicking on the last button on the GRASS Mapcalc toolbar.
12.2.6. In Conclusion
In this lesson, we have covered only a few of the many tools GRASS offers. To explore the capabilities of GRASS for yourself, open the GRASS Tools dialog and scroll down the Modules List. Or for a more structured approach, look under the Modules Tree tab, which organizes tools by type.