2.3. Lesson: Обзор интерфейса
Мы изучим пользовательский интерфейс QGIS, чтобы вы ознакомились с меню, панелями инструментов, картой и списком слоёв.
Цель этого урока: Понять основы интерфейска QGIS.
2.3.1.  Try Yourself: Основы
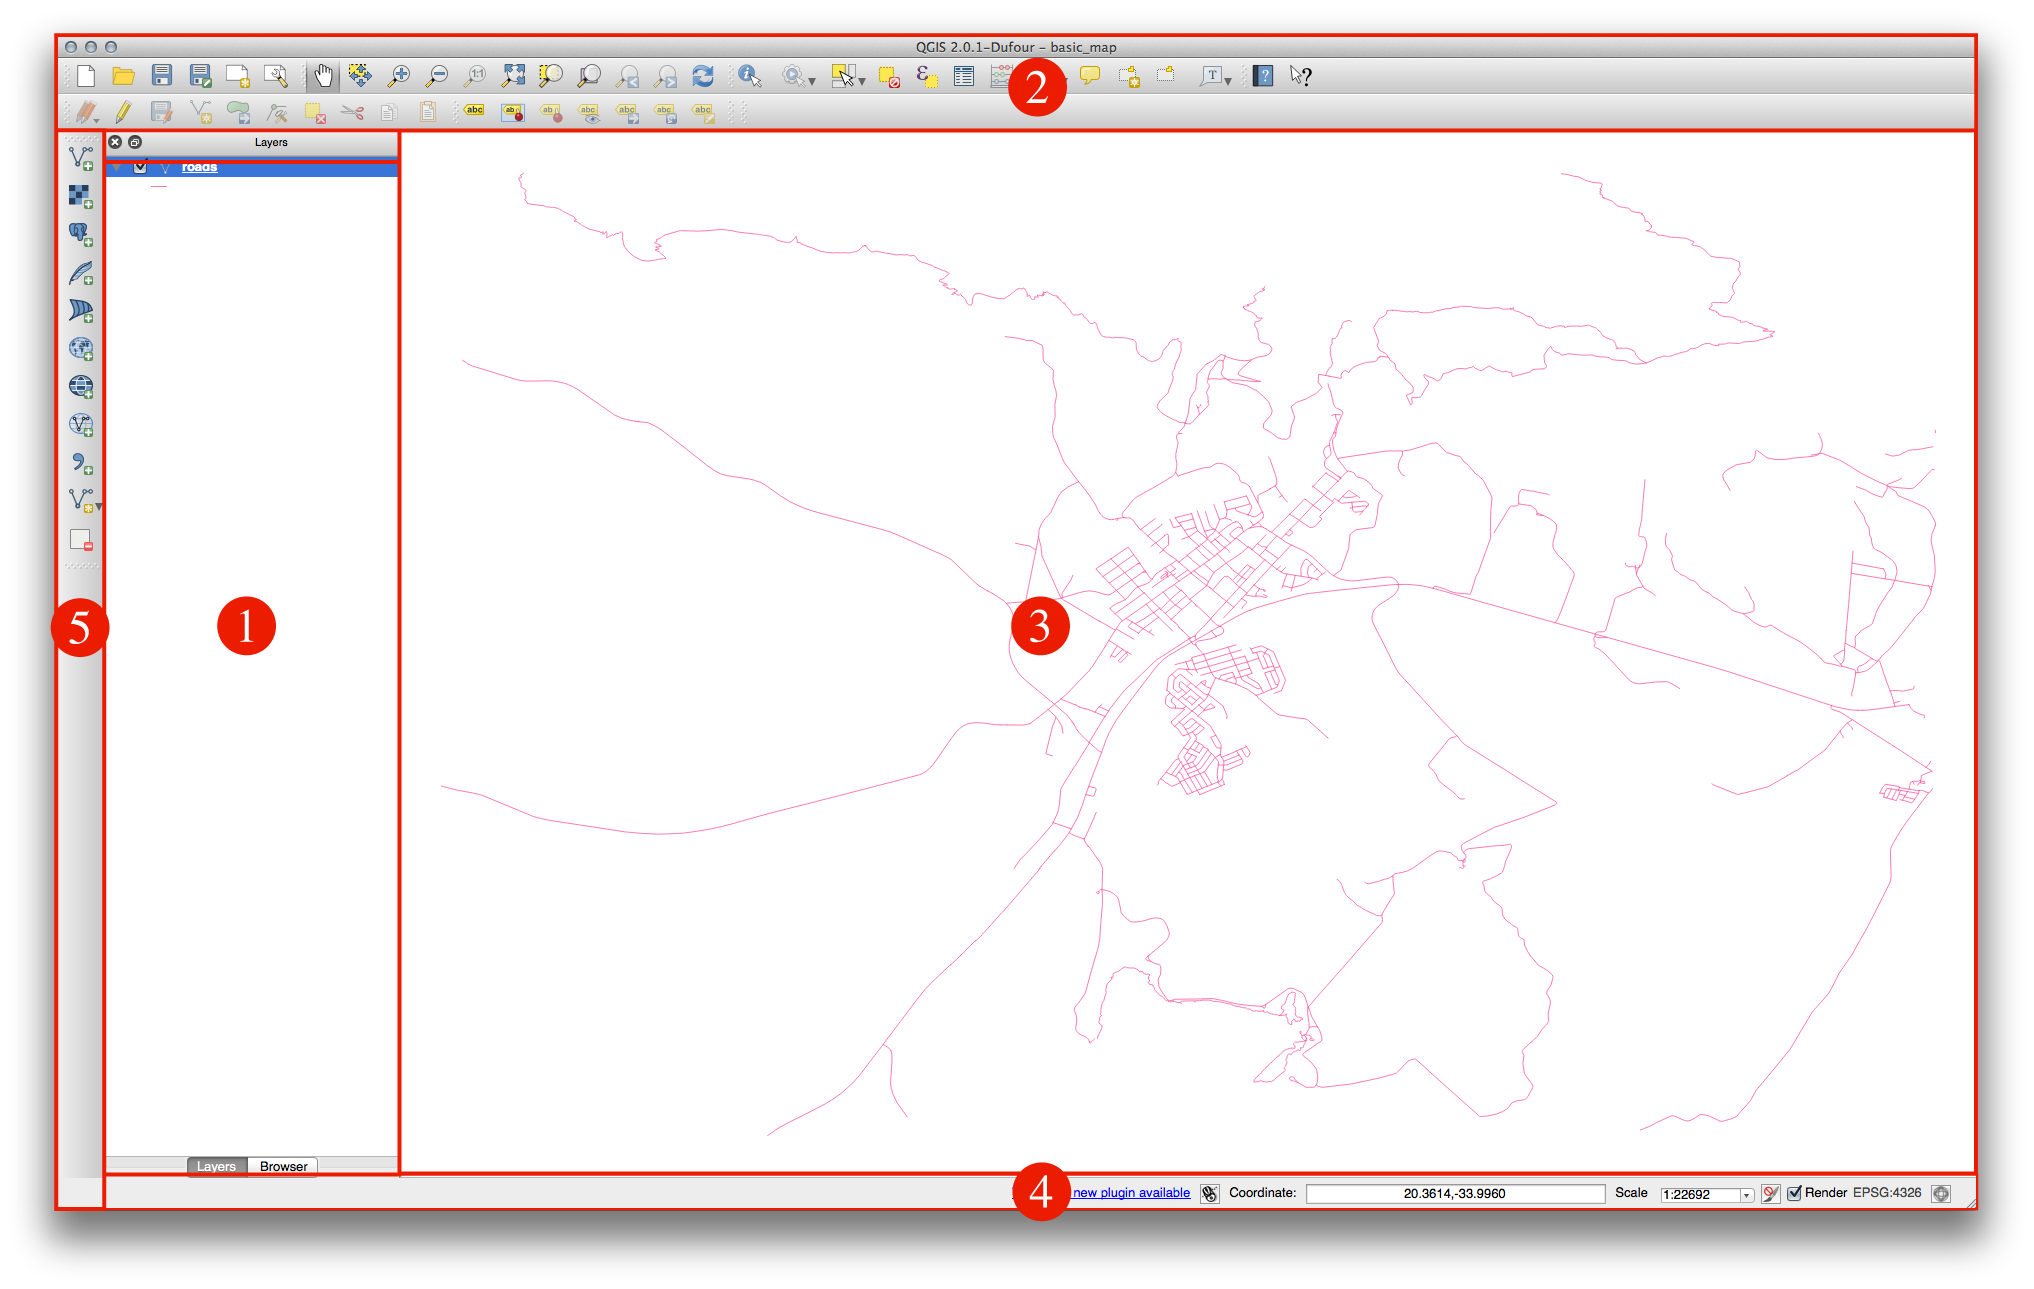
Элементы, обозначенные выше:
Список слоёв / Обозреватель
Панели инструментов
Карта
Строка состояния
Боковая панель инструментов
2.3.1.1. Список слоёв
В списке слоёв Вы можете в любое время просмотреть доступные слои.
Разворачивание свёрнутых элементов (нажатием на плюс рядом с ними) предоставит вам информацию он внешнем виде слоя.
Нажатие по слою правой кнопкой мыши откроет меню с множеством опций. Вы вскоре будете использовать некоторые из них, так что можете осмотреться!
Some versions of QGIS have a separate Control rendering order checkbox just underneath the Layers list. Don’t worry if you can’t see it. If it is present, ensure that it’s checked for now.
Примечание
A vector layer is a dataset, usually of a specific kind of object, such as roads, trees, etc. A vector layer can consist of either points, lines or polygons.
2.3.1.2. The Browser Panel
The QGIS Browser is a panel in QGIS that lets you easily navigate in your database. You can have access to common vector files (e.g. ESRI shapefile or MapInfo files), databases (e.g.PostGIS, Oracle, Spatialite or MSSQL Spatial) and WMS/WFS connections. You can also view your GRASS data.
2.3.1.3. Toolbars
Your most oft-used sets of tools can be turned into toolbars for basic access. For example, the File toolbar allows you to save, load, print, and start a new project. You can easily customize the interface to see only the tools you use most often, adding or removing toolbars as necessary via the Settings ‣ Toolbars menu.
Even if they are not visible in a toolbar, all of your tools will remain accessible via the menus. For example, if you remove the File toolbar (which contains the Save button), you can still save your map by clicking on the Project menu and then clicking on Save.
2.3.1.4. The Map Canvas
This is where the map itself is displayed.
2.3.1.5. The Status Bar
Shows you information about the current map. Also allows you to adjust the map scale and see the mouse cursor’s coordinates on the map.
2.3.2. Try Yourself 1
Try to identify the four elements listed above on your own screen, without referring to the diagram above. See if you can identify their names and functions. You will become more familiar with these elements as you use them in the coming days.
2.3.3. Try Yourself 2
Try to find each of these tools on your screen. What is their purpose?


Примечание
If any of these tools is not visible on the screen, try enabling some toolbars that are currently hidden. Also keep in mind that if there isn’t enough space on the screen, a toolbar may be shortened by hiding some of its tools. You can see the hidden tools by clicking on the double right arrow button in any such collapsed toolbar. You can see a tooltip with the name of any tool by holding your mouse over the tool for a while.
2.3.4. What’s Next?
Now you’ve seen how the QGIS interface works, you can use the tools available to you and start improving on your map! This is the topic of the next lesson.