Wichtig
Übersetzen ist eine Gemeinschaftsleistung Sie können mitmachen. Diese Seite ist aktuell zu 31.65% übersetzt.
18.2. Lesson: Using DB Manager to work with Spatial Databases in QGIS
Wir haben schon eine ganze Menge von Datenbankoperationen mit Hilfe von QGIS und anderen Werkzeugen kennengelernt. Jetzt wollen wir uns die DB-Verwaltung ansehen. Sie enthält viele ähnliche Funktionalitäten sowie zusätzlich Werkzeuge zum Management.
Ziel dieser Lektion: Zu erlernen, wie mit Hilfe der QGIS DB-Verwaltung mit räumlichen Datenbanken interagiert.
18.2.1. ★☆☆ Follow Along: Managing PostgreSQL Databases with DB Manager
You should first open the DB Manager interface by selecting
on the menu
or by selecting the  DB Manager icon on the toolbar.
You should already see the previous connections we have configured
and be able to expand the myPG section and its public schema
to see the tables we have worked with in previous sections.
Als Erstes fällt uns vielleicht auf, dass einige Metadaten über die in der Datenbank enthaltenen Schemas angezeigt werden.
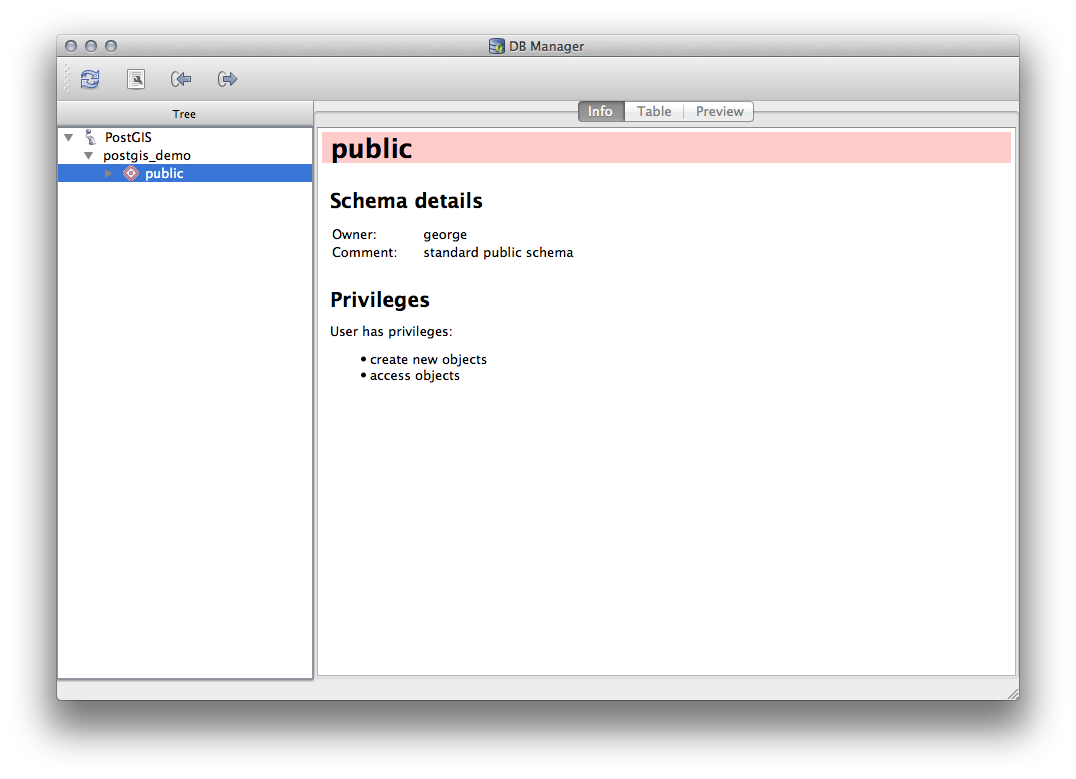
Schemas sind eine Möglichkeit, Datentabellen und andere Objekte in einer PostgreSQL Datenbank zu gruppieren. Sie sind ein Behältnis für Zugriffsrechte und andere Einschränkungen. Das Management von PostgreSQL Schemas geht über den Umfang dieser Anleitung hinaus. Weitere Informationen hierzu findet man unter PostgreSQL documentation on Schemas. Man kann die DB-Verwaltung zur Erstellung neuer Schemas verwenden. Allerdings sind für die effektive Verwaltung andere Werkzeuge wie pgAdmin III oder die Kommandozeile erforderlich.
Die DB-Verwaltung kann auch zur Verwaltung der Tabellen in der Datenbank verwendet werden. Wir haben bereits einige Möglichkeiten der Erstellung und Verwaltung von Tabellen mit Hilfe der Kommandozeile behandelt. Sehen wir uns nun an, wie man das mit der DB-Verwaltung erledigen kann.
Als Erstes ist es nützlich, sich die Metadaten einer Tabelle anzusehen. Man klickt dazu im Baum auf den Namen der Tabelle und schaut sich den Info Reiter an.
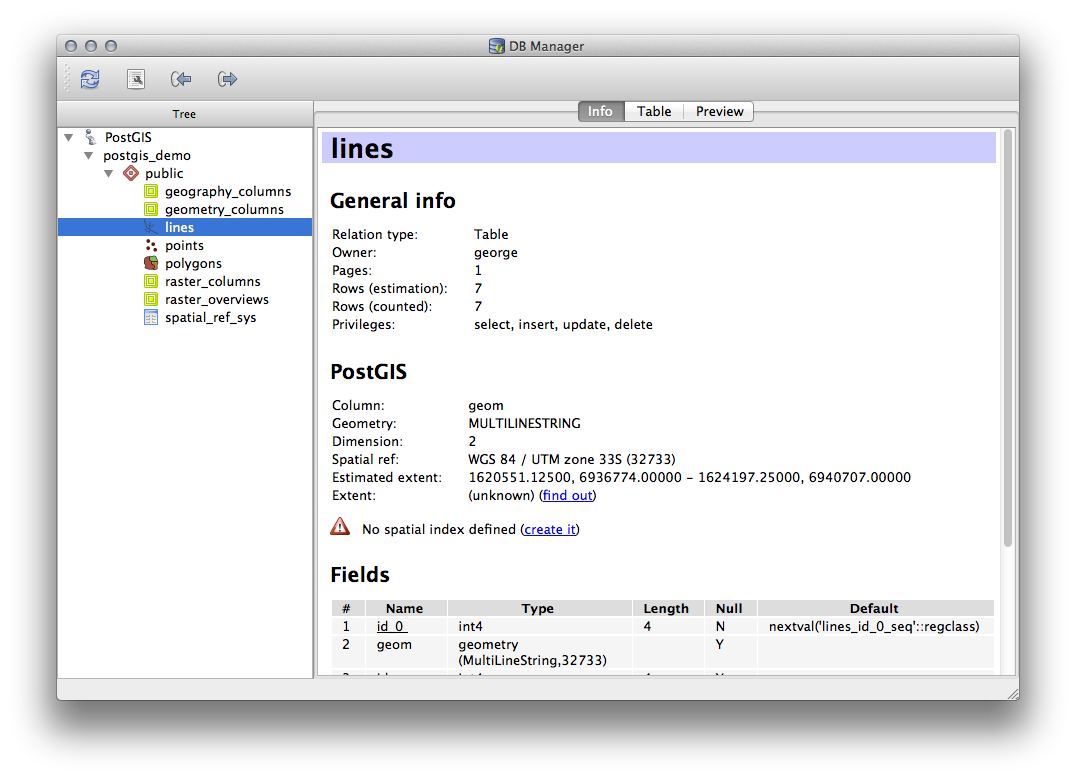
In diesem Bedienfeld sehen wie die Allgemeinen Informationen über die Tabelle als auch die Informationen über die Geometrie und das räumliche Bezugssystem, die von der PostGIS Erweiterung bereitgestellt werden.
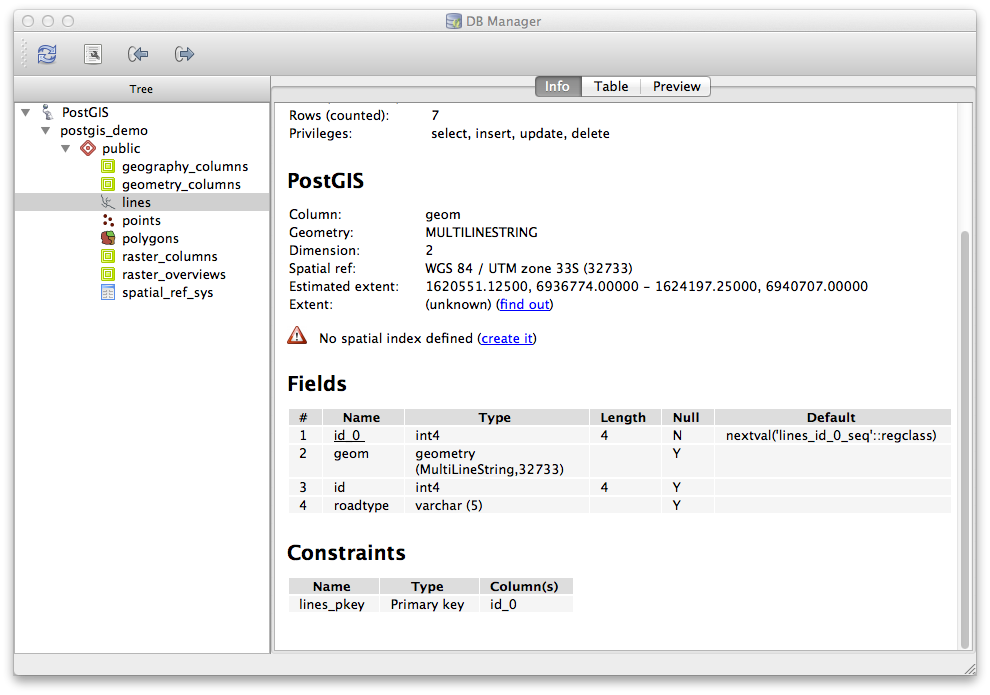
Wenn man im Info Reiter weiter nach unten scrollt, sieht man weitere Informationen zu Felder, Constraints und Indexes bezüglich der aktuellen Tabelle.
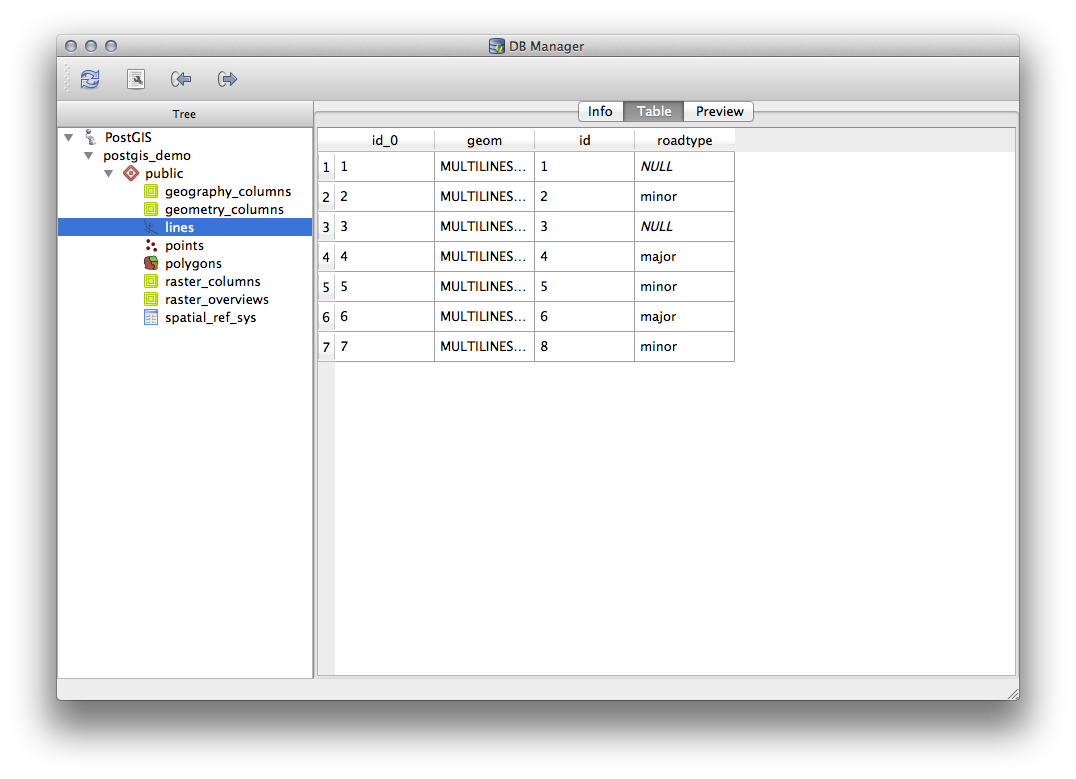
Der DB-Manager ist außerdem sehr nützlich, um sich Datensätze anzusehen - ähnlich der Attributtabelle eines Layers im Layerbaum. Sie können die Daten im Reiter Tabelle durchsehen.
Es gibt auch einen Vorschau Reiter, der die Layerdaten als Kartenvorschau zeigt.
Mit Rechtsklick auf den Layer im Baum und Klick auf Zur Karte hinzufügen wird der Layer in Ihre Karte eingefügt.
Bis hierher haben wir nur die Datenbank, ihre Schemas, Tabellen und Metadaten angezeigt. Was ist nun, wenn man Tabellen ändern möchte und z.B. eine neue Spalte hinzufügen möchte? Die DB-Verwaltung erlaubt uns, dass direkt zu machen.
Wählen Sie die Tabelle, die sie bearbeiten möchten im Baum
Select from the menu, to open the Table Properties dialog.
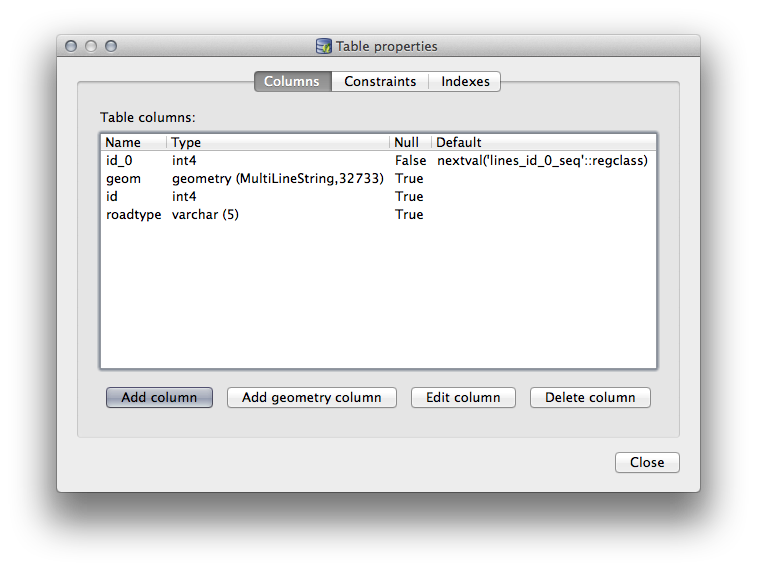
Sie können der Dialog verwenden, um Spalten oder Geometriespalten hinzuzufügen, vorhandene Spalten zu bearbeiten oder Spalten komplett zu entfernen.
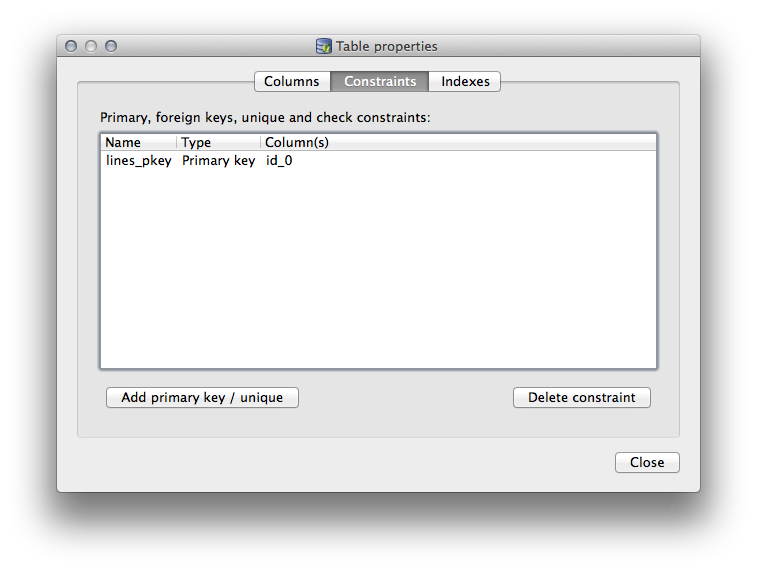
Mit Hilfe des Reiters Restriktionen können Sie verwalten, welche Felder als Primärschlüssel verwendet werden oder um vorhandene Einschränkungen zu entfernen.
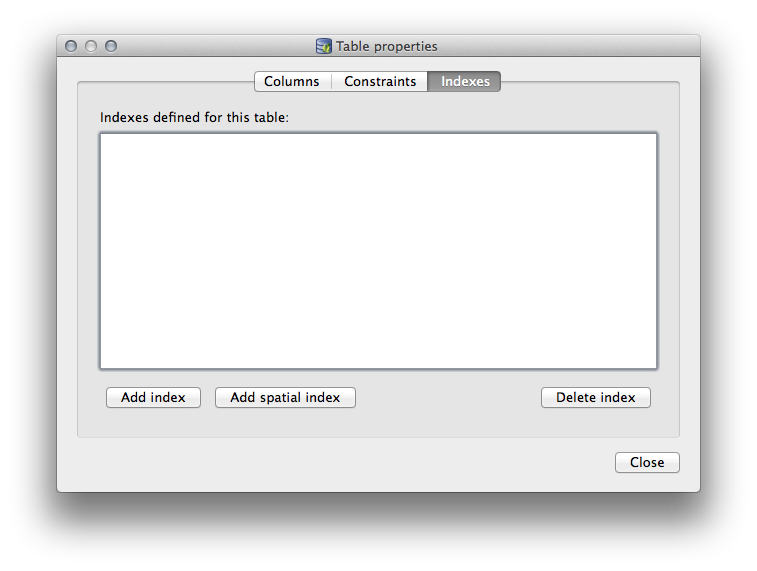
Im Reiter Indizes können normale oder räumliche Indizes hinzugefügt oder gelöscht werden.
18.2.2. ★☆☆ Follow Along: Creating a New Table
Nachdem wir den Prozess zur Arbeit mit vorhandenen Tabellen durchgegangen sind, nutzen wir die DB-Verwaltung jetzt zur Erstellung einer neuen Tabelle.
If it is not already open, open the DB Manager window, and expand the tree until you see the list of tables already in your database.
Wählen Sie Tabelle –> Tabelle erzeugen um den Dialog zu öffnen.
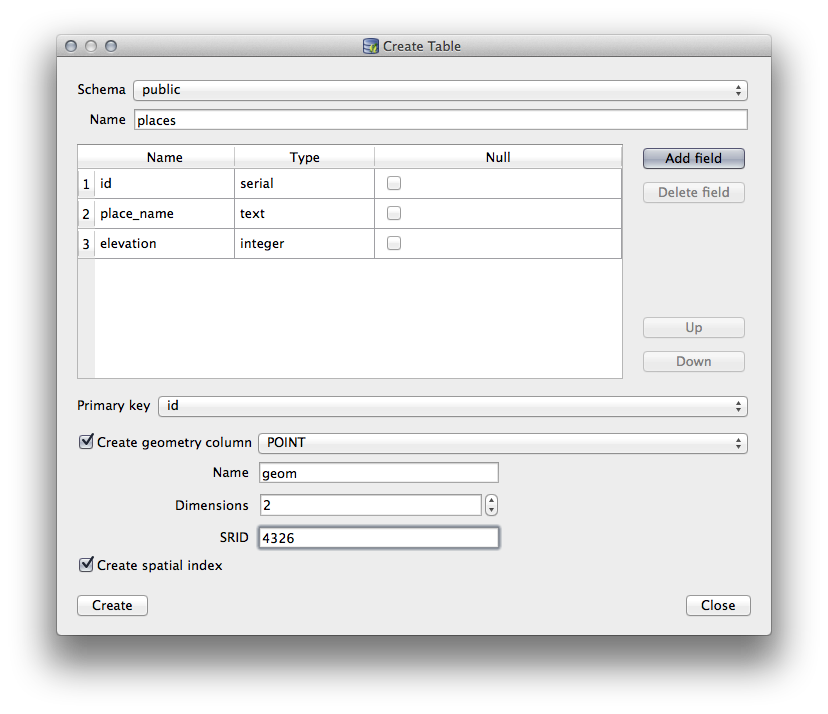
Use the default
Publicschema and name the tableplaces.Add the
id,place_name, andelevationfields as shown belowMake sure the
idfield is set as the primary key.Click the checkbox to Create geometry column and make sure it is set to a
POINTtype and leave it namedgeomand specify4326as the SRID.Setzen Sie den Haken bei Räumlichen Index erzeugen und klicken dann auf Erzeugen, um die Tabelle zu erstellen.
Dismiss the dialog letting you know that the table was created and click Close to close the Create Table Dialog.
You can now inspect your table in the DB Manager and you will of course find that there is no data in it. From here you can Toggle Editing on the layer menu and begin to add places to your table.
18.2.3. ★☆☆ Follow Along: Basic Database Administration
The DB Manager will also let you do some basic database administration tasks. It is certainly not a substitute for a more complete database administration tool, but it does provide some functionality that you can use to maintain your database.
Datenbanktabellen können oftmals sehr groß werden und oft veränderte Tabellen können Überbleibsel zurücklassen, die nicht mehr von PostgreSQL benötigt werden. Der Befehl VACUUM stellet eine Art Müllabfuhr dar. Er verringert die Größe der Tabellen. Bei Bedarf analysiert er die Tabellen, um eine höhere Geschwindigkeit der Datenbank zu erreichen.
Let us take a look at how we can perform a VACUUM ANALYZE command from within DB Manager.
Select one of your tables in the DB Manager Tree
Select from the menu
PostgreSQL will now perform the operation. Depending on how big your table is, this may take some time to complete.
Weitere Informationen zum Prozess VACUUM ANALYZE finden Sie unter PostgreSQL Documentation on VACUUM ANALYZE.
18.2.4. ★☆☆ Follow Along: Executing SQL Queries with DB Manager
DB Manager also provides a way for you to write queries against your database tables and to view the results. We have already seen this type of functionality in the Browser panel, but lets look at it again here with DB Manager.
Select the
linestable in the tree.Select the SQL window button in the DB Manager toolbar.

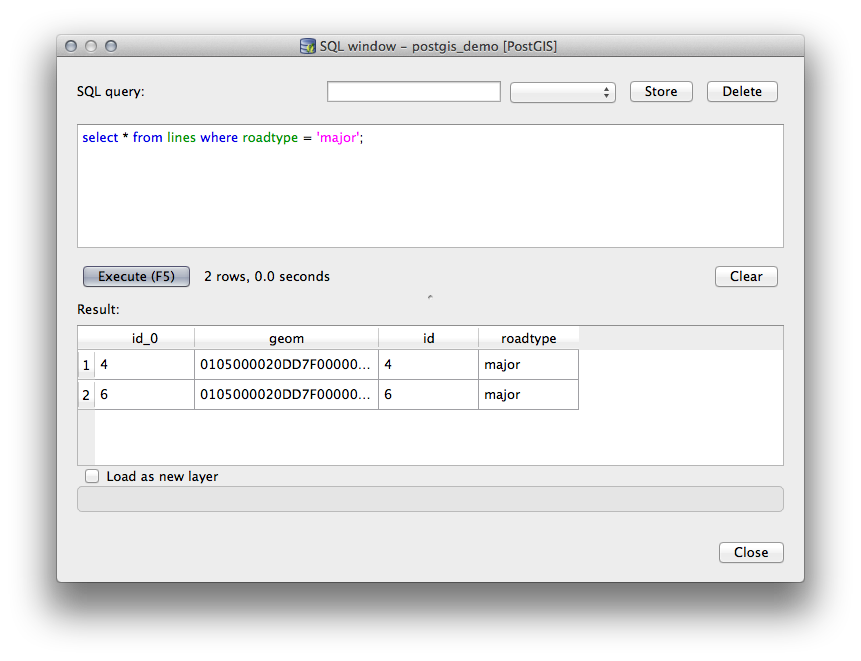
Compose the following SQL query in the space provided:
select * from lines where roadtype = 'major';
Click the Execute (F5) button to run the query.
You should now see the records that match in the Result panel.
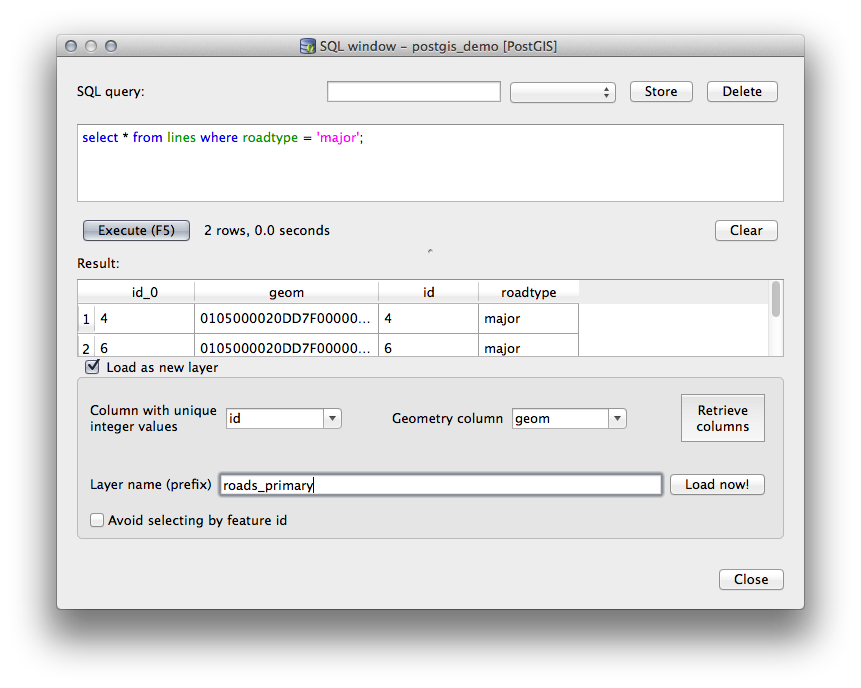
Click the checkbox for Load as new layer to add the results to your map.
Select the
idcolumn as the Column with unique integer values and thegeomcolumn as the Geometry column.Enter
roads_primaryas the Layer name (prefix).Click Load now! to load the results as a new layer into your map.
The layers that matched your query are now displayed on your map. You can of course use this query tool to execute any arbitrary SQL command including many of the ones we looked at in previous modules and sections.
18.2.5. Importing Data into a Database with DB Manager
We have already looked at how to import data into a spatial database using command line tools, so now let’s learn how to use DB Manager to do imports.
Click the Import layer/file button on the toolbar in the DB Manager dialog.

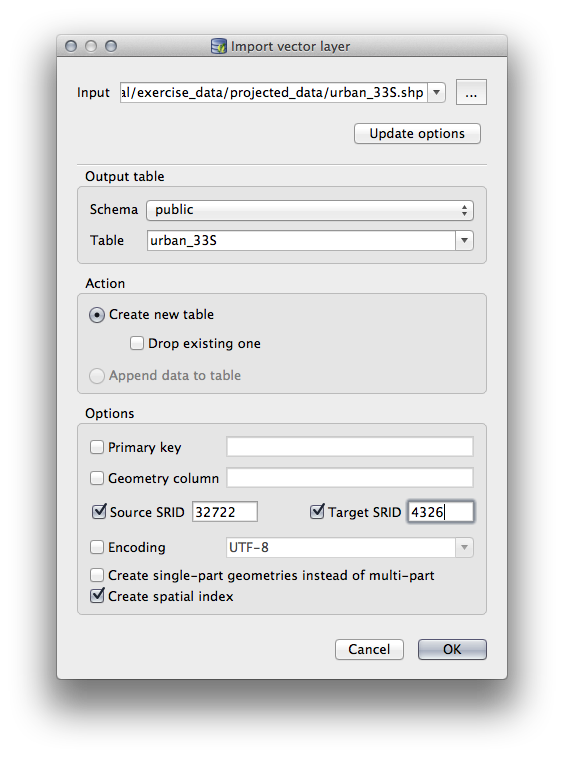
Select the
urban_33S.shpfile fromexercise_data/projected_dataas the input datasetClick the Update Options button to pre-fill some of the form values.
Make sure that the Create new table option is selected
Specify the Source SRID as
32722and the Target SRID as4326Enable the checkbox to Create Spatial Index
Click OK to perform the import
Dismiss the dialog letting you know that the import was successful
Click the Refresh button on the DB Manager Toolbar
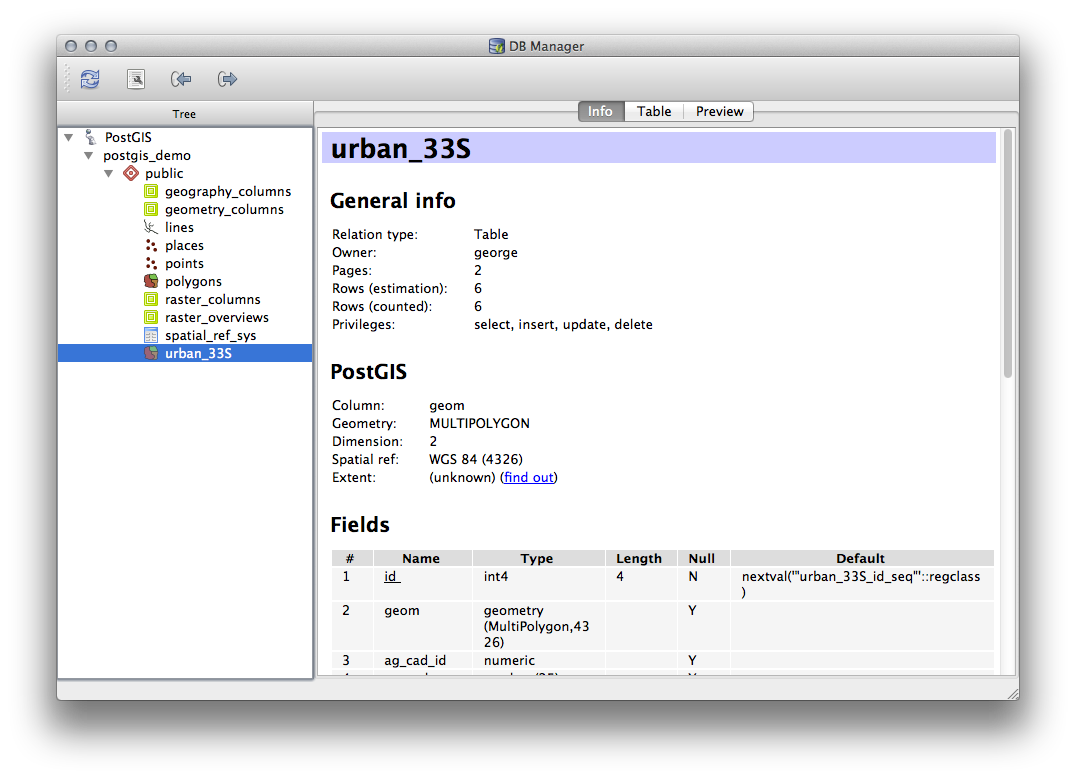
You can now inspect the table in your database by clicking on it in
the Tree.
Verify that the data has been reprojected by checking that the
Spatial ref: is listed as WGS 84 (4326).
Right clicking on the table in the Tree and a selecting Add to Canvas will add the table as a layer in your map.
18.2.6. Exporting Data from a Database with DB Manager
Of course DB Manager can also be used to export data from your spatial databases, so lets take a look at how that is done.
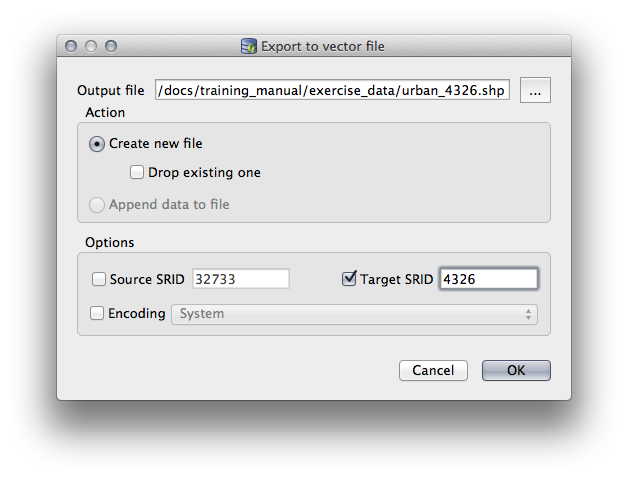
Select the
lineslayer in the Tree and click the Export to File button on the toolbar to open the Export to vector file dialog.Click the … button to select the Output file and save the data to your
exercise_datadirectory asurban_4326.Set the Target SRID as
4326.Click OK to initialize the export.
Dismiss the dialog letting you know the export was successful and close the DB Manager.
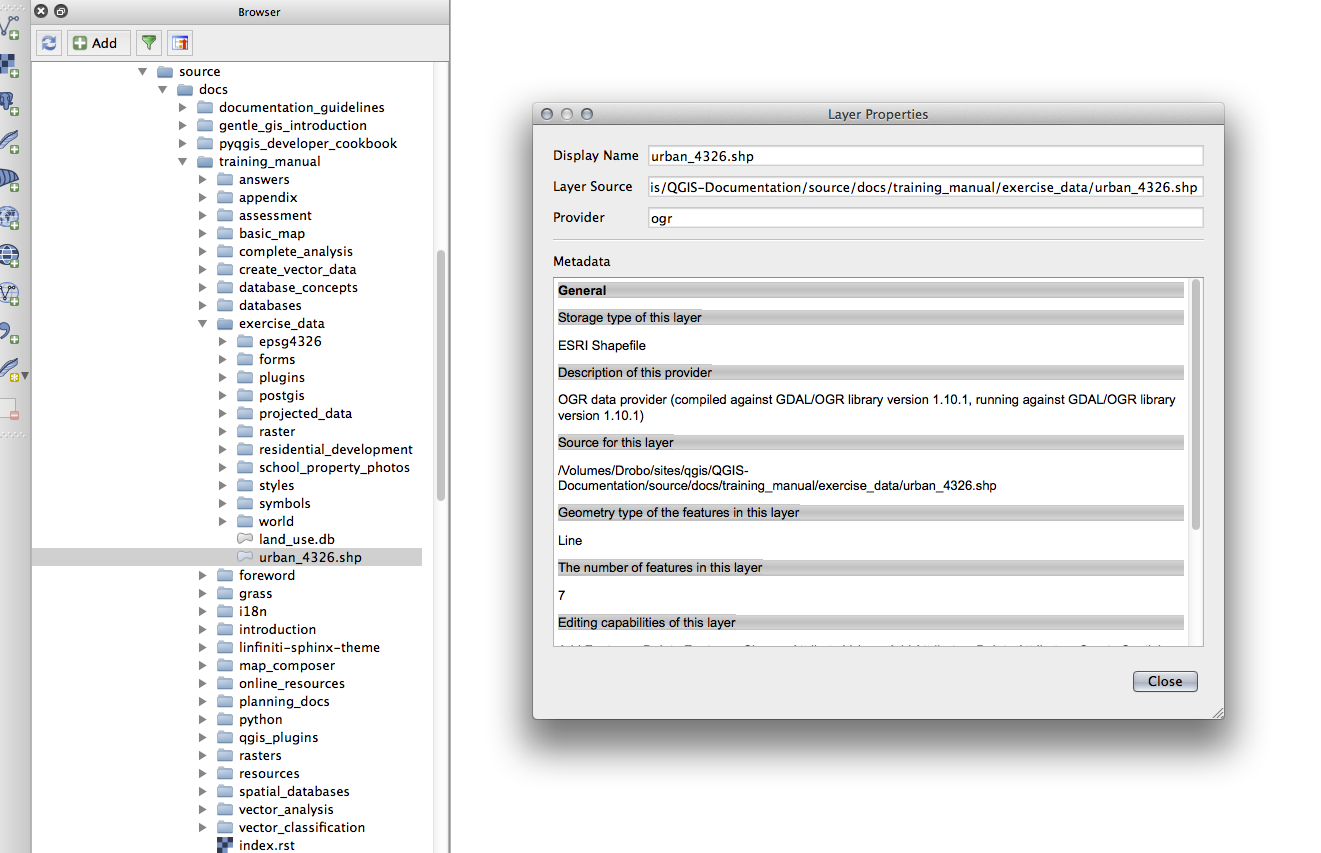
You can now inspect the shapefile you created with the Browser panel.
18.2.7. Zusammenfassung
You have now seen how to use the DB Manager interface in QGIS to manage your spatial databases, to execute SQL queries against your data and how to import and export data.
18.2.8. Was kommt als Nächstes?
Next, we will look at how to use many of these same techniques with SpatiaLite databases.