3.2. Lesson: Simbologia
A simbologia de uma camada é sua aparência visual no mapa. A força básica do SIG sobre outras formas de representação de dados espaciais é que com o SIG, você pode obter uma representação visual dinâmica dos dados com os quais está trabalhando.
Por conseguinte, o aspecto visual do mapa (que depende da simbologia das camadas individuais ) é muito importante. O usuário final dos mapas que você produz necessitará ver o que o mapa representa com facilidade.
Em outras palavras, ter simbologia adequada não é um luxo ou é apenas bom ter. Na verdade, é essencial para você usar um SIG corretamente e produzir mapas e informações que as pessoas serão capazes de usar.
O objetivo desta lição: Ser capaz de criar qualquer simbologia que você queira para uma camada vetorial.
3.2.1.  Follow Along: Mudando cores
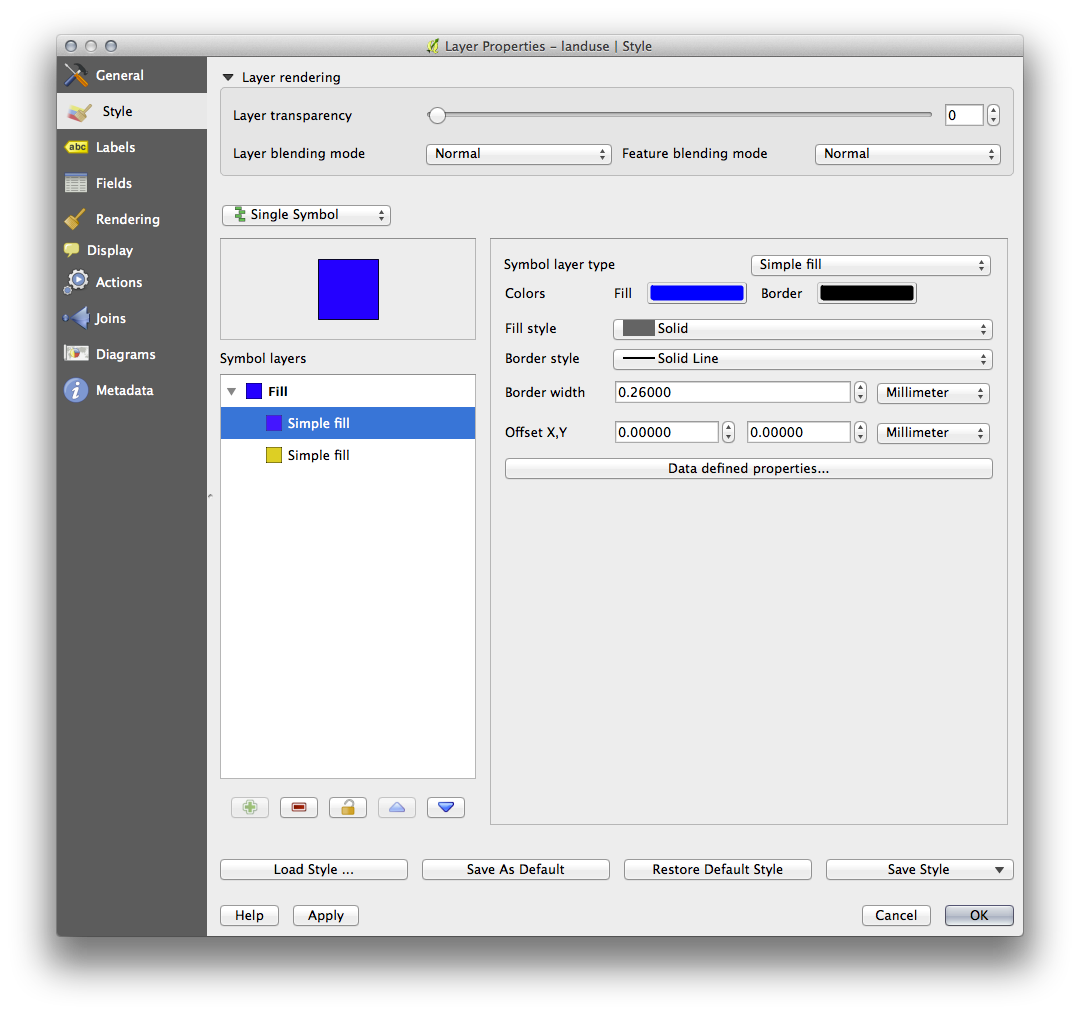
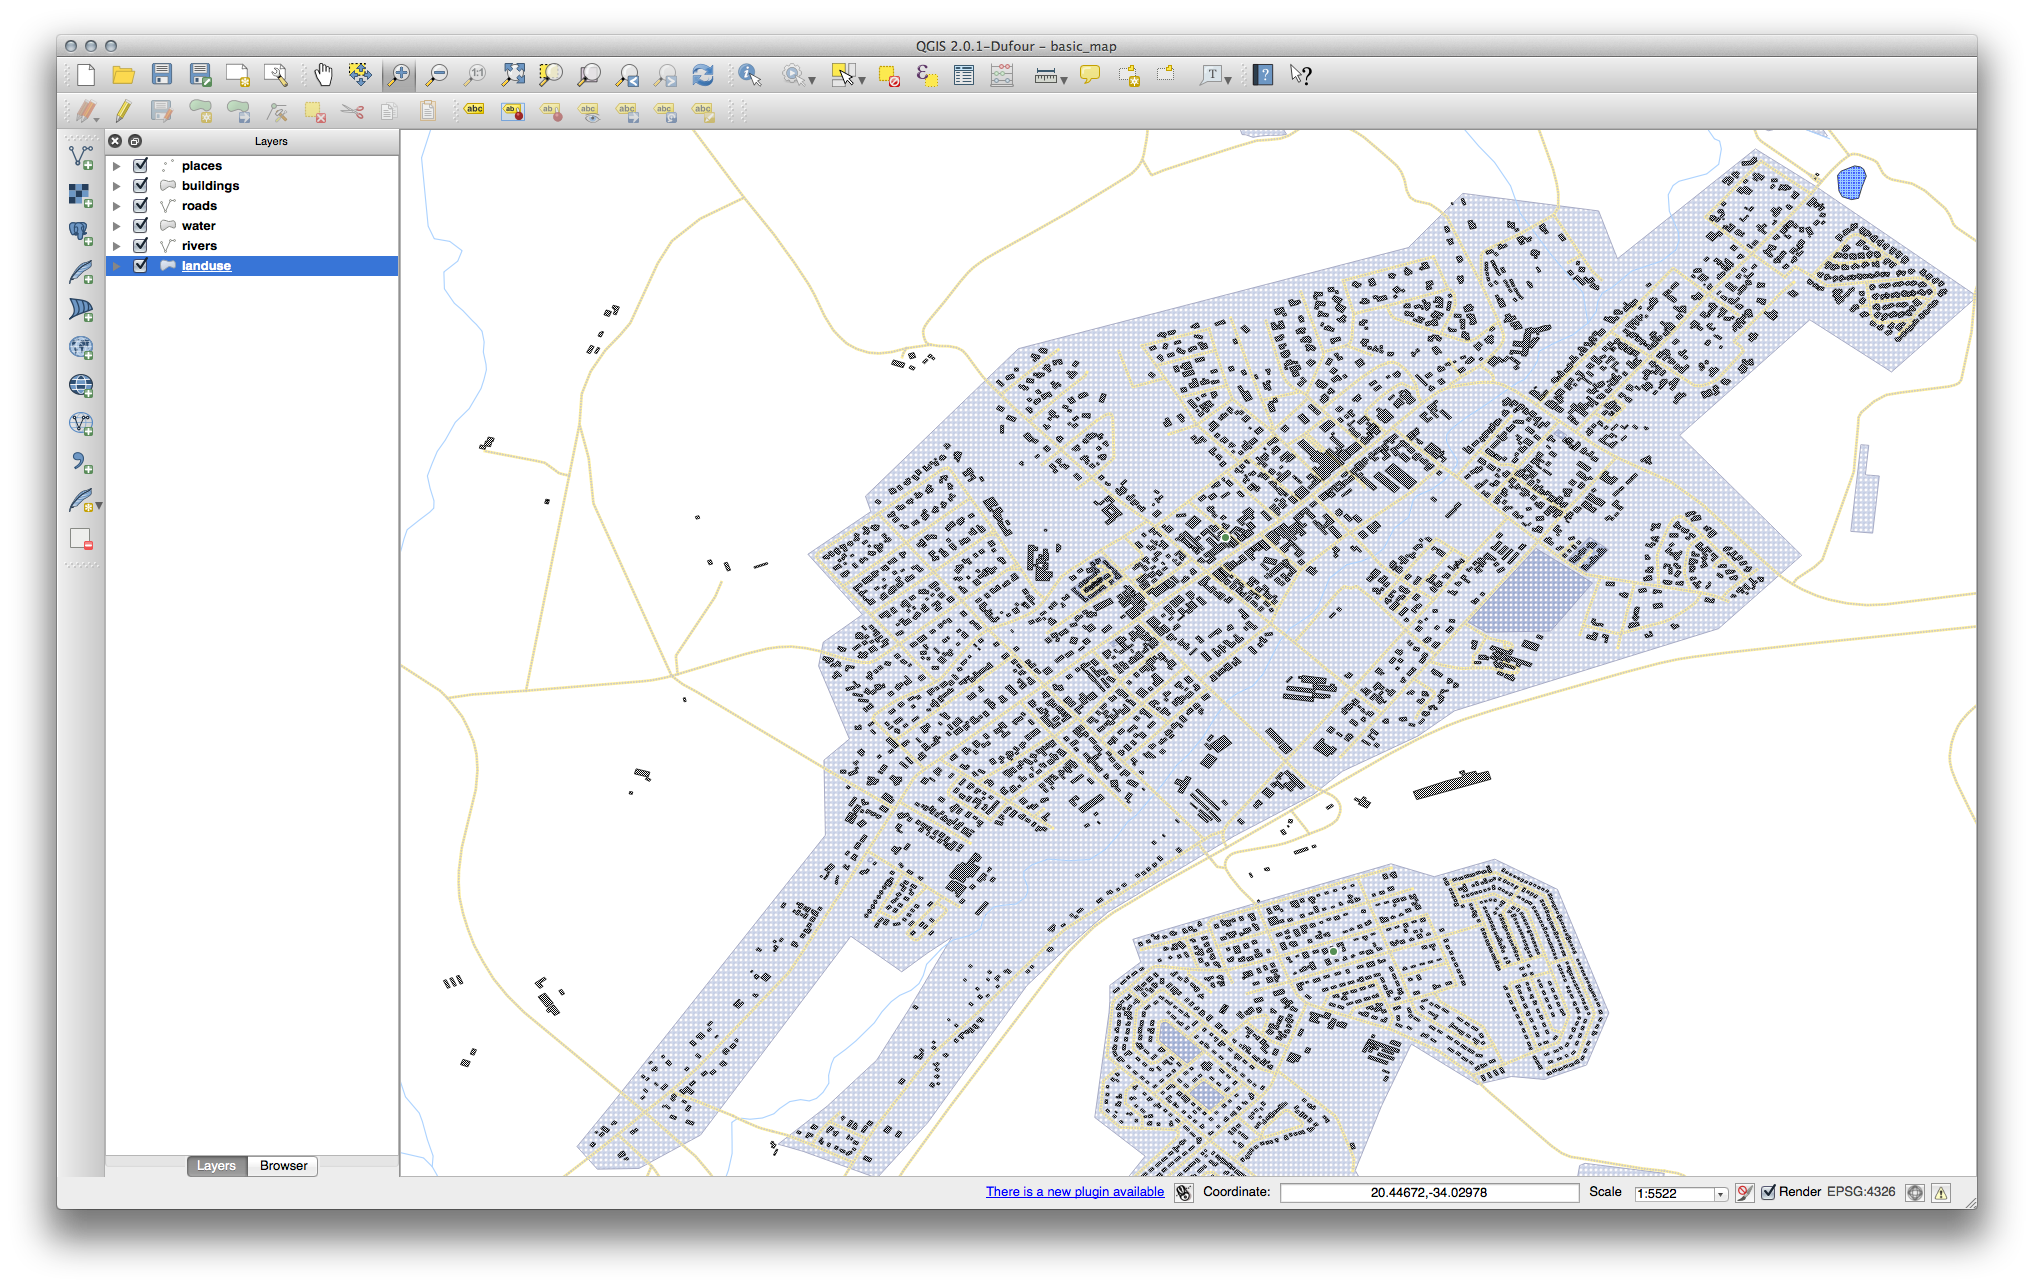
Para alterar a simbologia de uma camada, abra Propriedades da Camada. Vamos começar mudando a cor do camada urban.
- Right-click on the landuse layer in the Layers list.
- Select the menu item Properties in the menu that appears.
Nota
Por padrão, você também pode acessar as propriedades de uma camada clicando duas vezes sobre a camada na lista de Camadas.
In the Properties window:
- Select the Style tab at the extreme left:
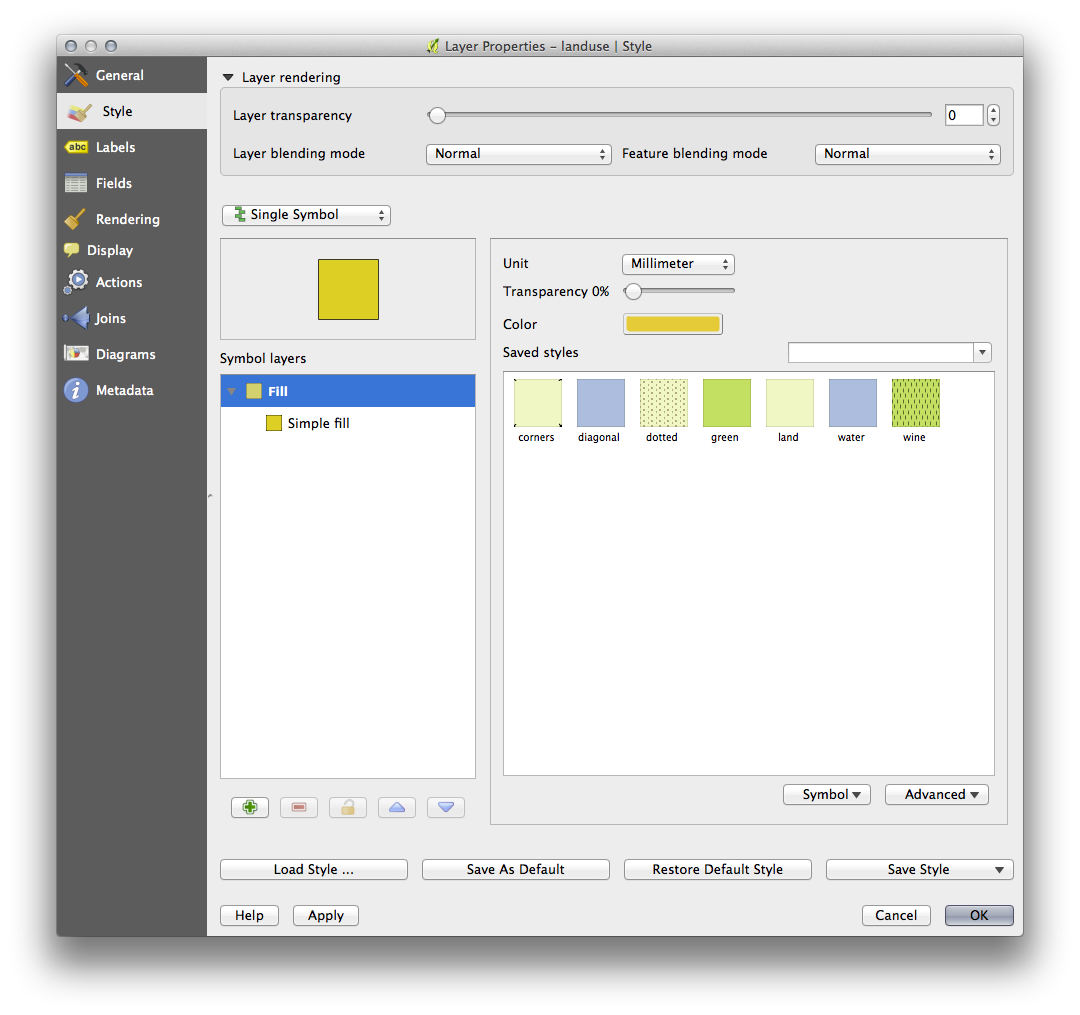
- Click the color select button next to the Color label.
A standard color dialog will appear.
Escolha a cor cinza e clique em OK.
Clique novamente em OK na janela Propriedades da Camada e você vai ver a mudança de cor ser aplicada à camada.
3.2.3. Follow Along: Mudando a Estrutura do Símbolo
Está muito bom até agora, mas há mais sobre simbologia de uma camada do que apenas a sua cor. Em seguida, queremos eliminar as linhas entre as diferentes áreas de uso da terra, de modo a fazer o mapa menos confuso visualmente.
Abra a janela Propriedades da camada para a camada urban.
Under the Style tab, you will see the same kind of dialog as before. This time, however, you’re doing more than just quickly changing the color.
- In the Symbol Layers panel, expand the Fill dropdown (if necessary) and select the Simple fill option:
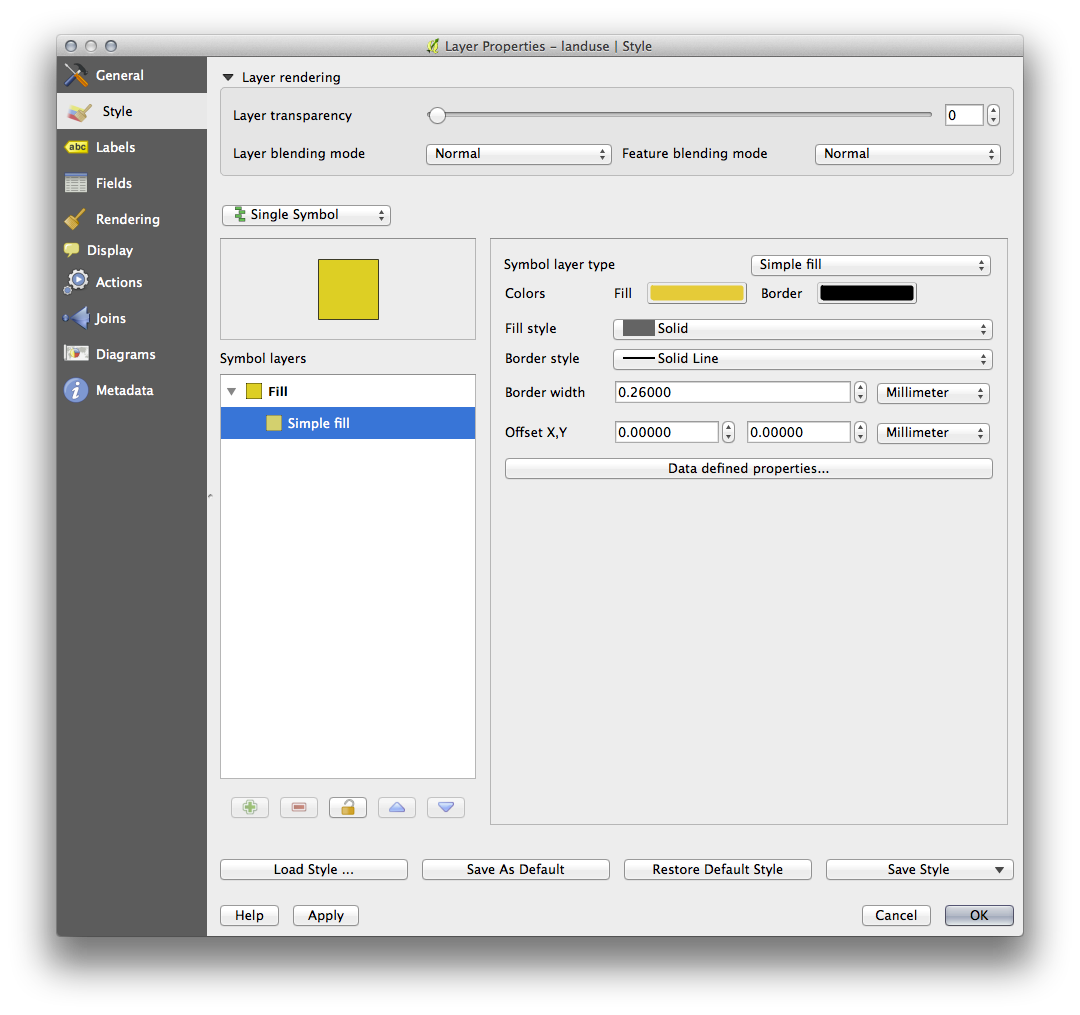
- Click on the Border style dropdown. At the moment, it should be showing a short line and the words Solid Line.
Troque para Sem caneta.
Clique em OK.
Agora a camada urban não terá nenhuma linha entre as áreas.
3.2.4. Try Yourself
- Change the water layer’s symbology again so that it is has a darker blue outline.
Altere a simbologia da camada rivers para uma representação adequada para vias navegáveis.
3.2.5.  Follow Along: Visibilidade Baseada na Escala
Às vezes, você vai achar que uma camada não é adequada para uma determinada escala. Por exemplo, um conjunto de dados de todos os continentes pode apresentar baixo detalhamento e não ser muito preciso ao nível da rua. Quando isso acontece, você quer ser capaz de esconder o conjunto de dados que esteja em escalas inadequadas.
In our case, we may decide to hide the buildings from view at small scales. This map, for example ...

... não é muito útil. Os edifícios são difíceis de distinguir nessa escala.
Para ativar a renderização baseada em escala:
Abra a janela Propriedades da camada para a camada buildings.
- Activate the General tab.
- Enable scale-based rendering by clicking on the checkbox labelled Scale dependent visibility:
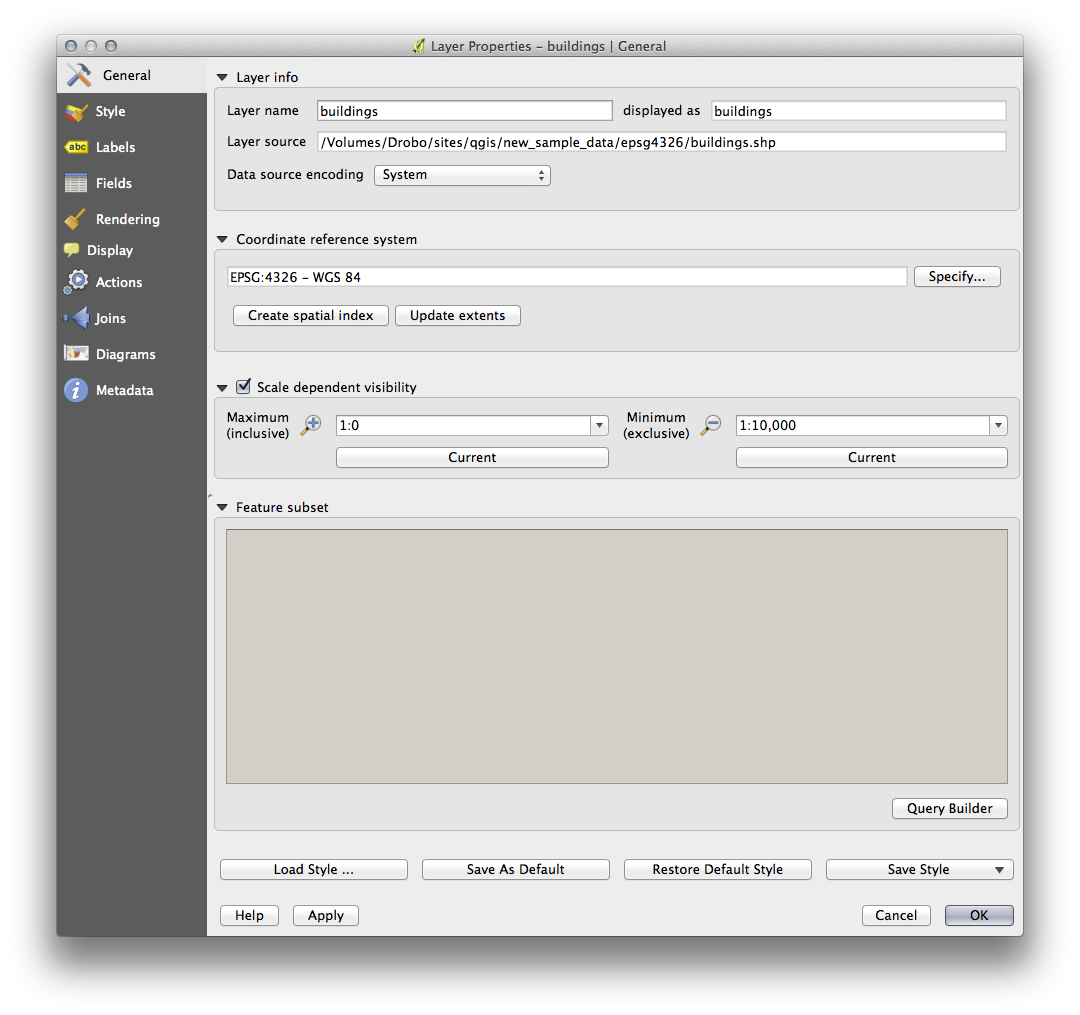
- Change the Minimum value to 1:10,000.
Clique em OK.
Teste os efeitos dando zoom in e out em seu mapa e observando quando a camada :guilabel: buildings desaparece e reaparece.
Nota
Você pode usar a roda do mouse para dar zoom ou, como alternativa, usar as ferramentas de zoom para a janela:


3.2.6. Follow Along: Adicionando Camadas de Símbolos
Agora que você já sabe como alterar simbologias simples para as camadas, o próximo passo será criar simbologias mais complexas. O QGIS permite que você faça isso usando camadas de símbolos.
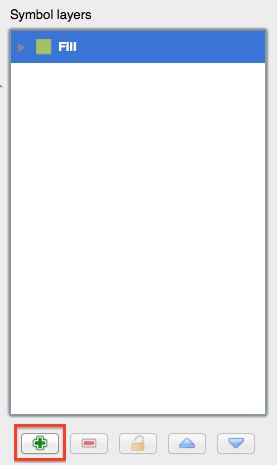
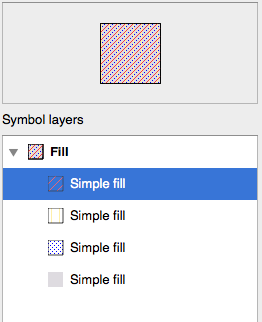
- Go back to the landuse layer’s symbol properties panel (by clicking Simple fill in the Symbol layers panel).
Neste exemplo, o símbolo atual não tem contorno (ou seja, ele usa como estilo da borda Sem caneta).
Select the Fill in the Symbol layers panel. Then click the Add symbol layer button:
- Click on it and the dialog will change to look somewhat like this:
(It may appear somewhat different in color, for example, but you’re going to change that anyway.)
Agora há uma segunda camada de símbolo. Sendo de uma cor sólida, ela irá naturalmente ocultar completamente o tipo anterior de símbolo. Além disso, ela tem um estilo de borda Linha Sólida, o que não queremos. É evidente que esse símbolo tem que ser mudado.
Nota
É importante não se confundir entre uma camada de mapa e uma camada de símbolo. Uma camada de mapa é um vetor (ou raster) que foi carregado no mapa. Uma camada de símbolo é parte do símbolo usado para representar uma camada de mapa. Este curso irá geralmente se referir a uma camada de mapa como apenas uma camada, mas uma camada de símbolo será sempre chamado de uma camada de símbolo, para evitar confusão.
With the new Simple Fill layer selected:
Defina o estilo de borda para Sem caneta, como feito anteriormente.
Mude o estilo de preenchimento para algo diferente de Sólido ou Sem pincel. Por exemplo:

- Click OK. Now you can see your results and tweak them as needed.
You can even add multiple extra symbol layers and create a kind of texture for your layer that way.
É divertido! Mas, provavelmente, você tem muitas cores para usar em um mapa real ...
3.2.7. Try Yourself
Lembrando-se de dar zoom, se necessário, crie uma textura simples para a camada buildings usando os métodos acima.
3.2.8. Follow Along: Ordenando os Níveis de Símbolos
Quando as camadas de símbolos são renderizadas, elas o são em uma sequência, semelhante à maneira como as diferentes camadas do mapa são renderizadas. Isto significa que, em alguns casos, ter muitas camadas de símbolo num símbolo pode causar resultados inesperados.
Dê uma camada extra de símbolo à camada roads (usando o método para adicionar camadas de símbolos demonstrado acima).
- Give the base line a Pen width of 0.3, a white color and select Dashed Line from the Pen Style dropdown.
- Give the new, uppermost layer a thickness of 1.3 and ensure that it is a Solid Line.
Você notará que isso acontecerá:
Well that’s not what we want at all!
Para evitar que isso aconteça, você pode classificar os níveis dos símbolos e assim controlar a ordem em que as diferentes camadas de símbolos são renderizadas.
To change the order of the symbol layers, select the Line layer in the Symbol layers panel, then click Advanced ‣ Symbol levels... in the bottom right-hand corner of the window. This will open a dialog like this:
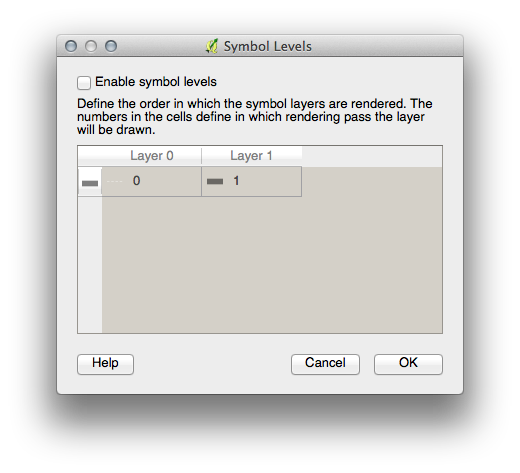
Select Enable symbol levels. You can then set the layer ordering of each symbol by entering the corresponding level number. 0 is the bottom layer.
In our case, we want to reverse the ordering, like this:

This will render the dashed, white line above the thick black line.
Clique OK duas vezes para retornar ao mapa.
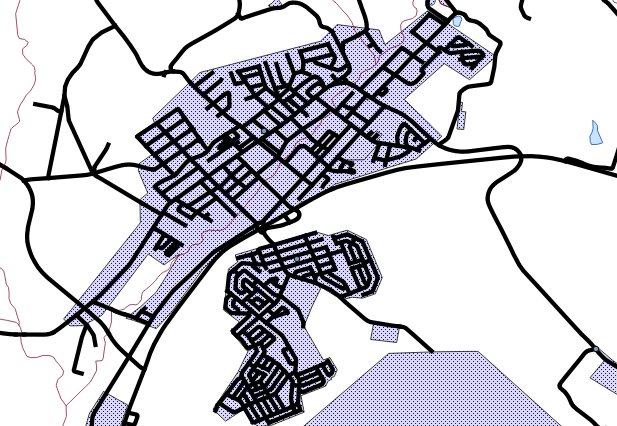
Agora o mapa ficará assim:
Also note that the meeting points of roads are now “merged”, so that one road is not rendered above another.
When you’re done, remember to save the symbol itself so as not to lose your work if you change the symbol again in the future. You can save your current symbol style by clicking the Save Style ... button under the Style tab of the Layer Properties dialog. Generally, you should save as QGIS Layer Style File.
Save your style under exercise_data/styles. You can load a previously saved style at any time by clicking the Load Style ... button. Before you change a style, keep in mind that any unsaved style you are replacing will be lost.
3.2.9. Try Yourself
Modifique novamente a aparência da camada roads.
The roads must be narrow and mid-gray, with a thin, pale yellow outline. Remember that you may need to change the layer rendering order via the Advanced ‣ Symbol levels... dialog.
3.2.10.  Try Yourself
Symbol levels also work for classified layers (i.e., layers having multiple symbols). Since we haven’t covered classification yet, you will work with some rudimentary pre-classified data.
Crie um novo mapa e adicione apenas o conjunto de dados roads.
- Apply the style advanced_levels_demo.qml provided in exercise_data/styles.
Amplie a área Swellendam.
Usando camadas de símbolos, assegure-se que os contornos das camadas fluam uns dentro dos outros conforme a imagem abaixo:

3.2.11. Follow Along: Tipos de Camadas de Símbolos
In addition to setting fill colors and using predefined patterns, you can use different symbol layer types entirely. The only type we’ve been using up to now was the Simple Fill type. The more advanced symbol layer types allow you to customize your symbols even further.
Cada tipo de vetor (ponto, linha e polígono) tem seu próprio conjunto de tipos de símbolo. Primeiro, vamos olhar para os tipos disponíveis para os pontos.
3.2.11.1. Tipos de Camadas de Símbolos para Pontos
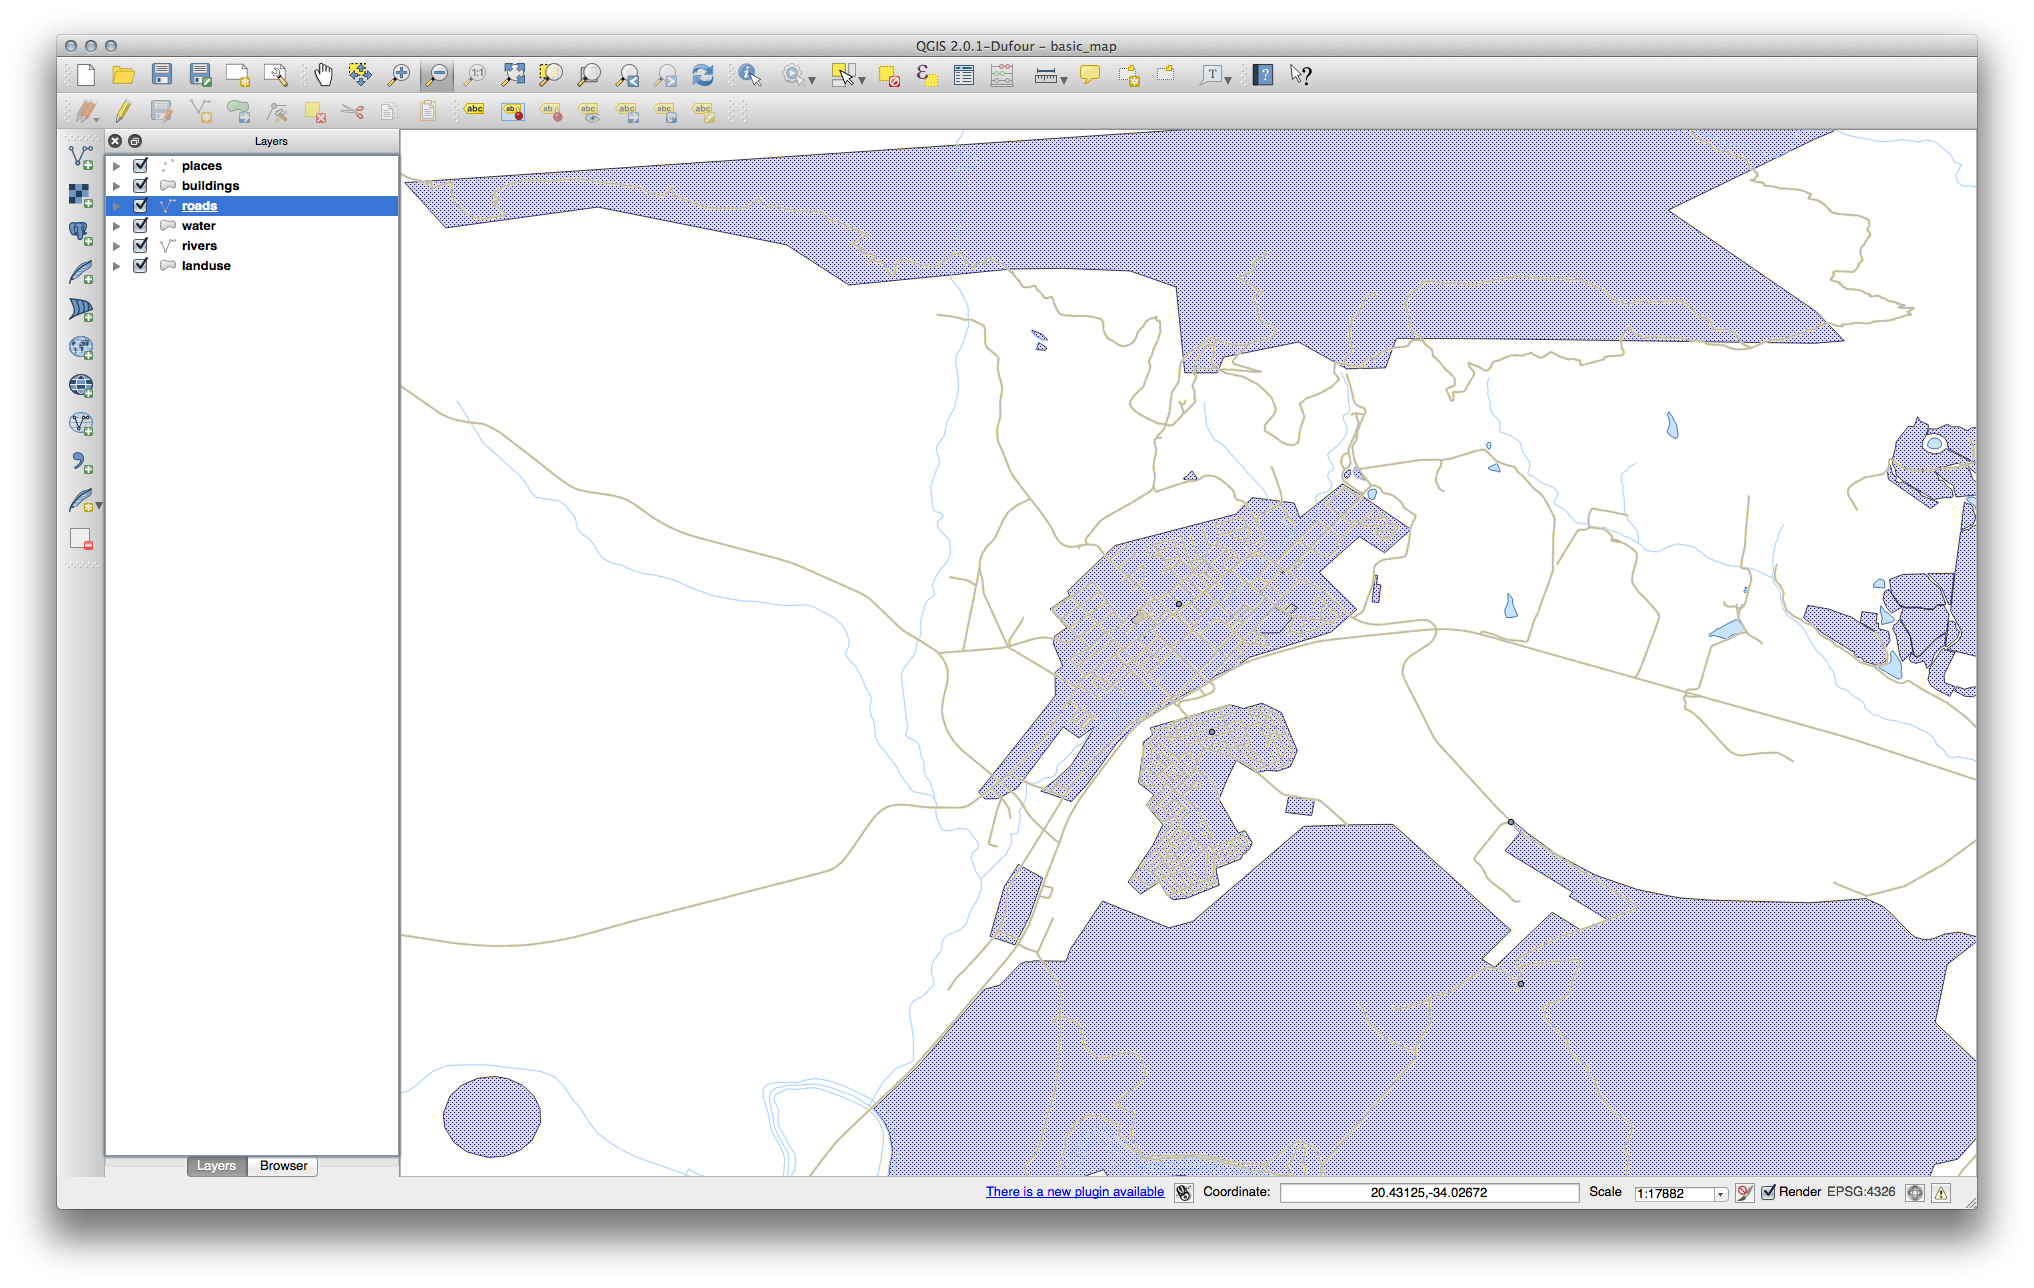
- Open your basic_map project.
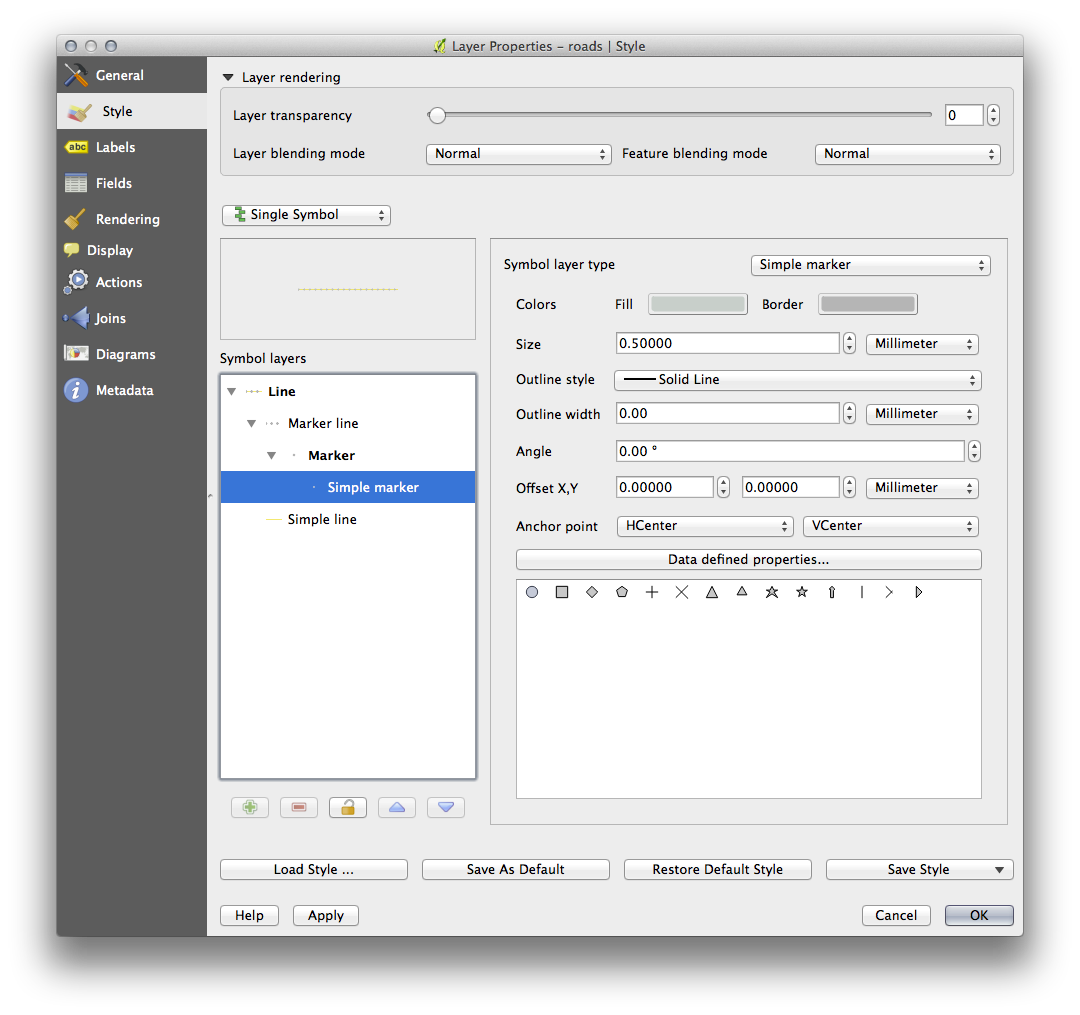
Troque as propriedades de símbolo para a camada places.
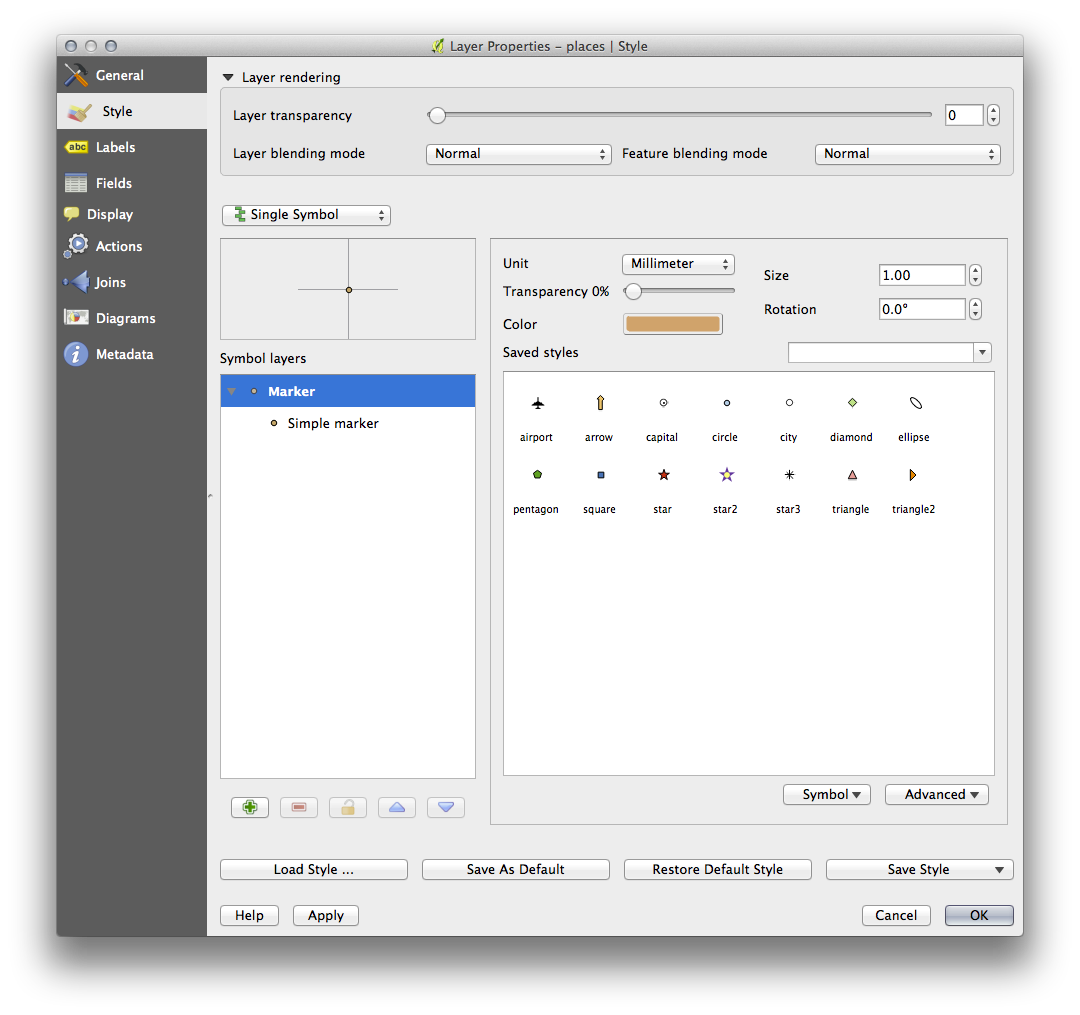
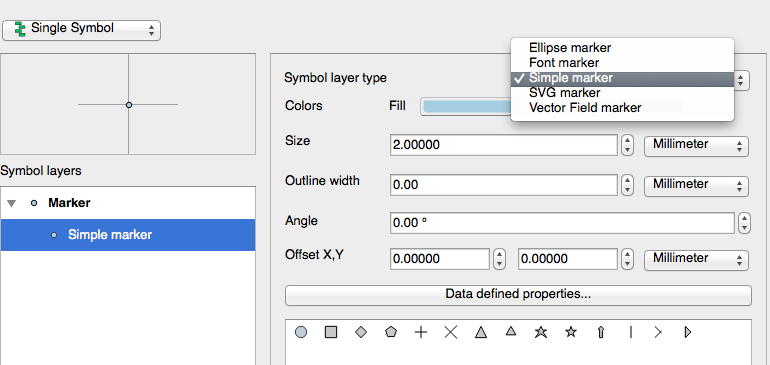
- You can access the various symbol layer types by selecting the Simple marker layer in the Symbol layers panel, then click the Symbol layer type dropdown:
Investigue as várias opções disponíveis para você e escolha um símbolo com um estilo que você considera adequado.
- If in doubt, use a round Simple marker with a white border and pale green fill, with a size of 3,00 and an Outline width of 0.5.
3.2.11.2. Tipos de Camadas de Símbolos para Linhas
Para ver as várias opções disponíveis para dados lineares:
- Change the symbol layer type for the roads layer’s topmost symbol layer to Marker line:
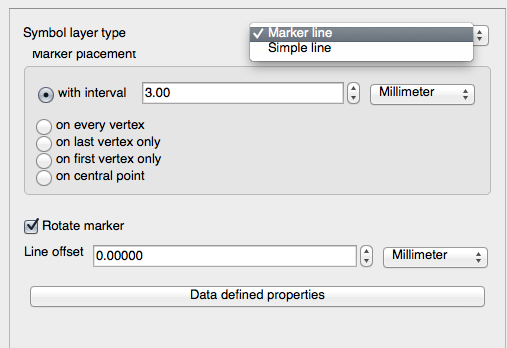
- Select the Simple marker layer in the Symbol layers panel. Change the symbol properties to match this dialog:
- Change the interval to 1,00:

- Ensure that the symbol levels are correct (via the Advanced ‣ Symbol levels dialog we used earlier) before applying the style.
Depois de ter aplicado o estilo, dê uma olhada em seus resultados no mapa. Como você pode ver, esses símbolos mudam de direção junto com a estrada, mas nem sempre dobram junto com ela. Isto é útil para certos fins, mas não para outros. Se preferir, você pode mudar a camada de símbolo em questão para voltar a ser como era antes.
3.2.11.3. Tipos de Camadas de Símbolos para Polígonos
Para ver as várias opções disponíveis para dados poligonais:
- Change the symbol layer type for the water layer, as before for the other layers.
Investigue que opções diferentes na lista pode-se usar.
Escolha uma que você considere adequada.
Se estiver em dúvida, utilize Padrão de preenchimento de pontos com as seguintes opções:


Adicione uma nova camada de símbolos com Preenchimento simples.
Use o mesmo azul claro com uma borda azul escuro.
Mova-a para debaixo da camada de padrão de preenchimento de ponto usando o botão Mover para baixo.

Como resultado, você tem um símbolo texturizado para a camada water, com a vantagem adicional de que você pode mudar o tamanho, forma e distância dos pontos individuais que compõem a textura.
3.2.12. Follow Along: Criando um Preenchimento SVG Personalizado
Nota
To do this exercise, you will need to have the free vector editing software Inkscape installed.
- Start the Inkscape program.
You will see the following interface:
Você deve achar o programa familiar se você já usou outros programas de edição de imagem vetorial, como o Corel.
Primeiro, vamos mudar a tela para um tamanho apropriado para uma pequena textura.
Clique no item de menu Arquivo ‣ Propriedades do Desenho. Isso fará com que seja aberta a janela Propriedades do Desenho.
Troque Unidades para px.
- Change the Width and Height to 100.
Feche a janela quando terminar.
Clique no item de menu Exibir ‣ Zoom ‣ Página para ver a página que você está trabalhando.
Selecione a ferramenta Elipse.
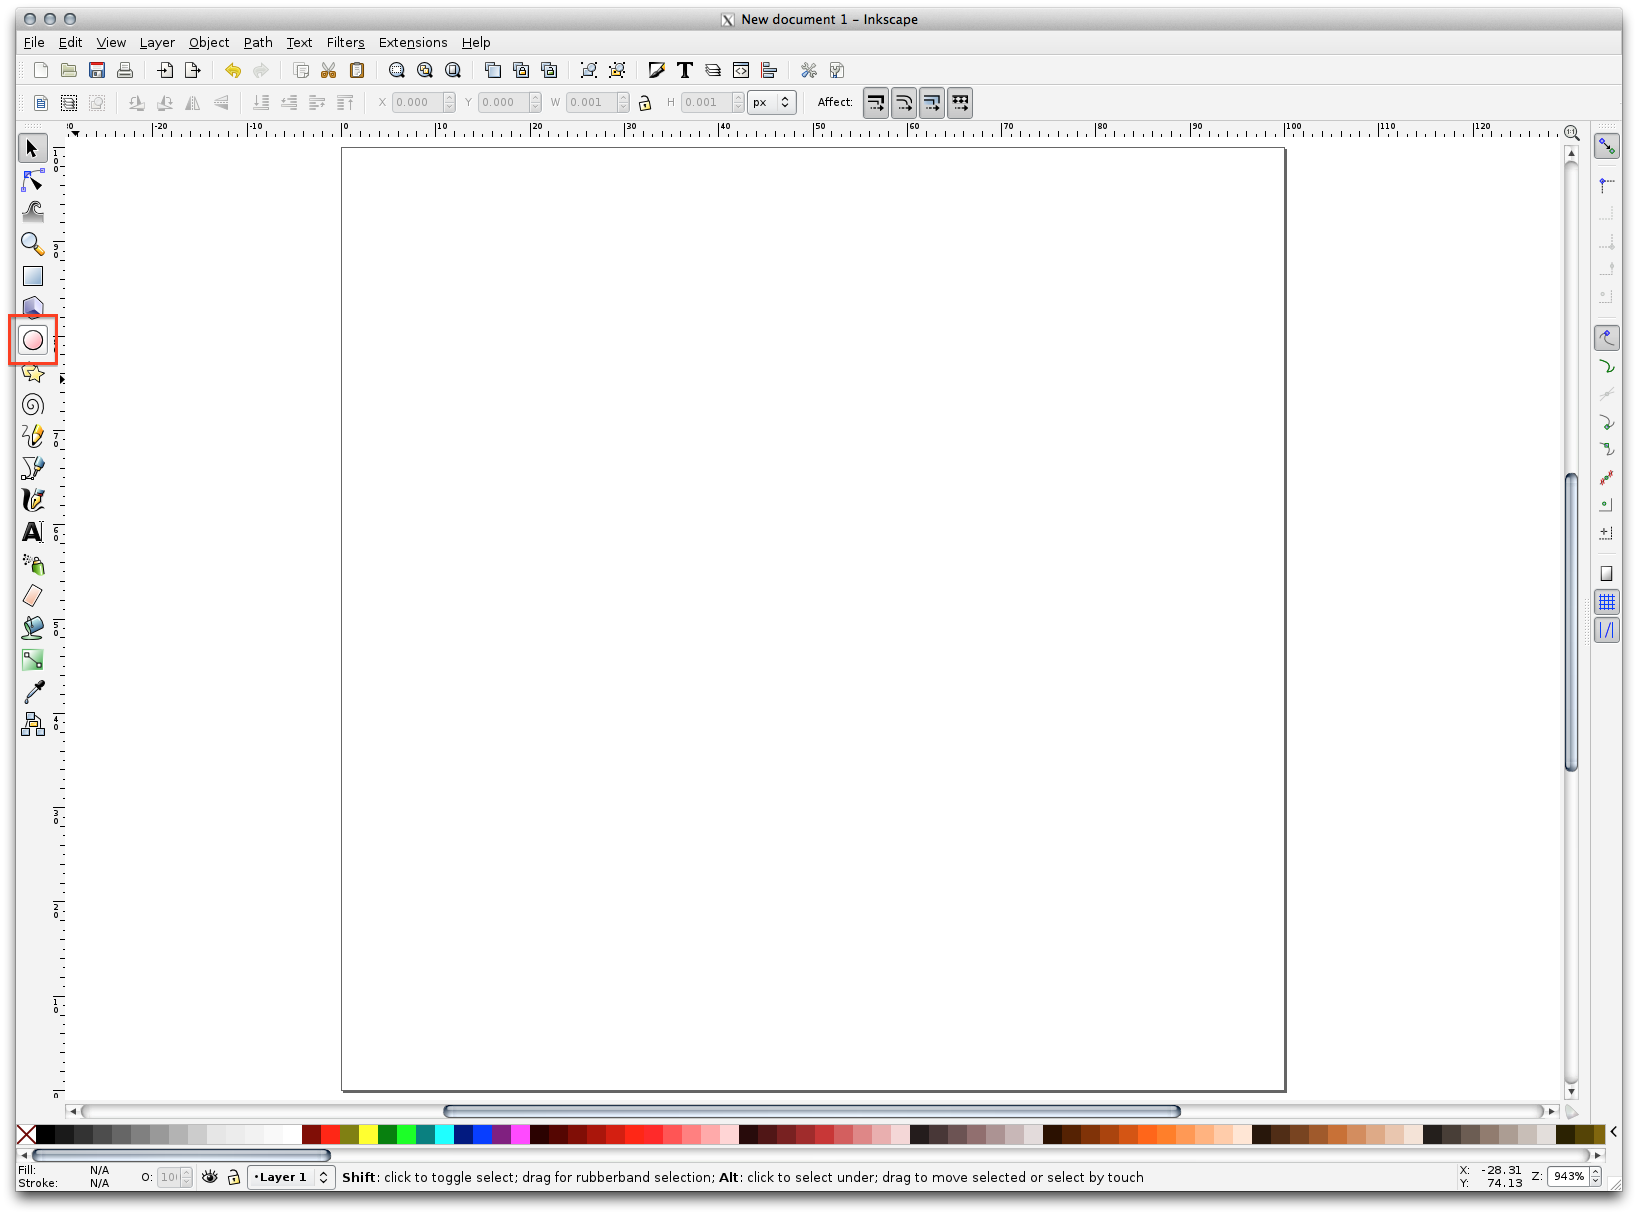
- Click and drag on the page to draw an ellipse. To make the ellipse turn into a circle, hold the Ctrl button while you’re drawing it.
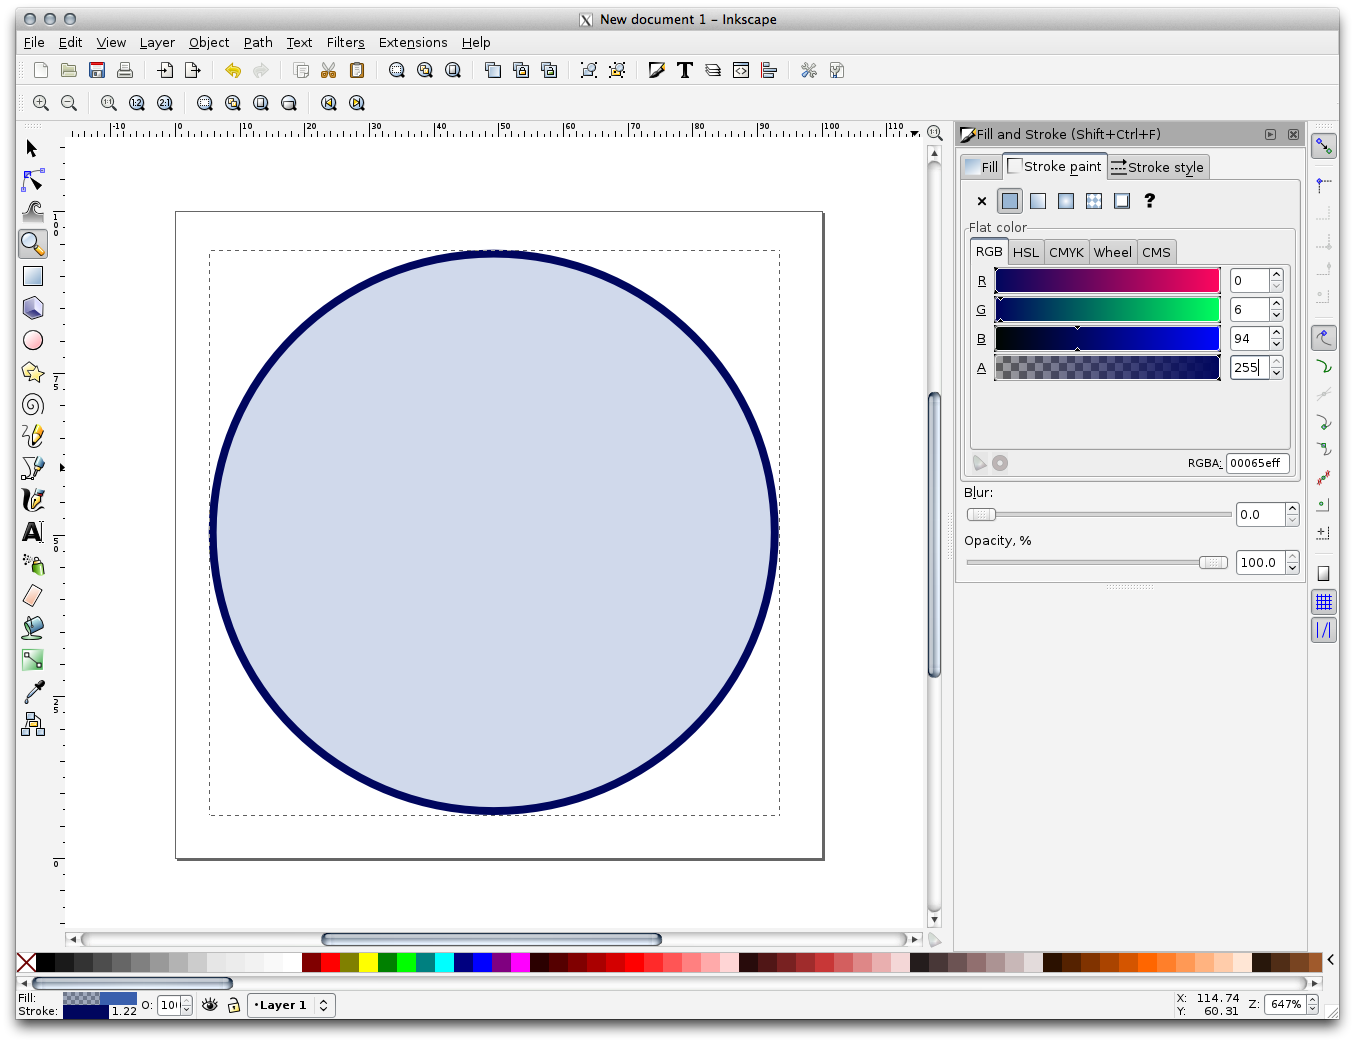
- Right-click on the circle you just created and open its Fill and
Stroke options. You can modify its rendering, such as:
- Change the Fill color to a somehow pale grey-blue,
- Assign to the border a darker color in Stroke paint tab,
- And reduce the border thickness under Stroke style tab.
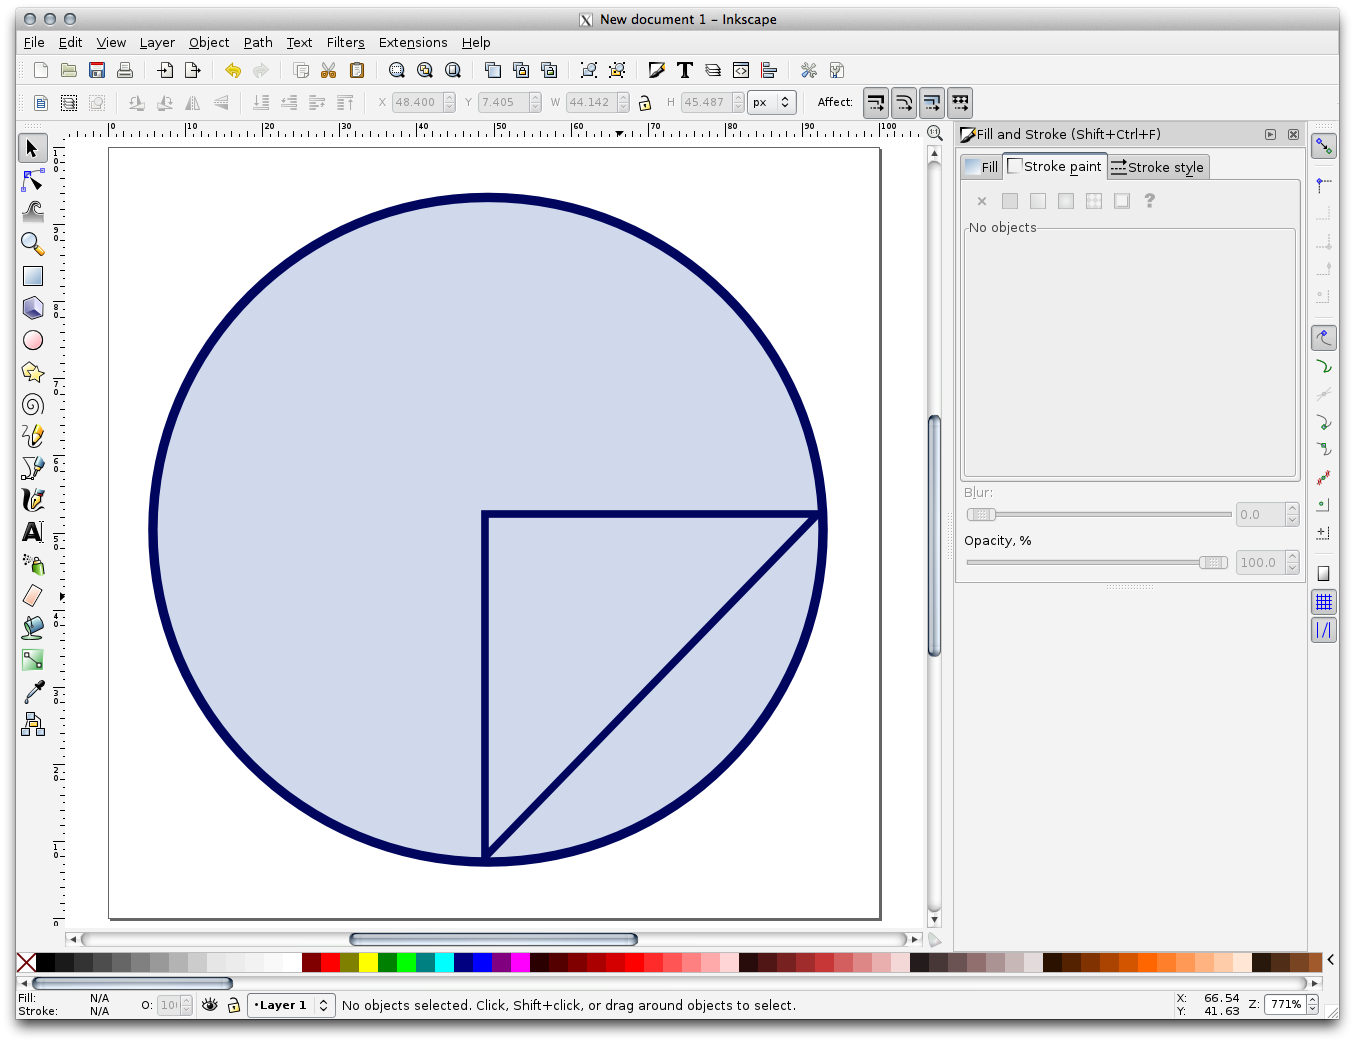
- Draw a line using the Pencil tool:
- Click once to start the line. Hold ctrl to make it snap to increments of 15 degrees.
- Move the pointer horizontally and place a point with a simple click.
- Click and snap to the vertex of the line and trace a vertical line, ended by a simple click.
Agora una os dois vértices finais.
- Change the color and width of the triangle symbol to match the circle’s stroke and move it around as necessary, so that you end up with a symbol like this one:
- If the symbol you get satisfies you, then save it as landuse_symbol under the directory that the course is in, under exercise_data/symbols, as SVG file.
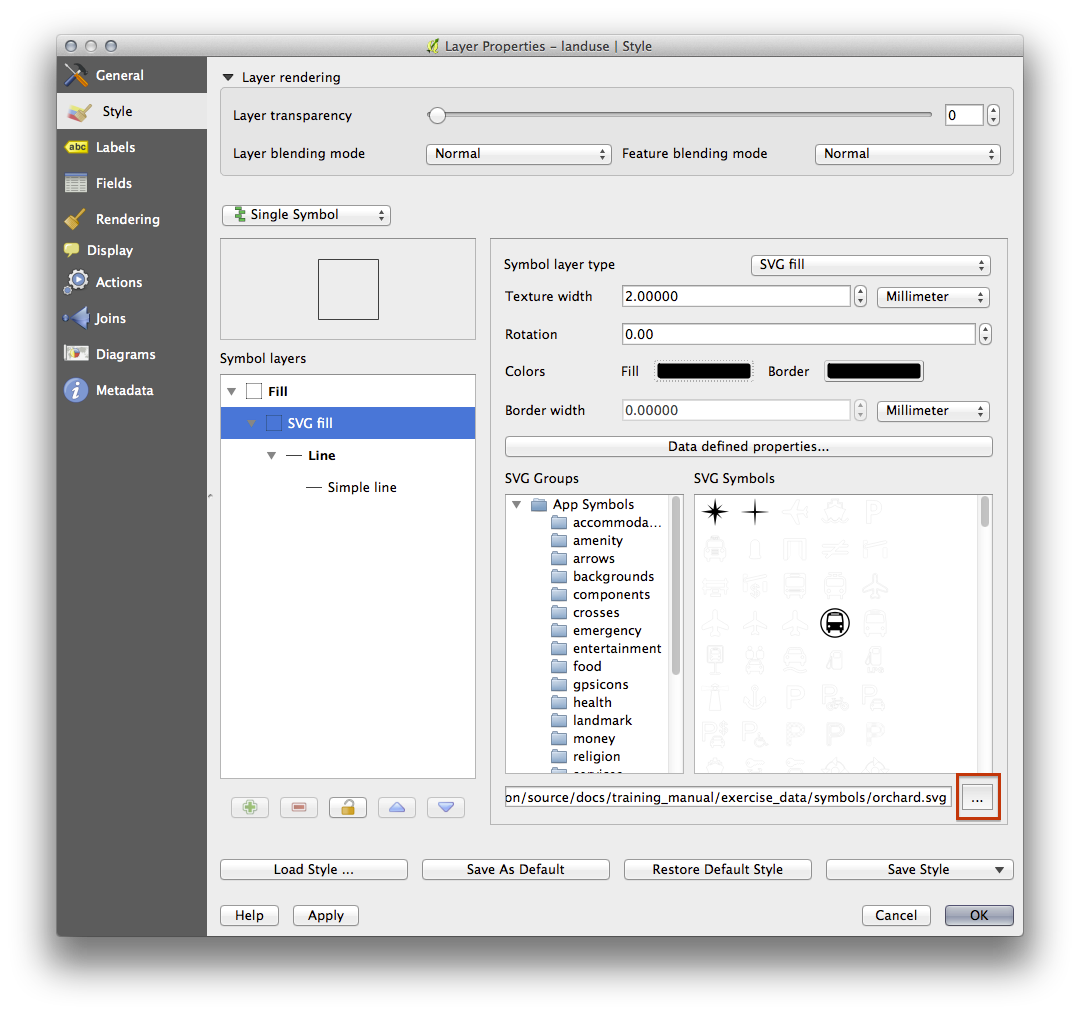
No QGIS:
- Open the Layer Properties for the landuse layer.
- In the Style tab, change the symbol structure by selecting SVG Fill as Symbol Layer Type option, as shown below.
- Click the
 Browse button to select your SVG image.
It’s added to the symbol tree and you can now customize its different
characteristics (colors, angle, effects, units...).
Browse button to select your SVG image.
It’s added to the symbol tree and you can now customize its different
characteristics (colors, angle, effects, units...).
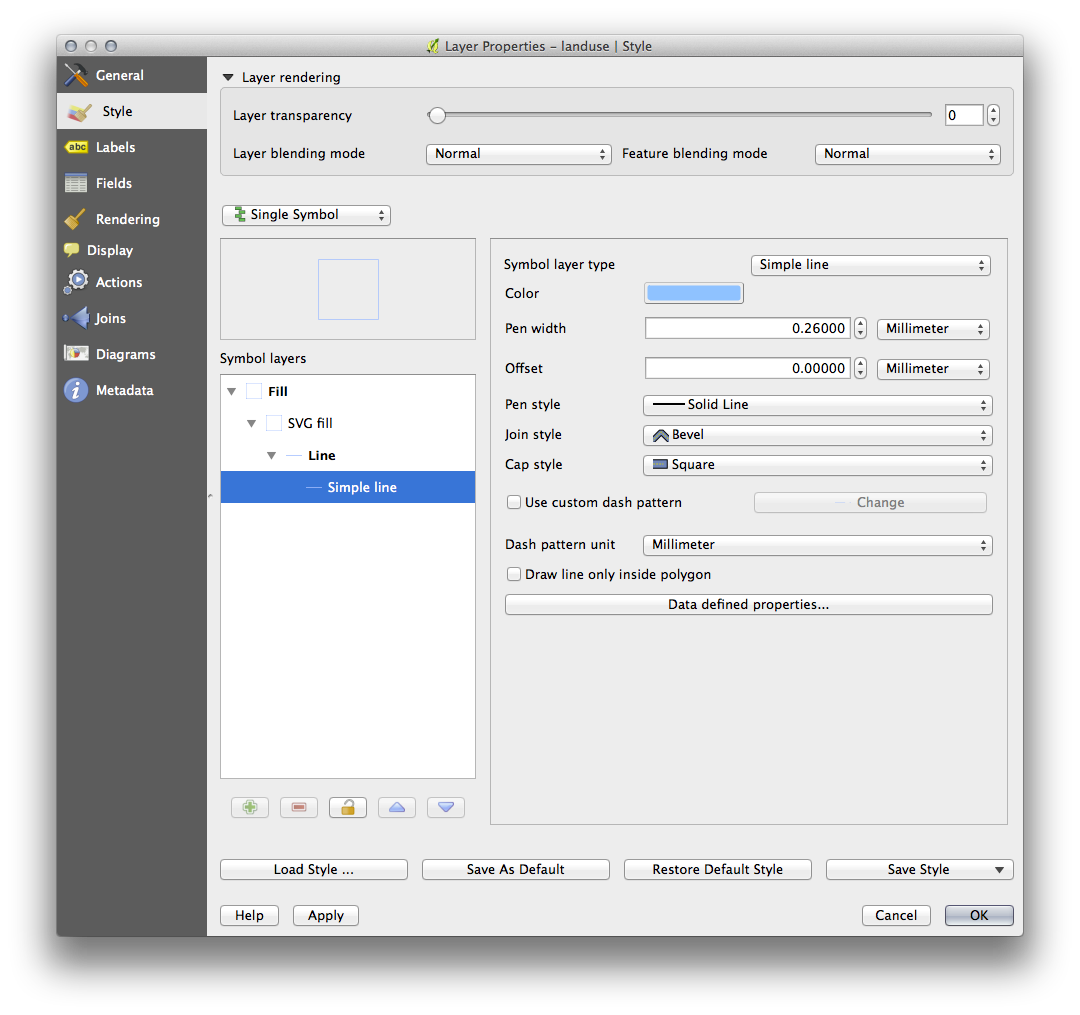
You may also wish to update the svg layer’s border (see below):
Once you validate the dialog, features in landuse layer should now be covered by a set of symbols, showing a texture like the one on the following map. If textures are not visible, you may need to zoom in the map canvas or set in the layer properties a bigger Texture width.
3.2.13. In Conclusion
Alterando a simbologia para as diferentes camadas transformou uma coleção de arquivos vetoriais em um mapa legível. Não apenas você pode ver o que está acontecendo mas é ainda agradável de olhar!
3.2.14. Further Reading
3.2.15. What’s Next?
Alterar símbolos para camadas inteiras é útil, mas a informação contida dentro de cada camada ainda não está disponível para alguém ler esses mapas. Como se chamam as ruas? A que regiões administrativas pertencem certas áreas? Quais são as superfícies relativas das fazendas? Toda esta informação está ainda escondida. A próxima lição irá explicar como representar estes dados em seu mapa.
Nota
Você se lembrou de salvar seu mapa recentemente?