2.3. Lesson: 인터페이스 개요
QGIS 사용자 인터페이스를 살펴보고, 인터페이스의 기본 구조를 형성하는 메뉴, 툴바, 맵 캔버스, 레이어 목록에 대해 알아봅니다.
이 강의의 목표: QGIS 사용자 인터페이스의 기본을 이해하기.
2.3.1.  Try Yourself: 기본
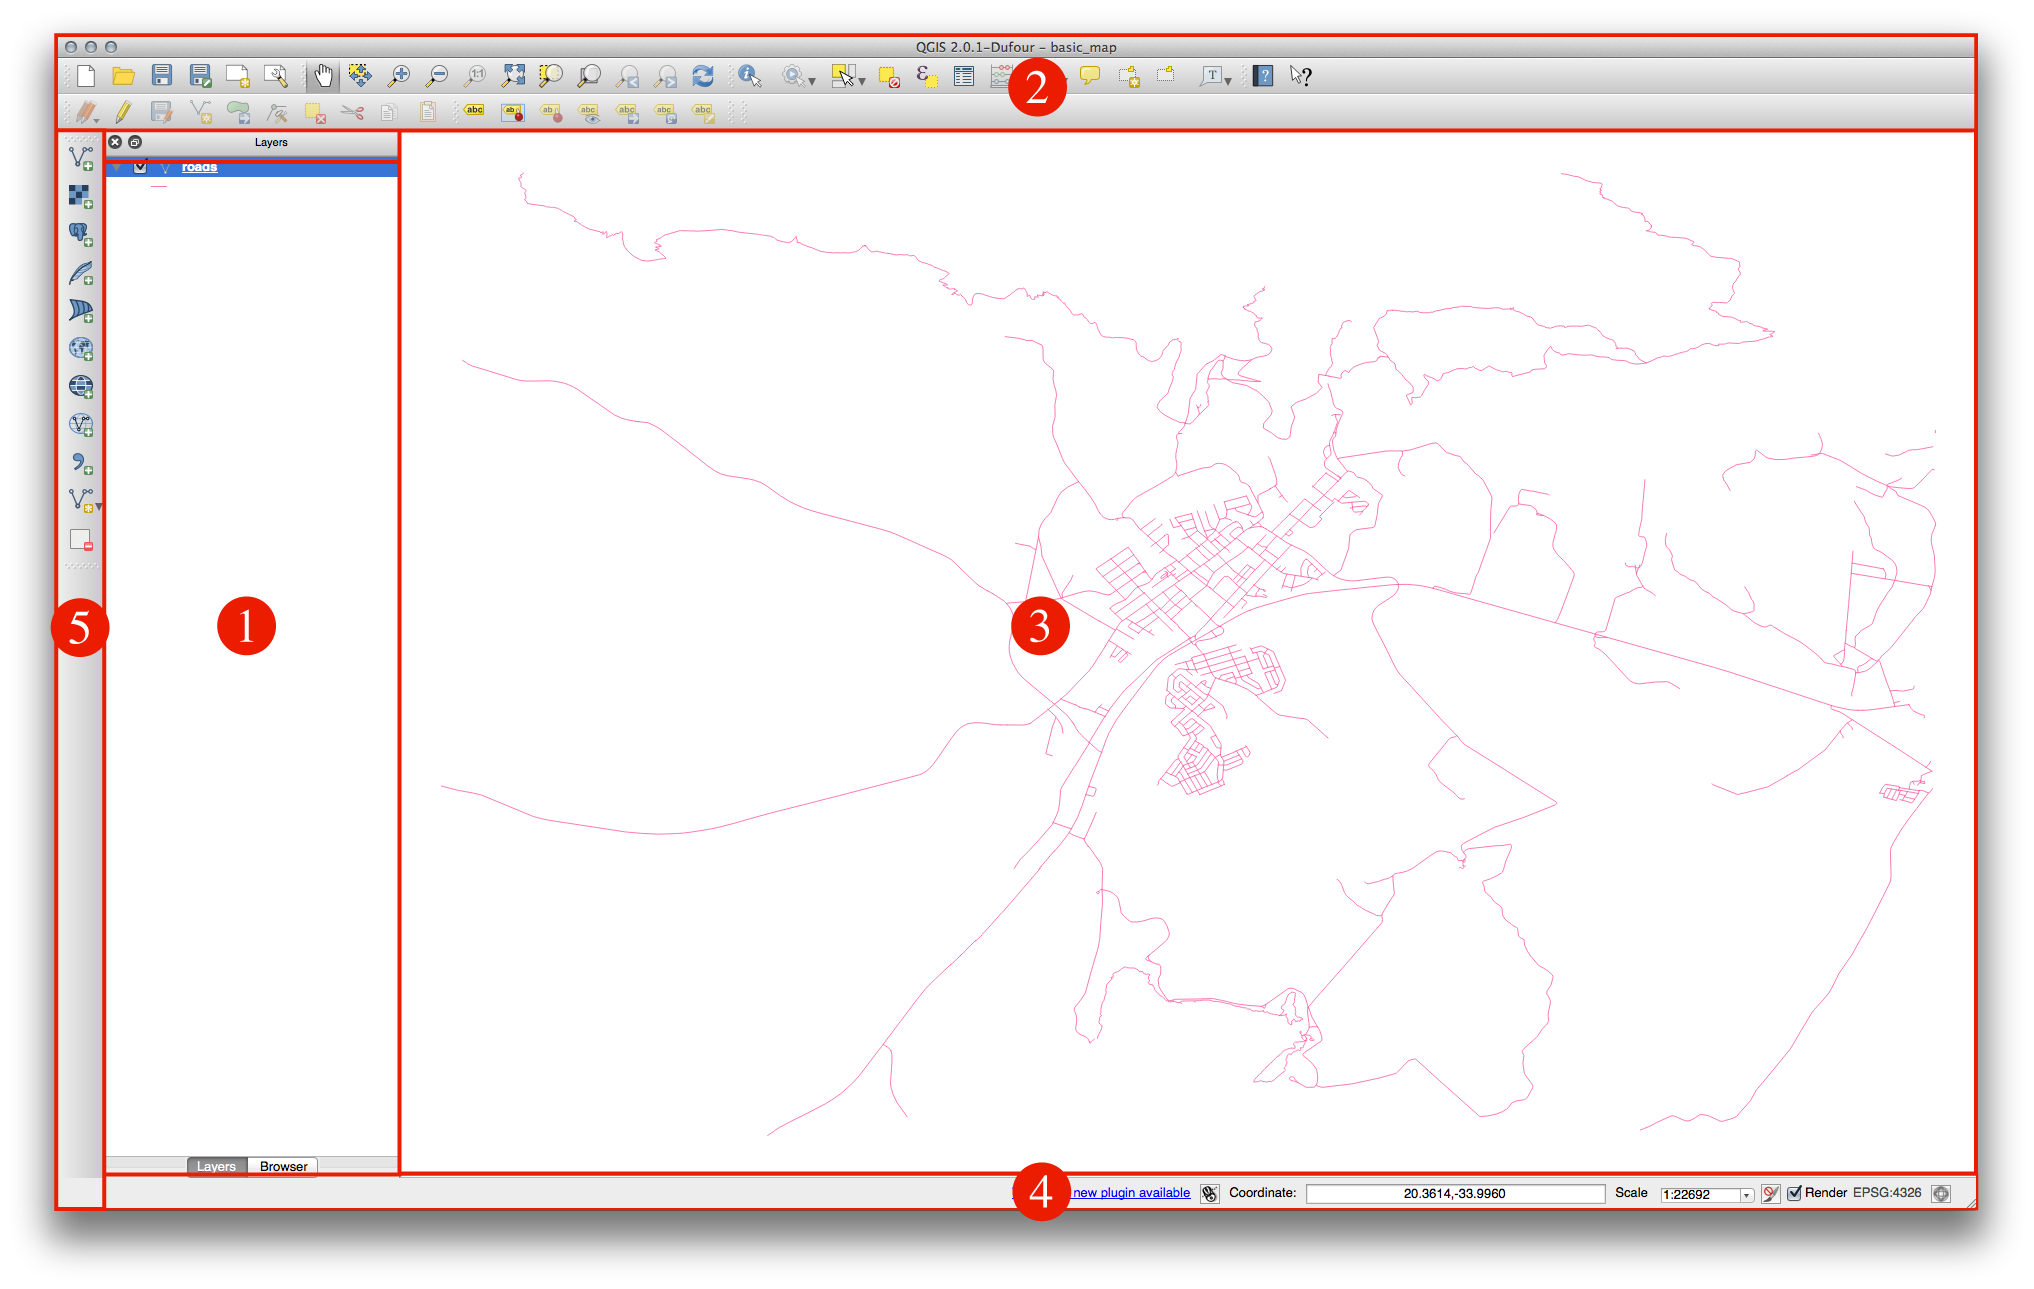
앞의 그림에 나타난 요소들은 다음과 같습니다.
레이어 목록 / 브라우저 패널
툴바
맵 캔버스
상태 바
사이드 툴바
2.3.1.1. 레이어 목록
레이어 목록에서 사용자가 사용할 수 있는 모든 레이어들의 목록을 언제나 볼 수 있습니다.
접혀 있는 항목을 (항목 옆의 화살표나 더하기 심볼을 클릭해서) 확장시키면 해당 레이어의 현재 모양에 대한 상세 정보를 알 수 있습니다.
레이어를 오른쪽 클릭하면 많은 추가 옵션 메뉴를 사용할 수 있습니다. 이제 곧 그 일부를 사용하게 될 테니 잘 살펴보세요!
Some versions of QGIS have a separate Control rendering order checkbox just underneath the Layers list. Don’t worry if you can’t see it. If it is present, ensure that it’s checked for now.
주석
벡터 레이어는 보통 도로, 나무 등과 같은 특정 유형의 오브젝트로 이루어진 데이터셋입니다. 벡터 레이어는 포인트, 라인, 폴리곤으로 구성됩니다.
2.3.1.2. 브라우저 패널
The QGIS Browser is a panel in QGIS that lets you easily navigate in your database. You can have access to common vector files (e.g. ESRI shapefile or MapInfo files), databases (e.g.PostGIS, Oracle, Spatialite or MSSQL Spatial) and WMS/WFS connections. You can also view your GRASS data.
2.3.1.3. 툴바
Your most oft-used sets of tools can be turned into toolbars for basic access. For example, the File toolbar allows you to save, load, print, and start a new project. You can easily customize the interface to see only the tools you use most often, adding or removing toolbars as necessary via the Settings ‣ Toolbars menu.
Even if they are not visible in a toolbar, all of your tools will remain accessible via the menus. For example, if you remove the File toolbar (which contains the Save button), you can still save your map by clicking on the Project menu and then clicking on Save.
2.3.1.4. 맵 캔버스
This is where the map itself is displayed.
2.3.1.5. 상태 바
Shows you information about the current map. Also allows you to adjust the map scale and see the mouse cursor’s coordinates on the map.
2.3.2. Try Yourself 1
앞에 나열된 이 네 가지 요소를 앞의 그림을 보지 않고 사용자의 화면에서 식별해보십시오. 명칭 및 기능을 식별할 수 있습니까? 앞으로 며칠 동안 이 요소들을 사용하면서 더 익숙해질 수 있을 것입니다.
2.3.3. Try Yourself 2
다음 도구들을 사용자 화면에서 찾아보십시오. 각각 어떤 기능입니까?


주석
이 도구들 가운데 화면에 보이지 않는 것이 있다면 현재 숨겨져 있는 상황이니 툴바들을 활성화시켜보십시오. 또 화면 해상도가 낮을 경우 툴바가 짧아지면서 일부 도구가 보이지 않게 됐을 가능성도 있습니다. 이렇게 접혀 있는 툴바의 경우 오른쪽 이중 화살표를 클릭하면 숨겨져 있던 도구들을 볼 수 있습니다. 각 도구 아이콘 위에 마우스를 가져다 대면 해당 도구의 명칭 및 간단한 설명을 볼 수 있습니다.
2.3.4. What’s Next?
이제 QGIS 인터페이스가 어떻게 작동하는지 알았으니, 도구들을 사용해서 사용자 맵을 향상시킬 수 있습니다! 이것이 다음 강의의 주제입니다.