` `
Plugin Mengambil Koordinat
Plugin Mengambil Koordinat mudah digunakan dan memberikan kemampuan menampilkan koordinat di kanvas peta untuk dua Sistem Koordinat Referensi (CRS) dipilih.
Plugin Mengambil Koordinat
- Start QGIS, select
 Project Properties from the
Settings (KDE, Windows) or File (Gnome, macOS) menu
and click on the Projection tab. As an alternative, you can also
click on the
Project Properties from the
Settings (KDE, Windows) or File (Gnome, macOS) menu
and click on the Projection tab. As an alternative, you can also
click on the  CRS status icon in the lower
right-hand corner of the status bar.
CRS status icon in the lower
right-hand corner of the status bar. Klik pada kotak centang
 Aktifkan proyeksi on the fly dan pilih proyeksi sistem koordinat dari yang Anda pilih (lihat juga Bekerja dengan Proyeksi).
- Activate the coordinate capture plugin in the Plugin Manager (see
The Plugins Dialog) and ensure that the dialog is visible by going to
View ‣ Panels and ensuring that
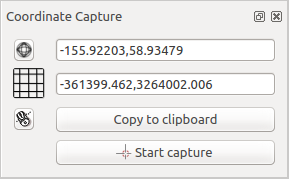
Coordinate Capture is enabled. The coordinate capture dialog
appears as shown in Figure figure_coordinate_capture. Alternatively,
you can also go to Vector ‣ Coordinate Capture and see
if Coordinate Capture is enabled.
Klik pada ikon
 Klik pilih CRS untuk menampilkan koordinat dan memilih CRS berbeda dari yang Anda pilih di atas.
- To start capturing coordinates, click on [Start capture]. You can now click anywhere on the map canvas and the plugin will show the coordinates for both of your selected CRS.
Untuk mengaktifkan tetikus pelacak koordinat, klik ikon
 pelacak tetikus.
Anda juga bisa menyalin koordinat yang dipilih ke papanklip.