중요
번역은 여러분이 참여할 수 있는 커뮤니티 활동입니다. 이 페이지는 현재 100.00% 번역되었습니다.
7.1. 수업: 래스터 데이터 작업
래스터 데이터는 벡터 데이터와는 사뭇 다릅니다. 벡터 데이터는 꼭짓점으로 이루어진, 그리고 아마도 선 그리고/또는 면과 연결된 도형을 가진 개별 피처를 가지고 있습니다. 하지만 래스터 데이터는 그냥 이미지입니다. 실제 세계에 있는 객체의 다양한 속성을 묘사할 수는 있지만, 이 객체들이 개별 객체로 존재하지는 않습니다. 그보다는 서로 다른 값들을 가진 픽셀들을 사용해서 객체들을 표현합니다.
이 강의에서 여러분은 기존 GIS 분석을 보충하기 위해 래스터 데이터를 사용할 것입니다.
이 수업의 목표: QGIS에서 래스터 데이터를 작업하는 방법을 배우기.
7.1.1. ★☆☆ 따라해보세요: 래스터 데이터 불러오기
래스터 데이터는 벡터 데이터와 동일한 방법으로 불러올 수 있습니다. 하지만 Browser 패널을 사용할 것을 권합니다.
Browser 패널을 열고
exercise_data/raster폴더를 펼치십시오.이 폴더에 있는 데이터를 전부 불러오십시오:
3320C_2010_314_RGB_LATLNG.tif3320D_2010_315_RGB_LATLNG.tif3420B_2010_328_RGB_LATLNG.tif3420C_2010_327_RGB_LATLNG.tif
다음 맵을 보게 될 것입니다:
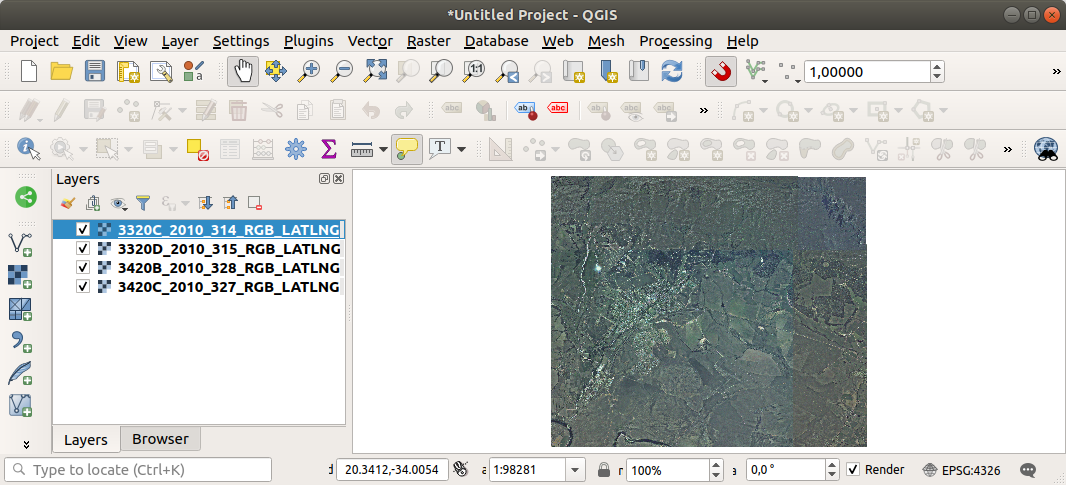
연구 지역을 커버하는 항공사진 4장을 불러왔습니다.
7.1.2. ★☆☆ 따라해보세요: 가상 래스터 생성하기
이제 알 수 있겠지만, 여러분의 해답 레이어는 이 이미지 4장 전부를 걸치게 됩니다. 다시 말해 여러분이 항상 4개의 래스터를 작업해야 한다는 뜻이지요. 그리 이상적인 상황은 아닙니다. 작업할 파일이 하나인 편이 훨씬 나을 겁니다.
다행히도, QGIS는 바로 그렇게 할 수 있도록 해줍니다. 실제로 새 래스터 파일을 생성할 필요도 없이 말이죠. 가상 래스터(virtual raster) 를 생성하면 됩니다. 가상 래스터를 그 기능을 설명하는 카탈로그(catalog) 라고 부르는 경우도 많습니다. 가상 래스터는 실제로 새 래스터라기보다는, 여러분의 기존 래스터들을 카탈로그 하나로, 즉 쉽게 접근할 수 있는 파일 하나로 구성하는 방법입니다.
카탈로그를 만들기 위해 를 사용할 것입니다.
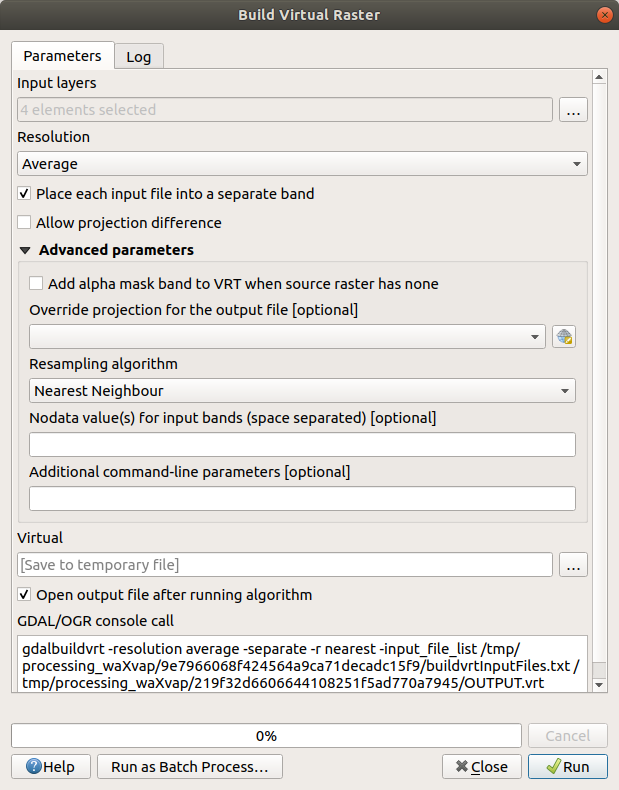
에서 Build virtual raster 알고리즘을 여십시오.
대화창이 열리면, Input layers 파라미터 옆에 있는 … 버튼을 클릭한 다음 레이어들을 전부 체크하거나 Select All 버튼을 누르십시오.
Place each input file into a separate band 옵션은 체크 해제하십시오. 대화창 하단의 GDAL/OGR console call 아래 생성된 코드가 보이십니까? 여러분이 Run 버튼을 클릭하면 실행될 명령어입니다. 대화창에서 서로 다른 옵션들을 변경하는 대로 이 텍스트가 업데이트됩니다.
참고
명령어를 실행하기 위해
OSGeo Shell(윈도우 사용자) 또는Terminal(리눅스 및 맥OS 사용자)에 이 텍스트를 복사해서 붙여넣을 수 있다는 사실을 기억하십시오. 또 각각의 GDAL 명령어를 위한 스크립트도 생성할 수 있습니다. 처리 과정이 오래 걸리거나 또는 여러분이 특정 작업을 예약하고 싶은 경우 매우 유용합니다. 명령어의 문법(syntax)에 대한 도움말을 보고 싶다면 Help 버튼을 사용하십시오.마지막으로 Run 을 클릭하십시오.
참고
이전 강의에서 배웠던 대로, Processing 이 기본적으로 임시 레이어를 생성합니다. 파일로 저장하려면, Virtual 아래 있는 … 버튼을 클릭하십시오.
이제 Layers 패널에서 원본 래스터 4개를 제거하고 산출 가상 카탈로그 래스터만 남기면 됩니다.
7.1.3. ★★★ 래스터 데이터 변환하기
앞에서 설명한 방법으로 카탈로그를 이용해서 데이터셋을 가상으로 병합하고 “실시간”으로 재투영할 수 있습니다. 그러나 비교적 긴 시간 동안 사용할 데이터를 준비하는 경우, 미리 병합하고 재투영한 새 래스터를 생성하는 편이 더 효율적일 수도 있습니다. 초기 준비 과정에 시간이 걸릴 수도 있지만, 맵 상에서 래스터를 사용할 때 속도를 향상시킬 수 있기 때문입니다.
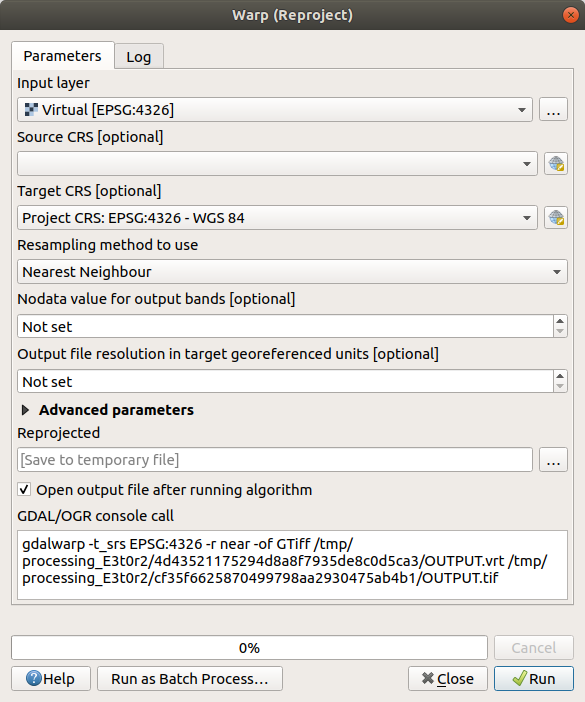
래스터 재투영하기
에서 Warp (reproject) 알고리즘을 여십시오.
가상 래스터(카탈로그)를 재투영하거나, 멀티스레딩(multithreading) 공간 처리를 활성화하는 등등 더 많은 작업도 할 수 있습니다.
래스터 병합하기
새 래스터 레이어를 생성해서 디스크 상에 저장해야 하는 경우 병합(merge) 알고리즘을 사용하면 됩니다.
참고
병합하는 래스터 파일이 얼마나 많은지 그리고 래스터의 해상도가 어떻게 되는지에 따라, 생성된 래스터 파일이 매우 커질 수 있습니다. 그 대신 가상 래스터 생성하기 예제에서 설명한 대로 래스터 카탈로그를 생성하는 것을 고려해보십시오.
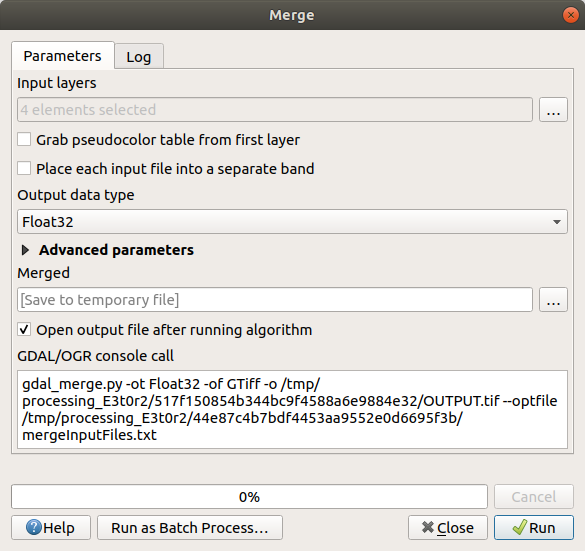
메뉴에서 Merge 알고리즘을 클릭하십시오.
가상 래스터 생성하기 예제에서 한 것처럼, … 버튼을 사용해서 병합하고자 하는 레이어들을 선택하십시오.
가상 래스터를 입력물로 지정할 수도 있습니다. 그러면 가상 래스터를 구성하고 있는 모든 래스터를 처리할 것입니다.
여러분이 GDAL 라이브러리를 알고 있다면, Advanced parameters 메뉴를 열어서 자신만의 옵션들도 추가할 수 있습니다.
7.1.4. 결론
QGIS를 통해 여러분의 기존 프로젝트에 래스터 데이터를 손쉽게 포함시킬 수 있습니다.
7.1.5. 다음은 무엇을 배우게 될까요?
다음 수업에서는 항공사진이 아닌 래스터 데이터를 사용해서 래스터를 어떻게 심볼로도 활용할 수 있는지 배워보겠습니다.