重要
翻訳は あなたが参加できる コミュニティの取り組みです。このページは現在 100.00% 翻訳されています。
17.26. バッチ処理インターフェイス
注釈
このレッスンではバッチ処理インターフェイスを紹介します。1つのアルゴリズムをさまざまな入力値のセットで実行できます。
あるアルゴリズムを異なる入力で繰り返し実行しなければならないことがあります。例えば、入力ファイルの集合をあるフォーマットから別のフォーマットに変換しなければならない場合や、ある投影法の複数のレイヤを別の投影法に変換しなければならない場合などです。
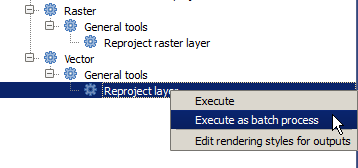
その場合には、ツールボックスでアルゴリズムを繰り返し呼び出すのは最良の選択肢ではありません。代わりに、バッチ処理インターフェイスを使用するべきです。そうすれば一定のアルゴリズムを複数回実行することが大幅に簡略化されます。バッチプロセスとしてアルゴリズムを実行するには、ツールボックスでそれを見つけて、ダブルクリックする代わりに右クリックして、 バッチ処理として実行 を選択します。
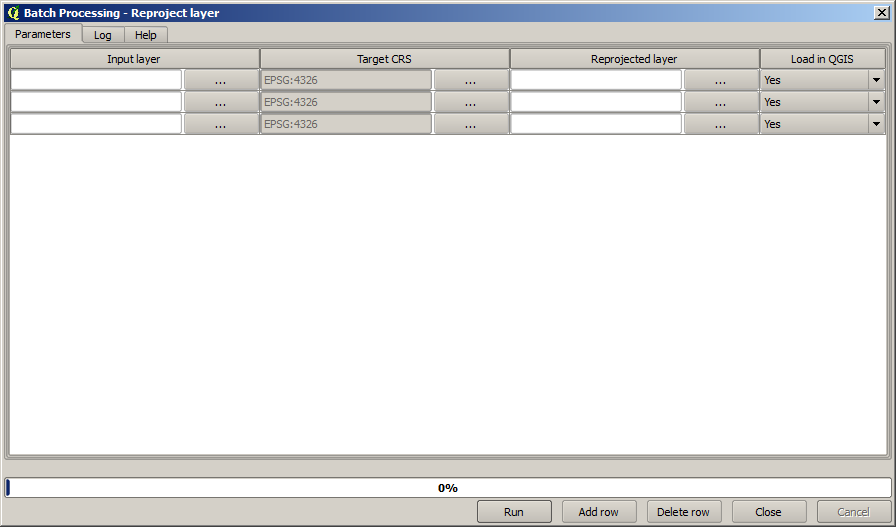
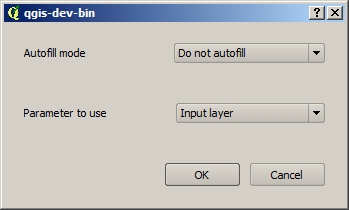
この例では、 ベクタレイヤを再投影 アルゴリズム を使用し、前述したようにそれを見つけて実行します。次のダイアログが表示されます。
このレッスンのためのデータを見てみると、3つのシェープファイルのセットは含むが、QGISプロジェクトファイルが含まれていないことがわかります。アルゴリズムは、バッチプロセスとして実行されると、レイヤの入力は、現在のQGISプロジェクトまたはファイルのいずれかから選択できるからです。それによって、例えば指定したフォルダ内の全てのレイヤなど、大量のレイヤを簡単に処理することができます。
バッチ処理ダイアログのテーブルの各行は、アルゴリズムの一回の実行を表します。行にあるセルはアルゴリズムが必要とするパラメータに対応します。これは、通常の一回の実行ダイアログの中でのように上下にではなく、行の中に水平に配置されています。
実行するバッチ処理を定義するには、テーブルに対応する値を入力します。この作業を容易にするためのいくつかのツールがダイアログ自体に含まれています。
フィールドを一つ一つ入力しましょう。入力する最初の列は、入力レイヤ 列です。処理したいレイヤの名前をそれぞれ入力する代わりに、それらの全てを選択し、ダイアログが各行にひとつずつ入れるようにさせることができます。左上のセル内のボタンをクリックし、ポップアップするファイル選択ダイアログで、再投影する3つのファイルを選択します。行ごとにそれらの1つだけが必要とされるので、残りは下の行を埋めるために使用されます。
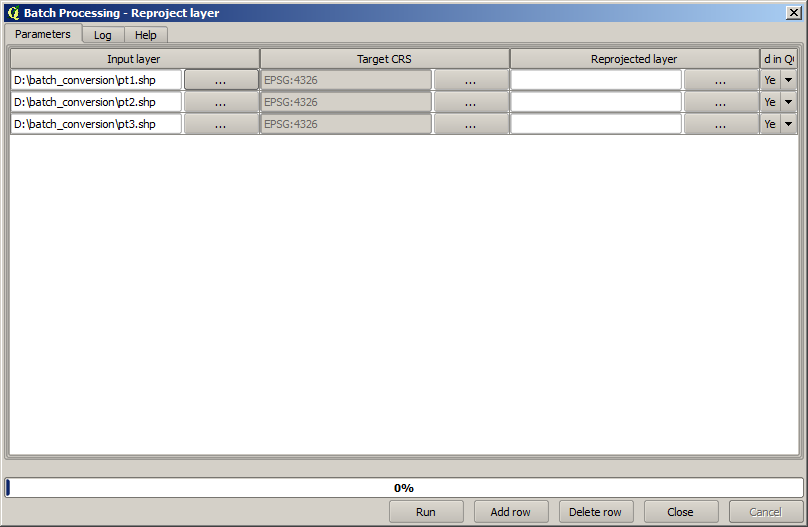
デフォルトの行数は3で、これはちょうど変換しなければならないレイヤの数ですが、より多くのレイヤを選択した場合、新しい行が自動的に追加されます。手動でエントリを入力したい場合は、 行を追加 ボタンを使用して行をもっと追加できます。
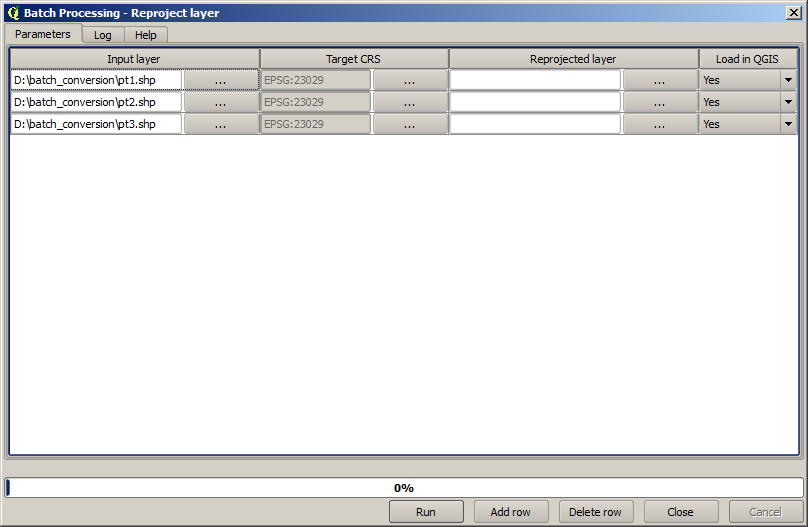
これらのレイヤを全て EPSG:23029 CRSに変換するので、2番目のフィールドでそのCRSを選択する必要があります。全ての行で同じにしますが、各行ひとつひとつに対してそれを行う必要はありません。その代わりに、1行目(一番上のもの)で対応するセル内のボタンを使用してそのCRSを設定し、次に列見出しをダブルクリックします。それにより、列のすべてのセルが一番上のセルの値を使用して埋められます。
最後にそれぞれの実行に対応し、再投影レイヤを格納する出力ファイルを選択する必要があります。もう一度最初の行だけにそれをやりましょう。上位のセルにあるボタンをクリックし、出力ファイルを入れたいフォルダにファイル名を入力します(例えば、 reprojected.shp )。
さて、ファイル選択ダイアログ上で OK をクリックすると、ファイルは自動的にセルに書き込まれず、以下のような入力ボックスが代わりに表示されます。
最初のオプションを選択した場合のみ、現在のセルが入力されます。他のいずれかを選択した場合は、下の全ての行は、与えられたパターンで埋められます。この場合は、 パラメーター値で埋める オプションを、次に下のドロップダウンメニューで 入力レイヤ 値を選択します。すると 入力レイヤ の値(つまり、レイヤ名)が 追加したファイル名に追加され、各出力ファイル名が異なるようになります。バッチ処理テーブルはこのようになるはずです:

最後の列は、成果レイヤを現在のQGISプロジェクトに追加するかどうかを設定します。今回は、成果を見ることができるよう、デフォルトの はい オプションのままにしておきます。
OK をクリックするとバッチ処理が実行されます。全てがうまくいった場合は、全てのレイヤが処理され、3つの新しいレイヤが作成されているでしょう。