4. Getting up and running with QtCreator and QGIS
QtCreator is a newish IDE from the makers of the Qt library. With QtCreator you can build any C++ project, but it’s really optimised for people working on Qt(4) based applications (including mobile apps). Everything I describe below assumes you are running Ubuntu 11.04 ‘Natty’.
4.1. Installing QtCreator
This part is easy:
sudo apt-get install qtcreator qtcreator-doc
After installing you should find it in your gnome menu.
4.2. Setting up your project
I’m assuming you have already got a local QGIS clone containing the source code, and have installed all needed build dependencies etc. There are detailed instructions for git access and dependency installation.
On my system I have checked out the code into $HOME/dev/cpp/QGIS and the
rest of the article is written assuming that, you should update these paths as
appropriate for your local system.
On launching QtCreator do:
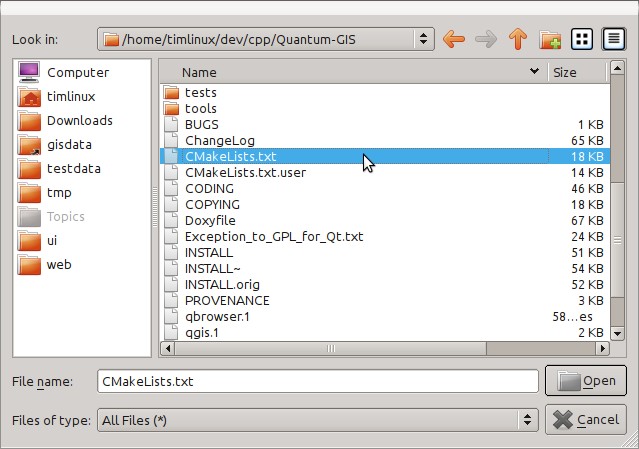
File -> Open File or Project
Then use the resulting file selection dialog to browse to and open this file:
$HOME/dev/cpp/QGIS/CMakeLists.txt
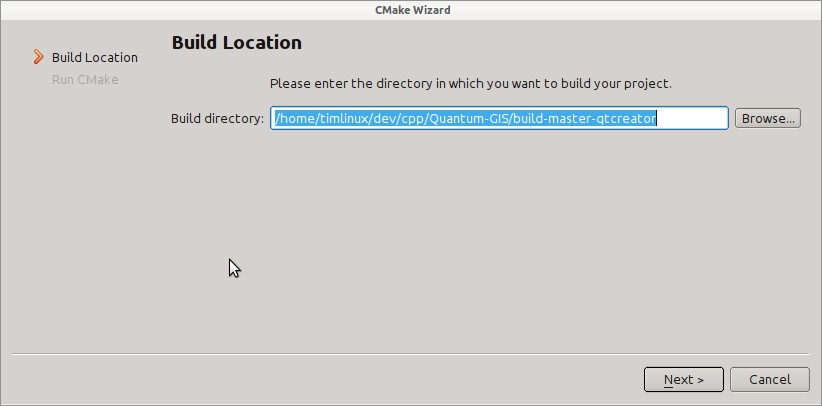
Next you will be prompted for a build location. I create a specific build dir for QtCreator to work in under:
$HOME/dev/cpp/QGIS/build-master-qtcreator
Its probably a good idea to create separate build directories for different branches if you can afford the disk space.
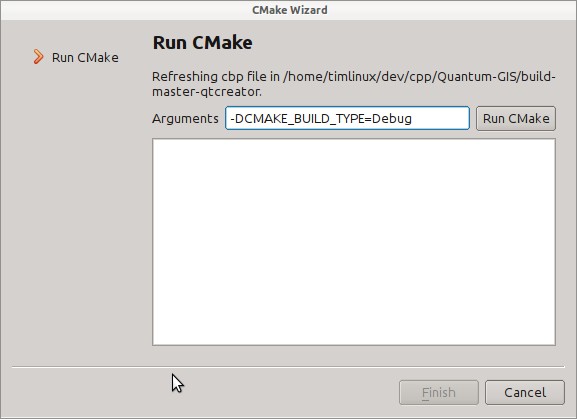
Next you will be asked if you have any CMake build options to pass to CMake. We will tell CMake that we want a debug build by adding this option:
-DCMAKE_BUILD_TYPE=Debug
That’s the basics of it. When you complete the Wizard, QtCreator will start scanning the source tree for autocompletion support and do some other housekeeping stuff in the background. We want to tweak a few things before we start to build though.
4.3. Setting up your build environment
Click on the ‘Projects’ icon on the left of the QtCreator window.

Select the build settings tab (normally active by default).

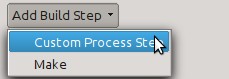
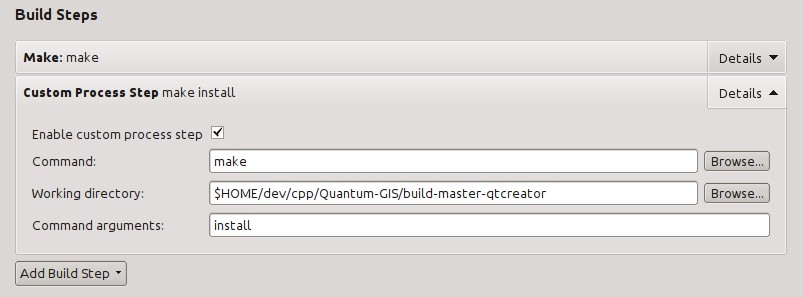
We now want to add a custom process step. Why? Because QGIS can currently only run from an install directory, not its build directory, so we need to ensure that it is installed whenever we build it. Under ‘Build Steps’, click on the ‘Add BuildStep’ combo button and choose ‘Custom Process Step’.
Now we set the following details:
Enable custom process step: [yes]
Command: make
Working directory: $HOME/dev/cpp/QGIS/build-master-qtcreator
Command arguments: install
You are almost ready to build. Just one note: QtCreator will need write
permissions on the install prefix. By default (which I am using here) QGIS is
going to get installed to /usr/local/. For my purposes on my development
machine, I just gave myself write permissions to the /usr/local directory.
To start the build, click that big hammer icon on the bottom left of the window.

4.4. Setting your run environment
As mentioned above, we cannot run QGIS from directly in the build directly, so
we need to create a custom run target to tell QtCreator to run QGIS from the
install dir (in my case /usr/local/). To do that, return to the projects
configuration screen.
Now select the ‘Run Settings’ tab

We need to update the default run settings from using the ‘qgis’ run configuration to using a custom one.
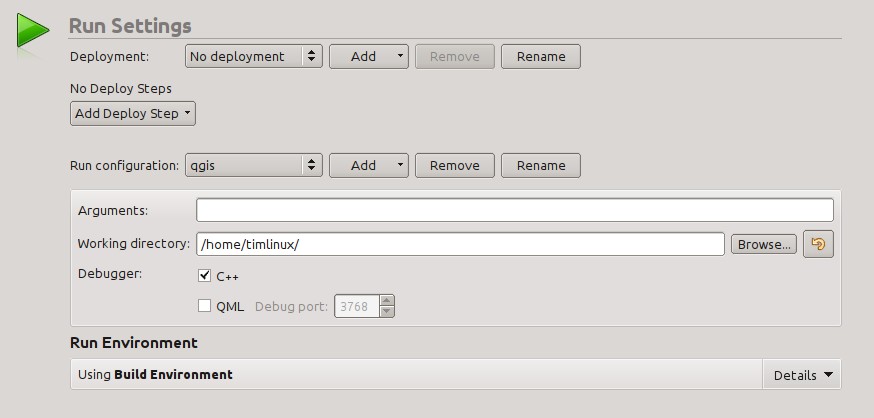
Do do that, click the ‘Add v’ combo button next to the Run configuration combo and choose ‘Custom Executable’ from the top of the list.

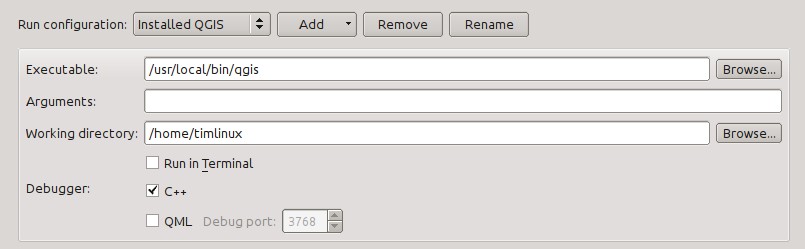
Now in the properties area set the following details:
Executable: /usr/local/bin/qgis
Arguments :
Working directory: $HOME
Run in terminal: [no]
Debugger: C++ [yes]
Qml [no]
Then click the ‘Rename’ button and give your custom executable a meaningful name e.g. ‘Installed QGIS’
4.5. Running and debugging
Now you are ready to run and debug QGIS. To set a break point, simply open a source file and click in the left column.

Now launch QGIS under the debugger by clicking the icon with a bug on it in the bottom left of the window.
