중요
번역은 여러분이 참여할 수 있는 커뮤니티 활동입니다. 이 페이지는 현재 93.18% 번역되었습니다.
5.3. 수업: 양식
디지타이즈 작업으로 새 데이터를 추가할 때, 피처에 대한 속성을 입력할 수 있는 대화창이 나타납니다. 그러나 이 기본 대화창은 한 눈에 파악하기 어렵습니다. 특히 여러분이 대용량 데이터셋을 생성하거나, 다른 사람들에게 디지타이즈 작업을 부탁했는데 기본 양식을 이해하기 어려워 할 경우 유용성 문제가 제기될 수 있습니다.
QGIS를 사용하면, 다행히도 레이어에 대한 사용자 정의 대화창을 생성할 수 있습니다. 이 수업에서 그 방법을 배워보겠습니다.
이 수업의 목표: 레이어에 대한 양식을 생성하기.
5.3.1. ★☆☆ 따라해보세요: QGIS의 양식 디자인 기능 사용하기
Layers 패널에서
roads레이어를 선택하십시오.이전과 마찬가지로 편집 모드 로 들어가십시오.
roads레이어의 속성 테이블을 여십시오.테이블에 있는 어떤 셀이든 하나를 오른쪽 클릭하십시오. Open form 메뉴 항목이 있는 짧은 컨텍스트 메뉴가 나타날 것입니다.
이 항목을 클릭해서 QGIS가 이 레이어에 대해 생성한 양식을 살펴보십시오.
물론 항상 Attribute Table 에서 특정한 거리를 검색해야 하는 것보다는 맵을 보면서 이 작업을 할 수 있다면 좋겠죠.
Layers 패널에서
roads레이어를 선택하십시오. Identify Features 도구를 사용해서 맵에 있는 어떤 거리든 하나를 클릭하십시오.
클릭한 피처에 대한 필드 값과 기타 일반 정보의 트리 뷰를 보여주는 Identify Results 패널이 열립니다.
이 패널의 최상단에서,
 Identify Settings 메뉴에 있는 Auto open form for single feature results 체크박스를 체크하십시오.
이제 맵에 있는 어떤 거리든 하나를 클릭하십시오. 이전의 Identify Results 대화창과 함께, 이젠 익숙한 양식을 보게 될 것입니다:
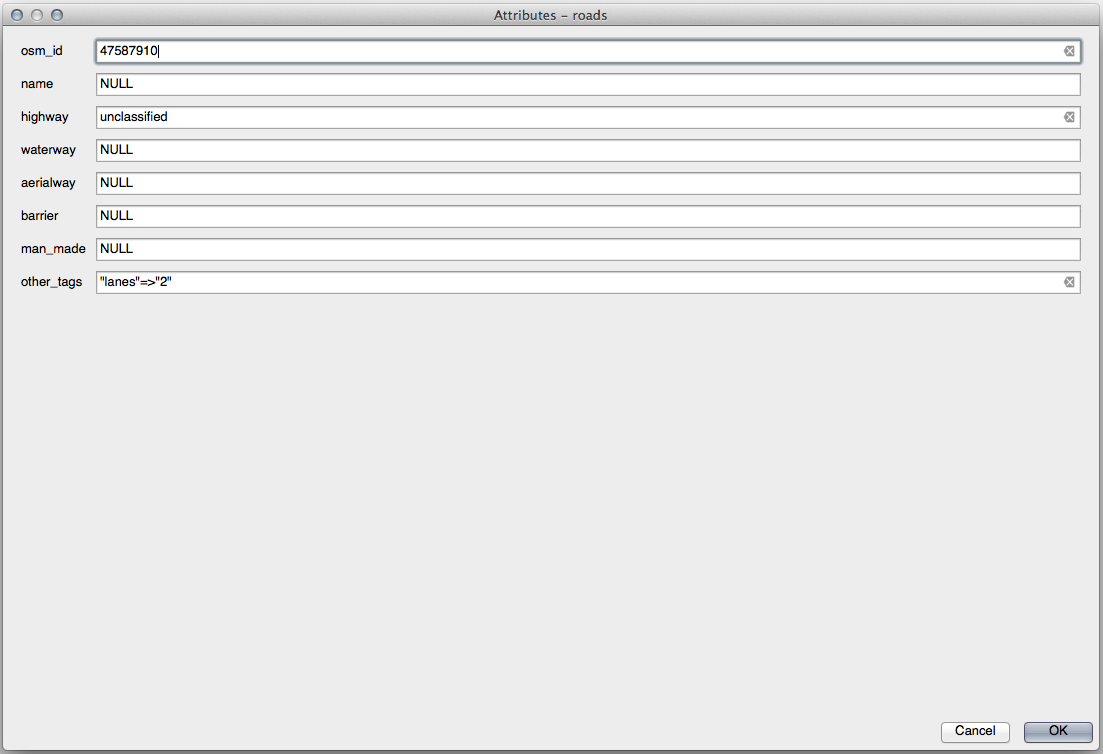
Each time you click on a single feature with the
Identify Features tool,
its form pops up as long as the Auto open form is
checked.
5.3.2. ★☆☆ 혼자서 해보세요: 양식을 사용해서 값을 편집하기
편집 모드로 들어온 상태라면, 이 양식을 사용해서 피처의 속성을 편집할 수 있습니다.
(편집 모드가 아니라면) 편집 모드를 활성화하십시오.
- Identify Features 도구를 사용해서 Swellendam 을 가로지르는 중심가를 클릭하십시오:
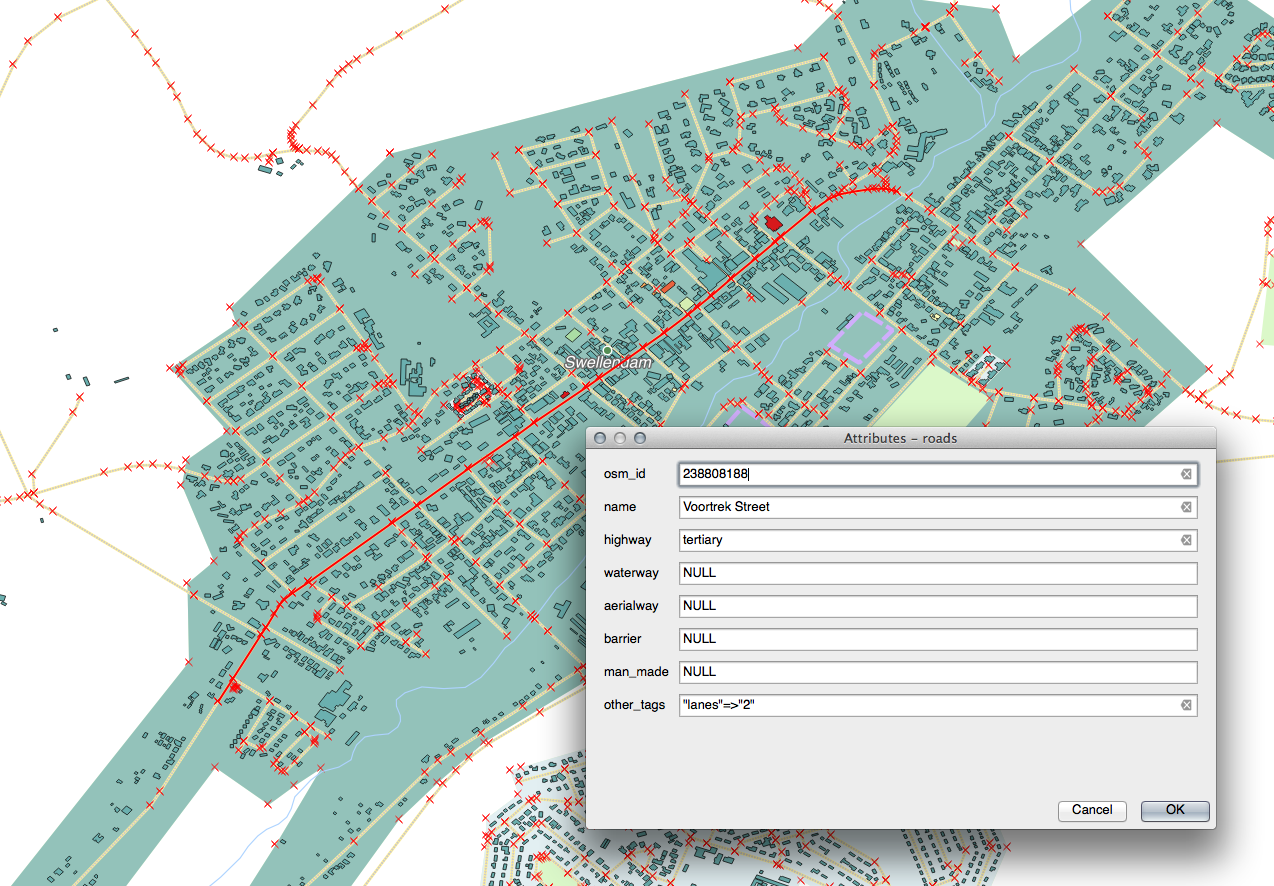
이 도로의 highway 값을
secondary로 편집하십시오.편집 모드를 해제하고 편집 내용을 저장하십시오.
Attribute Table 을 열어보면 속성 테이블의 값이, 즉 소스 데이터의 값이 업데이트되었다는 사실을 알 수 있습니다.
5.3.3. ★★☆ 따라해보세요: 양식 필드 유형 설정하기
양식을 사용해서 편집하는 것도 좋지만, 이 방법은 모든 것을 직접 입력해야 하기도 합니다. 다행스럽게도, 양식에는 서로 다른 다양한 방법으로 데이터를 편집할 수 있도록 해주는, 소위 말하는 위젯 이 여러 종류 있습니다.
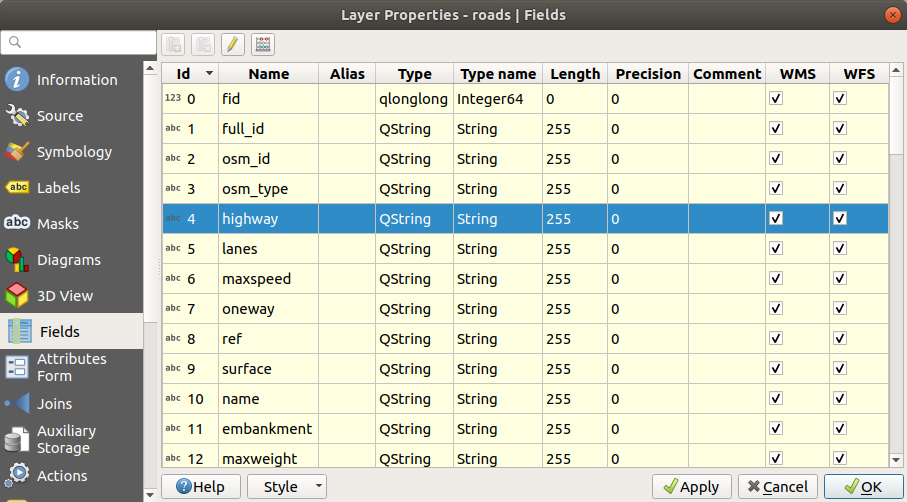
Open the
roadslayer’s Properties…Fields 탭을 선택하십시오. 다음과 같은 테이블을 볼 수 있습니다:
Attributes Form 탭으로 전환하십시오. 다음을 보게 될 것입니다:
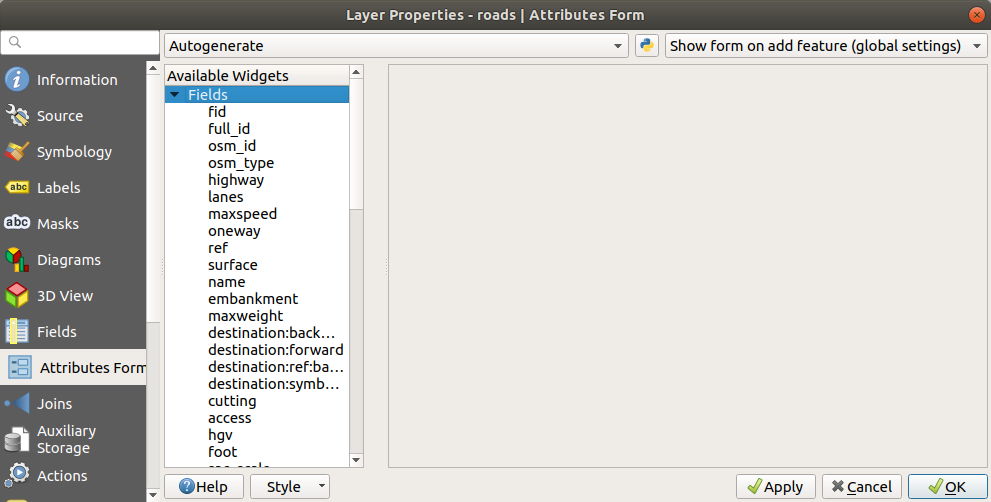
oneway행을 클릭한 다음 옵션 목록에서 Widget Type 을 Checkbox 로 선택하십시오:
OK 를 클릭하십시오.
(
roads레이어가 이미 편집 모드가 아니라면) 편집 모드로 들어가십시오.- Identify Features 도구를 클릭하십시오
앞서 선택했던 것과 동일한 중심가를 클릭하십시오.
이제 oneway 속성 옆에 True (체크) 또는 False (체크 해제)를 의미하는 체크박스가 생긴 것을 볼 수 있을 것입니다.
5.3.4. ★★★ 혼자서 해보세요:
highway 항목에 더 적합한 위젯을 설정해보십시오.
해답
TYPE 의 경우, 도로가 가질 수 있는 유형의 개수는 당연하게도 제한되어 있고, 여러분이 이 레이어의 속성 테이블을 확인해본다면 이 도로 유형들이 사전 정의되어 있다는 사실을 알게 될 것입니다.
Value Map 에 위젯을 설정하고 Load Data from Layer 를 클릭하십시오.
Select
roadsin the Label dropdown andhighwayfor both the Value and Description options: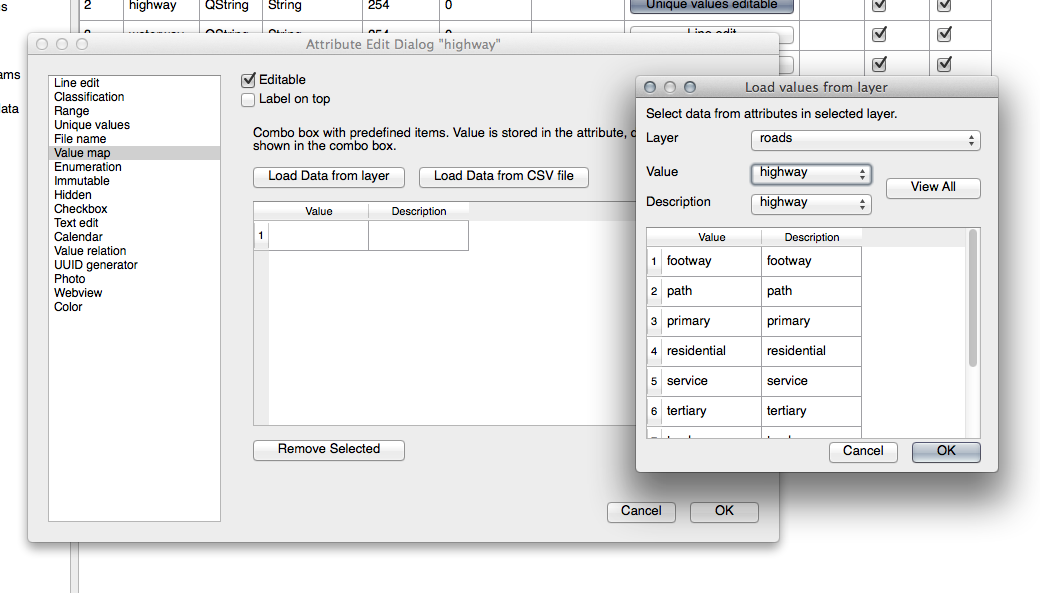
OK 를 세 번 클릭합니다.
If you use the
Identify Features tool on a street now while edit mode is
active, the dialog you get should look like this: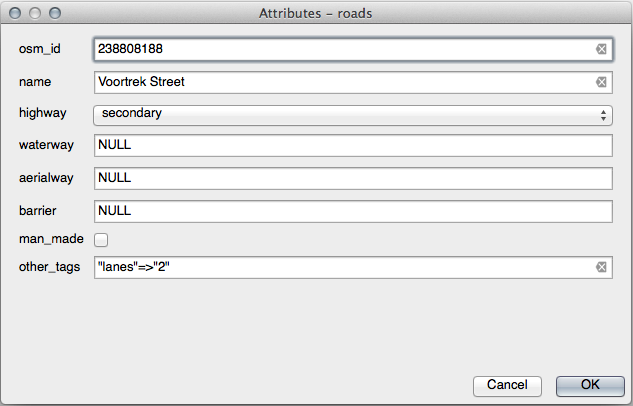
5.3.5. ★★★ 혼자서 해보세요: 테스트 데이터 생성하기
여러분만의 사용자 정의 양식을 완전히 새로 디자인할 수도 있습니다.
다음 두 속성을 가진
test-data라는 단순 포인트 레이어를 생성하십시오:name(텍스트)age(정수)
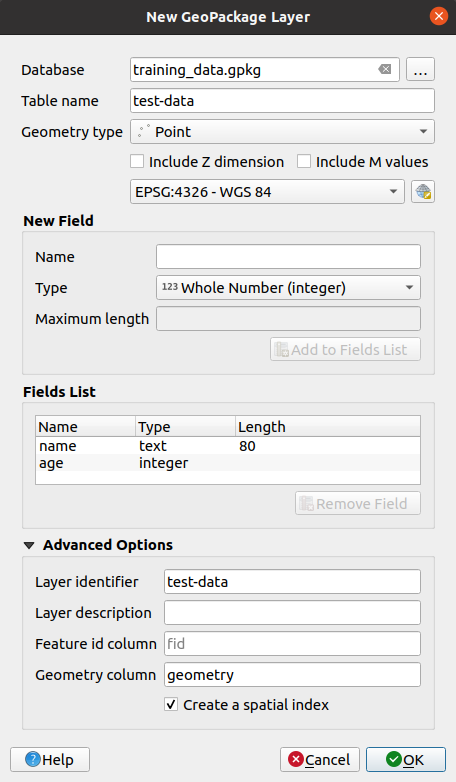
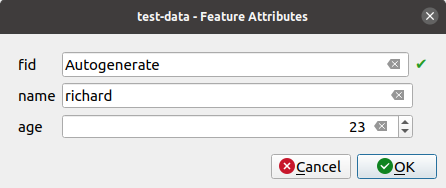
이 새 레이어에 디지타이즈 작업 도구로 포인트 몇 개를 찍어 간단한 데이터를 준비하십시오. 새 포인트를 만들 때마다 QGIS의 기본 속성 부여 양식이 나타날 것입니다.
참고
이전 단계에서 스냅 옵션을 활성화시킨 채라면 비활성화시켜야 할 수도 있습니다.
5.3.6. ★★★ 따라해보세요: 새 양식 생성하기
이제 속성 데이터 부여 단계를 위한 우리만의 사용자 정의 양식을 생성하려 합니다. 이 작업을 하려면, Qt 설계자(Qt Designer) 가 설치되어 있어야 합니다. (양식을 생성하는 사람에게만 필요합니다.)
Qt 설계자 를 실행하십시오.
새 대화창을 생성할 수 있는 다음 대화창이 나타납니다:

(기본적으로) 대화창의 왼쪽에 있는 Widget Box 를 찾아보십시오. Line Edit 라는 항목을 담고 있습니다.
이 항목을 여러분의 양식으로 클릭&드래그하십시오. 양식에 새로운 Line Edit 가 생성될 것입니다.
이 새로운 라인 편집 요소를 선택하면 (기본적으로 창의 오른쪽에 있는) 요소의 속성(properties) 을 볼 수 있습니다:
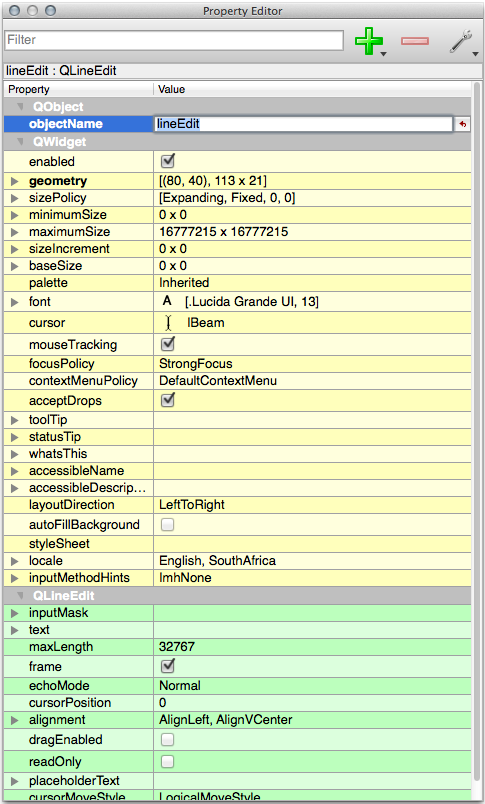
이름을
name으로 설정하십시오.동일한 접근법을 사용해서, 새 Spin Box 를 생성하고 그 이름을
age로 설정하십시오.굵은 글꼴의
Add a New Person이라는 텍스트를 가진 Label 을 추가하십시오. (이를 설정하는 방법을 찾아보려면 객체의 속성 을 살펴보십시오.) 아니면, (라벨을 추가하기 보다) 대화창 자체의 제목을 설정하고 싶을 수도 있습니다.여러분의 Line Edit 와 Spin Box 에 대한 Label 을 추가하십시오.
여러분이 원하는 대로 요소들을 배열해보십시오.
사용자의 대화창 아무 곳이나 클릭하십시오.
Find the Lay Out in a Form Layout button (in a toolbar along the top edge of the screen, by default). This lays out your dialog automatically.
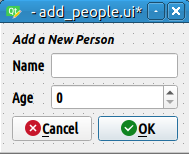
(대화창의 속성에서) 대화창의 최대 크기를 너비
200, 높이150으로 설정하십시오.여러분의 양식은 다음과 비슷하게 보여야 합니다:
새 양식을
exercise_data/forms/add_people.ui파일로 저장하십시오.저장이 완료되면 Qt 설계자 를 닫아도 됩니다.
5.3.7. ★★★ 따라해보세요: 양식을 사용자 레이어와 연결하기
QGIS로 돌아가십시오.
Double click the
test-datalayer in the legend to access its properties.Layer Properties 대화창에 있는 Attributes Form 탭을 클릭하십시오.
Attribute editor layout 드롭다운 메뉴에서 Provide ui-file 을 선택합니다.
… 버튼을 클릭한 다음 방금 생성한
add_people.ui파일을 선택합니다: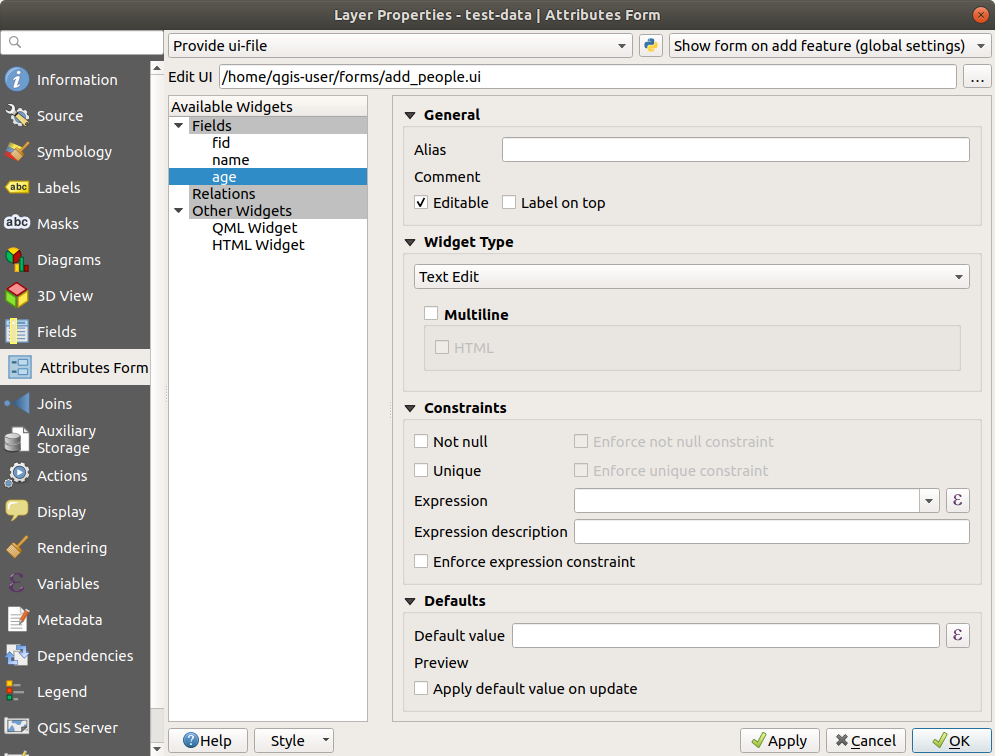
Layer Properties 대화창의 OK 버튼을 클릭하십시오.
편집 모드로 들어가서 새 포인트를 생성하십시오.
이제 (QGIS가 보통 생성하는 기본 대화창 대신) 사용자 정의 대화창이 나타날 것입니다.
이제
Identify Features 도구를 사용해서 포인트들 가운데 하나를 클릭하는 경우, 식별 결과 창을 오른쪽 클릭해서 나타나는 컨텍스트 메뉴에서 을 선택하면 양식을 열 수 있습니다.이 레이어에 대해 편집 모드를 활성화시킨 경우, 이 컨텍스트 메뉴는 그 대신 메뉴 항목을 보일 것입니다. 포인트를 생성한 후라도, 이 메뉴를 선택하면 열리는 새 양식에서 속성을 조정할 수 있습니다.
5.3.8. 결론
데이터를 편집 또는 생성할 때 양식을 이용하면 훨씬 편하게 작업할 수 있습니다. 위젯 유형을 편집하거나 완전히 새로운 양식을 생성해서 해당 레이어를 위해 새 데이터를 디지타이즈하는 사람의 경험을 향상시켜 오해 및 불필요한 오류를 최소화할 수 있습니다.
5.3.9. 더 읽어볼 거리
앞의 고급 수준 부분을 완료했고 파이썬에 대한 지식이 있다면, 데이터 무결성 검증, 자동 완성 등등을 포함하는 고급 기능들을 사용할 수 있게 해주는 파이썬 로직을 사용해서 사용자 정의 피처 양식을 생성하는 데 대한 이 블로그 포스트 를 읽어봐도 좋을 겁니다.
5.3.10. 다음은 무엇을 배우게 될까요?
QGIS가 수행할 수 있는 표준 액션 가운데 하나가 피처를 식별하는 동시에 양식을 여는 것입니다. 하지만 여러분이 정의한 사용자 정의 액션을 실행하도록 할 수도 있습니다. 이것이 다음 수업의 내용입니다.