8.1. Lesson: Working with Raster Data
Raster data is quite different from vector data. Vector data has discrete features constructed out of vertices, and perhaps connected with lines and/or areas. Raster data, however, is like any image. Although it may portray various properties of objects in the real world, these objects don’t exist as separate objects; rather, they are represented using pixels of various different color values.
During this module you’re going to use raster data to supplement your existing GIS analysis.
The goal for this lesson: To learn how to work with raster data in the QGIS environment.
8.1.1.  Follow Along: Loading Raster Data
Open your analysis.qgs map (which you should have created and saved during the previous module).
Deactivate all the layers except the solution and important_roads layers.
Click on the Load Raster Layer button:

The Load Raster Layer dialog will open. The data for this project is in exercise_data/raster.
- Either load them all in separately, or hold down ctrl and click on all four of them in turn, then open them at the same time.
The first thing you’ll notice is that nothing seems to be happening in your map. Are the rasters not loading? Well, there they are in the Layers list, so obviously they did load. The problem is that they’re not in the same projection. Luckily, we’ve already seen what to do in this situation.
- Select Project ‣ Project Properties in the menu:
- Select CRS tab in the menu:
- Enable “on the fly” reprojection.
- Set it to the same projection as the rest of your data (WGS 84 / UTM zone 33S).
- Click [OK].
The rasters should fit nicely:
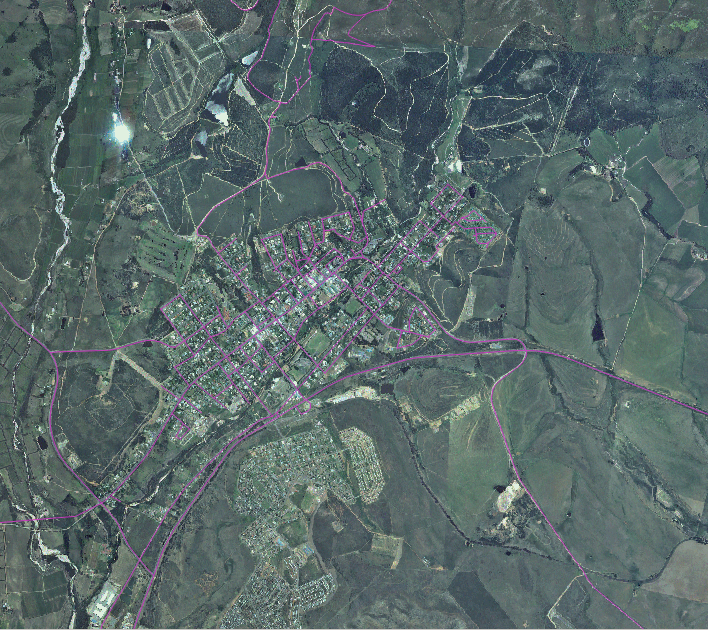
There we have it - four aerial photographs covering our whole study area.
8.1.2. Follow Along: Create a Virtual Raster
Now as you can see from this, your solution layer lies across all four photographs. What this means is that you’re going to have to work with four rasters all the time. That’s not ideal; it would be better to have one file for one (composite) image, right?
Luckily, QGIS allows you to do exactly this, and without needing to actually create a new raster file, which could take up a lot of space. Instead, you can create a Virtual Raster. This is also often called a Catalog, which explains its function. It’s not really a new raster. Rather, it’s a way to organize your existing rasters into one catalog: one file for easy access.
To make a catalog:
- Click on the menu item Raster ‣ Miscellaneous ‣ Build Virtual Raster (Catalog).
- In the dialog that appears, check the box next to Use visible raster layers for input.
- Enter exercise_data/residential_development as the output location.
- Enter aerial_photos.vrt as the file name.
- Check the Load into canvas when finished button.
Notice the text field below. What this dialog is actually doing is that it’s writing that text for you. It’s a long command that QGIS is going to run.
Not
 Keep in mind that the command text is editable, so you can
customize the command further if preferred. Search online for the initial
command (in this case, gdalbuildvrt) for help on the syntax.
Keep in mind that the command text is editable, so you can
customize the command further if preferred. Search online for the initial
command (in this case, gdalbuildvrt) for help on the syntax.
- Click OK to run the command.
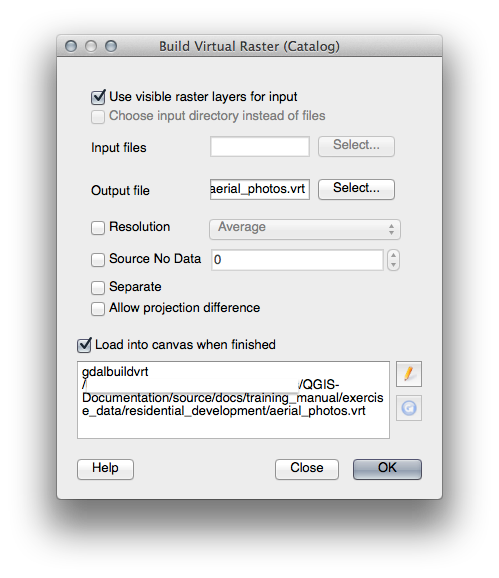
It may take a while to complete. When it’s done, it will tell you so with a message box.
- Click OK to chase the message away.
- Click Close on the Build Virtual Raster (Catalog) dialog. (Don’t click OK again, otherwise it’s going to start running that command again.)
- You can now remove the original four rasters from the Layers list.
- If necessary, click and drag the new aerial_photos raster catalog layer to the bottom of the Layers list so that the other activated layers become visible.
8.1.3. Transforming Raster Data
The above methods allow you to virtually merge datasets using a catalog, and to reproject them “on the fly”. However, if you are setting up data that you’ll be using for quite a while, it may be more efficient to create new rasters that are already merged and reprojected. This improves performance while using the rasters in a map, but it may take some time to set up initially.
8.1.3.1. Reprojecting rasters
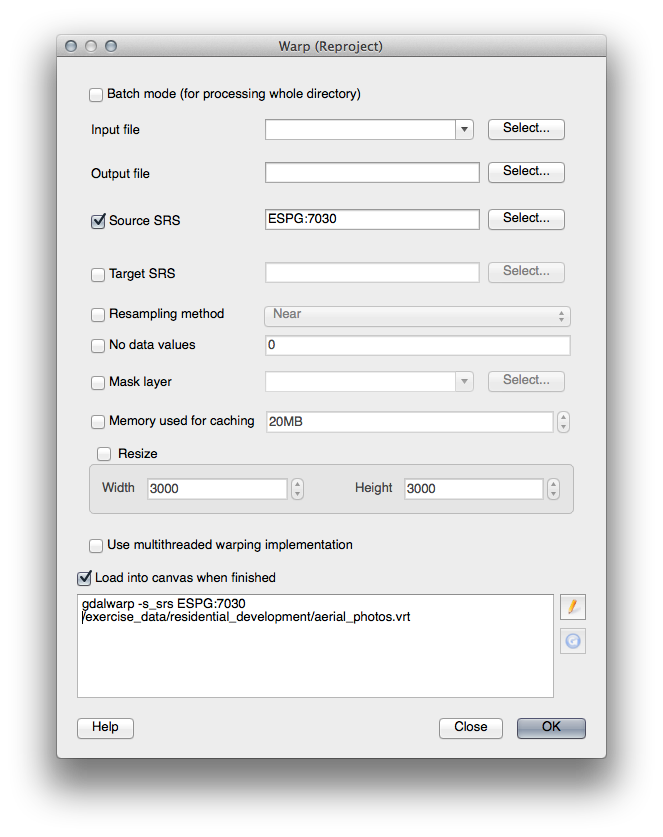
- Click on the menu item Raster ‣ Projections ‣ Warp (Reproject).
Note that this tool features a handy batch option for reprojecting the contents of whole directories. You can also reproject virtual rasters (catalogs), as well as enabling a multithreaded processing mode.
8.1.3.2. Merging rasters
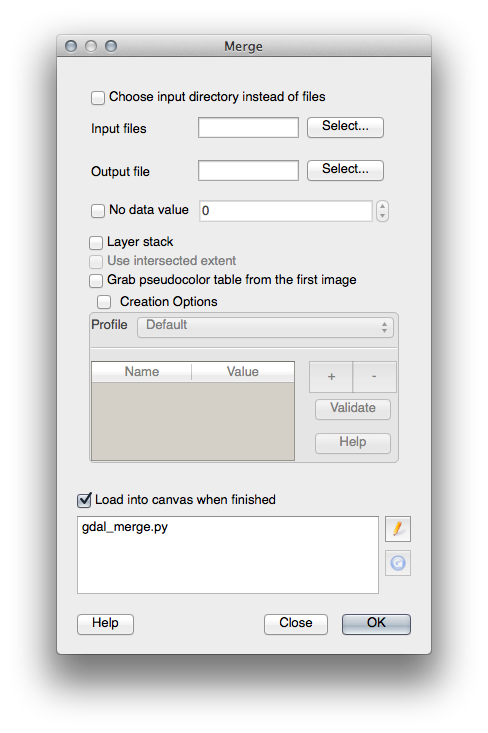
- Click on the menu item Raster ‣ Miscellaneous ‣ Merge.
You can choose to process entire directories instead of single files, giving you a very useful built-in batch processing capability. You can specify a virtual raster as input file, too, and all of the rasters that it consists of will be processed.
You can also add your own command line options using the Creation Options checkbox and list. This only applies if you have knowledge of the GDAL library’s operation.
8.1.4. In Conclusion
QGIS makes it easy to include raster data into your existing projects.
8.1.5. What’s Next?
Next, we’ll use raster data that isn’t aerial imagery, and see how symbolization is useful in the case of rasters as well.