중요
번역은 여러분이 참여할 수 있는 커뮤니티 활동입니다. 이 페이지는 현재 100.00% 번역되었습니다.
13. 사용자에게 정보 전달하기
힌트
PyQGIS 콘솔을 사용하지 않는 경우 이 페이지에 있는 코드 조각들을 다음과 같이 가져와야 합니다:
 1from qgis.core import (
 2    QgsMessageLog,
 3    QgsGeometry,
 4)
 5
 6from qgis.gui import (
 7    QgsMessageBar,
 8)
 9
10from qgis.PyQt.QtWidgets import (
11    QSizePolicy,
12    QPushButton,
13    QDialog,
14    QGridLayout,
15    QDialogButtonBox,
16)
이 장에서는 사용자 인터페이스에서 일관성을 유지하기 위해 사용자에게 정보를 전달하는 데 사용해야 하는 몇몇 메소드 및 요소에 대해 설명합니다.
13.1. 메시지 보이기: QgsMessageBar 클래스
메시지 상자를 사용하는 것은 사용자 경험이라는 관점에서 그리 좋은 생각이 아닙니다. 짧은 정보 또는 경고/오류 메시지를 표출하는 데에는 QGIS 메시지 바를 사용하는 편이 더 낫습니다.
QGIS 인터페이스 객체에 참조(reference)를 사용하면, 메시지 바에 메시지를 다음 코드로 표시할 수 있습니다:
from qgis.core import Qgis
iface.messageBar().pushMessage("Error", "I'm sorry Dave, I'm afraid I can't do that", level=Qgis.Critical)
Messages(2): Error : I'm sorry Dave, I'm afraid I can't do that

그림 13.35 QGIS 메시지 바
제한 시간 동안에만 메시지를 보이려면 지속 시간(duration)을 설정하면 됩니다.
iface.messageBar().pushMessage("Ooops", "The plugin is not working as it should", level=Qgis.Critical, duration=3)
Messages(2): Ooops : The plugin is not working as it should

그림 13.36 타이머를 적용한 QGIS 메시지 바
앞의 예시들은 오류 메시지를 보이지만, level 파라미터를 사용하면 Qgis.MessageLevel 클래스의 열거 목록(enumeration)을 통해 경고 또는 정보 메시지를 생성할 수 있습니다. 모두 4개의 서로 다른 수준을 사용할 수 있습니다:
정보(Info)
경고(Warning)
중요(Critical)
성공(Success)

그림 13.37 QGIS 메시지 바 (정보)
추가적인 정보를 표시하기 위한 버튼 등의 위젯을 메시지 바에 추가할 수도 있습니다:
1def showError():
2    pass
3
4widget = iface.messageBar().createMessage("Missing Layers", "Show Me")
5button = QPushButton(widget)
6button.setText("Show Me")
7button.pressed.connect(showError)
8widget.layout().addWidget(button)
9iface.messageBar().pushWidget(widget, Qgis.Warning)
Messages(1): Missing Layers : Show Me

그림 13.38 버튼이 들어간 QGIS 메시지 바
별도의 메시지 상자가 필요 없거나 QGIS 메인 창에 메시지를 표시할 이유가 없을 경우, 사용자의 대화창에 메시지 바를 표시할 수도 있습니다.
 1class MyDialog(QDialog):
 2    def __init__(self):
 3        QDialog.__init__(self)
 4        self.bar = QgsMessageBar()
 5        self.bar.setSizePolicy( QSizePolicy.Minimum, QSizePolicy.Fixed )
 6        self.setLayout(QGridLayout())
 7        self.layout().setContentsMargins(0, 0, 0, 0)
 8        self.buttonbox = QDialogButtonBox(QDialogButtonBox.Ok)
 9        self.buttonbox.accepted.connect(self.run)
10        self.layout().addWidget(self.buttonbox, 0, 0, 2, 1)
11        self.layout().addWidget(self.bar, 0, 0, 1, 1)
12    def run(self):
13        self.bar.pushMessage("Hello", "World", level=Qgis.Info)
14
15myDlg = MyDialog()
16myDlg.show()
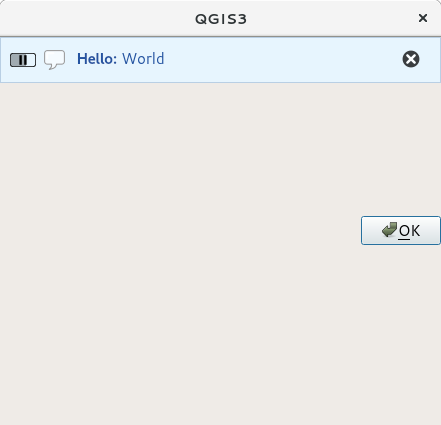
그림 13.39 사용자 정의 대화창 내부의 QGIS 메시지 바
13.2. 진행률 보이기
앞에서 배웠듯이 QGIS 메시지 바에 위젯을 추가할 수 있으므로, 진행률(progress) 막대도 추가할 수 있습니다. 다음은 여러분이 콘솔에서 실행해볼 수 있는 예시 코드입니다.
 1import time
 2from qgis.PyQt.QtWidgets import QProgressBar
 3from qgis.PyQt.QtCore import *
 4progressMessageBar = iface.messageBar().createMessage("Doing something boring...")
 5progress = QProgressBar()
 6progress.setMaximum(10)
 7progress.setAlignment(Qt.AlignLeft|Qt.AlignVCenter)
 8progressMessageBar.layout().addWidget(progress)
 9iface.messageBar().pushWidget(progressMessageBar, Qgis.Info)
10
11for i in range(10):
12    time.sleep(1)
13    progress.setValue(i + 1)
14
15iface.messageBar().clearWidgets()
Messages(0): Doing something boring...
또한 다음 예시에서와 같이 진행률을 보고하는 내장 상태 바도 사용할 수 있습니다:
 1vlayer = iface.activeLayer()
 2
 3count = vlayer.featureCount()
 4features = vlayer.getFeatures()
 5
 6for i, feature in enumerate(features):
 7    # do something time-consuming here
 8    print('.') # printing should give enough time to present the progress
 9
10    percent = i / float(count) * 100
11    # iface.mainWindow().statusBar().showMessage("Processed {} %".format(int(percent)))
12    iface.statusBarIface().showMessage("Processed {} %".format(int(percent)))
13
14iface.statusBarIface().clearMessage()
13.3. 로그 작성하기
여러분의 코드를 실행하는 것에 대한 모든 정보를 로그로 작성하고 저장할 수 있도록, QGIS는 세 가지의 서로 다른 로그 작업 유형을 지원합니다. 각 유형은 전용 산출 위치를 가지고 있습니다. 여러분의 목적에 따라 올바른 로그 작업 방식을 사용해주십시오:
QgsMessageLog는 사용자에게 문제점을 전달하기 위한 메시지 용 클래스입니다. QgsMessageLog 클래스의 산출물은 로그 메시지 패널에 나타납니다.파이썬 내장 logging 모듈은 QGIS 파이썬 API (PyQGIS) 수준에서 디버그 작업을 하기 위한 모듈입니다. 예를 들면 피처 ID 또는 도형 같은 파이썬 코드를 디버그해야 하는 파이썬 스크립트 개발자들에게 권장합니다.
QgsLogger는 (예를 들어 어떤 깨진 코드가 뭔가를 촉발한다고 의심하는 경우) QGIS 내부 디버그 작업 또는 개발자 용 클래스입니다. 이 메시지는 QGIS 개발자 버전에서만 보일 것입니다.
다음 절들에서 이 서로 다른 로그 작업 유형들의 예시를 볼 수 있습니다.
경고
파이썬 print 선언문을 사용하면 멀티스레드일 수도 있는 모든 코드를 안전하지 못 하게 만들고 알고리즘을 극단적으로 느려지게 합니다. 이때 모든 코드란 (다른 것들 가운데에서도) 표현식 함수, 렌더링 작업자, 심볼 레이어, 그리고 공간 처리 알고리즘 을 포함합니다. 이런 경우 항상 파이썬 로그 작업 모듈 또는 스레드 안전 클래스들(QgsLogger 또는 QgsMessageLog)을 대신 시용해야 합니다.
13.3.1. QgsMessageLog
# You can optionally pass a 'tag' and a 'level' parameters
QgsMessageLog.logMessage("Your plugin code has been executed correctly", 'MyPlugin', level=Qgis.Info)
QgsMessageLog.logMessage("Your plugin code might have some problems", level=Qgis.Warning)
QgsMessageLog.logMessage("Your plugin code has crashed!", level=Qgis.Critical)
MyPlugin(0): Your plugin code has been executed correctly
(1): Your plugin code might have some problems
(2): Your plugin code has crashed!
참고
로그 메시지 패널 에서 QgsMessageLog 클래스의 산출물을 볼 수 있습니다.
13.3.2. 파이썬 내장 로그 작업 모듈
1import logging
2formatter = '%(asctime)s - %(name)s - %(levelname)s - %(message)s'
3logfilename=r'c:\temp\example.log'
4logging.basicConfig(filename=logfilename, level=logging.DEBUG, format=formatter)
5logging.info("This logging info text goes into the file")
6logging.debug("This logging debug text goes into the file as well")
basicConfig 메소드가 로그 작업의 기본 설정을 환경설정합니다. 앞의 코드에서 파일 이름, 로그 작업 수준 및 서식을 정의했습니다. 파일 이름은 로그 파일을 작성할 위치를 알려주며, 로그 작업 수준은 산출할 수준을 정의하고, 서식은 각 메시지를 산출할 서식을 정의합니다.
2020-10-08 13:14:42,998 - root - INFO - This logging text goes into the file
2020-10-08 13:14:42,998 - root - DEBUG - This logging debug text goes into the file as well
여러분이 여러분의 스크립트를 실행할 때마다 로그 파일을 지우길 바라는 경우, 다음과 같은 코드를 작성하면 됩니다:
if os.path.isfile(logfilename):
    with open(logfilename, 'w') as file:
        pass
다음 링크에서 파이썬 로그 작업 기능을 사용하는 방법에 대한 심화 자료들을 찾아볼 수 있습니다:
경고
파일 이름을 설정해서 파일에 로그를 작성하지 않는다면 로그 작업이 산출 속도를 크게 떨어뜨리는 멀티스레드가 될 수도 있다는 사실을 기억하십시오.