Wichtig
Übersetzen ist eine Gemeinschaftsleistung Sie können mitmachen. Diese Seite ist aktuell zu 23.81% übersetzt.
7.1. Lesson: Working with Raster Data
Rasterdaten unterscheiden sich deutlich von Vektordaten. Vektordaten haben individuelle Eigenschaften und bestehen aus geometrischen Formen, die aus verbundenen Punkten zusammengesetzt sind. Ggf. sind sie mit anderen Linien und/oder Flächen verbunden sind. Rasterdaten hingegen sind mit einem Bild vergleichbar. Obwohl Rasterdaten verschiedene Eigenschaften von Objekten in der realen Welt abbilden können, existieren sie nicht als separate Objekte. Stattdessen werden sie durch Pixel mit unterschiedlichen Werten dargestellt.
In diesem Modul werden Sie Rasterdaten verwenden, um Ihre bestehenden GIS-Analysen zu erweitern.
Das Ziel dieser Lektion: Sie lernen, wie Sie mit Rasterdaten in QGIS arbeiten.
7.1.1. ★☆☆ Follow Along: Loading Raster Data
Raster data can be loaded with the same methods we used for vector data. However we suggest to use the Browser Panel.
Open the Browser Panel and expand the
exercise_data/rasterfolder.Load all the data in this folder:
3320C_2010_314_RGB_LATLNG.tif3320D_2010_315_RGB_LATLNG.tif3420B_2010_328_RGB_LATLNG.tif3420C_2010_327_RGB_LATLNG.tif
You should see the following map:
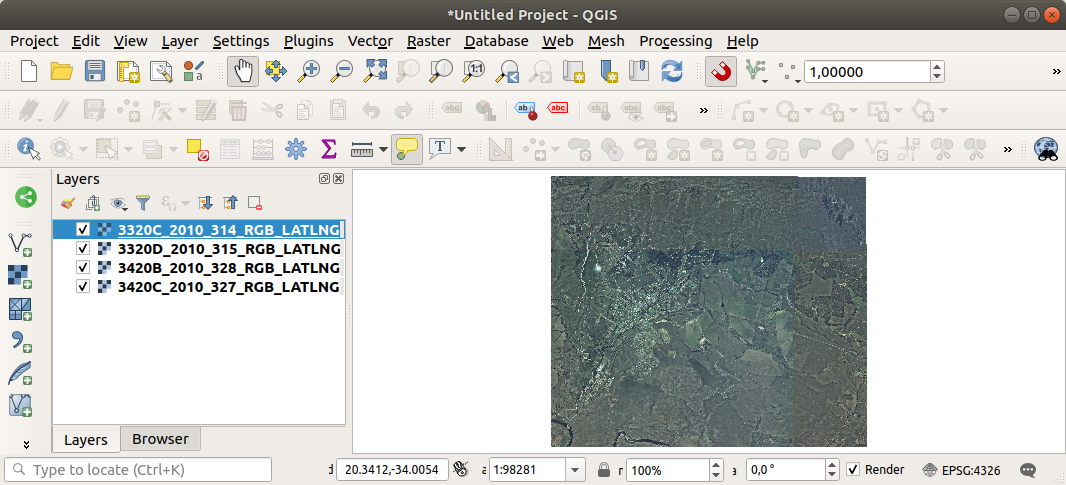
There we have it - four aerial images covering our study area.
7.1.2. ★☆☆ Follow Along: Create a Virtual Raster
Now as you can see from this, your solution layer lies across all four images. What this means is that you are going to have to work with four rasters all the time. That’s not ideal. It would be better to have one file to work with.
Luckily, QGIS allows you to do exactly this, and without needing to actually create a new raster file. You can create a Virtual Raster. This is also often called a Catalog, which explains its function. It’s not really a new raster. Rather, it is a way to organize your existing rasters into one catalog: one file for easy access.
To make a catalog we will use the .
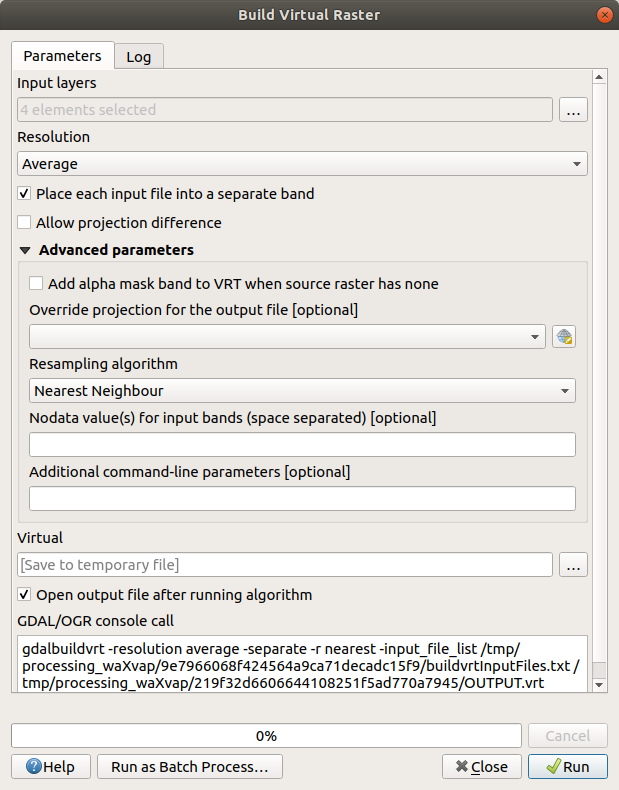
Open the Build virtual raster algorithm from the ;
In the dialog that appears, click on the … button next to the Input layers parameter and check all the layers or use the Select All button;
Uncheck Place each input file into a separate band. Notice the code that is generated at the bottom of the dialog under GDAL/OGR console call. This is the command that will be executed when you click Run. The text updates as you change different options in the dialog.
Bemerkung
Keep in mind that you can copy and paste the text in the
OSGeo Shell(Windows user) orTerminal(Linux and OSX users) to run the command. You can also create a script for each GDAL command. This is very handy when the procedure is taking a long time or when you want to schedule specific tasks. Use the Help button to get more help on the syntax of the command.Finally click on Run.
Bemerkung
As you know from the previous modules, Processing creates temporary layers by default. To save the file, click on the … button under Virtual.
You can now remove the original four rasters from the Layers Panel and leave only the output virtual catalog raster.
7.1.3. ★★★ Transforming Raster Data
The above methods allow you to virtually merge datasets using a catalog, and to reproject them „on the fly“. However, if you are setting up data that you’ll be using for quite a while, it may be more efficient to create new rasters that are already merged and reprojected. This improves performance while using the rasters in a map, but it may take some time to set up initially.
Reprojecting rasters
Open Warp (reproject) from .
You can also reproject virtual rasters (catalogs), enable multithreaded processing, and more.

Merging rasters
If you need to create a new raster layer and save it to disk you can use the merge algorithm.
Bemerkung
Depending on how many raster files you are merging and their resolution, the new raster file created can be really big. Consider instead to create a raster catalog as described in the Create a Virtual Raster section.
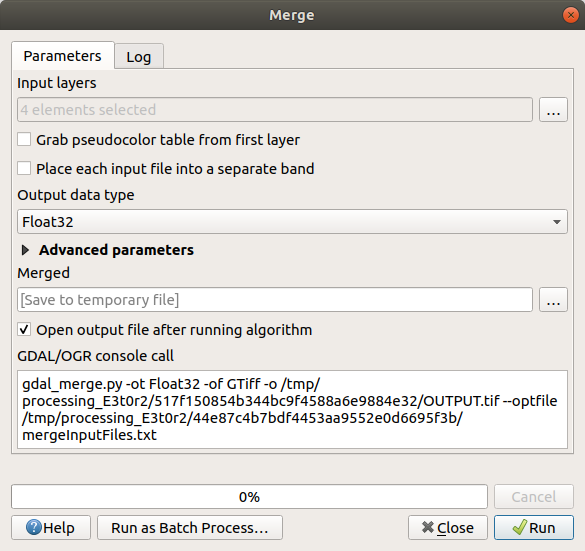
Click on the Merge algorithm from the menu.
As we did for the Create a Virtual raster, use the … button to choose which layers you want to merge.
You can also specify a Virtual raster as input, and then all of the rasters that it consists of will be processed.
If you know the GDAL library, you can also add your own options by opening the Advanced parameters menu.
7.1.4. Zusammenfassung
QGIS makes it easy to include raster data into your existing projects.
7.1.5. Was kommt als Nächstes?
Next, we’ll use raster data that isn’t aerial imagery, and see how symbolization is useful in the case of rasters as well.