Importante
A tradução é um esforço comunitário você pode contribuir. Esta página está atualmente traduzida em 50.00%.
7.1. Lesson: Working with Raster Data
Raster data is quite different from vector data. Vector data has discrete features with geometries constructed out of vertices, and perhaps connected with lines and/or areas. Raster data, however, is like any image. Although it may portray various properties of objects in the real world, these objects don’t exist as separate objects. Rather, they are represented using pixels with different values.
Durante este módulo, você usará dados raster para complementar sua análise GIS existente.
O objetivo desta lição: aprender a trabalhar com dados raster no QGIS.
7.1.1. ★☆☆ Follow Along: Loading Raster Data
Dados raster podem ser carregados com os mesmos métodos que usamos para dados vetoriais. No entanto, sugerimos o uso do painel Navegador.
Open the Browser Panel and expand the
exercise_data/rasterfolder.Carregar todos os dados desta pasta:
3320C_2010_314_RGB_LATLNG.tif3320D_2010_315_RGB_LATLNG.tif3420B_2010_328_RGB_LATLNG.tif3420C_2010_327_RGB_LATLNG.tif
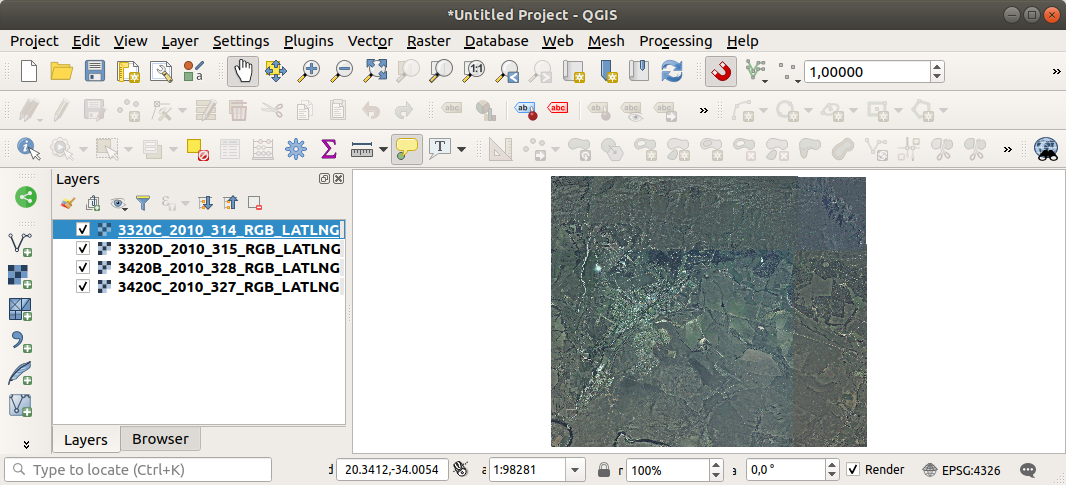
Você deve ver o seguinte mapa:

Lá temos - quatro imagens aéreas cobrindo nossa área de estudo.
7.1.2. ★☆☆ Follow Along: Create a Virtual Raster
Now as you can see from this, your solution layer lies across all four images. What this means is that you are going to have to work with four rasters all the time. That’s not ideal. It would be better to have one file to work with.
Luckily, QGIS allows you to do exactly this, and without needing to actually create a new raster file. You can create a Virtual Raster. This is also often called a Catalog, which explains its function. It’s not really a new raster. Rather, it is a way to organize your existing rasters into one catalog: one file for easy access.
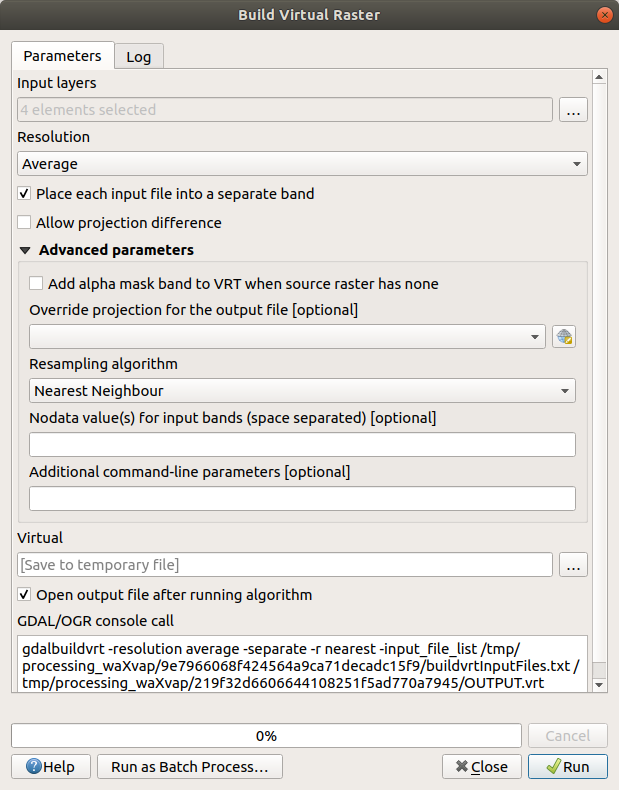
To make a catalog we will use the .
Open the Build virtual raster algorithm from the ;
In the dialog that appears, click on the … button next to the Input layers parameter and check all the layers or use the Select All button;
Uncheck Place each input file into a separate band. Notice the code that is generated at the bottom of the dialog under GDAL/OGR console call. This is the command that will be executed when you click Run. The text updates as you change different options in the dialog.
Nota
Keep in mind that you can copy and paste the text in the
OSGeo Shell(Windows user) orTerminal(Linux and OSX users) to run the command. You can also create a script for each GDAL command. This is very handy when the procedure is taking a long time or when you want to schedule specific tasks. Use the Help button to get more help on the syntax of the command.Finalmente clique em Executar.
Nota
As you know from the previous modules, Processing creates temporary layers by default. To save the file, click on the … button under Virtual.

Agora você pode remover os quatro rasters originais do painel Camadas e deixar apenas o ratser do catálogo virtual de saída.
7.1.3. ★★★ Transforming Raster Data
Los métodos anteriores te permiten unir virtualmente conjuntos de datos utilizando un catálogo, y reproyectarlos “al vuelo”. Sin embargo, si estás ajustando datos que utilizarás por mucho tiempo, puede ser más eficiente crear un nuevo ráster que ya esté unido y reproyectado. Esto mejora el rendimiento cuando utilizas rásters en un mapa, pero puede que lleve algún tiempo para ajustarlo inicialmente.
Reprojetando Raster
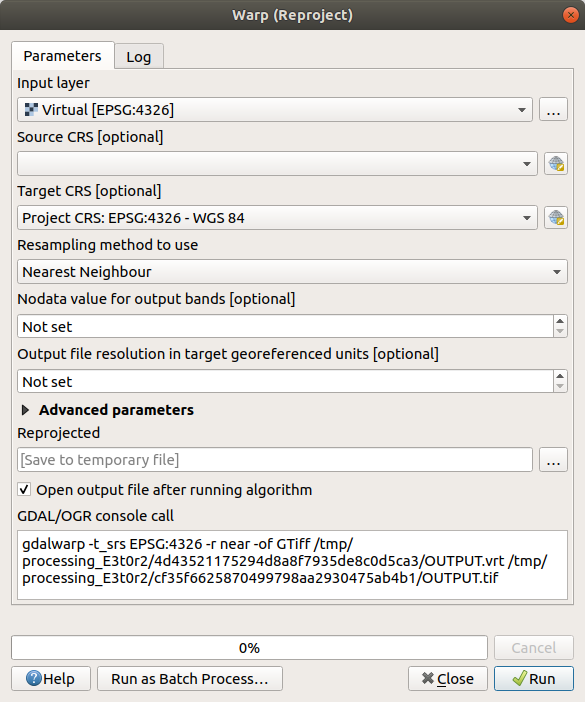
Open Warp (reproject) from .
You can also reproject virtual rasters (catalogs), enable multithreaded processing, and more.

Fundindo rasters
Se você precisar criar uma nova camada raster e salvá-la em disco, poderá usar o algoritmo de mesclagem.
Nota
Dependendo de quantos arquivos raster você está mesclando e de sua resolução, o novo arquivo ratser criado pode ser realmente grande. Em vez disso, considere criar um catálogo raster, conforme descrito na seção Create a Virtual Raster.
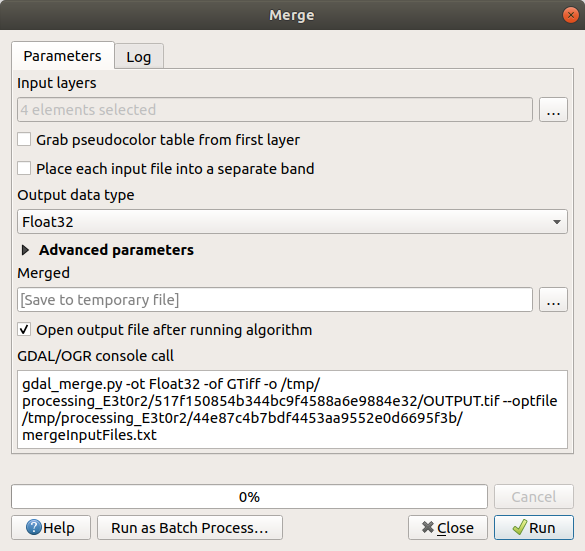
Click on the Merge algorithm from the menu.
As we did for the Create a Virtual raster, use the … button to choose which layers you want to merge.
Você também pode especificar um Raster virtual como entrada e, em seguida, todos os rasters em que consiste serão processados.
If you know the GDAL library, you can also add your own options by opening the Advanced parameters menu.

7.1.4. In Conclusion
QGIS facilita a inclusão de dados raster em seus projetos existentes.
7.1.5. What’s Next?
Lo siguiente será utilizar datos ráster que no sean imágenes aéreas, y veremos cómo la simbología también es útil en el caso de los rásters.