18.2.10. The Shape Items
QGIS provides a couple of tools to draw regular or more complex shapes over the print layout.
Note
Unlike other print layout items, you can not style the frame nor the background color of the shapes bounding frame (set to transparent by default).
18.2.10.1. The Regular Shape Item
The Shape item is a tool that helps to decorate your map with regular
shapes like triangle, rectangle, ellipse…
You can add a regular shape using the  Add Shape tool which
gives access to particular tools like
  Add Rectangle,
 Add Ellipse and
  Add Triangle.
Once you have selected the appropriate tool, you can draw the item following
items creation instructions. Like other layout
items, a regular shape can be manipulated the same way as exposed in
Interacting with layout items.
Note
Holding down the Shift key while drawing the basic shape with the click and drag method helps you create a perfect square, circle or triangle.
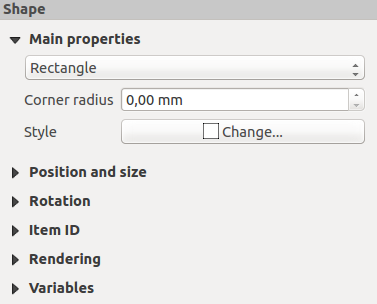
The default shape item can be customized using its Item Properties panel. Other than the items common properties, this feature has the following functionalities (see Fig. 18.55):

Fig. 18.55 Shape Item Properties Panel
The Main properties group shows and allows you to switch the type of the shape item (Ellipse, Rectangle or Triangle) inside the given frame.
You can set the style of the shape using the advanced symbol and color selector widget…
For the rectangle shape, you can set in different units the value of the Corner radius to round of the corners.
18.2.10.2. The Node-Based Shape Items
While the  Add Shape tool provides way to create
simple and predefined geometric item, the
  Add Node
Item tool helps you create a custom and more advanced geometric item. For
polylines or polygons, you can draw as many lines or sides as you want and
vertices of the items can be independently and directly manipulated using the
 Edit Nodes Item. The item itself can be manipulated
as exposed in Interacting with layout items.
To add a node-based shape:
Perform consecutive left clicks to add nodes of your item. If you hold down the Shift key while drawing a segment, it is constrained to follow an orientation multiple of 45°.
When you’re done, right-click to terminate the shape.
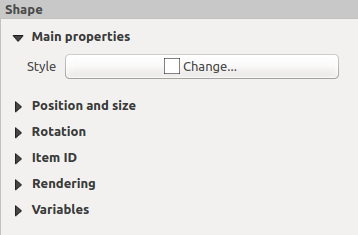
You can customize the appearance of the shape in the Item Properties panel.

Fig. 18.56 Polygon Node Shape Item Properties Panel
In the Main properties, you can set the style of the shape using the advanced symbol and color selector widget…
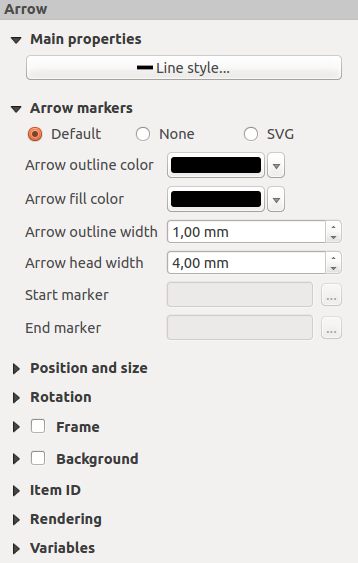
For polyline node items, you can also parameterize the Line markers i.e. add:
start and/or end markers with options:
None: draws a simple polyline.
Arrow: adds a regular triangular arrow head that you can customize.
SVG marker: uses an
SVGfile as arrow head of the item.
customize the arrow head:
Arrow stroke color: sets the stroke color of the arrow head.
Arrow fill color: sets the fill color of the arrow head.
Arrow stroke width: sets the stroke width of the arrow head.
Arrow head width: sets the size of the arrow head.
SVG images are automatically rotated with the line. Stroke and fill colors of QGIS predefined SVG images can be changed using the corresponding options. Custom SVG may require some tags following this instruction.

Fig. 18.57 Polyline Node Shape Item Properties Panel
The Arrow Item
The  Add Arrow tool is a shortcut to create an arrow-enabled
polyline by default and thus has the same properties and behavior as a
polyline node item.
Actually, the arrow item can be used to add a simple arrow, for example, to
show the relation between two different print layout items. However, to create
a north arrow, the image item should be considered
first as it gives access to a set of north arrows in .SVG format that
you can sync with a map item so that it rotates automatically with it.
Editing a node item geometry
A specific tool is provided to edit node-based shapes through
 Edit Nodes Item. Within this mode, you can select
a node by clicking on it (a marker is displayed on the selected node). A
selected node can be moved either by dragging it or by using the arrow keys.
Moreover, in this mode, you are able to add nodes to an existing shape:
double-click on a segment and a node is added at the place you click.
Finally, you can remove the currently selected node by
hitting the Del key.

