2.3. Lesson: Navigating the Map Canvas
This section will focus on basic QGIS navigation tools used to navigate within the Map Canvas. These tools will allow you to visually explore the layers at different scales.
The goal for this lesson: Learn how to use Pan and Zoom tools within QGIS and learn about map scale.
2.3.1.  Follow Along: Basic Navigation Tools
Before learning how to navigate within the Map Canvas, let’s add some layers that we can explore during this tutorial.
Open a new blank project and using the steps learnt in Create a Map, load the previously seen
protected_areas,roadsandbuildingslayers to the project. The result view should look similar to the snippet in Fig. 2.1 below (colors do not matter):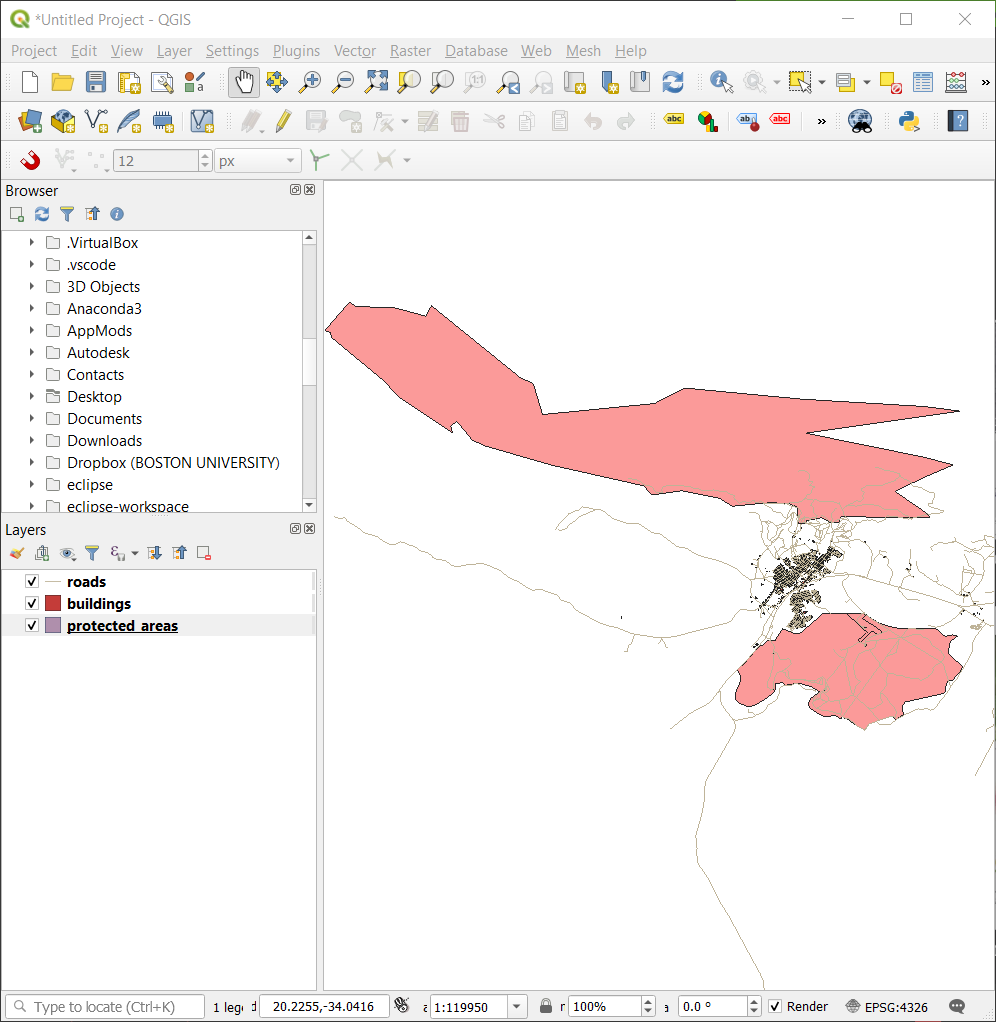
Fig. 2.1 Protected areas, roads and buildings added
Let’s first learn how to use the Pan Tool.
In the Map Navigation Toolbar, make sure the
 Pan button is activated.
Move the mouse to the center of the Map Canvas area.
Left-click and hold, and drag the mouse in any direction to pan the map.
Next, let’s zoom in and take a closer look at the layers we imported.
In the Map Navigation Toolbar, click on the
 Zoom In button.
Move your mouse to approximately the top left area of where there is the highest density of buildings and roads.
Left click and hold.
Then drag the mouse, which will create a rectangle, and cover the dense area of buildings and roads (Zoom in).
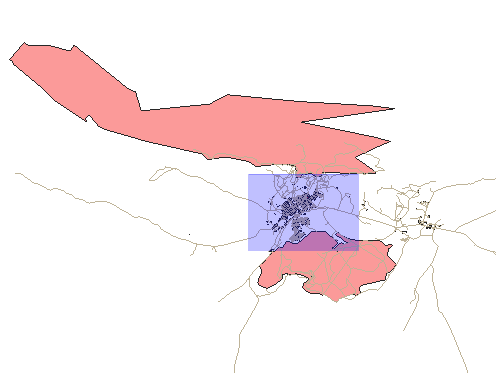
Fig. 2.2 Zoom in
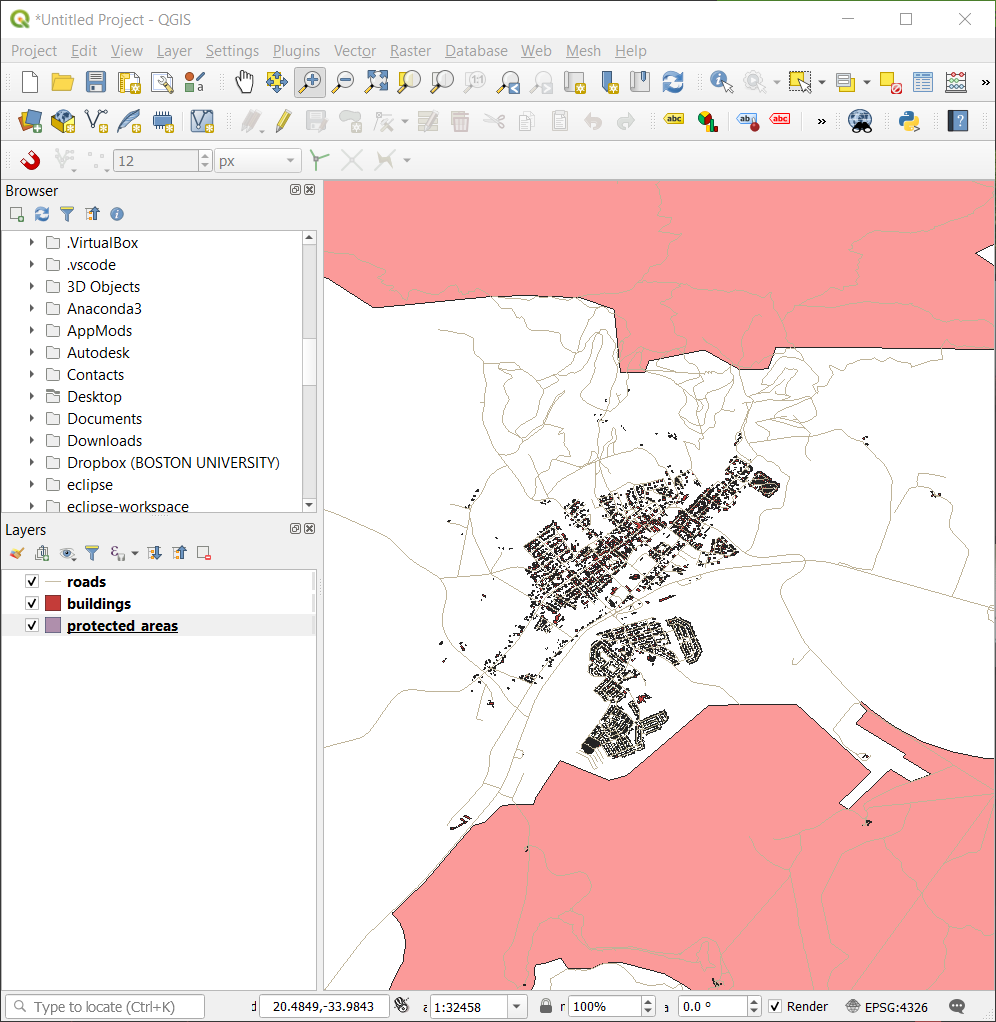
Release the left click. This will zoom in to include the area that you selected with your rectangle.
To zoom out, select the
 Zoom Out button and perform the same
action as you did for zooming in.
Zoom Out button and perform the same
action as you did for zooming in.
As you pan, zoom in, or zoom out, QGIS saves these views in a history. This allows you to backtrack to a previous view.
In the Map Navigation Toolbar, click on
 Zoom Last button to
go to your previous view.
Zoom Last button to
go to your previous view.Click on
 Zoom Next button to proceed to move forward in your
history.
Zoom Next button to proceed to move forward in your
history.
Sometimes after exploring the data, we need to reset our view to the extent of all the layers. Instead of trying to use the Zoom Out tool multiple times, QGIS provides us with a button to do that action for us.
Click on the
 Zoom Full Extent button.
As you zoomed in and out, notice that the Scale value in the Status Bar changes. The Scale value represents the Map Scale. In general, the number to the right of : represents how many times smaller the object you are seeing in the Map Canvas is to the actual object in the real world.

You can also use this field to set the Map Scale manually.
In the Status Bar, click on the Scale textfield.
Type in
50000and press Enter. This will redraw the features in the Map Canvas to reflect the scale you typed in.Alternatively, click on the options arrow of the Scale field to see the preset map scales.
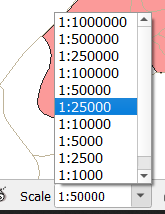
Select 1:5000. This will also update the map scale in the Map Canvas.
Now you know the basics of navigating the Map Canvas. Check out the User Manual on Zooming and Panning to learn about alternative ways of navigating the Map Canvas.
2.3.2. In Conclusion
Knowing how to navigate the Map Canvas is important, as it allows one to explore and visually inspect the layers. This could be done for initial data exploration, or to validate output of a spatial analysis.