重要
翻訳は あなたが参加できる コミュニティの取り組みです。このページは現在 100.00% 翻訳されています。
17.21. モデルを作成するためにモデラー専用ツールを使用する
注釈
このレッスンでは、モデルに追加機能を提供するために、モデラーでのみ利用可能ないくつかのアルゴリズムを使用する方法を示しています。
このレッスンの目標は、モデラーを使用して現在の選択を考慮に入れる補間アルゴリズムを作成すること、選択地物だけを使用するのではなく、その選択の範囲を使用して補間されるラスタレイヤを作成することです。
補間処理には、先のレッスンで既に説明したように、2つのステップが含まれます。ポイントレイヤーをラスタ化し、ラスタ化されたレイヤに表示されるno-data(データなし)値を埋めます。ポイントレイヤに選択範囲がある場合、選択されたポイントのみが使用されますが、出力範囲が自動的に調整されるように設定されている場合は、レイヤの全範囲が使用されます。つまり、レイヤの範囲は、選択されたものから計算されたものではなく、常にすべての地物の完全な範囲とみなされます。私たちのモデルにいくつかの追加ツールを使うことによってそれを修正してみます。
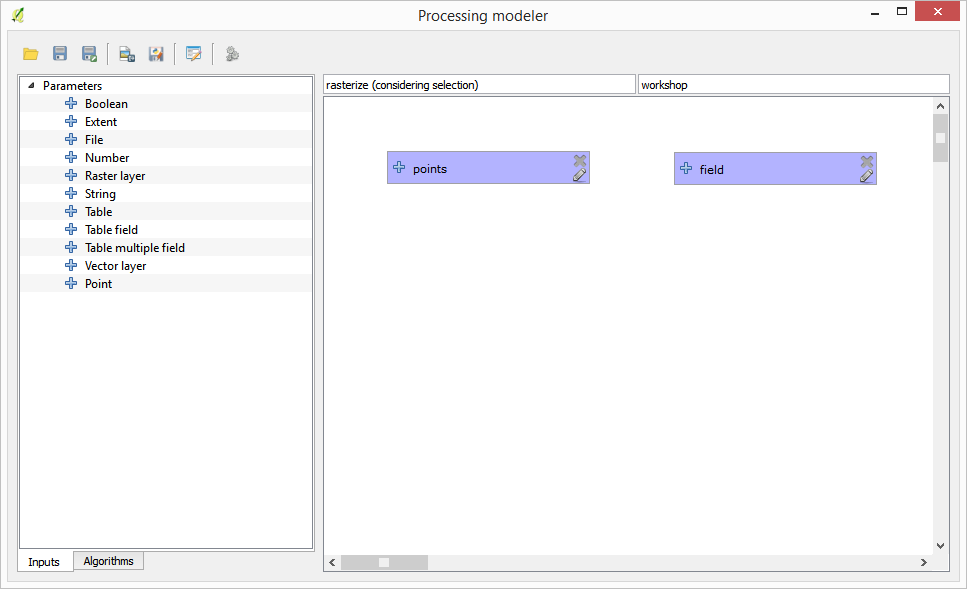
モデラーを開き、必要な入力を追加することによって、モデルを開始します。この場合は、ベクタレイヤ(ポイントに制限)と、ラスタ化に使う値を持ったその属性が必要です。
次のステップは、選択された地物の範囲を計算することです。ここで ベクターレイヤーの境界 という名前のモデル専用ツールが使えます。まずその選択した地物の範囲を持つレイヤを作成する必要があります。次にこのツールをそのレイヤに使用できます。
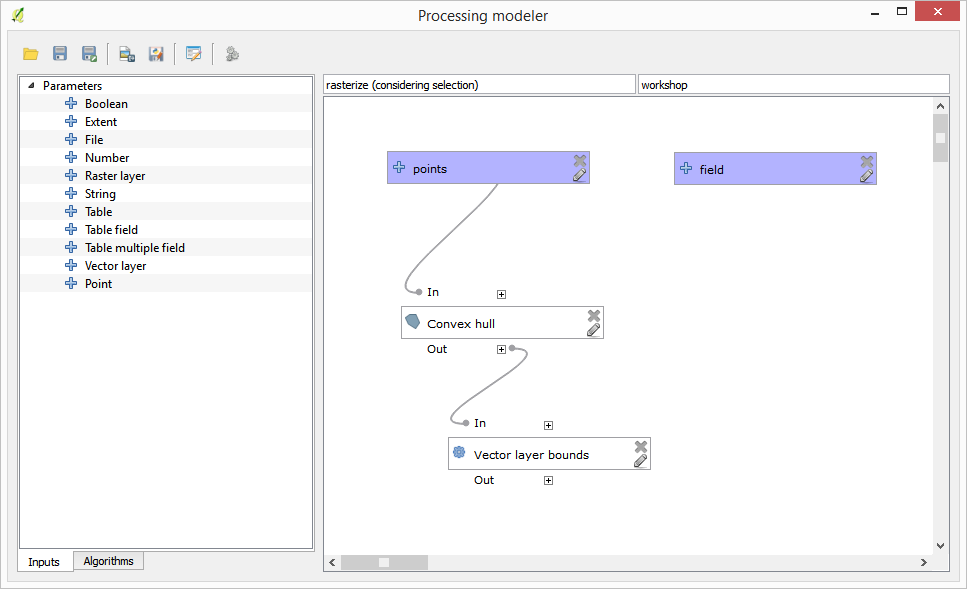
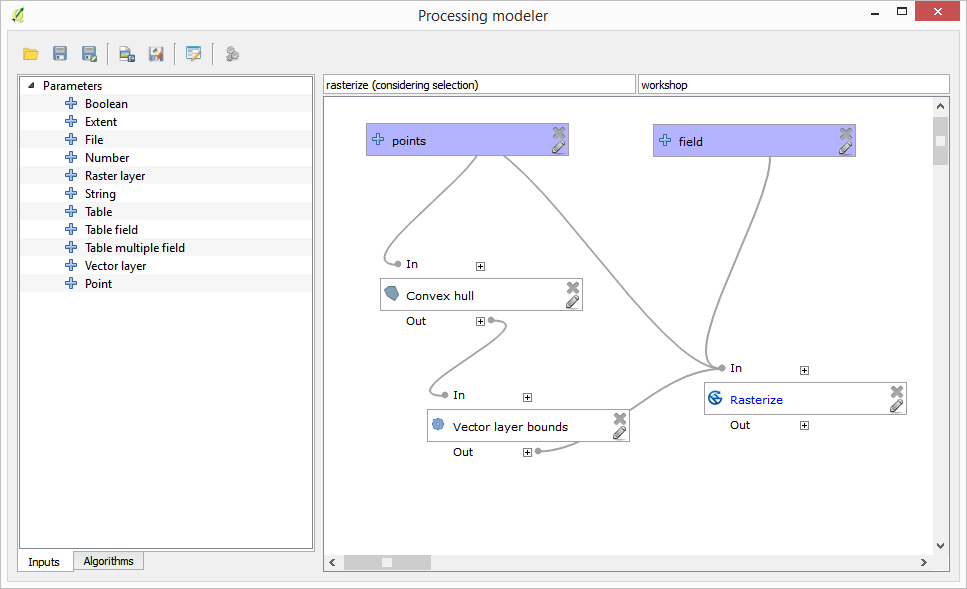
選択された地物の範囲を持つレイヤを作成する簡単な方法は、入力ポイントレイヤの凸包を計算することです。計算には選択したポイントだけを使用するので、凸包は選択と同じバウンディングボックスを持つことになります。その次に ベクターレイヤーの境界 アルゴリズムを追加し、入力としてその凸包レイヤを使用できます。モデラーのキャンバスでこのようになります:
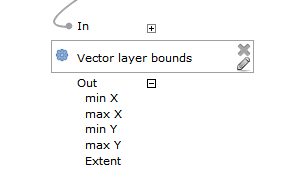
ベクターレイヤーの境界 からの結果は、4つの数値の集合と範囲オブジェクトです。この演習では数値出力と範囲の両方を使用します。
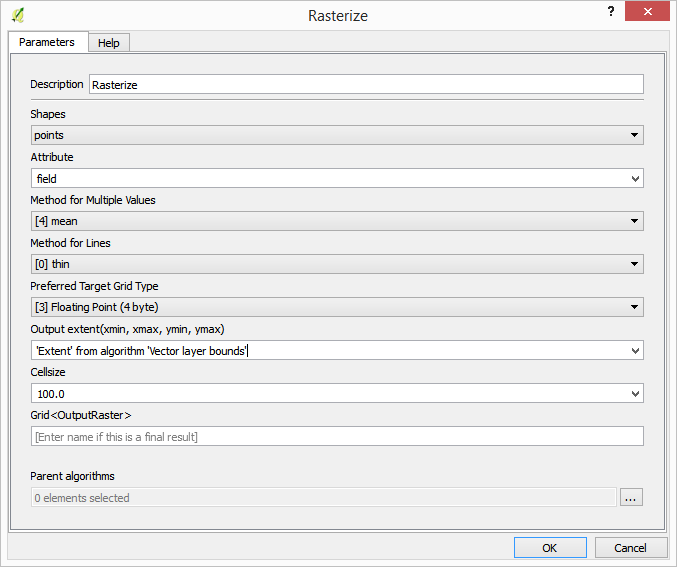
これで ベクターレイヤーの境界 アルゴリズムからの範囲を入力として使用して、ベクタレイヤをラスタ化するアルゴリズムを追加できます。
次に示すようにアルゴリズムのパラメータを入力します:
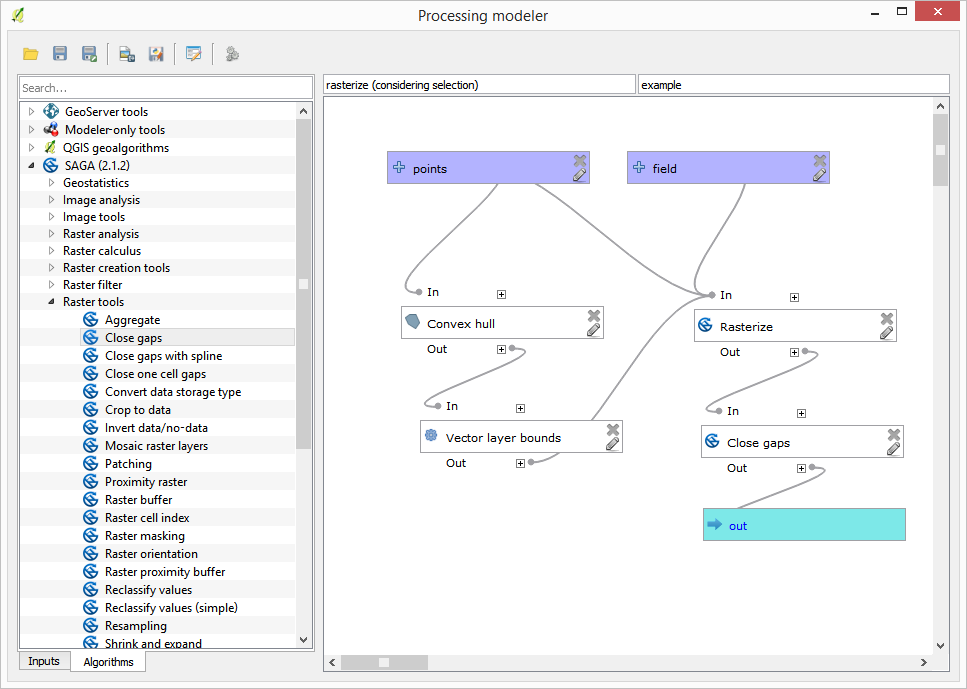
キャンバスはこのようになる筈です。
最後に、 ギャップを閉じる アルゴリズムを使用してラスタレイヤのno-data値を埋めます。
これでアルゴリズムは保存して、ツールボックスに追加する準備が整いました。それを実行すると、入力レイヤで選択されたポイントを補間することでラスタレイヤが作成され、そのレイヤは選択と同じ範囲になります。
ここでアルゴリズムの改善があります。ラスタ化する時のセルサイズは、ハードコードされた値を使いました。この値は、ここでのテスト入力レイヤーにとっては良いですが、他の場合ではそうではないかもしれません。新しいパラメータを追加してユーザーが希望する値を入力することもできますが、より良いアプローチは、その値を自動的に計算させることでしょう。
モデラー専用計算機を使用し、範囲座標からその値を計算できます。例えば、固定幅の100ピクセルのレイヤーを作成するには、計算機で次の式を使用できます。
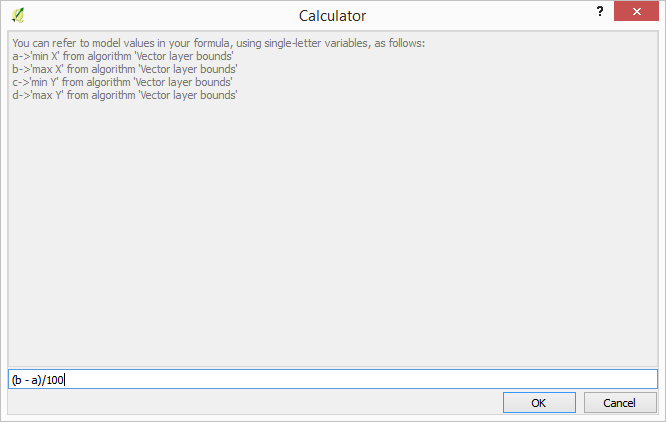
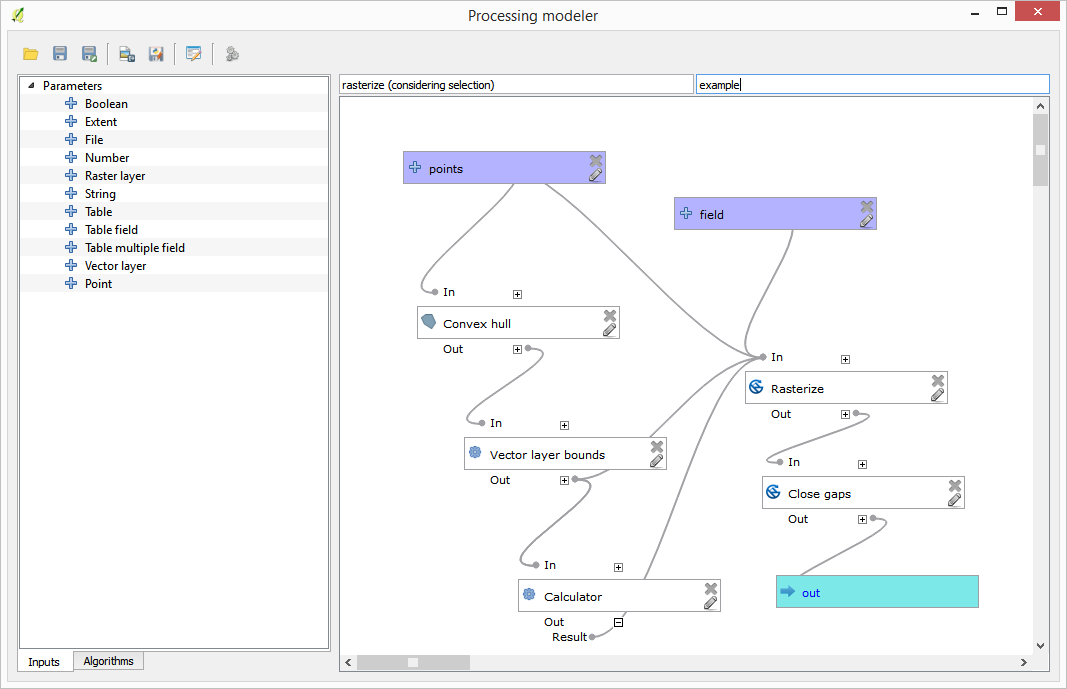
ここでラスター化アルゴリズムを、ハードコード値の代わりに計算機の出力を使用するように編集する必要があります。
最終的なアルゴリズムはこうなるはずです: