` `
Редактор моделей
The graphical modeler allows you to create complex models using a simple and easy-to-use interface. When working with a GIS, most analysis operations are not isolated, but rather part of a chain of operations instead. Using the graphical modeler, that chain of processes can be wrapped into a single process, so it is as more convenient to execute as a single process later on a different set of inputs. No matter how many steps and different algorithms it involves, a model is executed as a single algorithm, thus saving time and effort, especially for larger models.
Редактор моделей можно вызвать из меню Анализ ‣ Редактор моделей
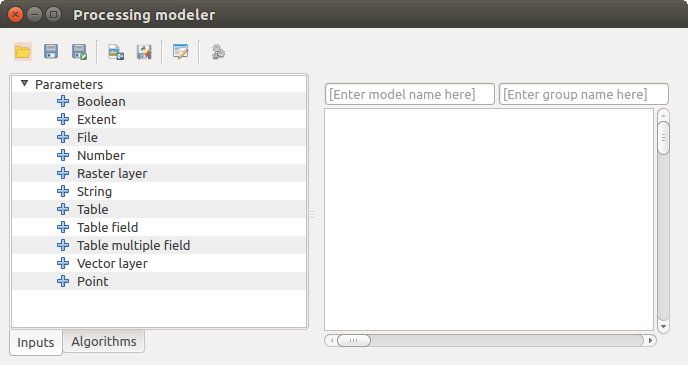
Окно построителя моделей состоит из двух частей: слева находится панель вкладок, в ней выбирают составные элементы модели (исходные данные и алгоритмы), справа — рабочая область, где и создаётся модель.
Modeler
Создание модели условно можно разделить на два этапа:
- Definition of necessary inputs. These inputs will be added to the parameters window, so the user can set their values when executing the model. The model itself is an algorithm, so the parameters window is generated automatically as it happens with all the algorithms available in the processing framework.
- Definition of the workflow. Using the input data of the model, the workflow is defined by adding algorithms and selecting how they use those inputs or the outputs generated by other algorithms already in the model.
Определение исходных данных
Перед созданием модели нужно задать необходимые исходные данные. Все доступные исходные данные собраны в левой части окна построителя моделей, на вкладке Исходные данные:
растровый слой (raster layer)
векторный слой (vector layer)
строка (string)
поле таблицы (table field)
таблица (table)
охват (extent)
число (number)
логическая величина (boolean)
файл (file)
Double-clicking on any of these elements, a dialog is shown to define its characteristics. Depending on the parameter itself, the dialog may contain just one basic element (the description, which is what the user will see when executing the model) or more of them. For instance, when adding a numerical value, as can be seen in the next figure, apart from the description of the parameter, you have to set a default value and a range of valid values.
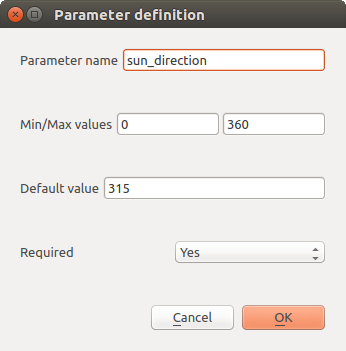
Model Parameters Definition
После заполнения полей, в рабочую область построения модели добавится новый блок, соответствующий новому элементу.

Model Parameters in canvas
You can also add inputs by dragging the input type from the list and dropping it in the modeler canvas, in the position where you want to place it.
Описание процесса
После того, как заданы все исходные данные, можно приступать к описанию процесса анализа. Доступные алгоритмы находятся на вкладке Algorithms в левой части окна. Алгоритмы сгруппированы точно так же как и в панели инструментов.
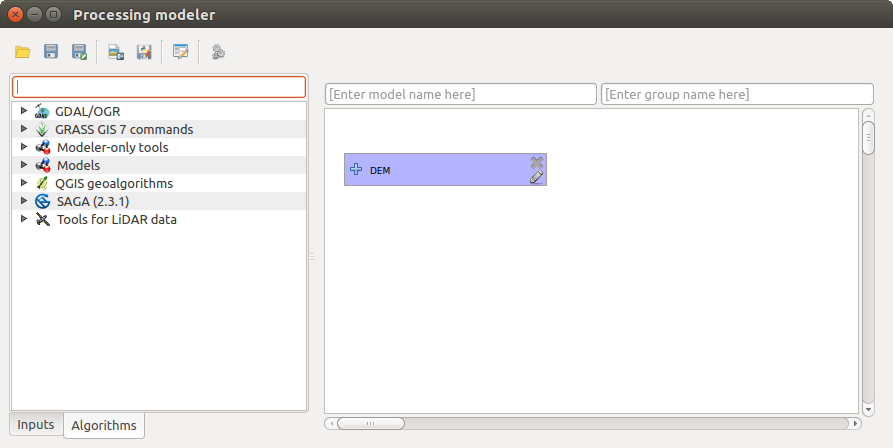
Model Inputs
To add an algorithm to a model, double-click on its name or drag and drop it, just like it was done when adding inputs. An execution dialog will appear, with a content similar to the one found in the execution panel that is shown when executing the algorithm from the toolbox. The one shown next corresponds to the SAGA ‘Convergence index’ algorithm.
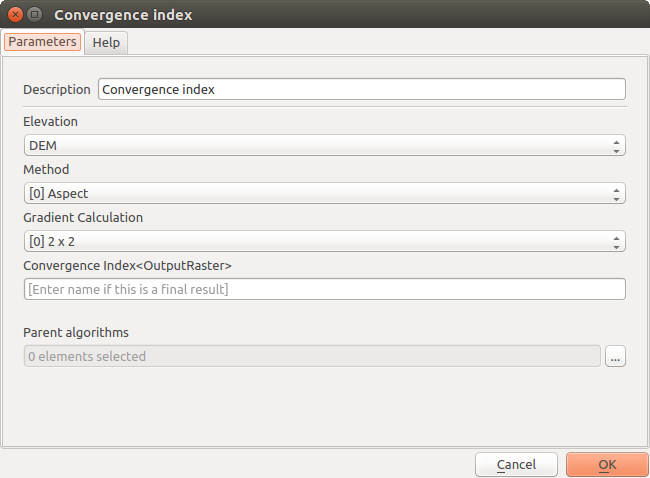
Model Algorithm parameters
As you can see, some differences exist. Instead of the file output box that was used to set the file path for output layers and tables, a simple text box is used here. If the layer generated by the algorithm is just a temporary result that will be used as the input of another algorithm and should not be kept as a final result, just do not edit that text box. Typing anything in it means that the result is final and the text that you supply will be the description for the output, which will be the output the user will see when executing the model.
Selecting the value of each parameter is also a bit different, since there are important differences between the context of the modeler and that of the toolbox. Let’s see how to introduce the values for each type of parameter.
- Layers (raster and vector) and tables. These are selected from a list, but in this case, the possible values are not the layers or tables currently loaded in QGIS, but the list of model inputs of the corresponding type, or other layers or tables generated by algorithms already added to the model.
- Numerical values. Literal values can be introduced directly in the text box. But this text box is also a list that can be used to select any of the numerical value inputs of the model. In this case, the parameter will take the value introduced by the user when executing the model.
- String. As in the case of numerical values, literal strings can be typed, or an input string can be selected.
- Table field. The fields of the parent table or layer cannot be known at design time, since they depend on the selection of the user each time the model is executed. To set the value for this parameter, type the name of a field directly in the text box, or use the list to select a table field input already added to the model. The validity of the selected field will be checked at run time.
In all cases, you will find an additional parameter named Parent algorithms that is not available when calling the algorithm from the toolbox. This parameter allows you to define the order in which algorithms are executed by explicitly defining one algorithm as a parent of the current one, which will force the parent algorithm to be executed before the current one.
When you use the output of a previous algorithm as the input of your algorithm, that implicitly sets the previous algorithm as parent of the current one (and places the corresponding arrow in the modeler canvas). However, in some cases an algorithm might depend on another one even if it does not use any output object from it (for instance, an algorithm that executes a SQL sentence on a PostGIS database and another one that imports a layer into that same database). In that case, just select the previous algorithm in the Parent algorithms parameter and the two steps will be executed in the correct order.
Once all the parameters have been assigned valid values, click on [OK] and the algorithm will be added to the canvas. It will be linked to all the other elements in the canvas, whether algorithms or inputs, that provide objects that are used as inputs for that algorithm.
Elements can be dragged to a different position within the canvas, to change the way the module structure is displayed and make it more clear and intuitive. Links between elements are updated automatically. You can zoom in and out by using the mouse wheel.
You can run your algorithm any time by clicking on the [Run] button. However, in order to use the algorithm from the toolbox, it has to be saved and the modeler dialog closed, to allow the toolbox to refresh its contents.
Сохранение и загрузка модели
Use the [Save] button to save the current model and the [Open] button to open any model previously saved. Models are saved with the .model extension. If the model has been previously saved from the modeler window, you will not be prompted for a filename. Since there is already a file associated with that model, the same file will be used for any subsequent saves.
Прежде чем сохранять модель, ей надо дать имя и указать в какой группе она будет находиться. Эти данные вносятся в два поля над рабочей областью построителя моделей.
Models saved on the models folder (the default folder when you are prompted for a filename to save the model) will appear in the toolbox in the corresponding branch. When the toolbox is invoked, it searches the models folder for files with the .model extension and loads the models they contain. Since a model is itself an algorithm, it can be added to the toolbox just like any other algorithm.
The models folder can be set from the Processing configuration dialog, under the Modeler group.
Модели, загруженные из каталога models появляются не только в панели инструментов, но и в списке алгоритмов вкладки Алгоритмы редактора моделей. Это значит, что модель может использоваться внутри более крупной модели, как любой другой алгоритм.
Редактирование модели
Текущую модель можно редактировать, изменяя описание процесса и меняя связи между алгоритмами и исходными данными, описающими модель.
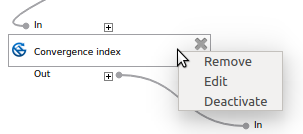
Нажатие правой клавиши мыши на блоке алгоритма вызовет следующее контекстное меню:
Modeler Right Click
Выбор пункта Remove приведет к удалению выделенного блока алгоритма. Необходимо помнить, что алгоритм может быть удален тогда и только тогда, когда нет других, зависящих от него, алгоритмов. Т.е. результаты удаляемого алгоритма нигде не используются. Если вы попытаетесь удалить алгоритм, от которого зависят другие алгоритмы, появится предупреждение:
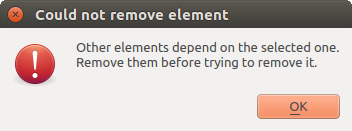
Cannot Delete Algorithm
Selecting the Edit option will show the parameters dialog of the algorithm, so you can change the inputs and parameter values. Not all input elements available in the model will appear in this case as available inputs. Layers or values generated at a more advanced step in the workflow defined by the model will not be available if they cause circular dependencies.
Select the new values and then click on the [OK] button as usual. The connections between the model elements will change accordingly in the modeler canvas.
A model can be run partially, by deactivating some of its algorithms. To do it, select the Deactivate option in the context menu that appears when right-clicking on an algorithm element. The selected algorithm, and all the ones in the model that depend on it will be displayed in grey and will not be executed as part of the model.
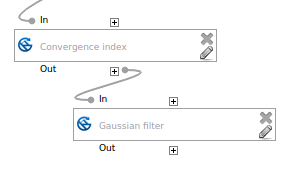
Model With Deactivated Algorithms
When right-clicking on an algorithm that is not active, you will instead see a Activate menu option that you can use to activate it back.
Документирование моделей
You can document your models from the modeler itself. Just click on the [Edit model help] button and a dialog like the one shown next will appear.
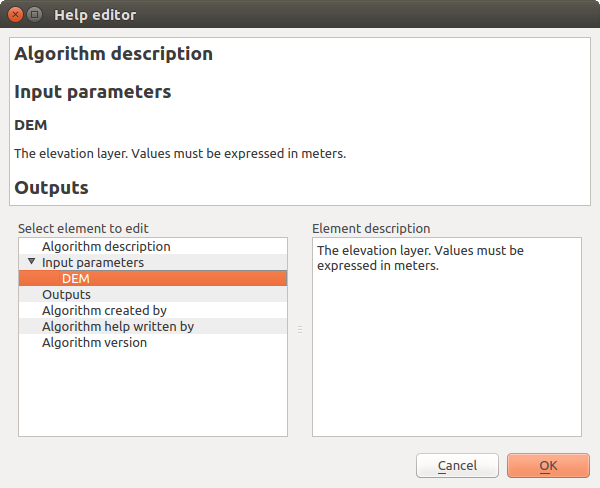
Help Edition
On the right-hand side, you will see a simple HTML page, created using the description of the input parameters and outputs of the algorithm, along with some additional items like a general description of the model or its author. The first time you open the help editor, all these descriptions are empty, but you can edit them using the elements on the left-hand side of the dialog. Select an element on the upper part and then write its description in the text box below.
Model help is saved as part of the model itself.
Exporting a model as a Python script
As we will see in a later chapter, Processing algorithms can be called from the QGIS Python console, and new Processing algorithms can be created as well using Python. A quick way of creating such a Python script is to create a model and then to export is as a Python file.
To do so, click on the Export as Python script button. Select the output file in the file chooser dialog, and Processing will write in it the Python commands that perform the same operations defined in the current model.
Немного о доступных алгоритмах
You might notice that some algorithms that can be be executed from the toolbox do not appear in the list of available algorithms when you are designing a model. To be included in a model, an algorithm must have a correct semantic, so as to be properly linked to others in the workflow. If an algorithm does not have such a well-defined semantic (for instance, if the number of output layers cannot be known in advance), then it is not possible to use it within a model, and thus, it does not appear in the list of algorithms that you can find in the modeler dialog.
Additionally, you will see some algorithms in the modeler that are not found in the toolbox. These algorithms are meant to be used exclusively as part of a model, and they are of no interest in a different context. The ‘Calculator’ algorithm is an example of that. It is just a simple arithmetic calculator that you can use to modify numerical values (entered by the user or generated by some other algorithm). This tool is really useful within a model, but outside of that context, it doesn’t make too much sense.