8.1. Werken met rastergegevens
Rastergegevens zijn heel anders dan vectorgegevens. Vectorgegevens hebben verschillende objecten die zijn geconstrueerd uit punten en misschien verbonden met lijnen en/of gebieden. Rastergegevens echter zijn als een afbeelding. Hoewel het verschillende eigenschappen van objecten in de echte wereld kan weergeven, deze objecten bestaan niet als afzonderlijke objecten; in plaats daarvan worden zij weergegeven door middel van pixels van verschillende kleurwaarden.
Gedurende deze module gaat u rastergegevens gebruiken om uw bestaande GIS-analyse aan te vullen.
Het doel voor deze les: Leren hoe te werken met rastergegevens in de omgeving van QGIS.
8.1.1.  Follow Along: Rastergegevens laden
Open your analysis.qgs map (which you should have created and saved during the previous module).
Deactivate all the layers except the solution and important_roads layers.
Click on the Load Raster Layer button:

The Load Raster Layer dialog will open. The data for this project is in exercise_data/raster.
- Either load them all in separately, or hold down ctrl and click on all four of them in turn, then open them at the same time.
The first thing you’ll notice is that nothing seems to be happening in your map. Are the rasters not loading? Well, there they are in the Layers list, so obviously they did load. The problem is that they’re not in the same projection. Luckily, we’ve already seen what to do in this situation.
- Select Project ‣ Project Properties in the menu:
- Select CRS tab in the menu:
- Enable “on the fly” reprojection.
- Set it to the same projection as the rest of your data (WGS 84 / UTM zone 33S).
- Click [OK].
The rasters should fit nicely:
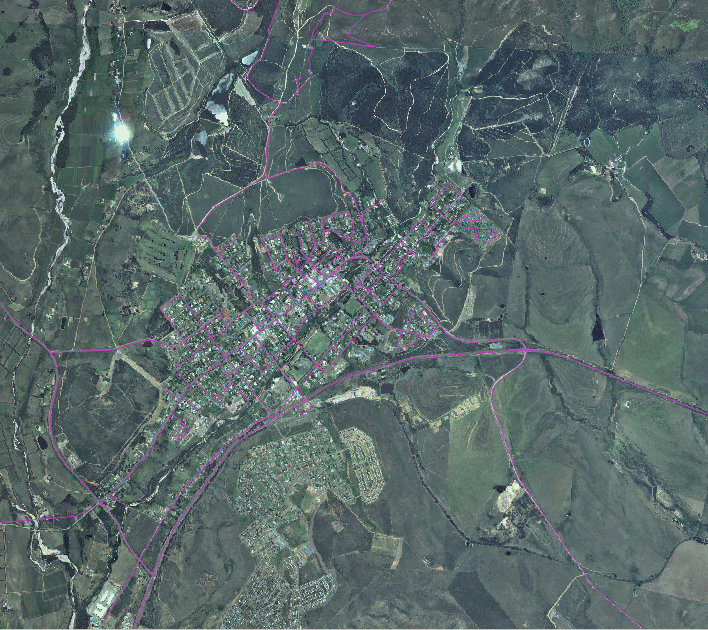
Daar hebben we ze - vier luchtfoto’s die ons gehele gebied bedekken
8.1.2. Follow Along: Een virtueel raster maken
Zoals u hier kunt zien ligt uw laag ‘solution’ over alle vier de foto’s. Wat dit betekent is dat u ten alle tijde moet werken met alle vier rasters. Dat is niet ideaal; het zou beter zijn om slechts één bestand voor één (samengestelde) afbeelding, toch?
Luckily, QGIS allows you to do exactly this, and without needing to actually create a new raster file, which could take up a lot of space. Instead, you can create a Virtual Raster. This is also often called a Catalog, which explains its function. It’s not really a new raster. Rather, it’s a way to organize your existing rasters into one catalog: one file for easy access.
To make a catalog:
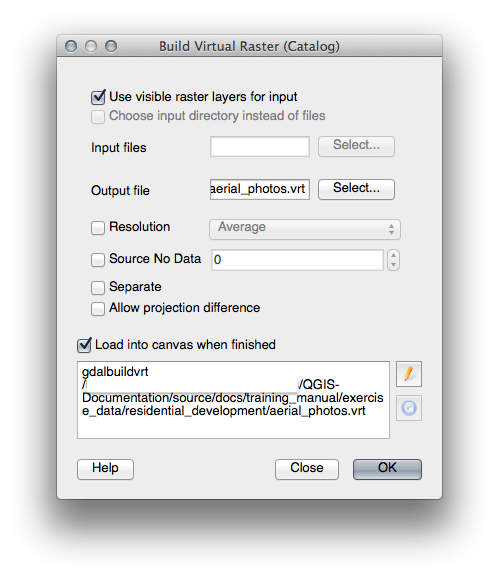
- Click on the menu item Raster ‣ Miscellaneous ‣ Build Virtual Raster (Catalog).
- In the dialog that appears, check the box next to Use visible raster layers for input.
- Enter exercise_data/residential_development as the output location.
- Enter aerial_photos.vrt as the file name.
- Check the Load into canvas when finished button.
Notice the text field below. What this dialog is actually doing is that it’s writing that text for you. It’s a long command that QGIS is going to run.
Notitie
 Keep in mind that the command text is editable, so you can
customize the command further if preferred. Search online for the initial
command (in this case, gdalbuildvrt) for help on the syntax.
Keep in mind that the command text is editable, so you can
customize the command further if preferred. Search online for the initial
command (in this case, gdalbuildvrt) for help on the syntax.
- Click OK to run the command.
It may take a while to complete. When it’s done, it will tell you so with a message box.
- Click OK to chase the message away.
- Click Close on the Build Virtual Raster (Catalog) dialog. (Don’t click OK again, otherwise it’s going to start running that command again.)
- You can now remove the original four rasters from the Layers list.
- If necessary, click and drag the new aerial_photos raster catalog layer to the bottom of the Layers list so that the other activated layers become visible.
8.1.3. Rastergegevens transformeren
De bovenstaande methoden stellen u in staat gegevenssets virtueel samen te voegen met behulp van een catalogus en ze opnieuw “direct” te projecteren. Echter, als u gegevens instelt die u geruime tijd niet zal gebruiken, zou het meer efficiënt zijn om nieuwe rasters te maken die al samengevoegd en opnieuw geprojecteerd zijn. Dat verbetert de uitvoering bij het gebruiken van de rasters in een kaart, maar het ka enige tijd duren om het in het begin in te stellen.
8.1.3.1. Rasters opnieuw projecteren
- Click on the menu item Raster ‣ Projections ‣ Warp (Reproject).
Note that this tool features a handy batch option for reprojecting the contents of whole directories. You can also reproject virtual rasters (catalogs), as well as enabling a multithreaded processing mode.

8.1.3.2. Rasters samenvoegen
- Click on the menu item Raster ‣ Miscellaneous ‣ Merge.
You can choose to process entire directories instead of single files, giving you a very useful built-in batch processing capability. You can specify a virtual raster as input file, too, and all of the rasters that it consists of will be processed.
You can also add your own command line options using the Creation Options checkbox and list. This only applies if you have knowledge of the GDAL library’s operation.

8.1.4. In Conclusion
QGIS maakt het eenvoudig om rastergegevens in uw huidige projecten op te nemen.
8.1.5. What’s Next?
Vervolgens zullen we rastergegevens gebruiken die geen luchtfoto’s zijn en zien hoe symbolisatie ook handig is in het geval van rasters.