` `
The Image Item
To add an image, click the  Add image icon and drag a rectangle onto the Composer
canvas with the left mouse button. You can then position and customize
its appearance in the image Item Properties panel.
Add image icon and drag a rectangle onto the Composer
canvas with the left mouse button. You can then position and customize
its appearance in the image Item Properties panel.
The image Item Properties tab provides the following functionalities (see figure_composer_image):
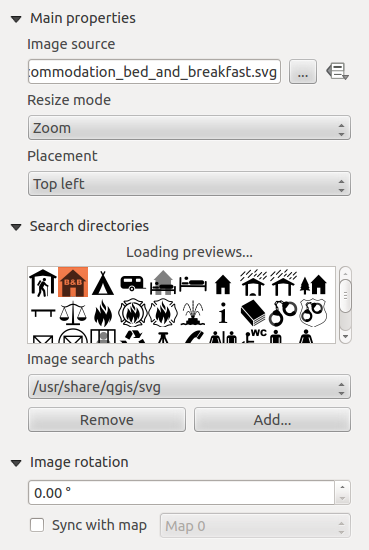
Image Item Properties panel
You first have to select the image you want to display. There are several ways to set the image source in the Main properties area.
- Use the browse button
 of image source to select a
file on your computer using the browse dialog. The browser will start in the
SVG-libraries provided with QGIS. Besides SVG, you can also select
other image formats like .png or .jpg.
of image source to select a
file on your computer using the browse dialog. The browser will start in the
SVG-libraries provided with QGIS. Besides SVG, you can also select
other image formats like .png or .jpg. - You can enter the source directly in the image source text field. You can even provide a remote URL-address to an image.
- From the Search directories area you can also select an image from loading previews ... to set the image source.
- Use the data defined button
 to set the image source from a
record or using a regular expression.
to set the image source from a
record or using a regular expression.
With the Resize mode option, you can set how the image is displayed when the frame is changed, or choose to resize the frame of the image item so it matches the original size of the image.
You can select one of the following modes:
- Zoom: Enlarges the image to the frame while maintaining aspect ratio of picture.
- Stretch: Stretches image to fit inside the frame, ignores aspect ratio.
- Clip: Use this mode for raster images only, it sets the size of the image to original image size without scaling and the frame is used to clip the image, so only the part of the image inside the frame is visible.
- Zoom and resize frame: Enlarges image to fit frame, then resizes frame to fit resultant image.
- Resize frame to image size: Sets size of frame to match original size of image without scaling.
Selected resize mode can disable the item options ‘Placement’ and ‘Image rotation’. The Image rotation is active for the resize mode ‘Zoom’ and ‘Clip’.
With Placement you can select the position of the image inside its frame. The Search directories area allows you to add and remove directories with images in SVG format to the picture database. A preview of the pictures found in the selected directories is shown in a pane and can be used to select and set the image source.
It is possible to change SVG fill/outline color and outline width when using parameterized SVG files such as those included with QGIS. If you add a SVG file you should add the following tags in order to add support for transparency:
- fill-opacity=”param(fill-opacity)”
- stroke-opacity=”param(outline-opacity)”
You can read this blog post to see an example.
Images can be rotated with the Image rotation field.
Activating the  Sync with map checkbox synchronizes the
rotation of the image (i.e., a rotated north arrow) with the rotation applied to
the selected map item.
Sync with map checkbox synchronizes the
rotation of the image (i.e., a rotated north arrow) with the rotation applied to
the selected map item.
It is also possible to select a north arrow directly. If you first select a
north arrow image from Search directories and then use the browse button
of the field Image source, you can now select one of
the north arrow from the list as displayed in figure_composer_image_north.
Note
Many of the north arrows do not have an ‘N’ added in the north arrow, this is done on purpose for languages that do not use an ‘N’ for North, so they can use another letter.
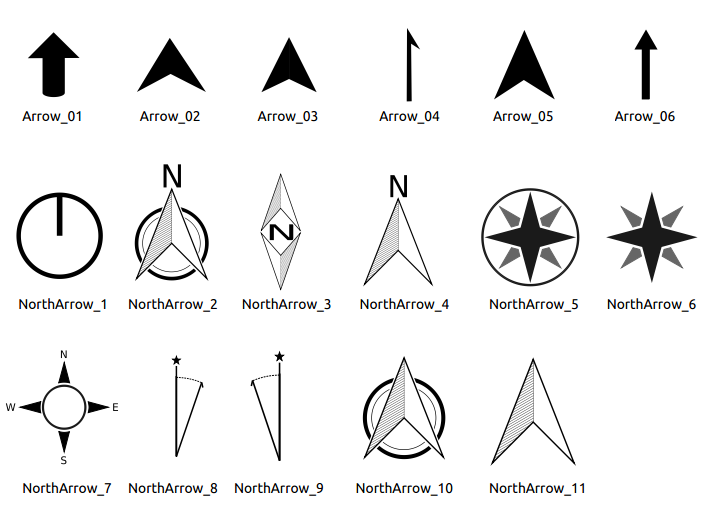
North arrows available for selection in provided SVG library