2.2. ILSI Menambah lapisan pertama Anda
Kami akan memulai aplikasi, dan membuat peta dasar yang akan digunakan untuk contoh dan latihan.
Tujuan pelajaran ini: Memulai dengan sebuah contoh peta.
Catatan
Before starting this exercise, QGIS must be installed on your computer. Also, download the training_manual_exercise_data.zip file from the QGIS data downloads area.
Peluncuran QGIS dari shortcut desktop, item menu, dll, tergantung pada bagaimana Anda mengkonfigurasi instalasi.
Catatan
The screenshots for this course were taken in QGIS 2.0 running on MacOS. Depending on your setup, the screens you encounter may well appear somewhat different. However, all the same buttons will still be available, and the instructions will work on any OS. You will need QGIS 2.0 (the latest version at time of writing) to use this course.
Mari kita mulai segera!
2.2.1.  Follow Along: Siapkan peta
Buka QGIS. Anda akan memiliki peta kosong baru.
- Look for the Add Vector Layer button:

- Click on it to open the following dialog:
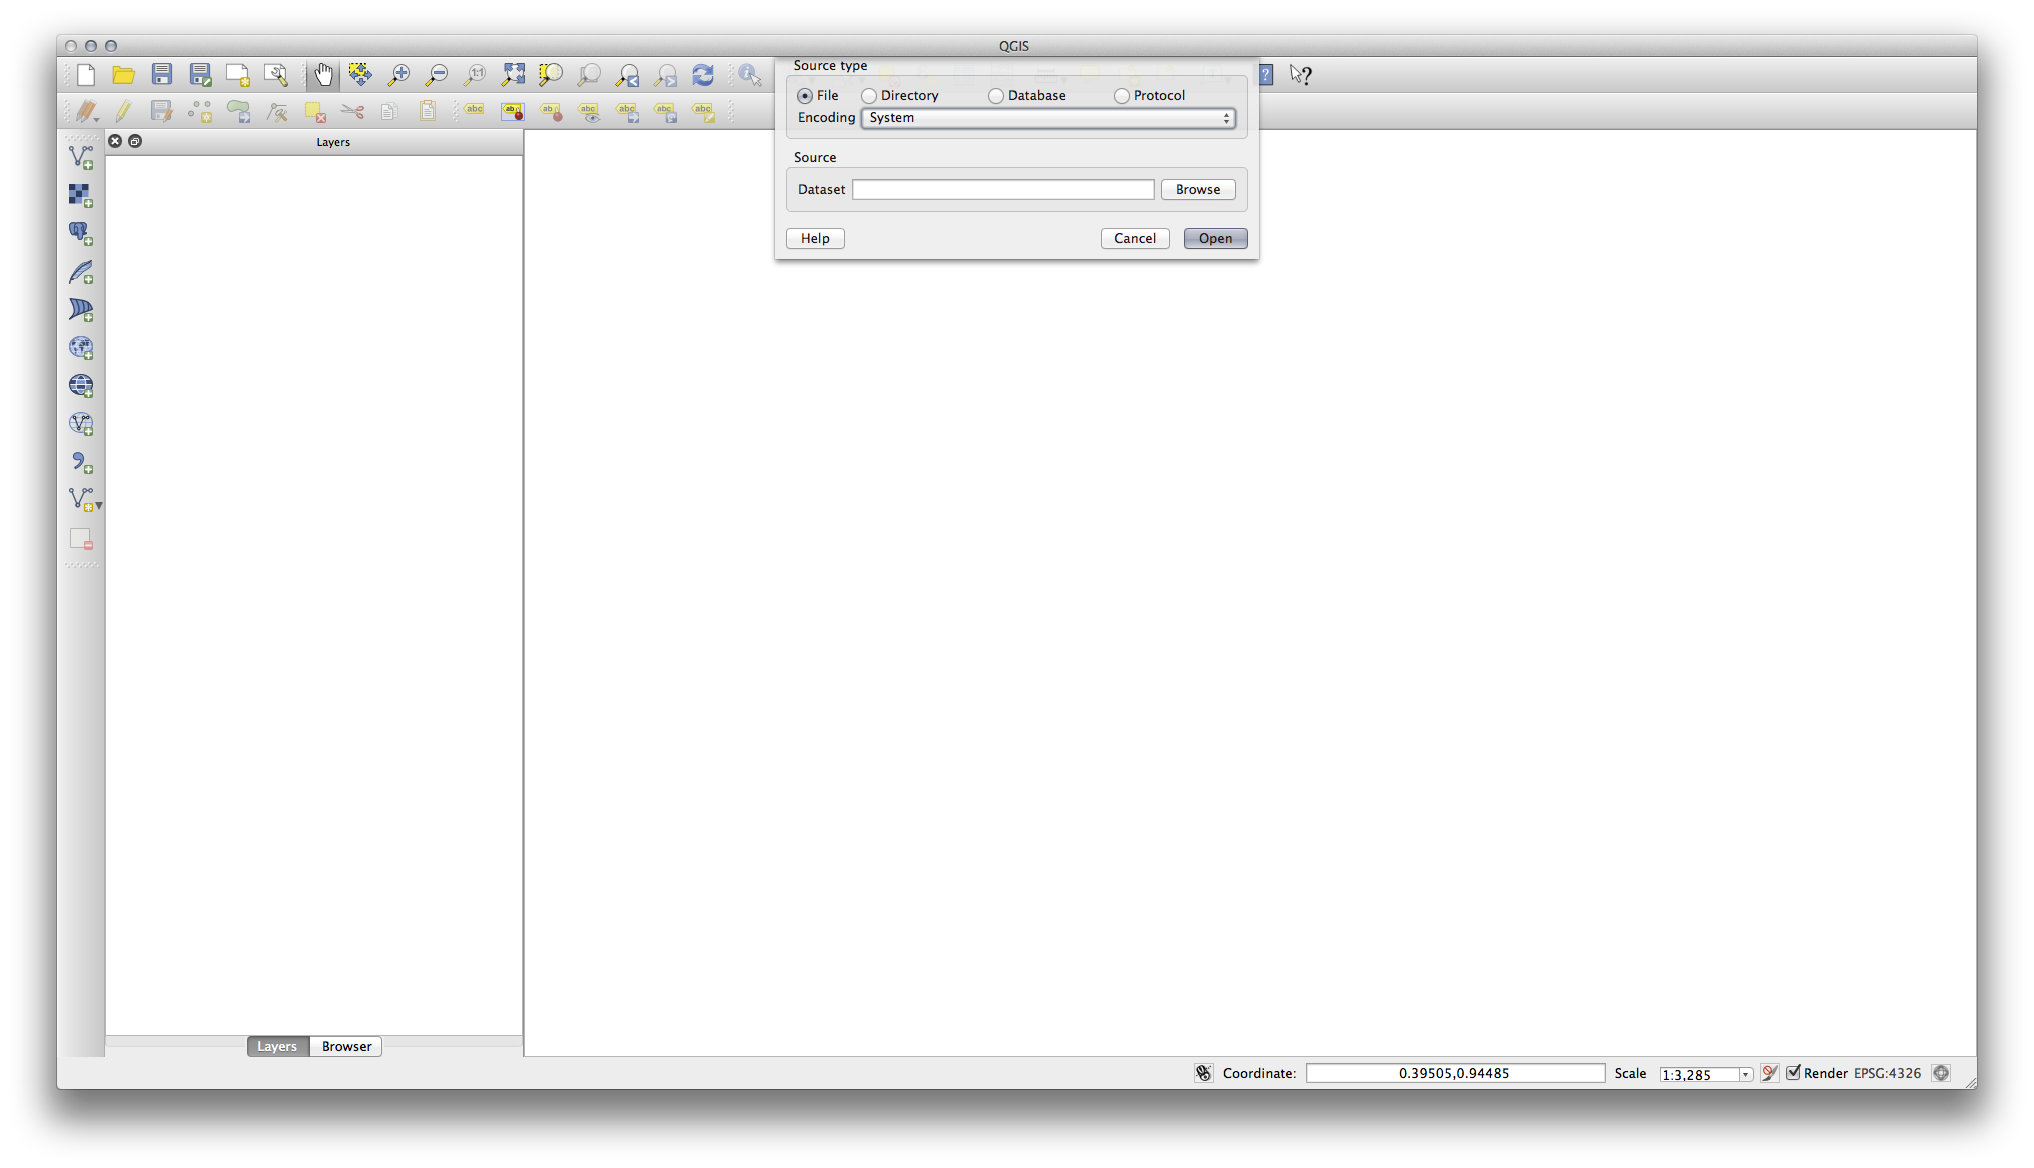
- Click on the Browse button and navigate to the file exercise_data/epsg4326/roads.shp (in your course directory). With this file selected, click Open. You will see the original dialog, but with the file path filled in. Click Open here as well. The data you specified will now load.
Selamat! Anda sekarang memiliki peta dasar. Sekarang akan menjadi saat yang tepat untuk menyimpan pekerjaan Anda.
- Click on the Save As button:

- Save the map under exercise_data/ and call it basic_map.qgs.
2.2.2. In Conclusion
Anda telah belajar bagaimana menambahkan lapisan dan membuat peta dasar!
2.2.3. What’s Next?
Now you’re familiar with the function of the Add Vector Layer button, but what about all the others? How does this interface work? Before we go on with the more involved stuff, let’s first take a good look at the general layout of the QGIS interface. This is the topic of the next lesson.