Main properties
The Main properties dialog of the attribute table provides the following functionalities (see figure_composer_table_ppt):
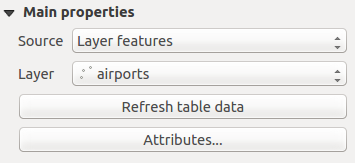
Attribute table Main properties Dialog
- For Source you can normally select only Layer features.
- With Layer you can choose from the vector layers loaded in the project.
- In case you activated the
 Generate an atlas option in
the Atlas generation panel, there are two additional
Source possible:
Generate an atlas option in
the Atlas generation panel, there are two additional
Source possible:- Current atlas feature (see figure_composer_table_atlas): you won’t see any option to choose the layer, and the table item will only show a row with the attributes from the current feature of the atlas coverage layer.
- and Relation children (see figure_composer_table_relation): an option with the relation names will show up. This feature can only be used if you have defined a relation using your atlas coverage layer as parent, and the table will show the children rows of the atlas coverage layer’s current feature (for further information about the atlas generation, see Generate an Atlas).
- The button [Refresh table data] can be used to refresh the table when the actual contents of the table has changed.
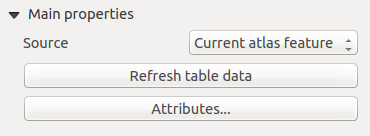
Attribute table Main properties for ‘Current atlas feature’
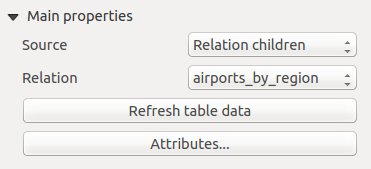
Attribute table Main properties for ‘Relation children’
The button [Attributes...] starts the Select attributes menu, see figure_composer_table_select, that can be used to change the visible contents of the table. After making changes use the [OK] button to apply changes to the table. The upper part of the window shows the list of the attributes to display and the lower part helps to set the way the data is sorted.
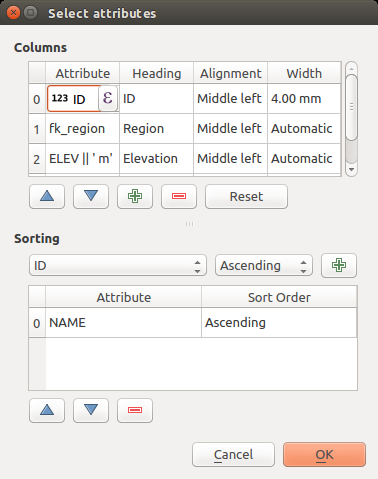
Attribute table Select attributes Dialog
In the Columns section you can:
- Remove an attribute, just select an attribute row by clicking anywhere in the row and press the minus button to remove the selected attribute.
- Add a new attribute use the plus button. At the end a new empty row appears and you can
select empty cell of the column Attribute. You can select a field attribute from
the list or you can select to build a new attribute using a regular expression
(
 button). Of course you can modify every already existing attribute
by means of a regular expression.
 - Use the up and down arrows to change the order of the attributes in the table.
- Select a cell in the Headings column and, to change the heading, just type in a new name.
- set a precise Alignment (mixing vertical and horizontal alignment options) for each column.
- Select a cell in the Width column and change it from Automatic to a width in mm, just type a number. When you want to change it back to Automatic, use the cross.
- The [Reset] button can always be used to restore it to the original attribute settings.
In the Sorting section you can:
- Add an attribute to sort the table with. Select an attribute and set the sorting order to ‘Ascending’ or ‘Descending’ and press the plus button. A new line is added to the sort order list.
- select a row in the list and use the up and down button to change the sort priority on attribute level. Selecting a cell in the Sort Order column helps you change the sorting order of the attribute field.
- use the minus button to remove an attribute from the sort order list.

