Iniciando y ejecutando con QtCreator y QGIS
QtCreator es un IDE bastante nuevo de marcadores de la librería Qt. Con QtCreator puede construir cualquier proyecto C++, pero esta realmente optimizado para la gente que trabaja con Qt(4) base en aplicaciones (incluyendo aplicaciones móviles). Todo lo que describo a continuación asume que estás corriendo en Ubuntu 11.04 ‘Natty’.
Instalando QtCreator
Esta parte es fácil:
sudo apt-get install qtcreator qtcreator-doc
Después de instalar debería encontrarlo en su menú gnome.
Estableciendo su proyecto
Supongo que ya tiene un clon de QGIS local que contiene el código fuente, y han instalado todas las dependencias de compilación necesarias, etc. Hay instrucciones detalladas para git access and Instalación de dependencias.
En mi sistema he comprobado el código en $HOME/dev/cpp/QGIS y el resto de los artículo esta escrito suponiendo eso, debe actualizar las rutas según corresponda para su sistema local.
Al lanzar QtCreator hace:
Archivo -> Abrir archivo o proyecto
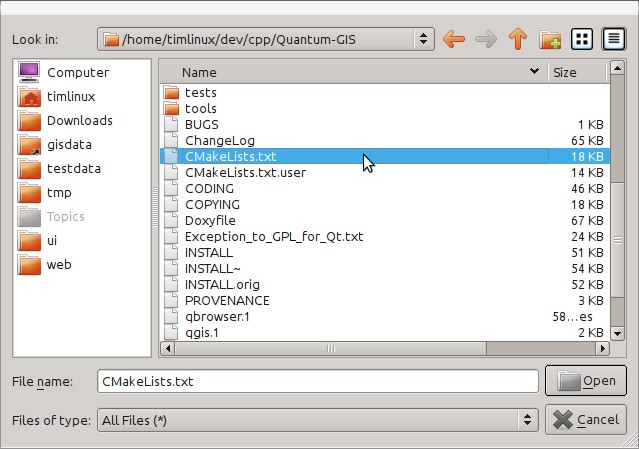
Después utilice el diálogo de selección de archivos resultante para buscar y abrir este archivo:
$HOME/dev/cpp/QGIS/CMakeLists.txt
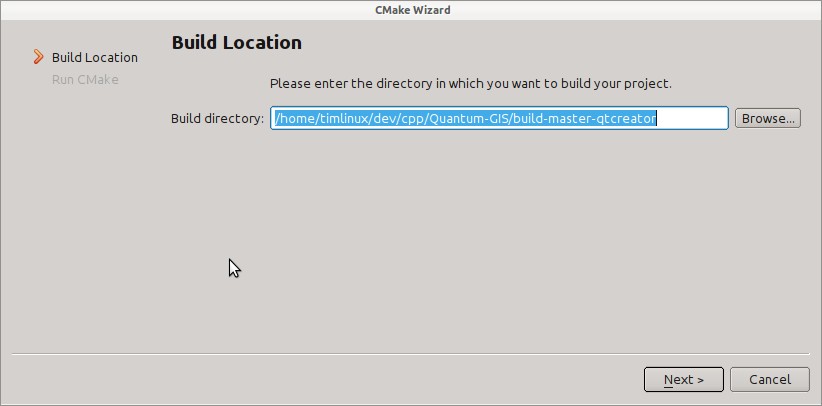
A continuación, se le pedirá una ubicación de compilación. Cree un directorio de compilación específico para que QtCreator funcione en:
$HOME/dev/cpp/QGIS/build-master-qtcreator
Probablemente es una buena idea crear directorios de compilación separados para diferentes ramas si se lo permite su espacio de disco.
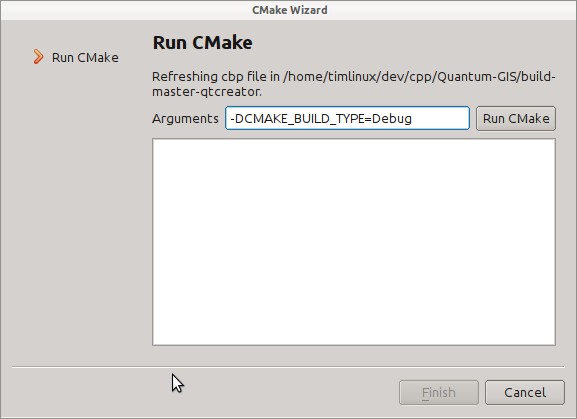
A continuación, se le preguntará si tiene alguna opción de compilación de CMake para pasar a CMake. Le diremos a CMake que queremos depurar la compilación agregando esta opción:
-DCMAKE_BUILD_TYPE=Debug
That’s the basics of it. When you complete the Wizard, QtCreator will start scanning the source tree for autocompletion support and do some other housekeeping stuff in the background. We want to tweak a few things before we start to build though.
Setting up your build environment
Click on the ‘Projects’ icon on the left of the QtCreator window.

Select the build settings tab (normally active by default).

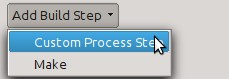
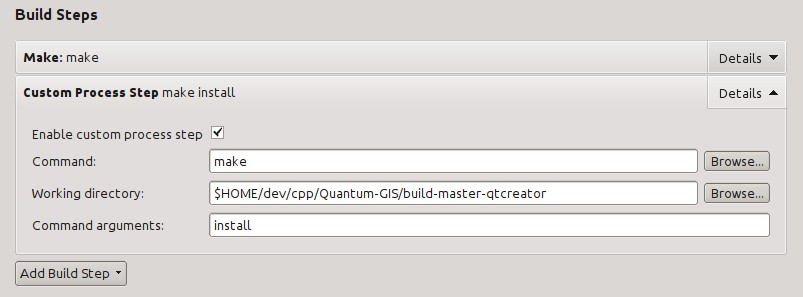
We now want to add a custom process step. Why? Because QGIS can currently only run from an install directory, not its build directory, so we need to ensure that it is installed whenever we build it. Under ‘Build Steps’, click on the ‘Add BuildStep’ combo button and choose ‘Custom Process Step’.
Ahora definimos los siguientes detalles:
Enable custom process step: [yes]
Comando: make
Directorio de trabajo: $HOME/dev/cpp/QGIS/build-master-qtcreator
Argumentos de comando: install
You are almost ready to build. Just one note: QtCreator will need write permissions on the install prefix. By default (which I am using here) QGIS is going to get installed to /usr/local/. For my purposes on my development machine, I just gave myself write permissions to the /usr/local directory.
To start the build, click that big hammer icon on the bottom left of the window.

Estableciendo su ambiente de ejecución
As mentioned above, we cannot run QGIS from directly in the build directly, so we need to create a custom run target to tell QtCreator to run QGIS from the install dir (in my case /usr/local/). To do that, return to the projects configuration screen.
Now select the ‘Run Settings’ tab

We need to update the default run settings from using the ‘qgis’ run configuration to using a custom one.
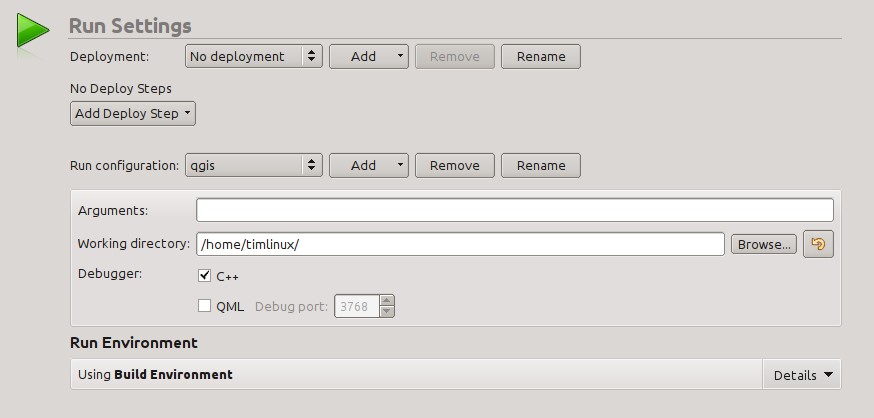
Do do that, click the ‘Add v’ combo button next to the Run configuration combo and choose ‘Custom Executable’ from the top of the list.

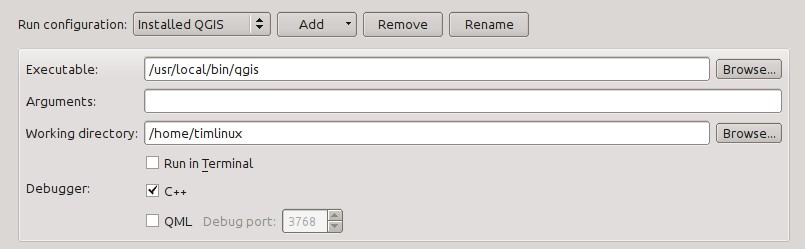
Now in the properties area set the following details:
Ejecutable: /usr/local/bin/qgis
Argumentos :
Working directory: $HOME
Ejecutar en la terminal: [no]
Debugger: C++ [yes]
Qml [no]
Then click the ‘Rename’ button and give your custom executable a meaningful name e.g. ‘Installed QGIS’
Ejecución y depuración
Now you are ready to run and debug QGIS. To set a break point, simply open a source file and click in the left column.

Now launch QGIS under the debugger by clicking the icon with a bug on it in the bottom left of the window.
