` `
The batch processing interface
Introduction
All algorithms (including models) can be executed as a batch process. That is, they can be executed using not just a single set of inputs, but several of them, executing the algorithm as many times as needed. This is useful when processing large amounts of data, since it is not necessary to launch the algorithm many times from the toolbox.
To execute an algorithm as a batch process, right-click on its name in the toolbox and select the Execute as batch process option in the pop-up menu that will appear.
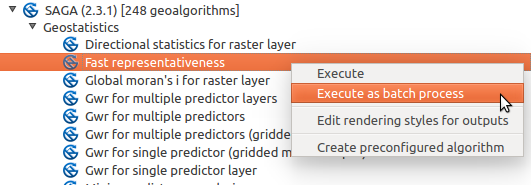
Batch Processing from right-click
If you have the execution dialog of the algorithm open, you can also start the batch processing interface from there, clicking on the Run as batch process... button.
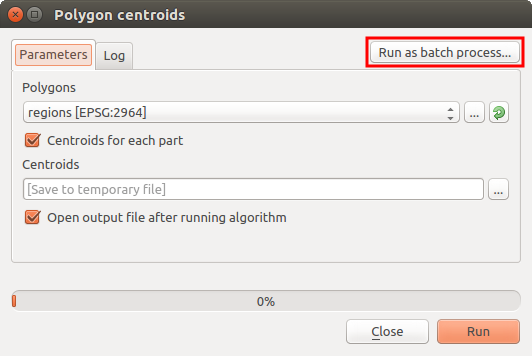
Batch Processing From Algorithm Dialog
The parameters table
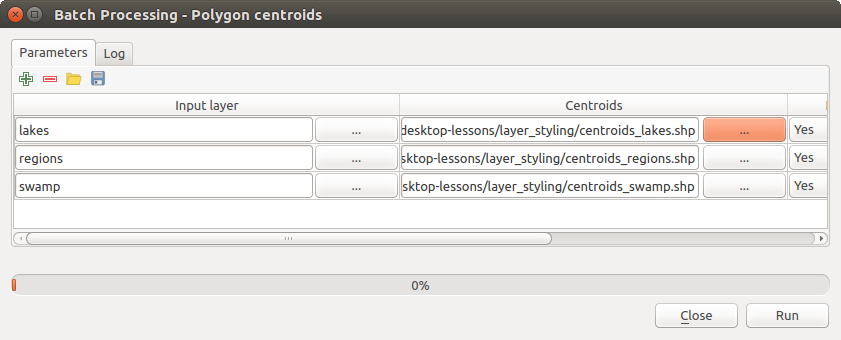
Executing a batch process is similar to performing a single execution of an algorithm. Parameter values have to be defined, but in this case we need not just a single value for each parameter, but a set of them instead, one for each time the algorithm has to be executed. Values are introduced using a table like the one shown next.
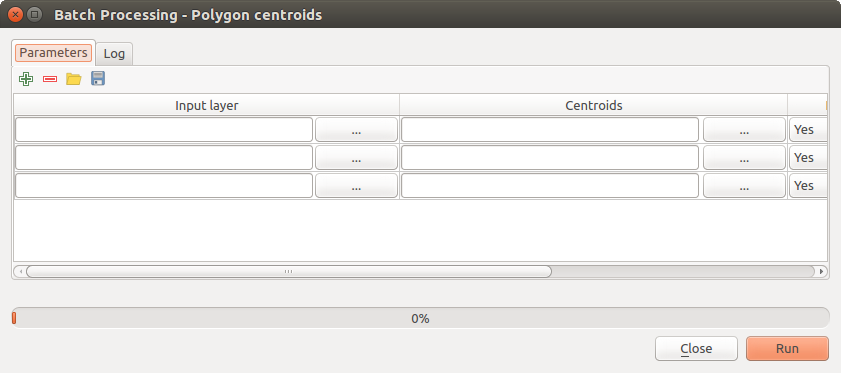
Batch Processing
Each line of this table represents a single execution of the algorithm, and each cell contains the value of one of the parameters. It is similar to the parameters dialog that you see when executing an algorithm from the toolbox, but with a different arrangement.
By default, the table contains just two rows. You can add or remove rows using the buttons on the lower part of the window.
Once the size of the table has been set, it has to be filled with the desired values.
Filling the parameters table
For most parameters, setting the value is trivial. Just type the value or select it from the list of available options, depending on the parameter type.
Filenames for input data objects are introduced directly typing or, more
conveniently, clicking on the  button on the right hand of the cell,
which will show a context menu with two option: one for selecting from the layers
currently opened and another to select from the filesystem. This second option,
when selected, shows a typical file chooser dialog. Multiple files can be
selected at once.
If the input parameter represents a single data object and several files are
selected, each one of them will be put in a separate row, adding new ones if
needed. If the parameter represents a multiple input, all the selected files
will be added to a single cell, separated by semicolons (;).
button on the right hand of the cell,
which will show a context menu with two option: one for selecting from the layers
currently opened and another to select from the filesystem. This second option,
when selected, shows a typical file chooser dialog. Multiple files can be
selected at once.
If the input parameter represents a single data object and several files are
selected, each one of them will be put in a separate row, adding new ones if
needed. If the parameter represents a multiple input, all the selected files
will be added to a single cell, separated by semicolons (;).
Layer identifiers can be directly typed in the parameter text box. You can enter the full path to a file or the name of a layer that is currently loaded in the current QGIS project. The name of the layer will be automatically resolved to its source path. Notice that, if several layers have the same name, this might cause unexpected results due to ambiguity.
Output data objects are always saved to a file and, unlike when executing an algorithm from the toolbox, saving to a temporary file or database is not permitted. You can type the name directly or use the file chooser dialog that appears when clicking on the accompanying button.
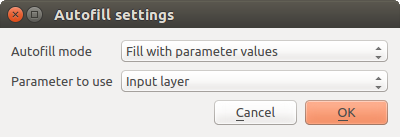
Once you select the file, a new dialog is shown to allow for autocompletion of other cells in the same column (same parameter).
Batch Processing Save
If the default value (‘Do not autocomplete’) is selected, it will just put the selected filename in the selected cell from the parameters table. If any of the other options is selected, all the cells below the selected one will be automatically filled based on a defined criteria. This way, it is much easier to fill the table, and the batch process can be defined with less effort.
Automatic filling can be done by simply adding correlative numbers to the selected file path, or by appending the value of another field at the same row. This is particularly useful for naming output data objects according to input ones.
Batch Processing File Path
Executing the batch process
To execute the batch process once you have introduced all the necessary values, just click on [OK]. Progress of the global batch task will be shown in the progress bar in the lower part of the dialog.