6.4. ILSI akce
Teď, když znáš standartní akci z předchozí lekce, je na čase definovat tvojí vlastni. Akce je něco, co se stane, když klikneš na vlastnost. Do tvé mapy můžeš přidat mnoho dalších funkcí, což ti například umožní získat další informace o objektu. Přiřazením akce můžeš do tvé mapy přidat celou novou dimenzi.
Cíl této lekce. Naučit se jak přidat běznou akci.
6.4.1. |základní| Follow Along: Otevřít obrázek
Použít: guilabel: školní vlastnosti = nosič, který jsi vytvořil před tím. Učební materiály obsahují fotografie každé ze tří vlastností, které digitalizuješ. Následuje spojení každé vlastnosti s jejím obrázkem. Potom vytvoříme akci, která otevře příslušný obrázek, když klikneš na vlastnost.
6.4.2. |základní| Follow Along: přidat pole pro obrázky
guilabel: školní vlastnosti = vlastnost, která ještě nemá žádný způsob, jak se spojit s obrázkem s jeho vlastností. Prvně vytvoříme pole pro tento účel.
Otevřít: guilabel: dialog Vlastnosti vrstvy .
Klikni na: guilabel: kartu Pole.
Přepnout režim editace.
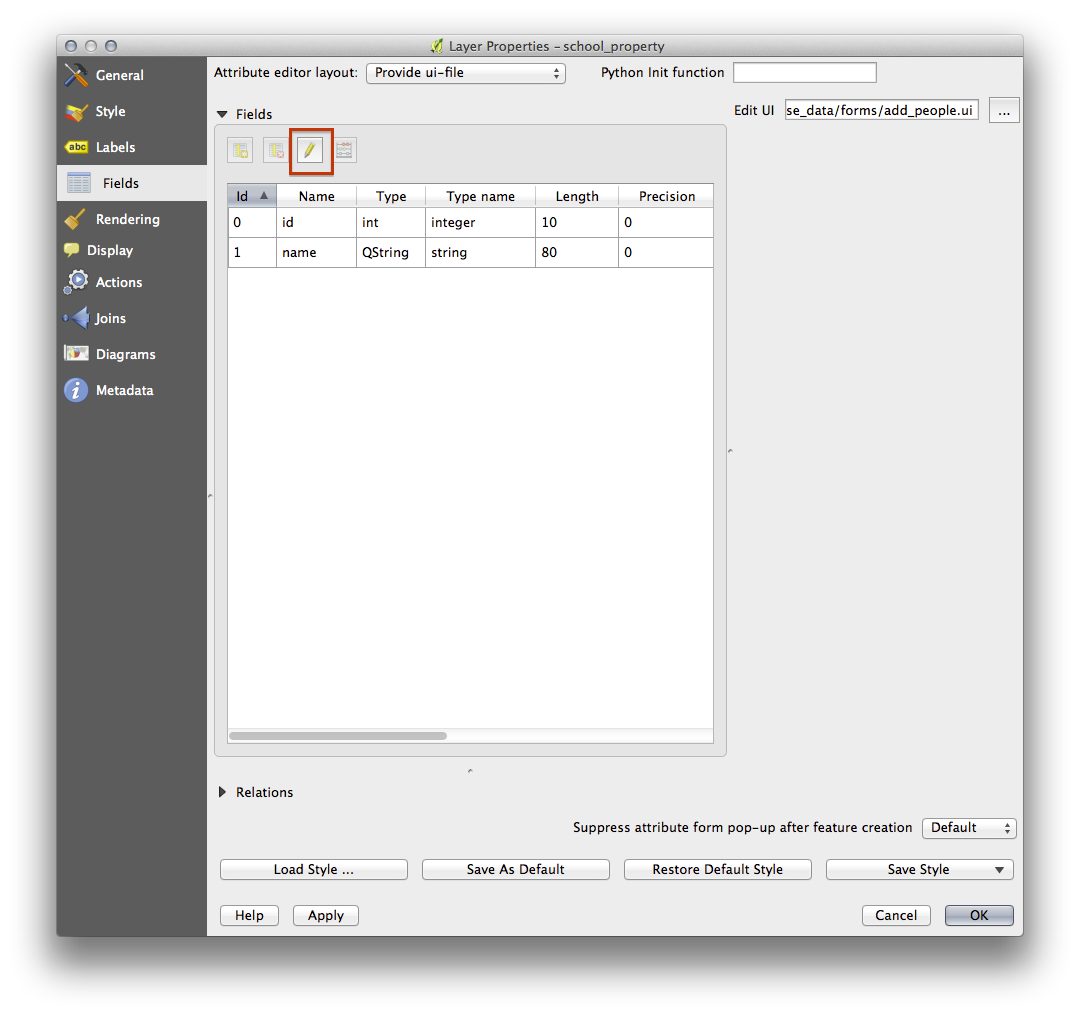
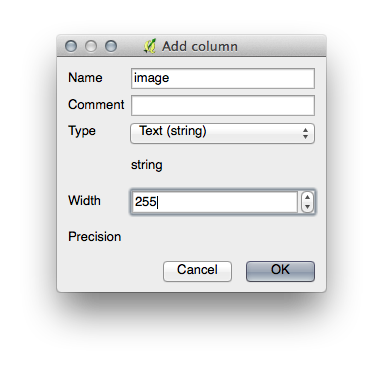
Přidat nový sloupec:
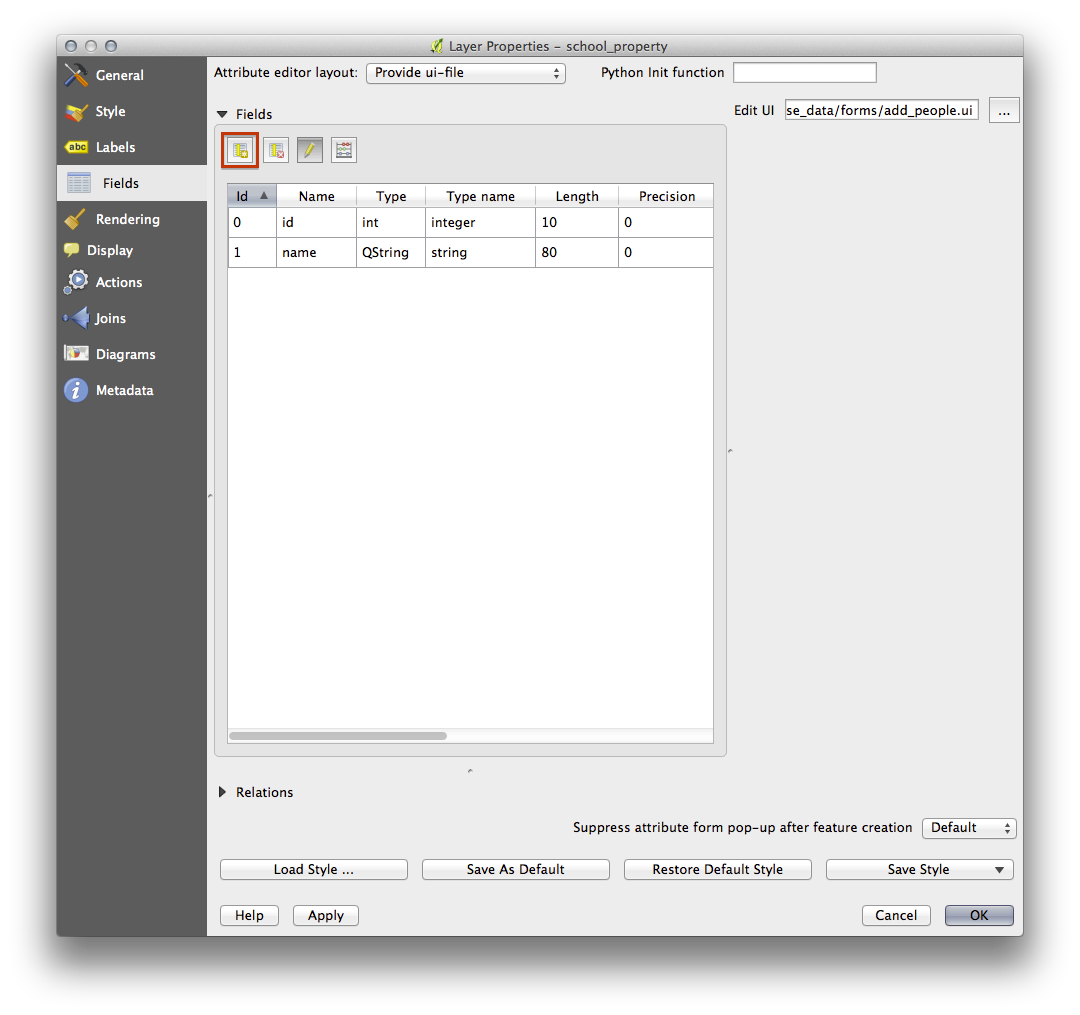
Vložit hodnoty níže:
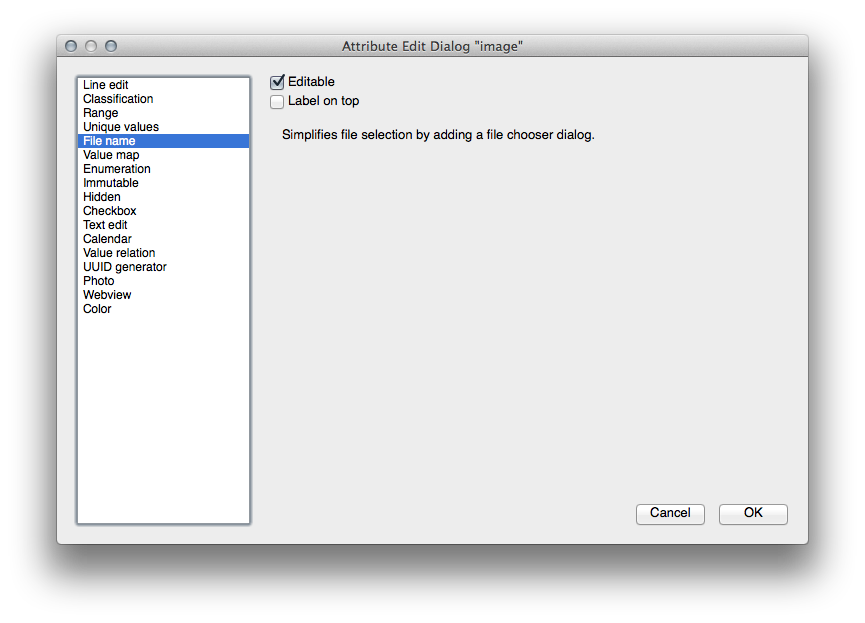
Poté co je pole vytvořeno, klikni na: guilabel: tlačítko linka editovat vedle nového pole.
Nastavit pro: guilabel: ` název souboru`:
Kliknout: guilabel:OK v: guilabel:dialog Vlastnosti vrstvy.
Použít: guilabel: nástroj identifikovat ke kliknutí na jednu ze tří funkcí v: guilabel: vlastnost školní vlastnosti.
Do doby, kdy jsi pořád v režimu editování, dialog může být aktivní a vypadat takto:

Kliknout na tlačítko procházet ( guilabel:... vedle :guilabel: pole obrázek ).
Vybrat cestu pro tvůj obrázek. Obrázky jsou v: exercise_data/school_property_photos/ a jsou pojmenovány stejně jako funkce, se kterými by měly být spojeny.
Kliknout OK.
Pro spojení všechech obrázků se správnými funkcemi použít tuto metodu.
Ulož tvoje úpravy a opusť režim úprav.
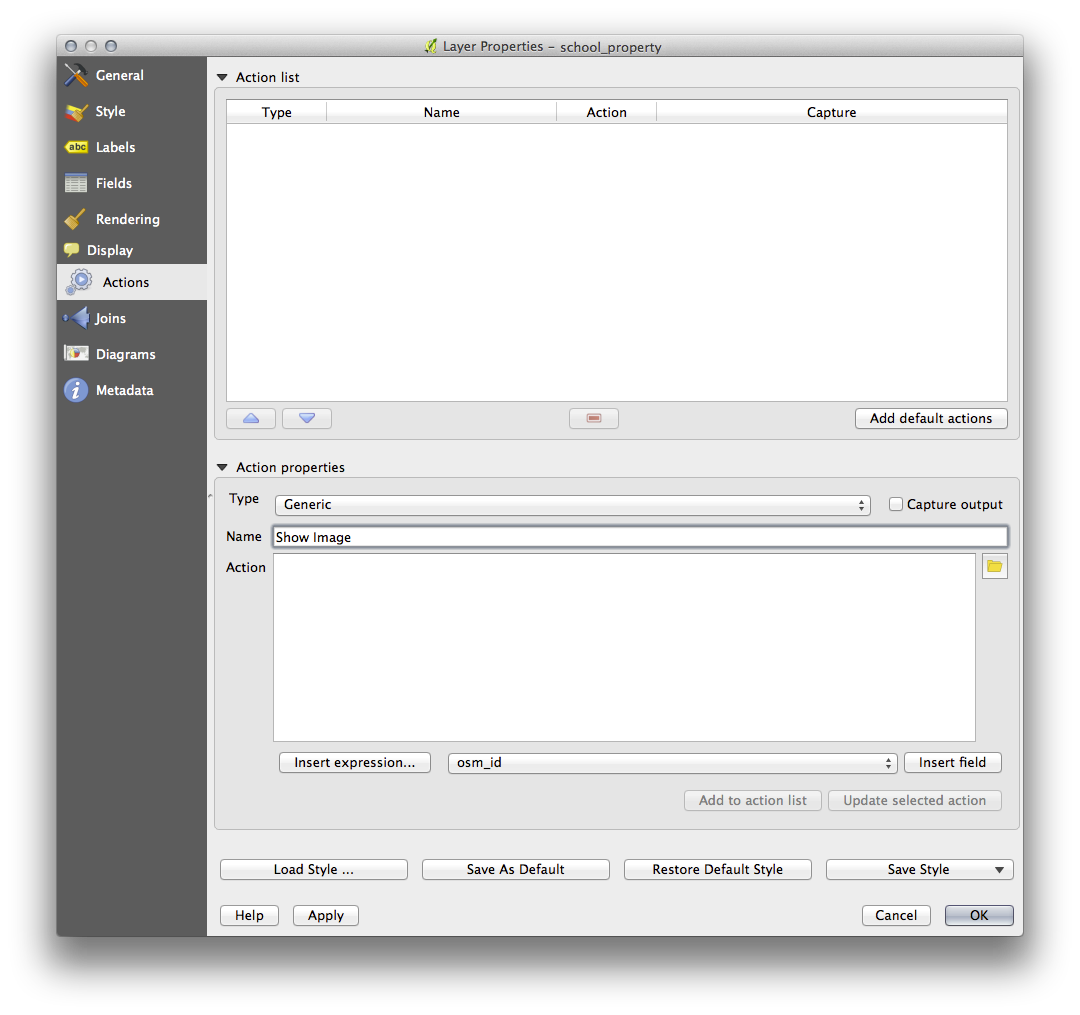
6.4.3. |základní| Follow Along: vytvořit akci
Otevřít akce z pro vlastnosti školní vlastnosti .
V panelu vlastnosti akce , vlož výraz ukázat obrázek do :guilabel: pole jméno:
o dělat dál, se liší v závislosti na operačním systému, takže vyber vhodný kurz a následuj:
6.4.3.1. Okna
Kliknout na :guilabel: rozbal Typ a vyber otevřít.
6.4.3.2. Ubuntu Linux
Pod: Akce, napiš eog pro Grome prohlížeč obrázkůr, nebo napiš zobrazit pro použití ImageMagick. Nezapomeň nechat místo za příkazem!
6.4.3.3. MacOS
Klikni na Typ rozbal ho a vyber Mac.
Pod Akce, napiš otevřít. Nezapomeň nechat místo za tímto příkazem!
6.4.3.4. Pokračuj v psaní příkazu
Chceš otevřít obrázek, a QGIS ví, kde obrázek je. Vše co potřebuješ je napsat Akce tam kde je obrázek.
Vyber obrázek z nabídky:
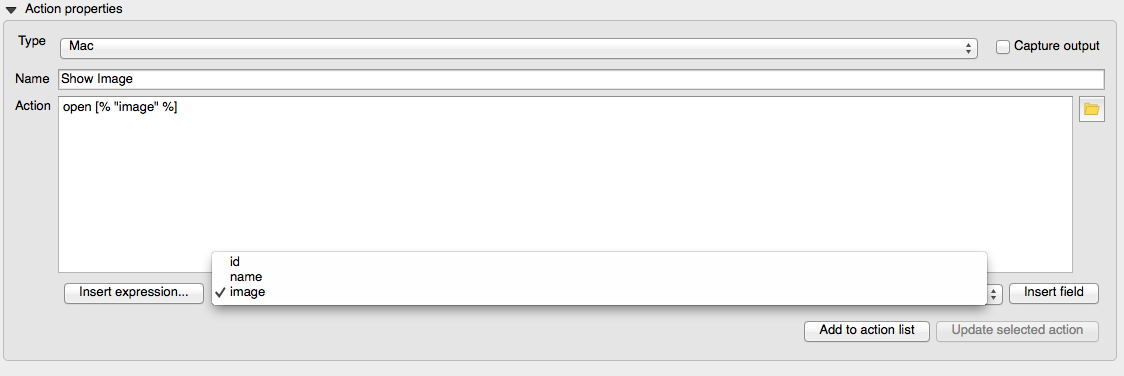
Klikni :guilabel: tlačítko vložit pole . QGIS přidá frázi [% "image" %] do pole Akce
Klikni na tlačítko přidat na list akcí .
Kliknout: guilabel:OK v: guilabel:dialog Vlastnosti vrstvy.
Nyní otestujeme novou akci:
Click on the school_property layer in the Layers list so that it is highlighted.
Najdi tlačítko spustit funkci akce (ve stejném panelu nástrojů jako tlačítko otevřít atributy tabulky ):

Klikni na šipku dolů doprava od tohoto tlačítka. Je tam jen jedna akce definovaná pro tuto vlastnost, což je ta, co jsi právě vytvořil.
Klikni na toto tlačítko a aktivuj nástroj.
Použití tohoto nástroje, kliknutím na kteroukoli z tří školních vlastností.
Obrázek pro tuto vlastnost se nyní otevře.
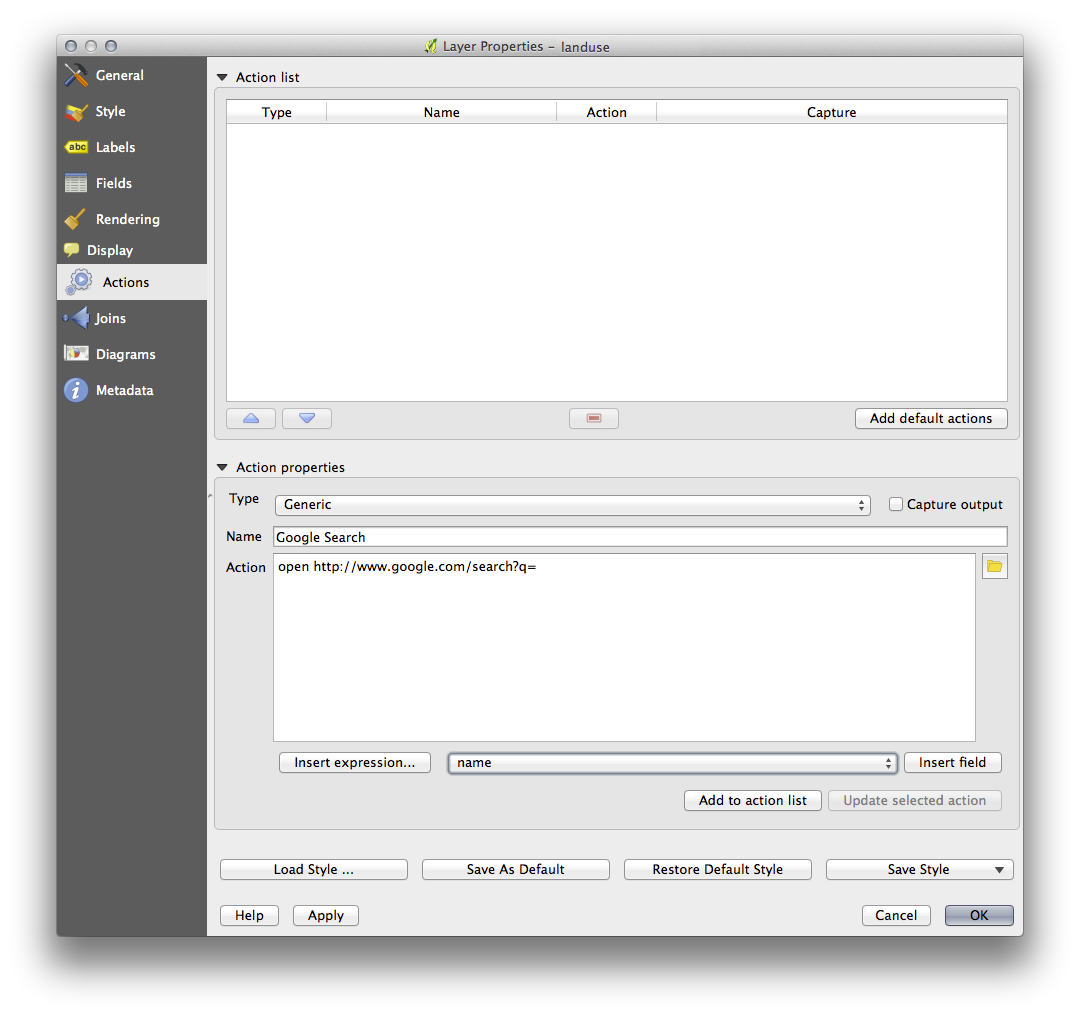
6.4.4. |střední| Follow Along: vyhledávání na internetu
Řekněme, že se díváme na mapu a chceme vědět víc o oblasti, kde je farma. Předpokládáme, že o příslušné oblasti nic nevíme a chceme znát základní informace. Prvním podnětem je, s ohledem, že používáš počítač, bude pravděpodobně vyhledávání pojmenování této oblasti na Googlu. Takže přikaž QGIS, aby to pro nás udělal automaticky.
Otevři vlastnost tabulky pro nosič využívání půdy.
We’ll be using the name field for each of our landuse areas to search Google.
- Close the attribute table.
- Go back to Actions in Layer Properties.
- In the field Action Properties ‣ Name, write Google Search.
o dělat dál, se liší v závislosti na operačním systému, takže vyber vhodný kurz a následuj:
6.4.4.1. Okna
- Under Type, choose Open. This will tell Windows to open an Internet address in your default browser, such as Internet Explorer.
6.4.4.2. Ubuntu Linux
- Under Action, write xdg-open. This will tell Ubuntu to open an Internet address in your default browser, such as Chrome or Firefox.
6.4.4.3. MacOS
- Under Action, write open. This will tell MacOS to open an Internet address in your default browser, such as Safari.
6.4.4.4. Pokračuj v psaní příkazu
Whichever command you used above, you need to tell it which Internet address to open next. You want it to visit Google, and to search for a phrase automatically.
Usually when you use Google, you enter your search phrase into the Google Search bar. But in this case, you want your computer to do this for you. The way you tell Google to search for something (if you don’t want to use its search bar directly) is by giving your Internet browser the address http://www.google.com/search?q=SEARCH_PHRASE, where SEARCH_PHRASE is what you want to search for. Since we don’t know what phrase to search for yet, we’ll just enter the first part (without the search phrase).
- In the Action field, write http://www.google.com/search?q=. Remember to add a space after your initial command before writing this in!
Now you want QGIS to tell the browser to tell Google to search for the value of name for any feature that you could click on.
- Select the name field.
- Click Insert field:
This will tell QGIS to add the phrase next:
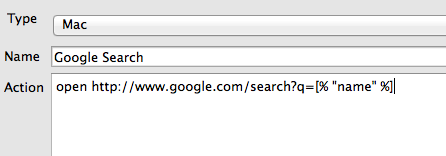
What this means is that QGIS is going to open the browser and send it to the address http://www.google.com/search?q=[% "name" %]. But [% "name" %] tells QGIS to use the contents of the name field as the phrase to search for.
So if, for example, the landuse area you click on is named Marloth Nature Reserve, then QGIS is going to send the browser to http://www.google.com/search?q=Marloth%20Nature%20Reserve, which will cause your browser to visit Google, which will in turn search for “Marloth Nature Reserve”.
- If you haven’t done so already, set everything up as explained above.
- Click the Add to action list button. The new action will appear in the list above.
Kliknout: guilabel:OK v: guilabel:dialog Vlastnosti vrstvy.
Now to test the new action.
- With the landuse layer active in the Layers list, click on the Run feature action button.
- Click on any landuse area you can see on the map. Your browser will now open, and will automatically start a Google search for the town that is recorded as that area’s name value.
Poznámka
If your action doesn’t work, check that everything was entered correctly; typos are common with this kind of work!
6.4.5.  Follow Along: Open a Webpage Directly in QGIS
Above, you’ve seen how to open a webpage in an external browser. There are some shortcomings with this approach in that it adds an unknowable dependency – will the end-user have the software required to execute the action on their system? As you’ve seen, they don’t necessarily even have the same kind of base command for the same kind of action, if you don’t know which OS they’ll be using. With some OS versions, the above commands to open the browser might not work at all. This could be an insurmountable problem.
However, QGIS sits on top of the incredibly powerful and versatile Qt4 library. Also, QGIS actions can be arbitrary, tokenized (i.e. using variable information based on the contents of a field attribute) Python commands!
Now you’ll see how to use a python action to show a web page. It’s the same general idea as opening a site in an external browser, but it requires no browser on the user’s system since it uses the Qt4 QWebView class (which is a webkit based html widget) to display the content in a pop up window.
Instead of Google, let’s use Wikipedia this time. So the URL you request will look like this:
http://wikipedia.org/wiki/SEARCH_PHRASE
To create the layer action:
- Open the Layer Properties dialog and head over to the Actions tab.
- Set up a new action using the following properties for the action:
- Type: Python
- Name: Wikipedia
- Action (all on one line): from PyQt4.QtCore import QUrl; from PyQt4.QtWebKit import QWebView; myWV = QWebView(None); myWV.load(QUrl('http://wikipedia.org/wiki/[% "name" %]')); myWV.show()
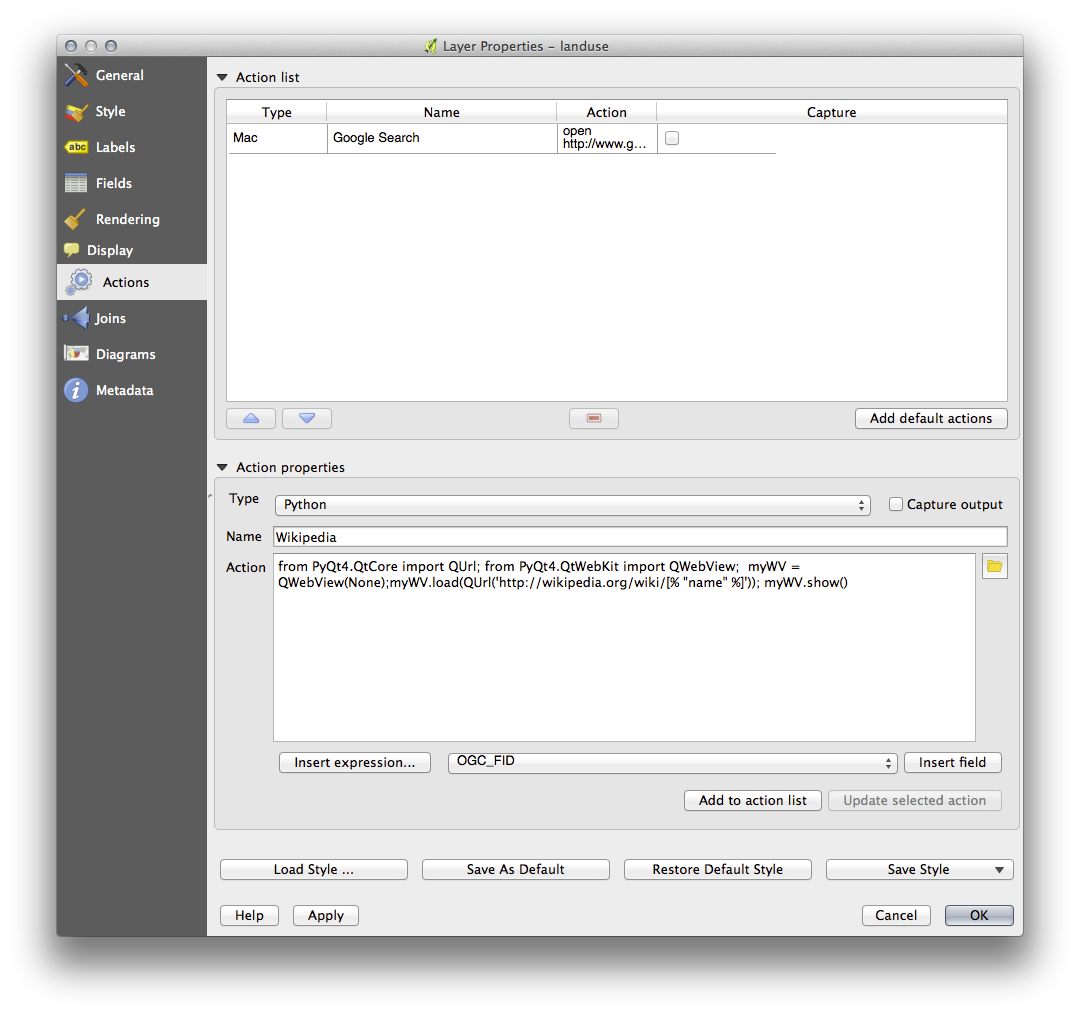
There are a couple of things going on here:
- All the python code is in a single line with semi-colons separating commands (instead of newlines, the usual way of separating Python commands).
- [% "name" %] will be replaced by the actual attribute value when the action is invoked (as before).
- The code simply creates a new QWebView instance, sets its URL, and then calls show() on it to make it visible as a window on the user’s desktop.
Note that this is a somewhat contrived example. Python works with semantically significant indentation, so separating things with semicolons isn’t the best way to write it. So, in the real world, you’d be more likely to import your logic from a Python module and then call a function with a field attribute as parameter.
You could equally use the approach to display an image without requiring that the user has a particular image viewer on their system.
- Try using the methods described above to load a Wikipedia page using the Wikipedia action you just created.
6.4.6. In Conclusion
Actions allow you to give your map extra functionality, useful to the end-user who views the same map in QGIS. Due to the fact that you can use shell commands for any operating system, as well as Python, the sky’s the limit in terms of the functions you could incorporate!
6.4.7. What’s Next?
Now that you’ve done all kinds of vector data creation, you’ll learn how to analyze this data to solve problems. That’s the topic of the next module.